
Admin Configuration
Configure the WooCommerce POS gateway settings and map physical credit card terminals to specific retail locations to begin accepting cards via Tranzila.
1. POS Payment Gateway Setup
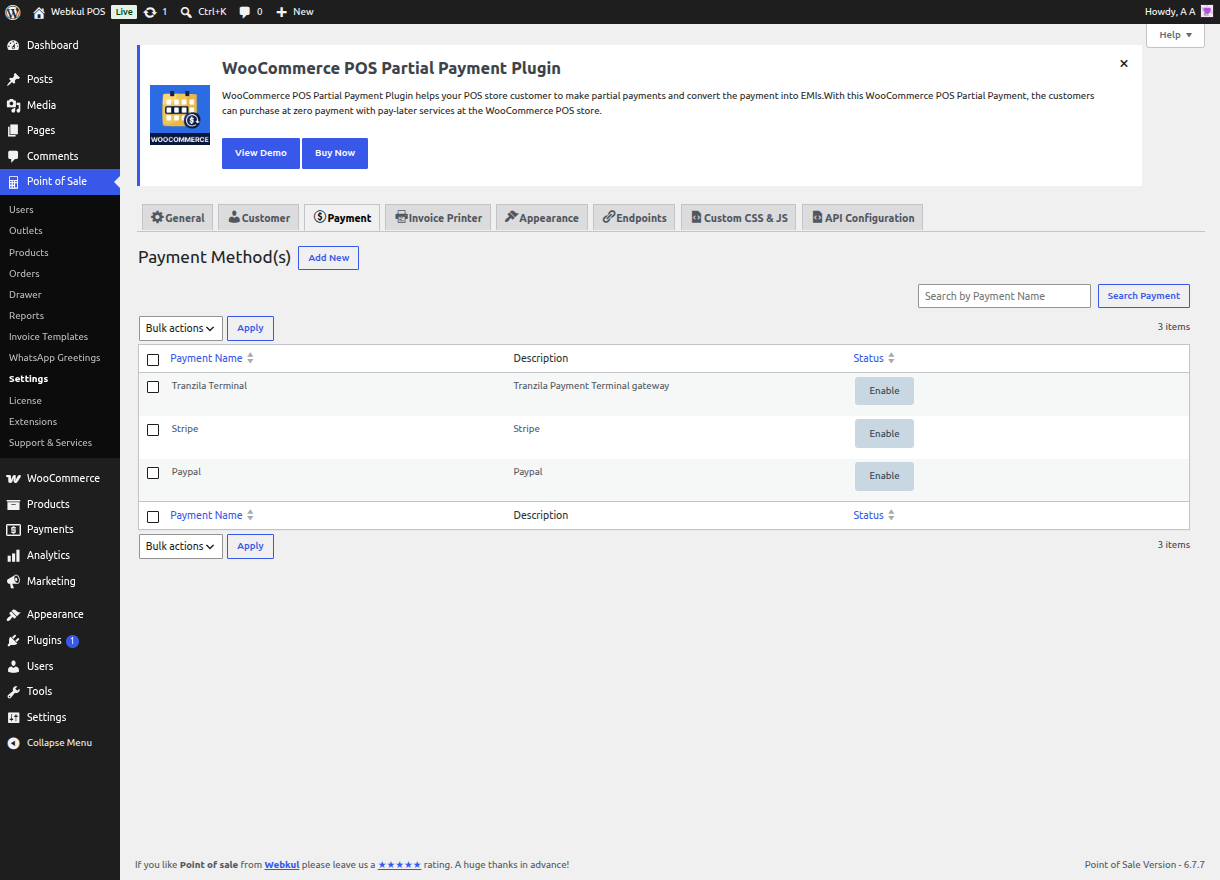
To register and activate the Tranzila payment gateway globally inside your Point of Sale dashboard, navigate to Point of Sale → Settings and select the Payment tab.
Payment Methods List
This screen lists all available payment options for your cashiers. Ensure that Tranzila Terminal is active.
Editing Gateway Metadata
Click Edit next to the Tranzila Terminal entry to customize the checkout drawer display details for your cashiers:
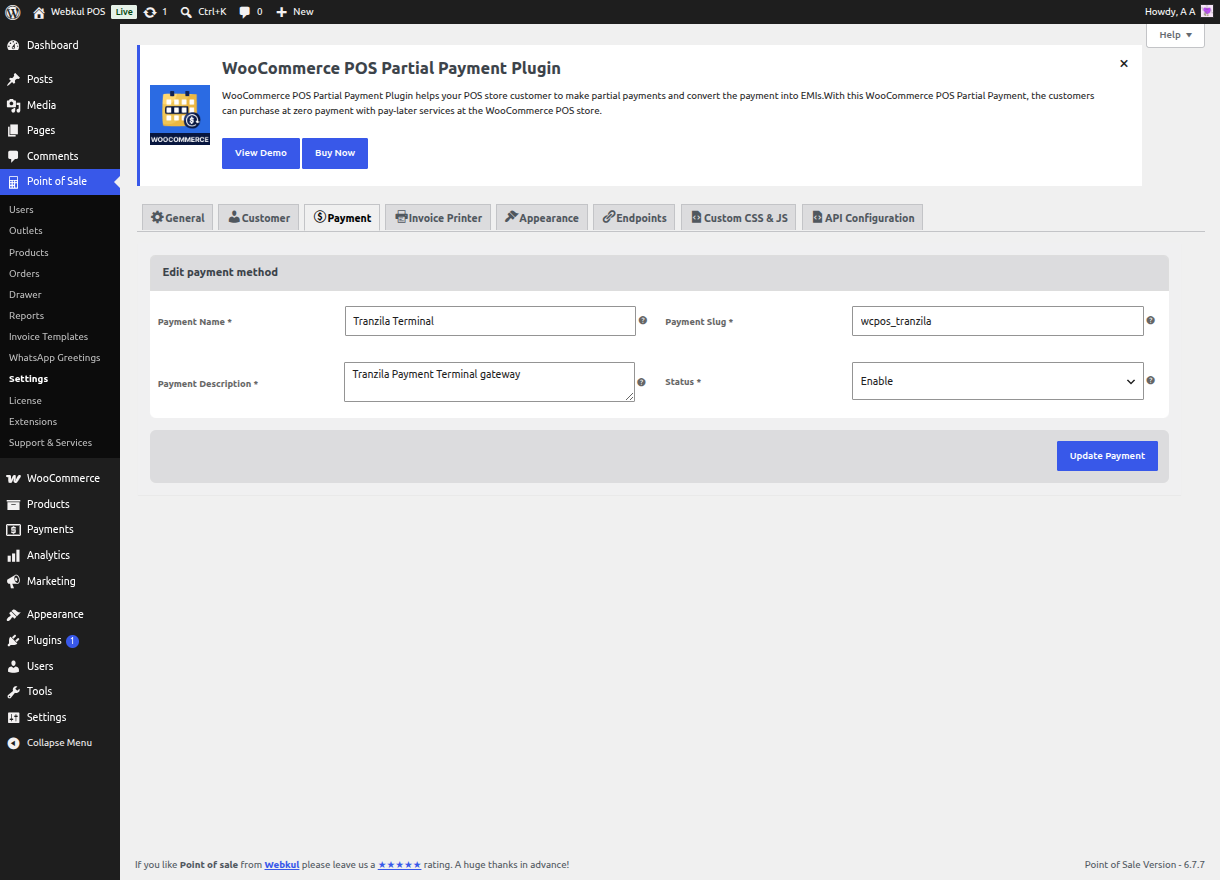
- Payment Name:* The cashier-facing label displayed in the POS payment drawer during checkout (e.g.
Tranzila TerminalorCard Terminal). - Payment Slug:* Unique system identifier used internally by WooCommerce POS (default:
wcpos_tranzila). - Payment Description:* The instructions displayed beneath the payment name (e.g.
Tranzila Payment Terminal gateway). - Status:* Set this to Enable to make the option selectable at checkouts.
- Update Payment: Click this button to save and apply your custom label updates.
2. Outlet Terminal Configuration
Tranzila terminal credentials must be configured for each retail location (Outlet) individually to ensure sales are routed to the appropriate merchant accounts.
Navigate to Point of Sale → Outlets, click Edit on your desired outlet, and scroll down to the Payment Options section. Check Tranzila Terminal to reveal the terminal-specific settings fields:
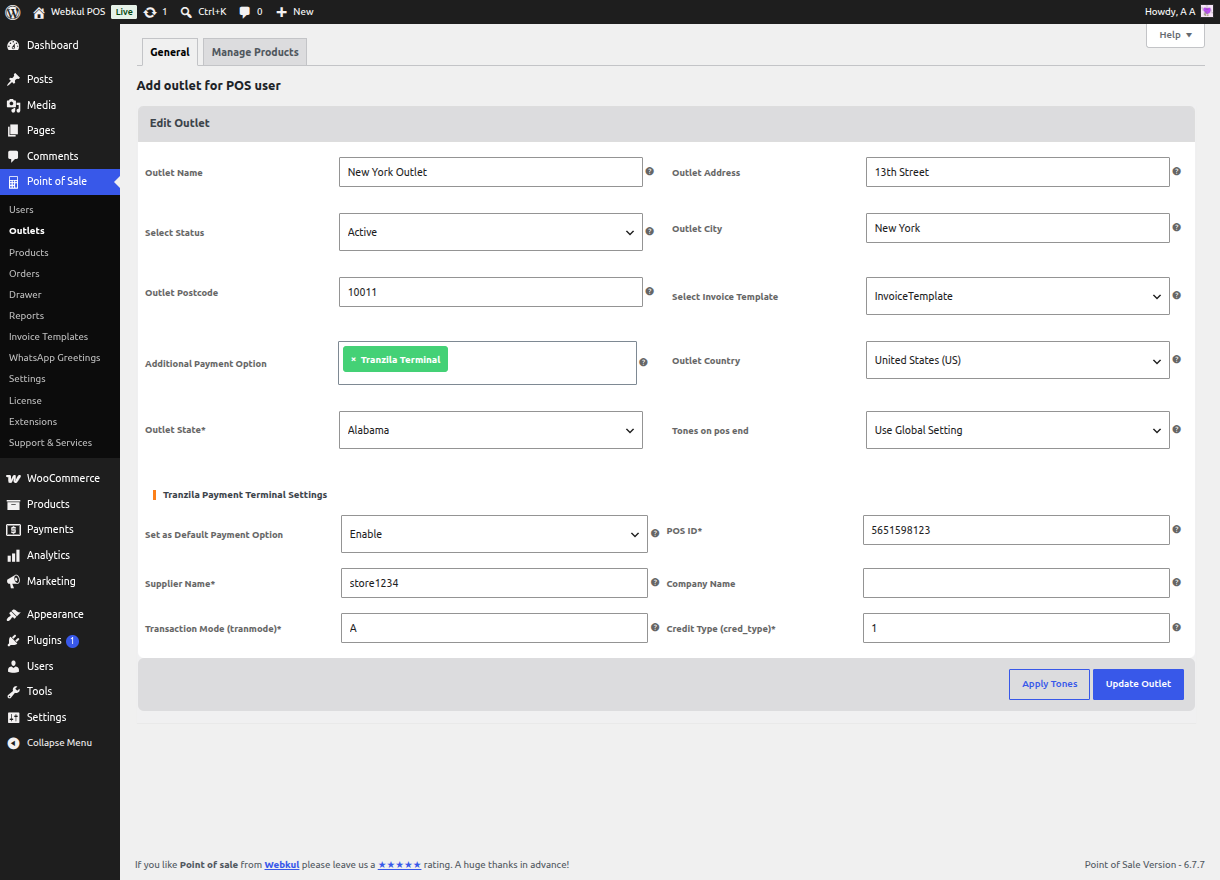
Configuration Fields
- POS ID: The unique terminal identifier assigned to your physical card reader by Tranzila. This value is usually printed on the terminal hardware sticker or merchant contract.
- Supplier Name: The merchant supplier identifier registered with your Tranzila merchant account (default sandbox supplier is
tranzilap). - Company Name: The merchant legal business name or shop name that will be displayed on customer credit card slips and receipts.
- Transaction Mode: Controls the transaction destination environment:
- Sandbox: Redirects requests to Tranzila's testing servers for mock transaction verifications.
- Production: Routes payments to Tranzila's live transaction network to capture real money charges.
- Credit Type: Select the credit processing method to support:
- Regular Credit (Standard credit card single charges)
- Payments (Installments or payment splitting)
3. Saving Configurations
After configuring terminal settings:
- Click Save Configurations at the bottom of the POS Settings screen to store gateway descriptions.
- Click Update on the POS Outlets edit screen to persist terminal IDs and Supplier keys.
- Reload your POS register screen to download the updated configuration files.
[!IMPORTANT] Outlet-Specific Isolation: If you have multiple outlets, you must configure these settings for each outlet profile individually. Cashiers logging into Outlet A will not have access to terminal details configured for Outlet B.