
POS Cashier Checkout & Payment Guide
This guide explains how cashiers and store agents process credit/debit card transactions using the Tranzila Payment Terminal integration directly within the WooCommerce POS frontend register interface.
Overview of POS Payment Workflow
When a customer completes a purchase at a physical retail outlet, the store cashier selects Tranzila Terminal as the payment method during checkout. The POS system communicates with the mapped Tranzila Terminal (configured per outlet), sends the exact payable amount, receives approval from Tranzila's gateway, and instantly completes the sale while printing/generating an invoice.
Step 1: Cashier Login & Register Access
- Open the POS register endpoint in your browser (e.g.,
https://yourstore.com/pos). - Enter your assigned cashier credentials (Username and Password).
- Select your designated Outlet and click Login to launch the point of sale register interface.
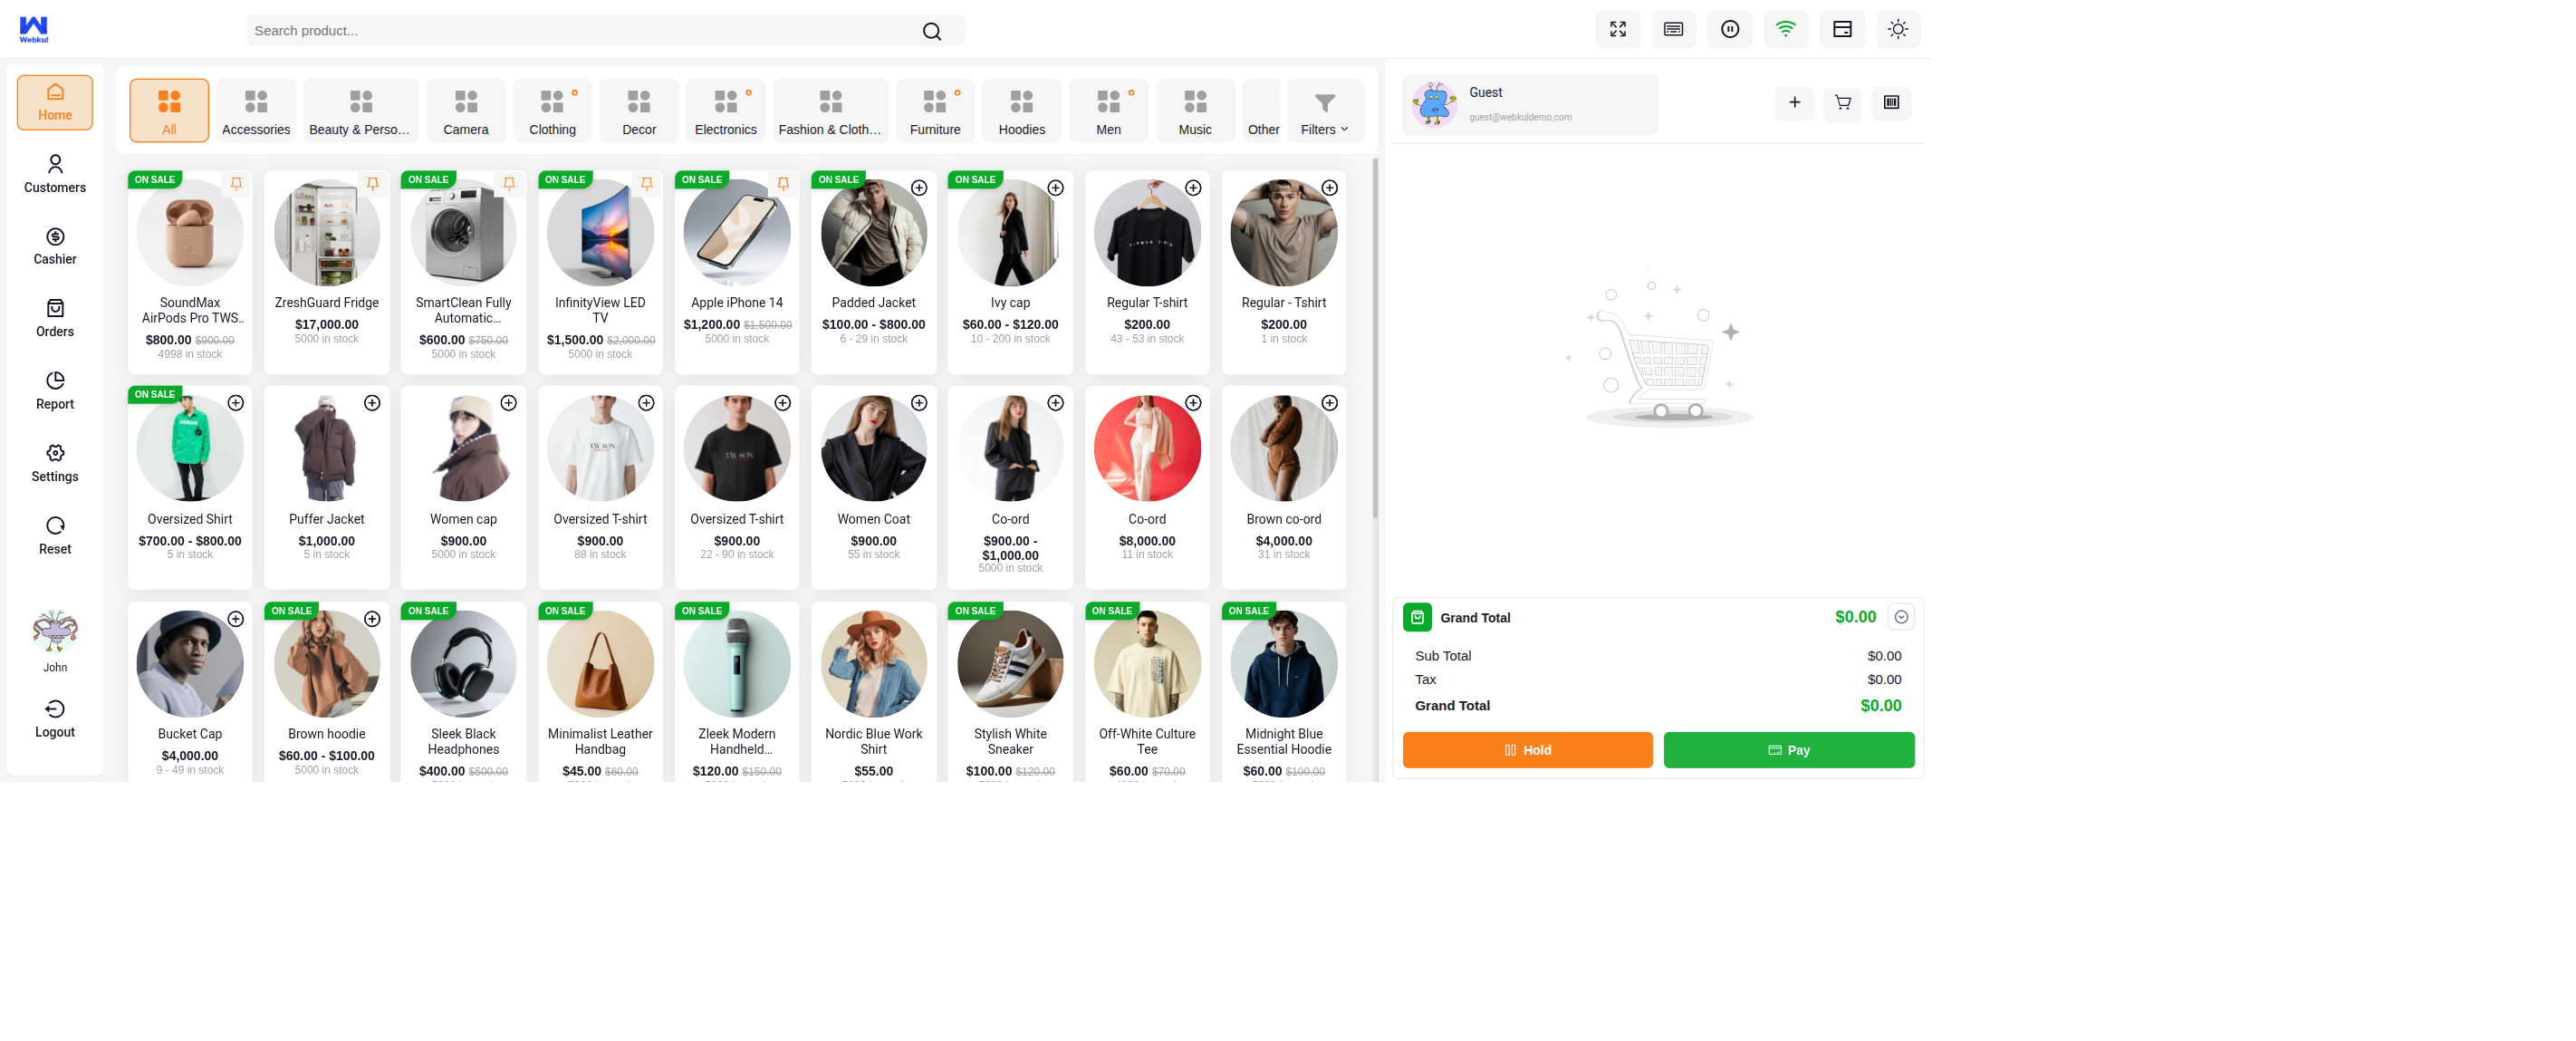
Step 2: Adding Products to Cart & Initiating Checkout
- Browse or search for items in the POS product catalog or scan barcodes.
- Click on the product cards to add the desired items to the cart.
- Review line items, quantities, and applied taxes/discounts in the right-hand cart panel.
- Click the Pay button (
#pay-to-pos) at the bottom of the cart panel to proceed to the checkout screen.
Step 3: Selecting Tranzila Payment Method
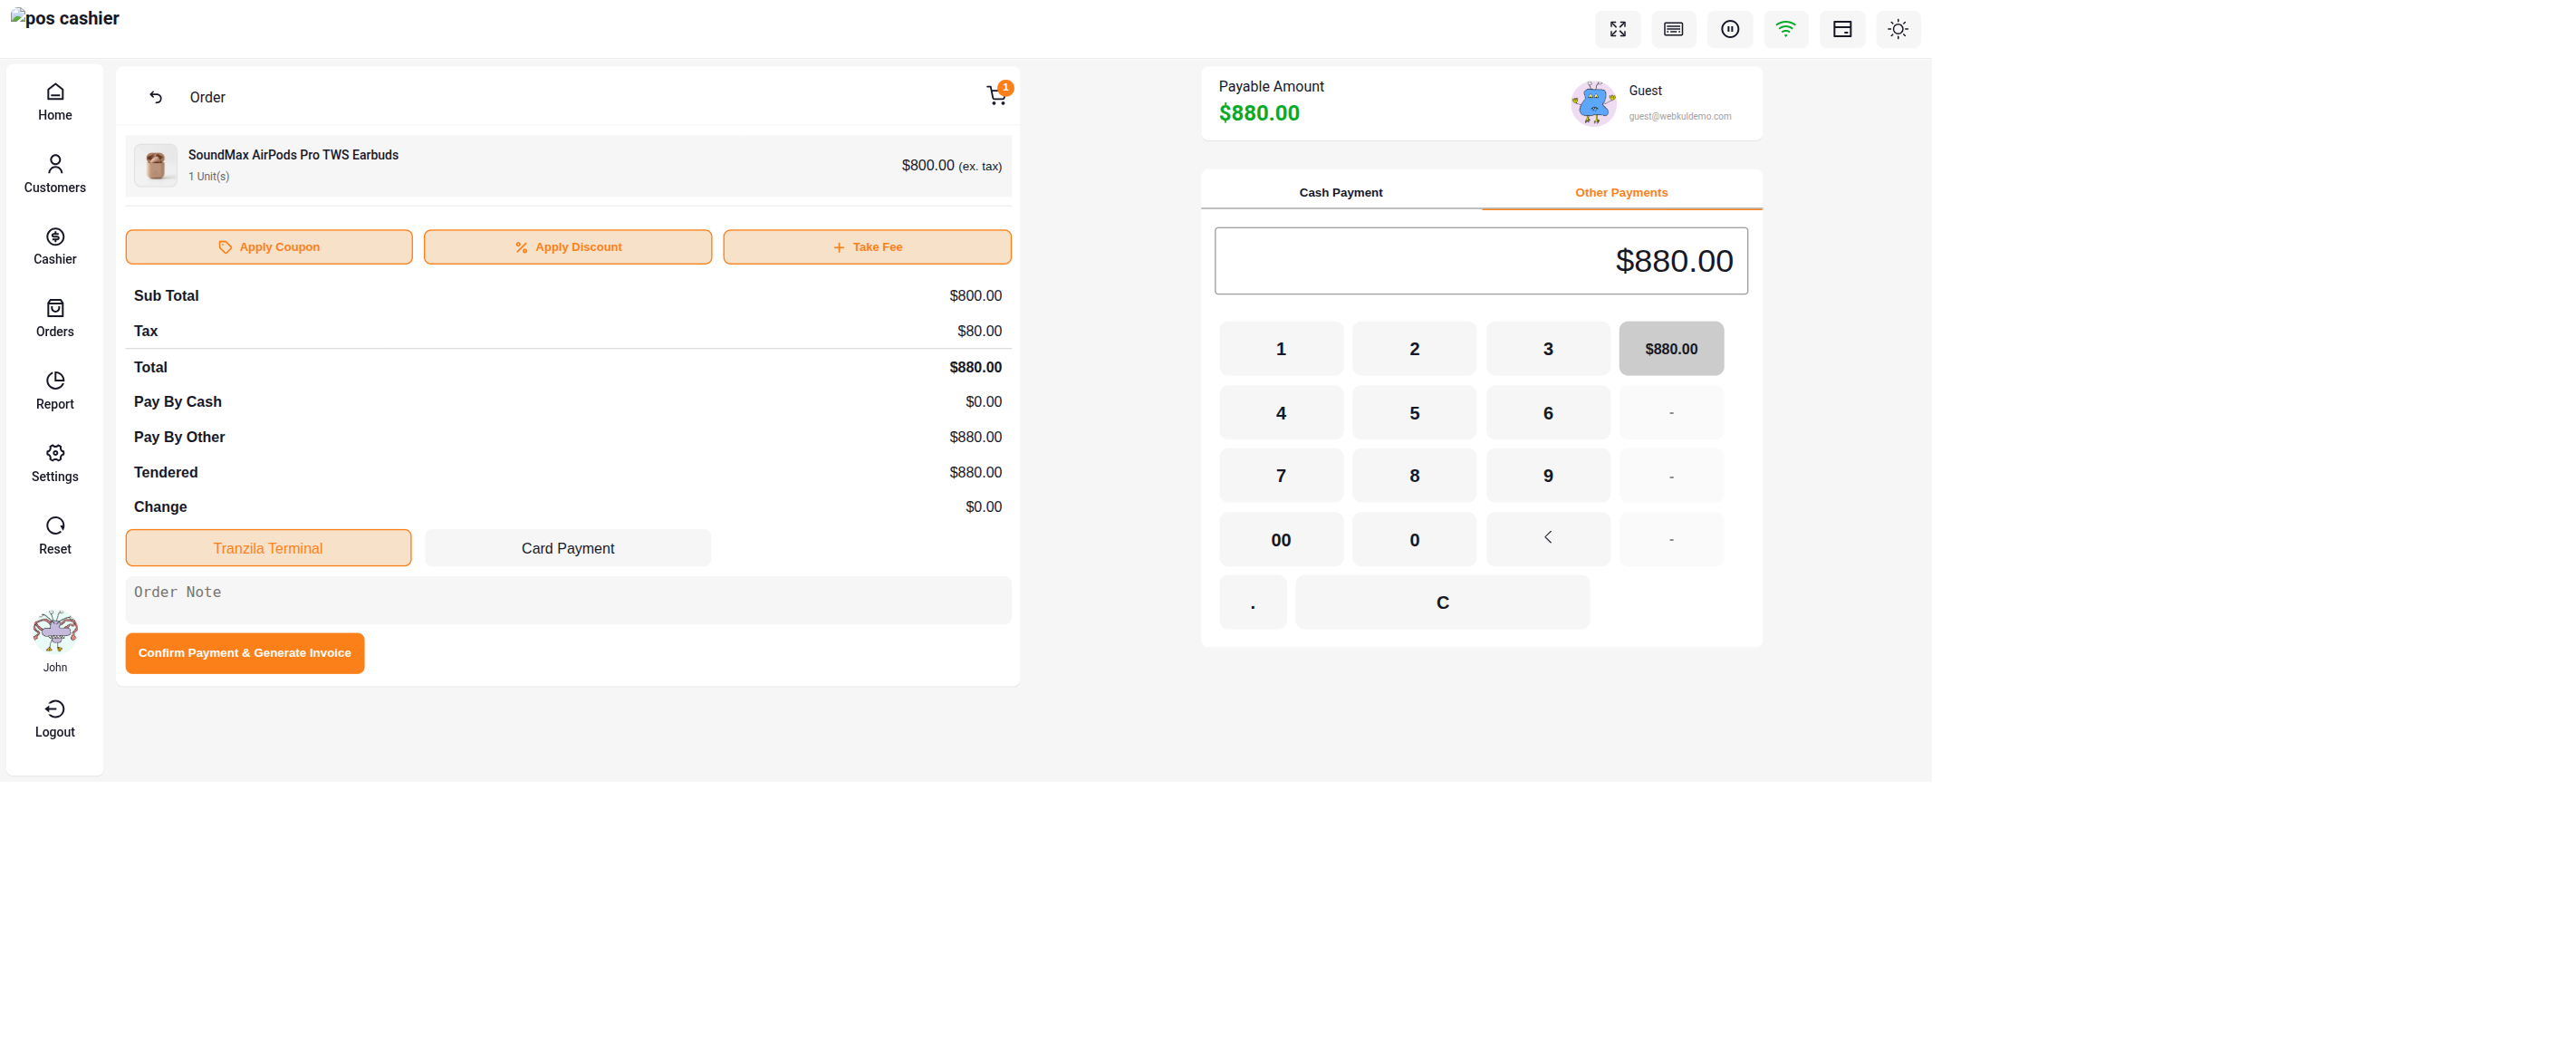
- On the POS Payment screen, locate the Payment Method section.
- Click the Other Payments tab to display integrated digital and card payment gateways.
- Select Tranzila Terminal from the list of available payment options.
Note: If Tranzila Terminal is set as the default terminal payment option in your admin settings, it will be automatically highlighted upon clicking Other Payments.
Step 4: Entering Transaction Amount & Confirming Payment
- Verify the total Payable Amount calculated for the current order.
- Click the quick-select preset button (e.g.,
$880.00) or use the numeric keypad to enter the exact payment amount into the Tranzila Terminal payment field. - Once the full payable amount is assigned to the terminal method, the Confirm Payment & Generate Invoice button becomes active.
- Click Confirm Payment & Generate Invoice to trigger the transaction request.
Step 5: Terminal Processing & Order Success
- Transaction Payload Transfer: The POS interface securely transmits the transaction payload to the mapped Tranzila payment terminal.
- Customer Card Swipe/Tap: The customer swipes, inserts (EMV dip), or taps their credit card on the Tranzila terminal.
- Gateway Authorization & Metadata Logging: Upon receiving an authorization response (
SUCCESS / Approved (Code 000)) from Tranzila:- Order Status Transition: The WooCommerce order status automatically transitions from Pending to Completed.
- Transaction Metadata: The unique Authorization Code (
049821), Transaction Reference ID (TZ-8849201), and Terminal POS ID (TRZ-OUTLET-01) are permanently saved to WooCommerce order postmeta. - Payment Success Modal Display: A high-visibility popup modal appears on the POS register screen displaying Payment Successful alongside green status badges, order summary, and authorization credentials.
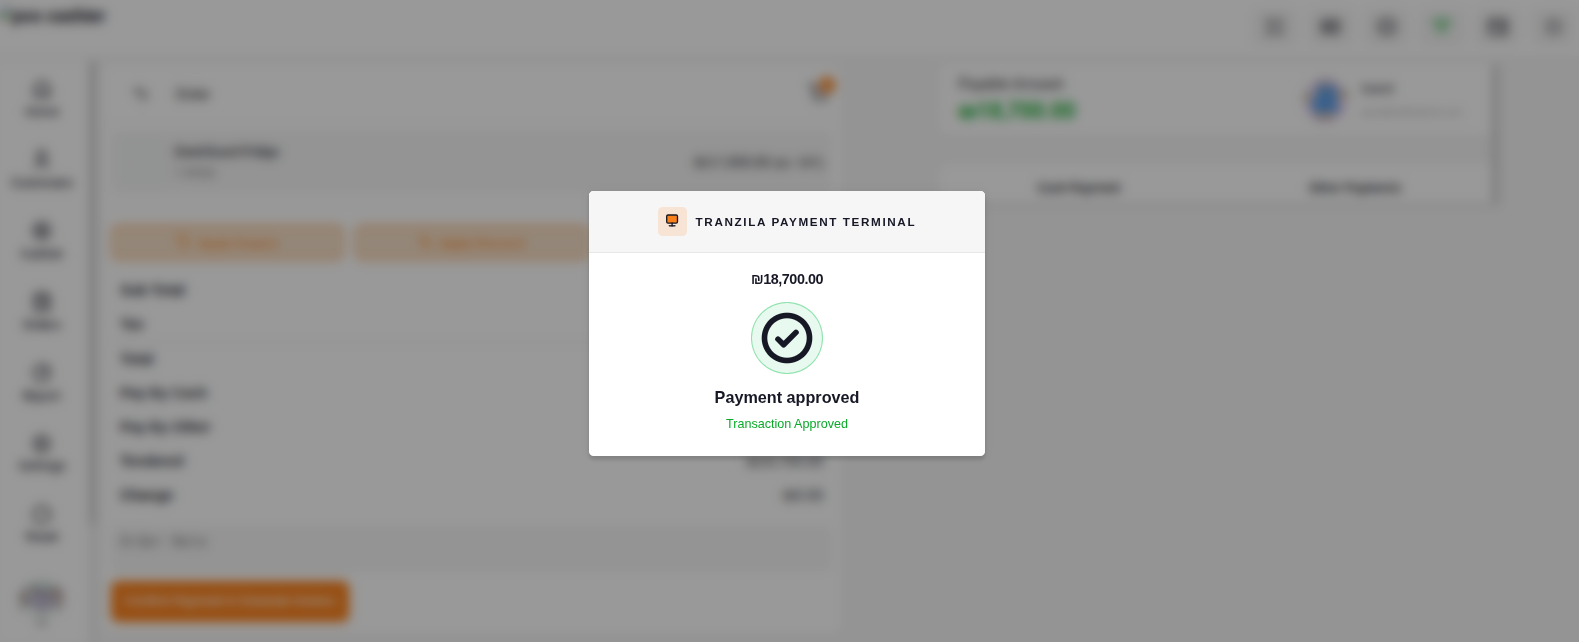
Payment Success Modal & Transaction Metadata Breakdown
When a transaction is approved by the Tranzila network, the POS modal displays the following verified metadata fields:
| Field Name | Example Value | Description |
|---|---|---|
| Order ID | #587 | The unique WooCommerce order number generated for the current POS transaction. |
| Total Paid | $880.00 | The grand total amount authorized and captured by the Tranzila card reader. |
| Gateway | Tranzila Terminal | The active gateway method used to process the transaction. |
| Authorization Code | 049821 | The approval code issued by the cardholder's issuing bank upon successful authentication. |
| Transaction Reference ID | TZ-8849201 | Unique gateway reference identifier for transaction auditing and settlement reconciliation. |
| Terminal POS ID | TRZ-OUTLET-01 | The outlet-specific terminal identifier registered in Point of Sale > Outlets. |
| Status | Approved (Code 000) | The gateway response code indicating a successful real-time payment capture. |
- Order Record Verification & Receipt Generation:
- The POS Order History instantly records the transaction as Completed under Tranzila Terminal:
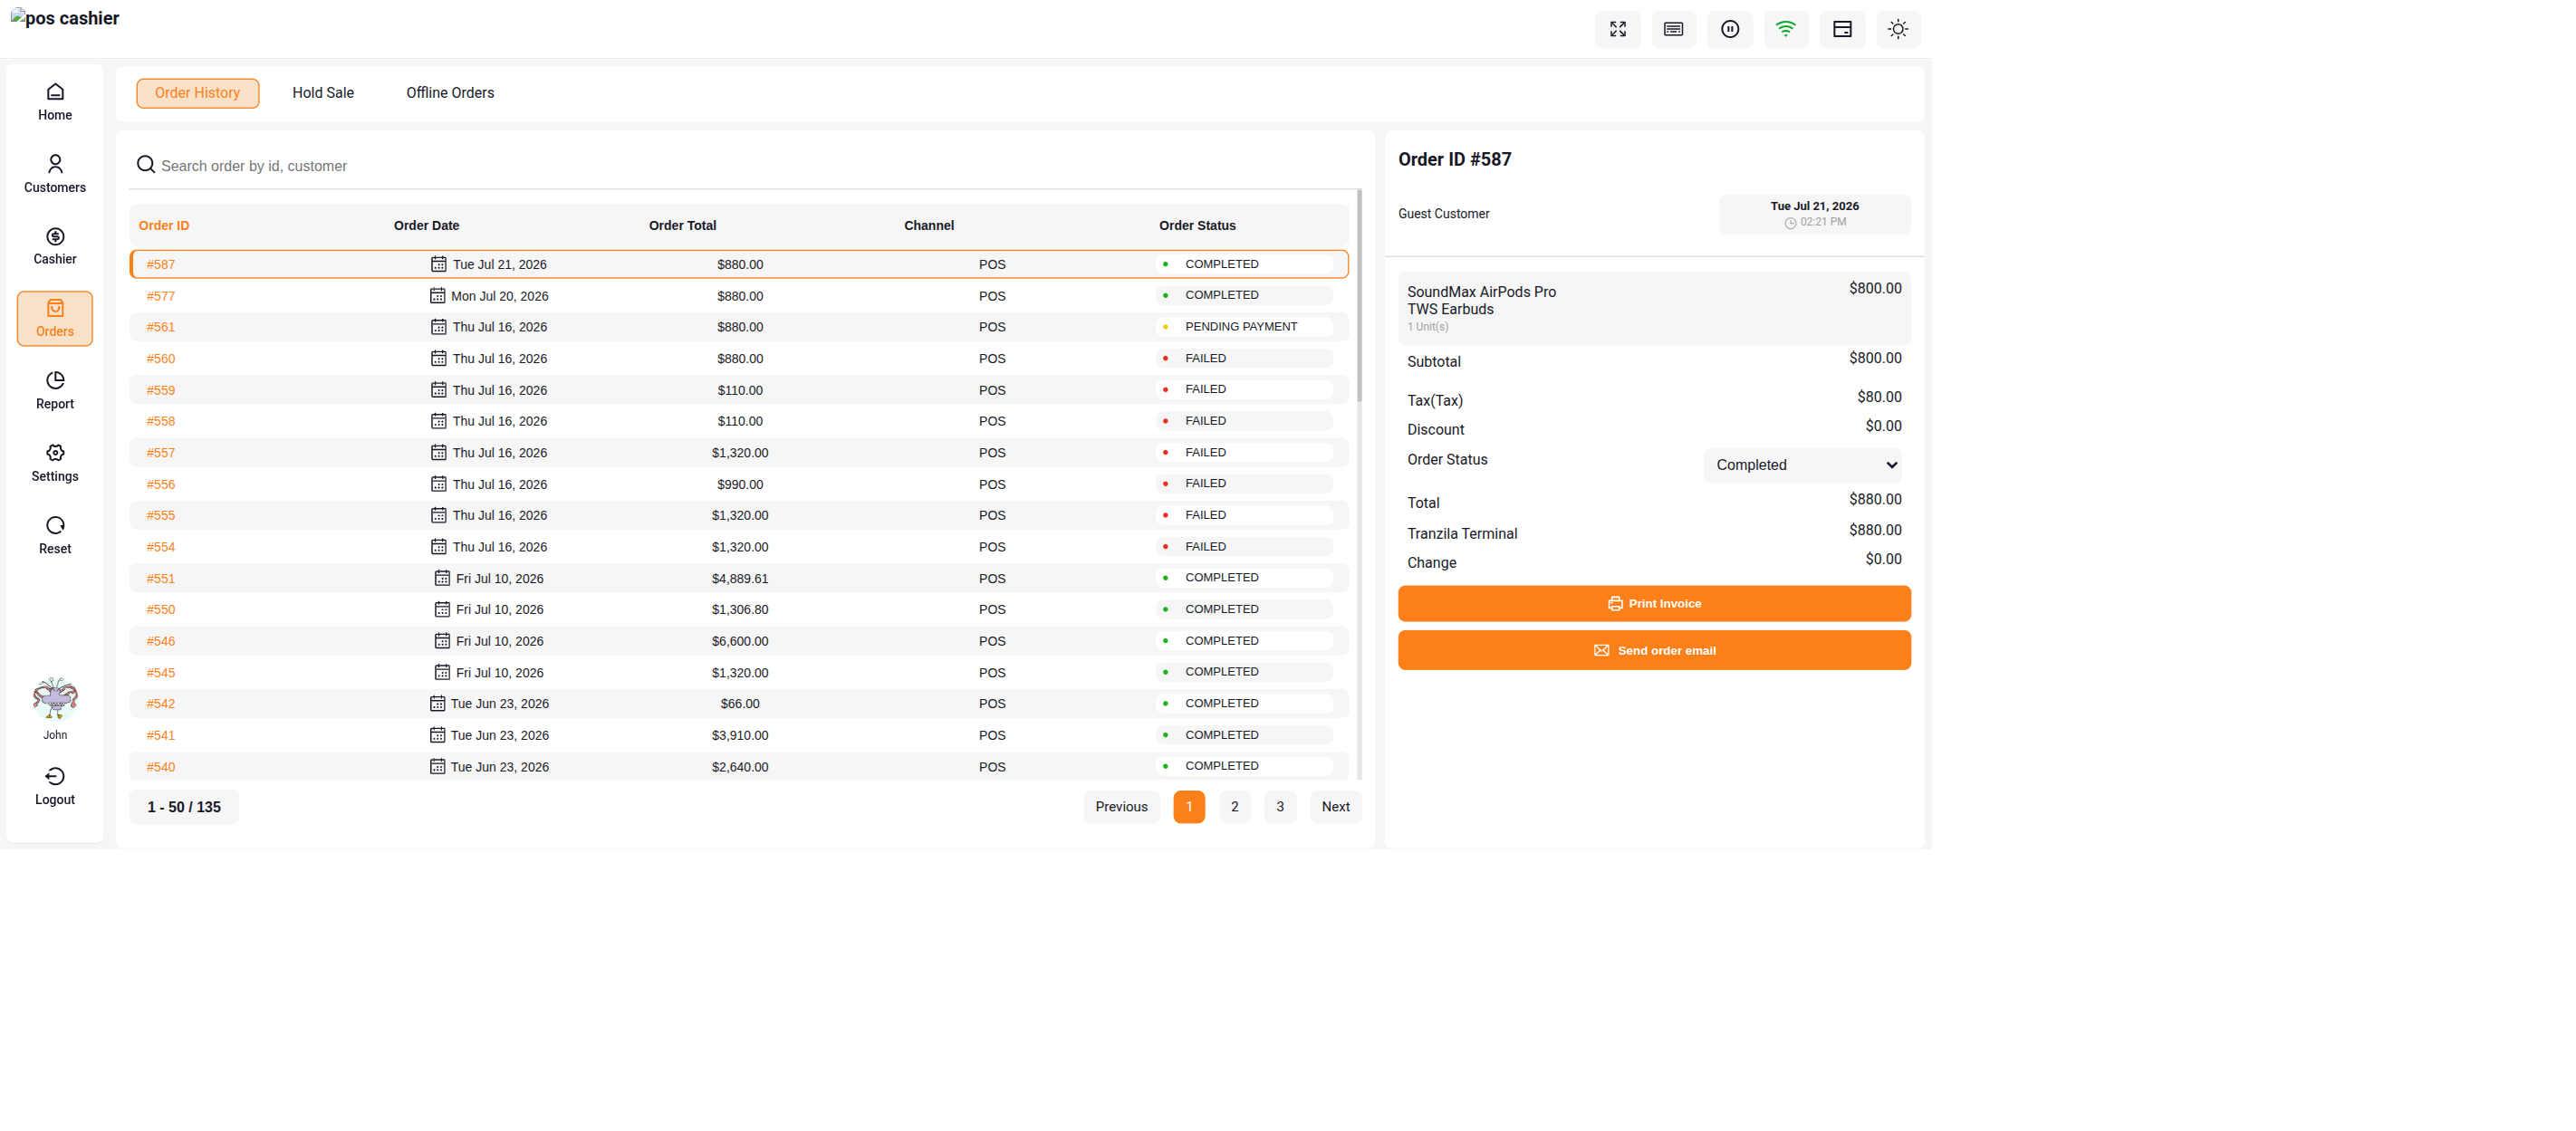
- Cashiers can click Print Invoice or Send Order Email to issue customer receipts, then return to the register for the next order.
Summary of Cashier Best Practices
| Action | Recommendation |
|---|---|
| Network Connection | Ensure the POS device and Tranzila terminal share a stable local network connection. |
| Amount Verification | Always verify that the entered split/full amount matches the order grand total before clicking confirm. |
| Transaction Failures | If the terminal declines a card, verify API credentials in Point of Sale > Outlets or retry the transaction under Other Payments. |