Configuration & Settings
To set up the plugin, navigate to WooCommerce → Settings → PDF Invoices tab. This interface allows you to define store details, configure invoice sequence numbers, adjust margins, assign templates, and manage when documents are automatically emailed to customers.
General Settings
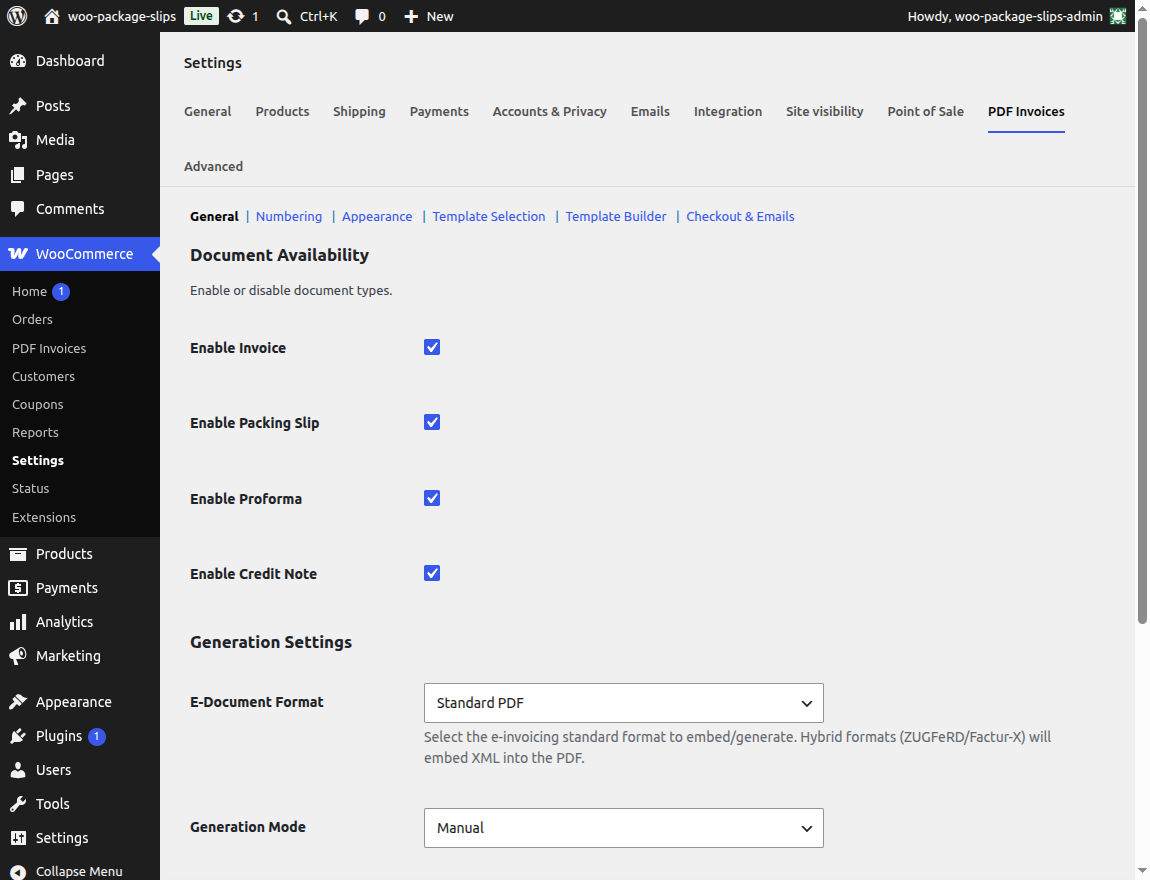
The General section defines your core store identity and determines which documents the plugin generates.
Key Parameters:
- Enable Document Types: Toggle the checkboxes for each document type you want to use. You can enable or disable:
- Invoices
- Credit Notes
- Proforma Invoices
- Packing Slips
- Picking Lists
- Company Logo: Click the upload button to choose a branding image from your WordPress Media Library. We recommend a logo with a transparent background in PNG or SVG format, sized around $300 \times 80\text{ px}$.
- Company Name & Address: Type your official registered company name, address, tax registry info, and email. This text appears exactly as typed in the header section of your PDF documents.
- Footnote / Notes: Enter footer information such as payment terms, bank account details (IBAN/BIC), support contact, or a friendly customer thank-you message.
- Invoice Viewing Mode: Choose how the system opens documents when you click the action button:
- Open in New Tab: Displays the PDF directly in the browser.
- Download PDF: Prompts an immediate file download.
Numbering Settings
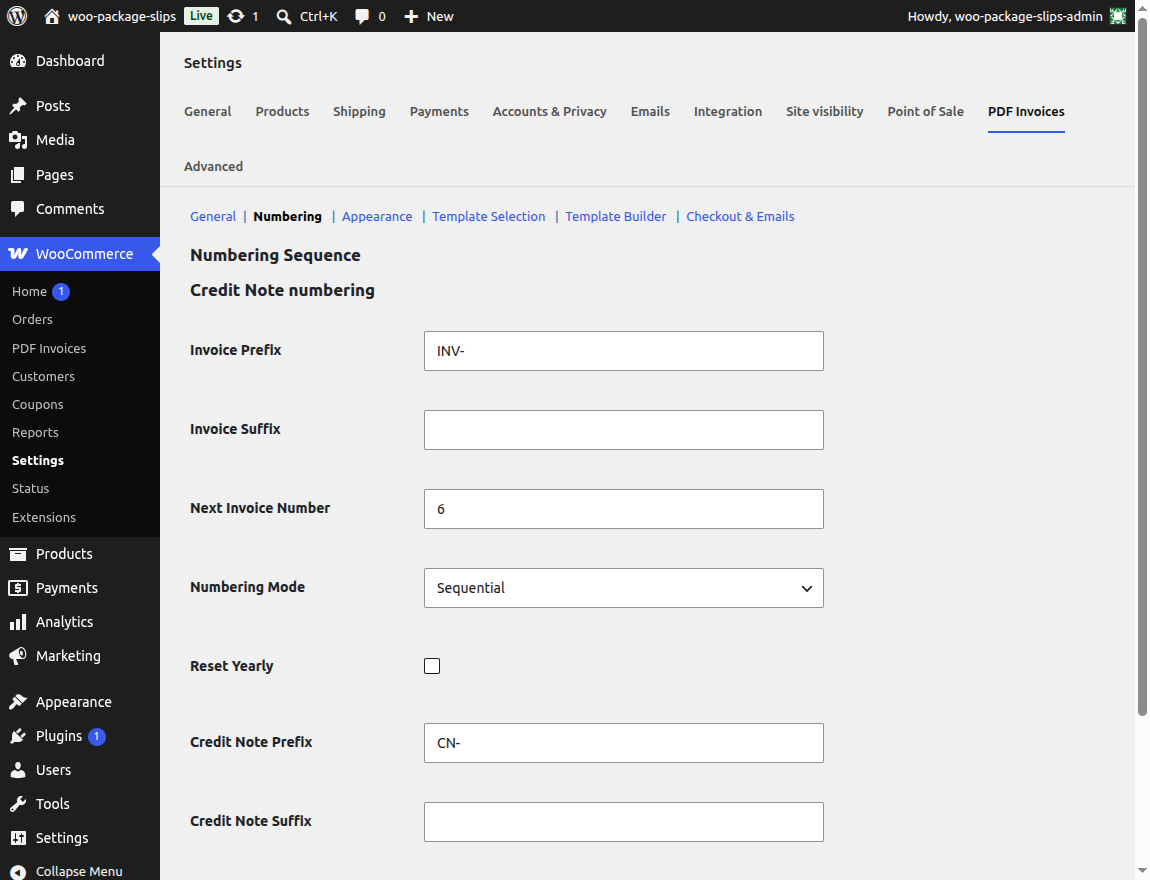
Maintain sequence consistency for accounting audits with the Numbering section.
Key Parameters:
- Invoice Prefix: Add text to prepend to your invoice numbers (e.g.,
INV-2026-). You can also use placeholders like{year}or{month}to insert dates dynamically. - Invoice Suffix: Append text or a fiscal identifier to the end of the number (e.g.,
-US). - Next Invoice Number: Set the next sequential number. If you are migrating from another invoicing system, you can enter your current sequence starting point (e.g.,
5204to make the next generated invoiceINV-2026-5204). - Number Padding: Add leading zeros to align number formatting. For example, a padding of
5turns number45into00045. - Reset Numbering Yearly: If enabled, the invoice sequence number automatically resets to
1(or your chosen starting point) on January 1st of every calendar year.
Appearance Settings
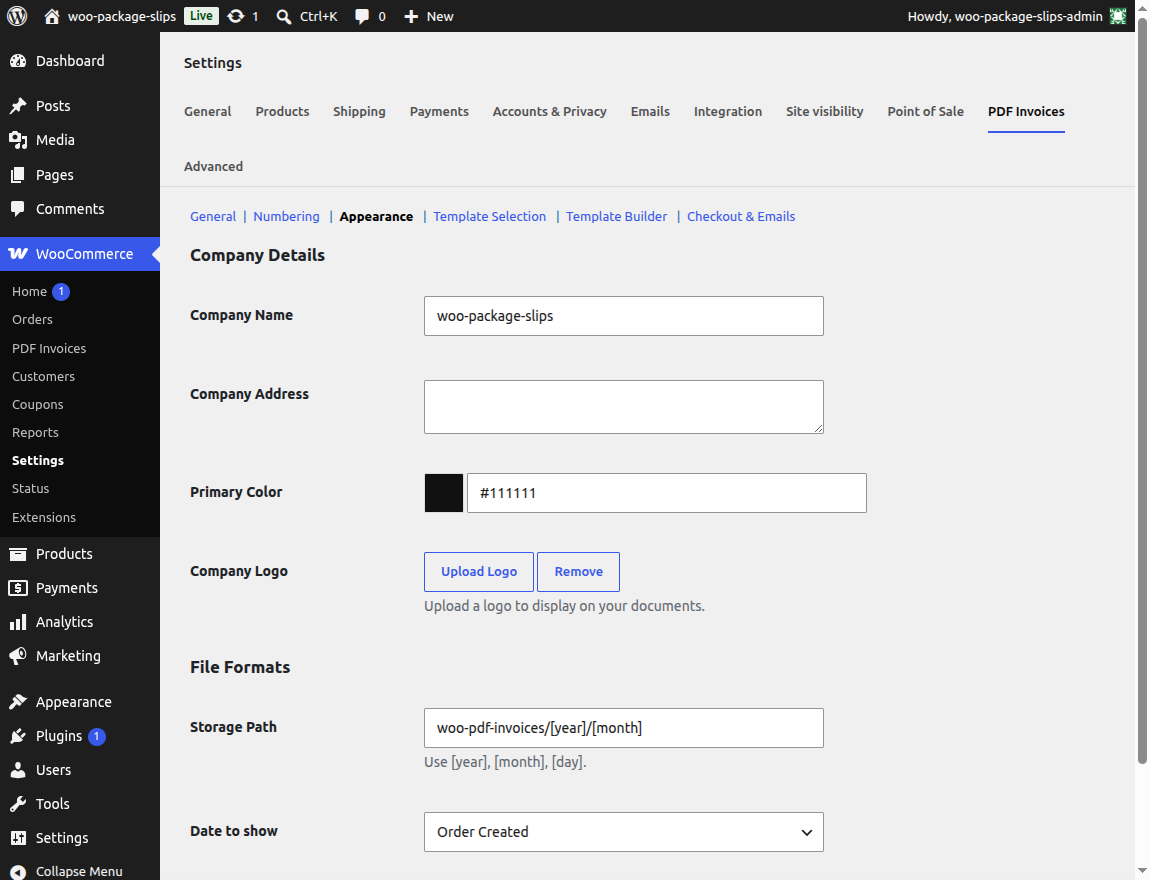
Adjust document layouts, sizes, margins, and accent colors to match your brand style.
Key Parameters:
- Page Size: Select standard A4 (common in Europe/Asia) or Letter (standard in North America).
- Margins (mm): Define top, bottom, left, and right page borders in millimeters to align header text and product tables.
- Brand Accent Color: Choose the color used for document table headers, decorative borders, and accents. Use your brand hex color code (e.g.,
#2b6be3). - Custom CSS: A code editor box where you can paste custom styles to override default document layouts (e.g., adding a custom font, styling row heights, or adjusting text sizing).
Templates Settings
Assign different built-in templates to different document types.
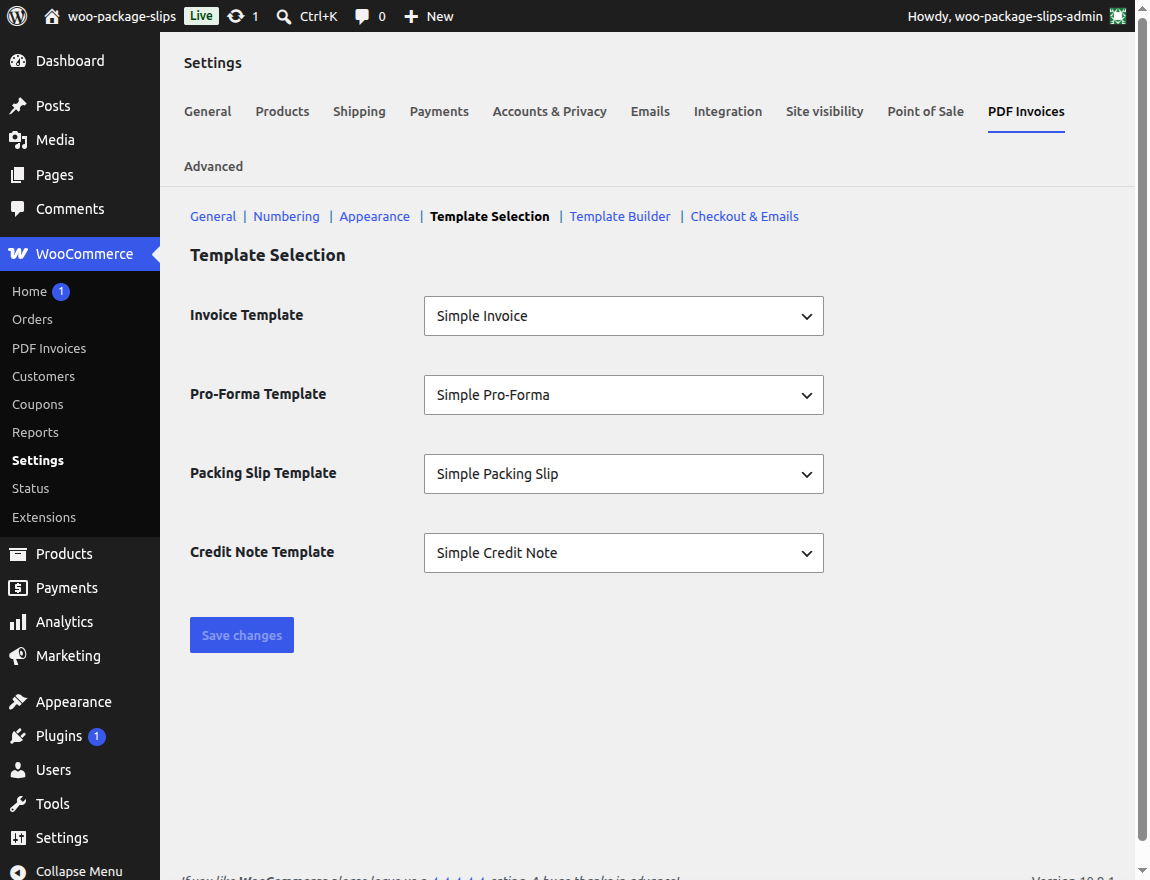
Key Parameters:
- Document Template Selection: Select the layout layout engine for each document type:
- Classic: A standard, clean grid layout.
- Minimal: A simple, high-contrast style that saves ink.
- Modern: A trendy layout featuring colored header blocks.
- Custom / Builder: Select this to apply the layout you build using the visual Template Builder.
Checkout & Emails Settings
Automate delivery by attaching documents directly to WooCommerce customer transactional emails, and enable optional checkouts fields.
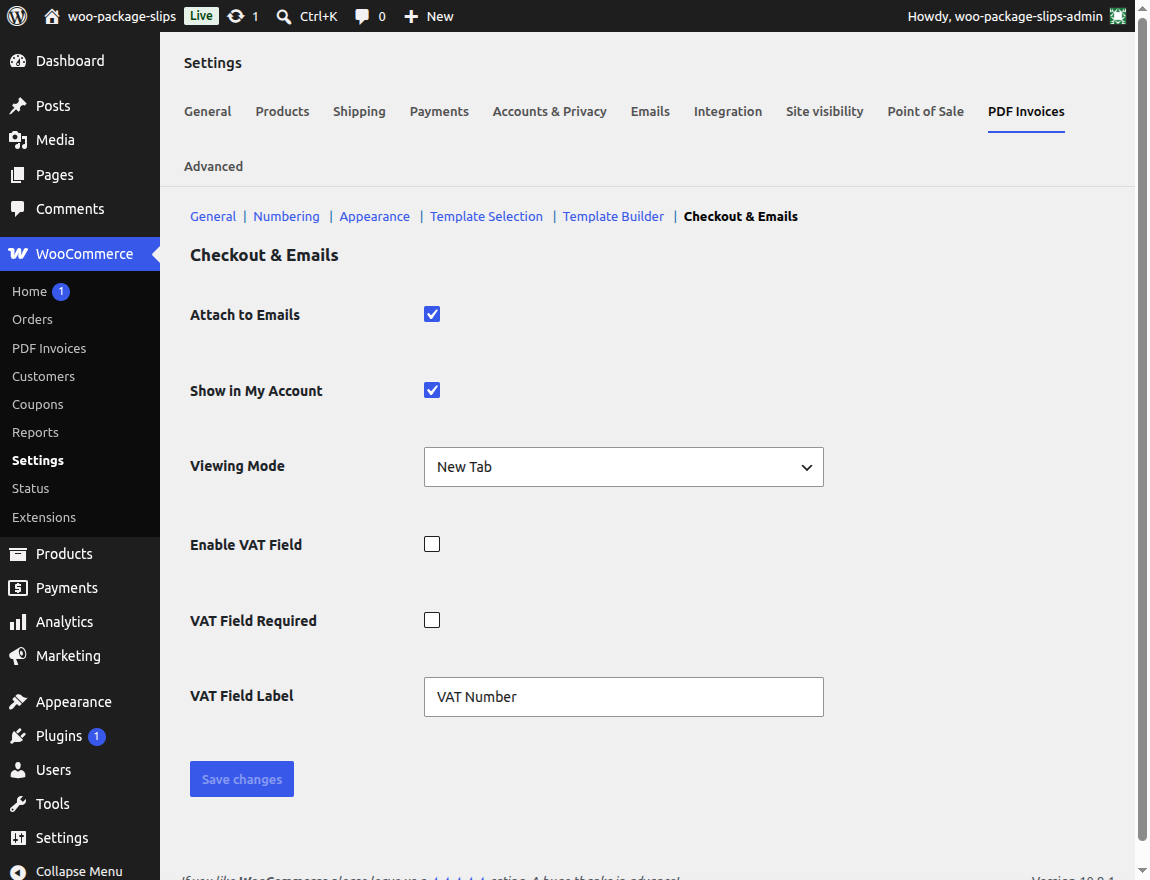
Key Parameters:
- Email Attachments: Choose which PDF documents to attach to specific WooCommerce system emails. For example:
- Attach the Invoice to the Completed Order email.
- Attach the Proforma Invoice to the Customer Invoice / Order Details email.
- Attach the Packing Slip to the Admin New Order email to alert warehouse staff.
- My Account Downloads: Toggle whether customers can download their PDF invoices and proformas directly from their WooCommerce My Account order dashboard page.
- Customer VAT Field: Choose whether to show an optional or mandatory "VAT / Tax Identification Number" text box on the checkout page. The validation engine ensures correct formatting for EU member states, and prints the tax number on the final PDF invoices automatically.