
Visual Template Builder
For merchants who require custom document layouts, the plugin features a built-in Visual Template Builder. This drag-and-drop editor allows you to adjust columns, align sections, size elements, and preview live layouts using dummy data without editing code or template files.
Accessing the Template Builder
- Navigate to WooCommerce → Settings → PDF Invoices → Templates tab.
- Select Custom / Builder as the layout option for the document type you want to customize (e.g., Invoices).
- Scroll to the Template Builder Canvas field.
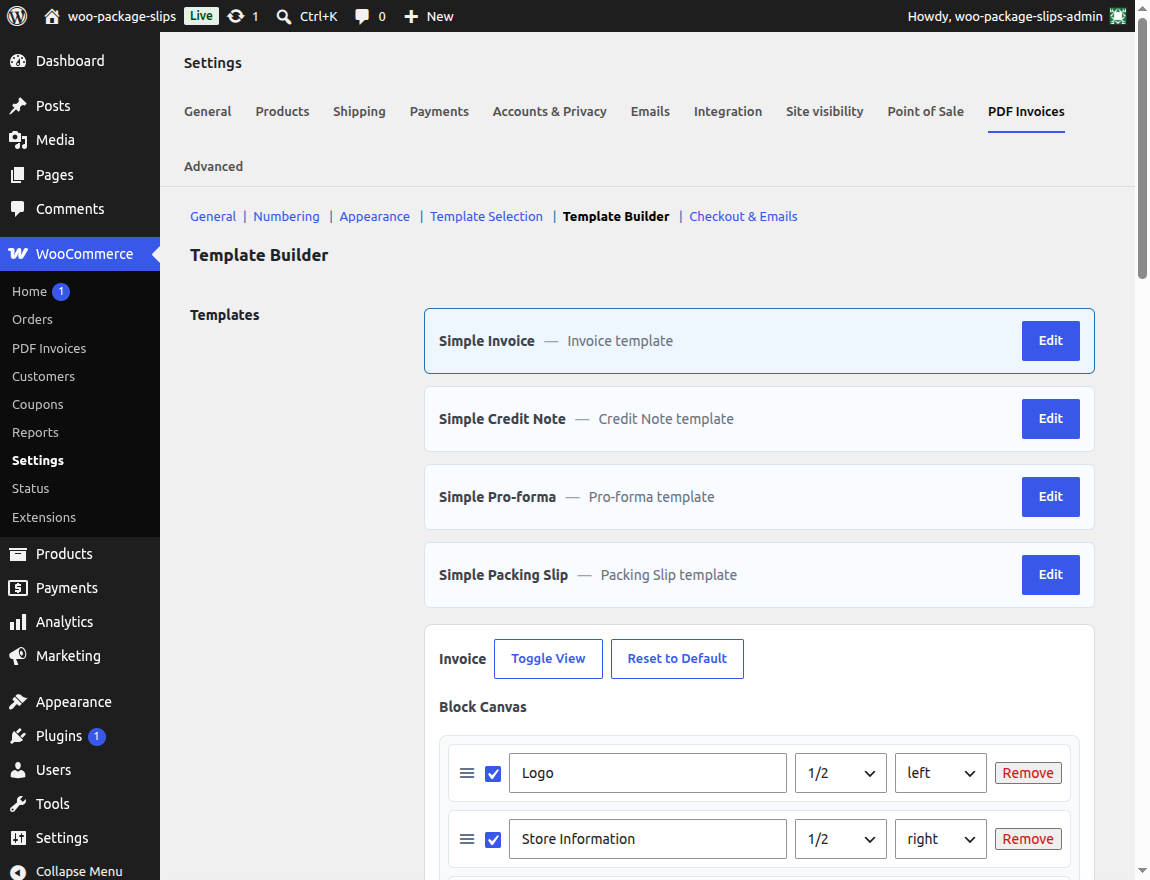
Available Layout Sections
You can drag, reorder, and configure the following sections within your custom layout:
- Logo: Inserts your uploaded company logo.
- Store Information: Displays your company address, contact email, and tax registry credentials.
- Billing Address: Output block for the customer's billing address and contact details.
- Shipping Address: Output block for the customer's shipping address.
- Order Details Table: Displays order metadata, including the Order Number, Date, Invoice Number, and Payment Method.
- Product Table: Renders columns with product names, ordered quantities, item prices, tax lines, and row totals.
- Tax Summary: A table showing total tax lines broken down by rate, alongside the final order totals.
- Payment Information: Displays details of the payment gateway used (e.g., Credit Card, PayPal, Cash on Delivery).
Configuring Individual Sections
Each section block in the layout builder canvas has control buttons to customize its structure:
1. Column Width (Span)
Adjust the horizontal space a section occupies on the page using standard grid columns:
- Span 4 (1/3 Width): Fits three columns side-by-side (e.g., Logo + Store Info + Order Details in one row).
- Span 6 (1/2 Width): Fits two columns side-by-side (e.g., Billing Address left, Shipping Address right).
- Span 8 (2/3 Width): Useful for wider content combined with a smaller side column.
- Span 12 (Full Width): Span across the entire page width (recommended for the Product Table).
2. Alignment
Toggle the text and element alignment inside the section:
- Left Align (◀): Floats and aligns text content to the left side of the column.
- Right Align (▶): Floats and aligns text content to the right side of the column.
3. Height Bounds
Set a height constraint (in pixels) for a section. This prevents overflowing content from pushing subsequent rows onto page breaks, which is useful for reserving exact header margins. Set to 0 for auto-height.
Saving & Live Previewing
The template builder automatically links with the WordPress admin AJAX handler to process changes instantly:
- Live Preview Panel: As you move blocks or toggle widths, the right-hand preview screen re-renders the document using mock order details (e.g., "John Doe", "INV-1001").
- Apply Changes: Click the Save Settings button at the bottom of the page. This action compiles the visual layout into an HTML document template and saves it to the database (
_template_builder_htmloptions), making it active for all future PDF generation requests.