
Interactive Label Creator
The Interactive Label Creator (powered by the React-based visual builder) is a drag-and-drop workspace that lets you design custom labels directly in your browser.
1. Templates Management
Navigate to Webkul WC Addons > Barcode Labels and select the Label Templates tab to manage existing templates or create new ones.
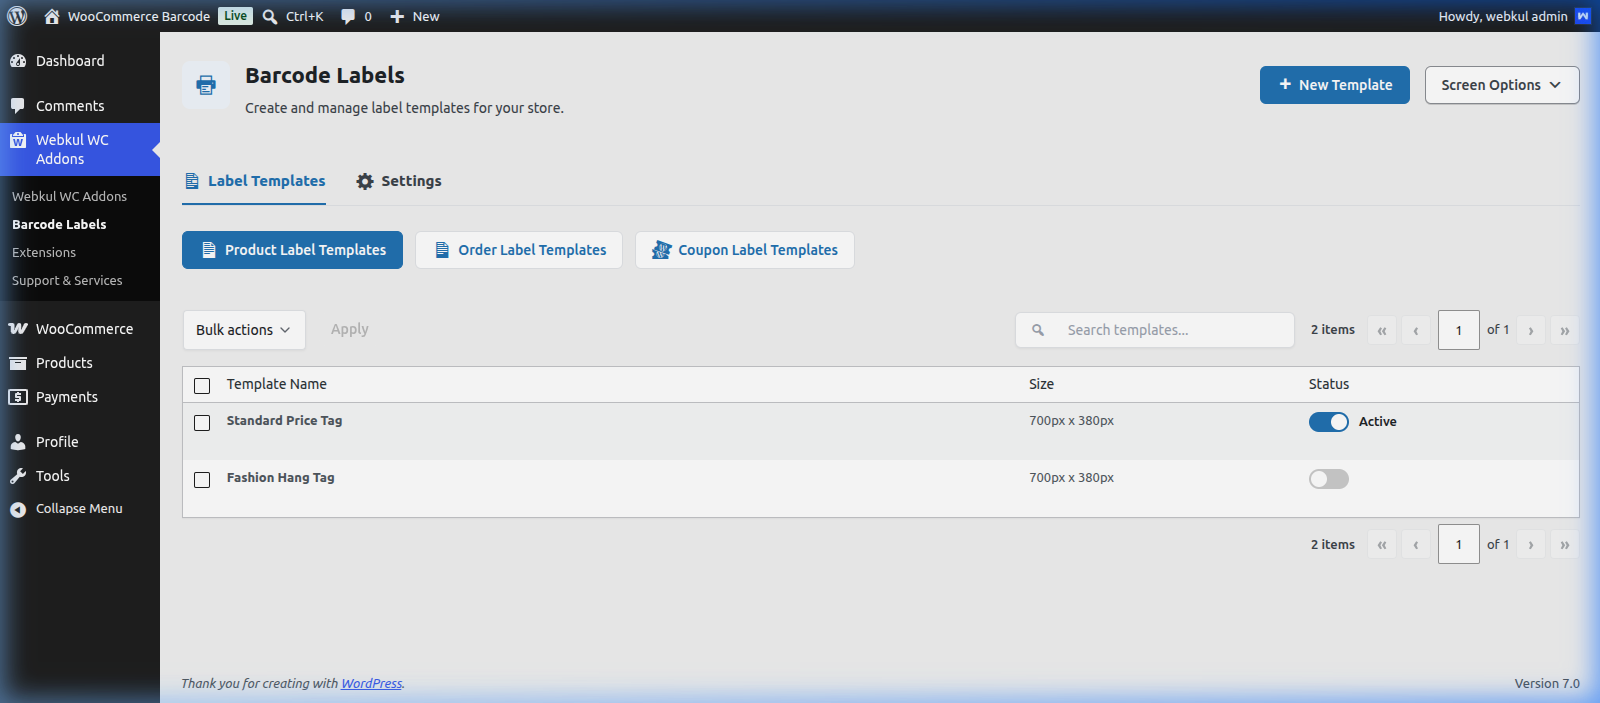
From this screen, you can:
- View existing templates for Product Label Templates, Order Label Templates, and Coupon Label Templates.
- See template details including the template title and creation dates.
- Click Add Template to open the visual designer canvas and build a new design.
2. Visual Designer Panels
When creating or editing a template, the interface is split into a canvas customization area and a property inspector:
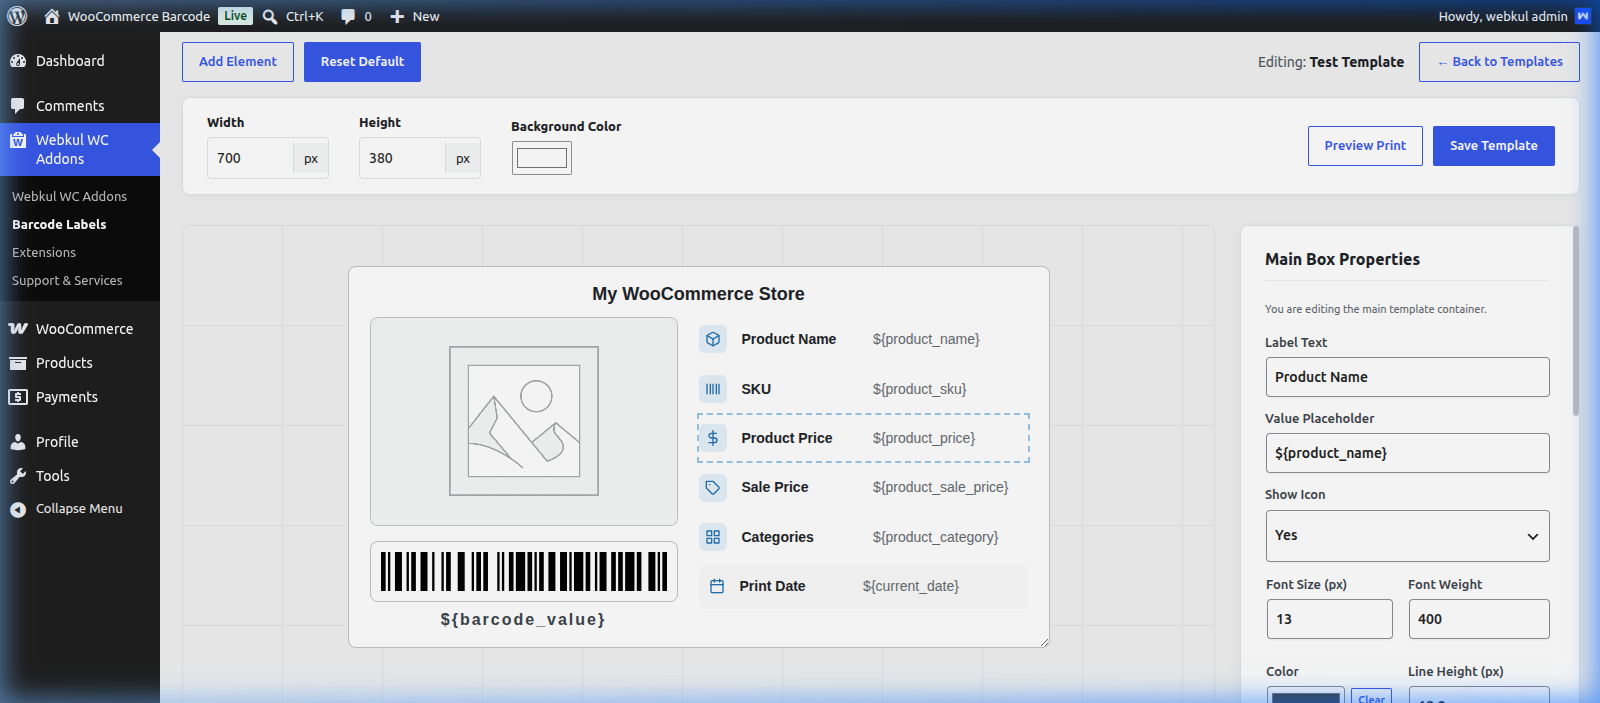
Control Bar & Canvas Settings
- Add Element: Click this button to add new text blocks, custom fields, or branding images.
- Reset Default: Instantly restores the template back to the original layout preset.
- Dimensions (Width & Height): Configure the label's default pixel dimensions (e.g.
700pxwidth by380pxheight) to fit your printing paper. - Background Color: Set a solid background color for the label using the color picker.
- Preview Print: Generates a real-time print preview modal to check margins and contrast.
- Save Template: Click this button to save your current layout.
Element Blocks & Variables
You can click, drag, and resize the following pre-built elements inside the visual canvas:
- Product Name: Standard placeholder
${product_name}displaying the product title. - SKU: Standard placeholder
${product_sku}displaying the unique product code. - Product Price: Standard placeholder
${product_price}displaying the product price. - Sale Price: Standard placeholder
${product_sale_price}displaying the promotional price. - Categories: Standard placeholder
${product_category}displaying product categories. - Print Date: Standard placeholder
${current_date}displaying the date of print. - Barcode Value: Standard placeholder
${barcode_value}displaying the scannable barcode block.
Properties Inspector (Right Sidebar)
When you select an element on the canvas, the right panel switches to edit its properties:
- Label Text / Title: Customize the text label (e.g. changing "Product Name" to a custom header).
- Value Placeholder: Displays the internal code mapped to the field data.
- Show Icon: Choose whether to show standard graphical icons next to details (e.g., shopping bag for name, tag for price).
- Typography: Edit the Font Size (in pixels) and Font Weight (e.g.,
400for normal,700for bold). - Colors & Margins: Select the font color and set the element line height.
3. Saving & Applying Templates
Once your layout matches your needs:
- Enter a descriptive name in the Editing: Template Name header input.
- Click Save Template to persist changes.
- Apply this template as the default choice in your global Settings > Barcode Settings page.
[!TIP] Optimizing Scanning Reliability: Keep high-contrast colors (e.g., black barcode bars on a pure white background). Custom background colors or low-contrast gradients will prevent hardware scanners from reading the printed barcode correctly.