
Admin Configuration
Configure global plugin parameters and connection details by navigating to Webkul WC Addons > Barcode Labels and selecting the Settings tab.
Settings Tabs
1. Barcode Settings
Configure the default barcode encoding symbologies used globally for different post types.
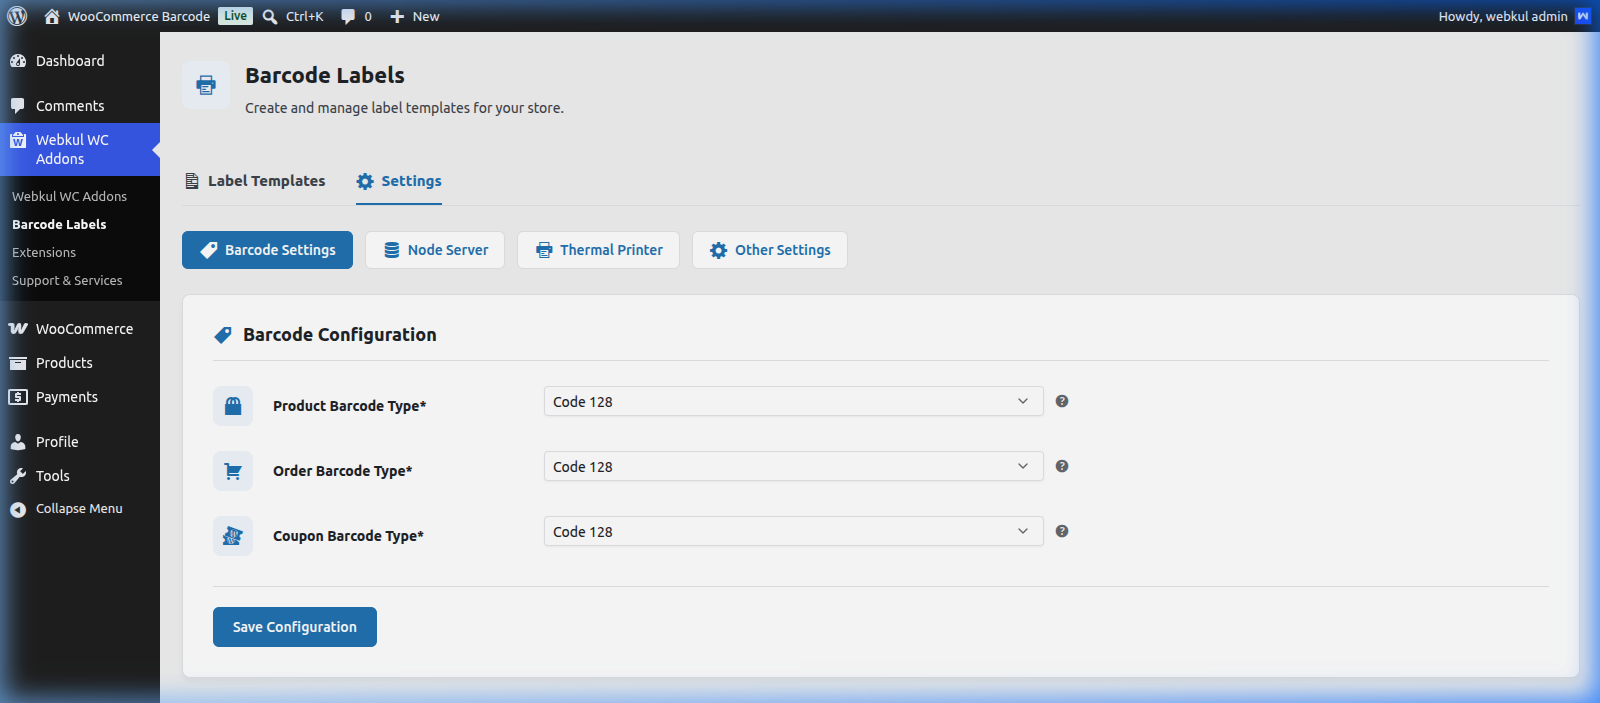
- Product Barcode Type:* Select the barcode standard used for WooCommerce products (e.g., Code 128, Code 39, EAN-13).
- Order Barcode Type:* Select the barcode standard used for WooCommerce order slips (e.g., Code 128, QR Code).
- Coupon Barcode Type:* Select the barcode standard used for discount coupon vouchers (e.g., Code 128, PDF417).
2. Node Server
Configure the host and SSL encryption details for the local Node.js WebSocket printing daemon.
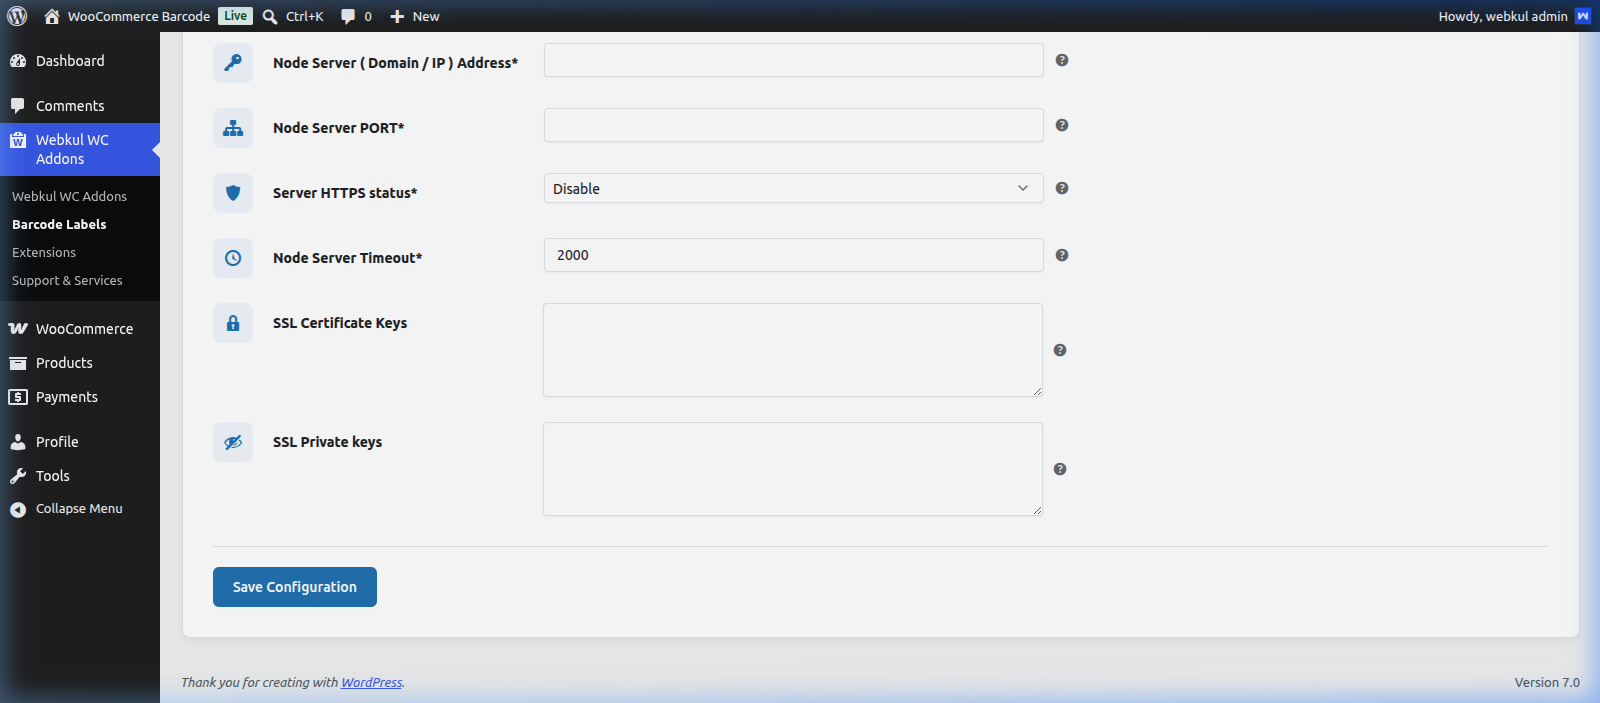
- Node Server ( Domain / IP ) Address:* The address where the desktop print daemon is hosted (default is empty, representing
localhostor local IP). - Node Server PORT:* The port number on which the Node server listens for WebSocket connections.
- Server HTTPS status:* Toggle whether the connection uses secure WebSockets (
wss:/// Enable) or unencrypted WebSockets (ws:/// Disable). - Node Server Timeout:* Connection timeout limit in milliseconds (default:
2000). - SSL Certificate Keys: Place your self-signed or trusted SSL certificate text block here if HTTPS status is enabled.
- SSL Private keys: Place your corresponding SSL private key text block here if HTTPS status is enabled.
3. Thermal Printer
Set your ZPL paper specifications and access desktop print clients.
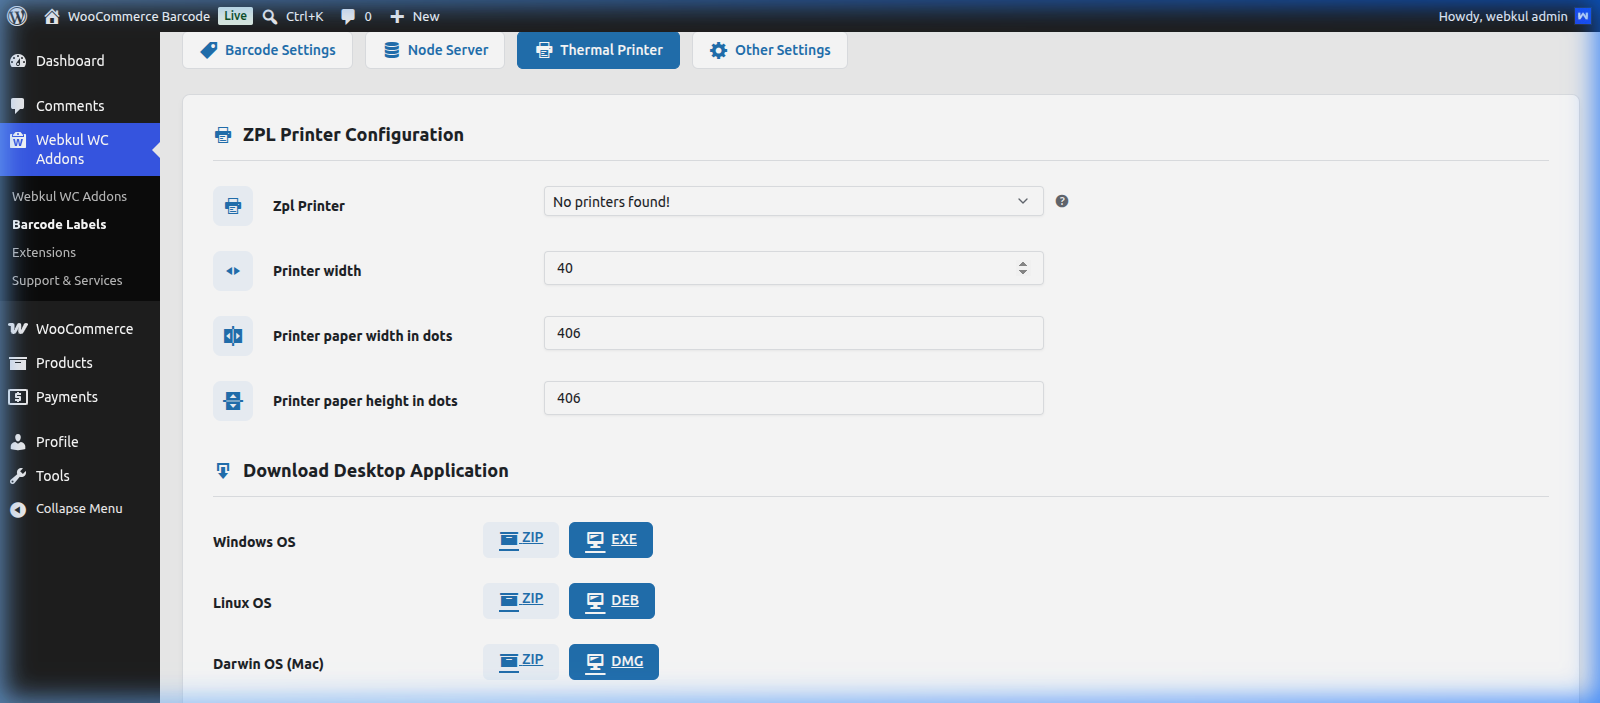
- Zpl Printer: Select your connected thermal printer from the dropdown menu of detected system devices.
- Printer width: Specify the physical label width (default:
40mm). - Printer paper width in dots: Define the print resolution width in dot pitch (default:
406dots). - Printer paper height in dots: Define the print resolution height in dot pitch (default:
406dots).
[!TIP] Download Desktop Application: At the bottom of this settings panel, you can download the local print listener daemon preconfigured for your operating system:
- Windows OS: Click to download as
ZIPorEXEinstaller.- Linux OS: Click to download as
ZIPorDEBbundle.- Darwin OS (Mac): Click to download as
ZIPorDMGpackage.
4. Other Settings
Control order-specific automation triggers and identifier modes.
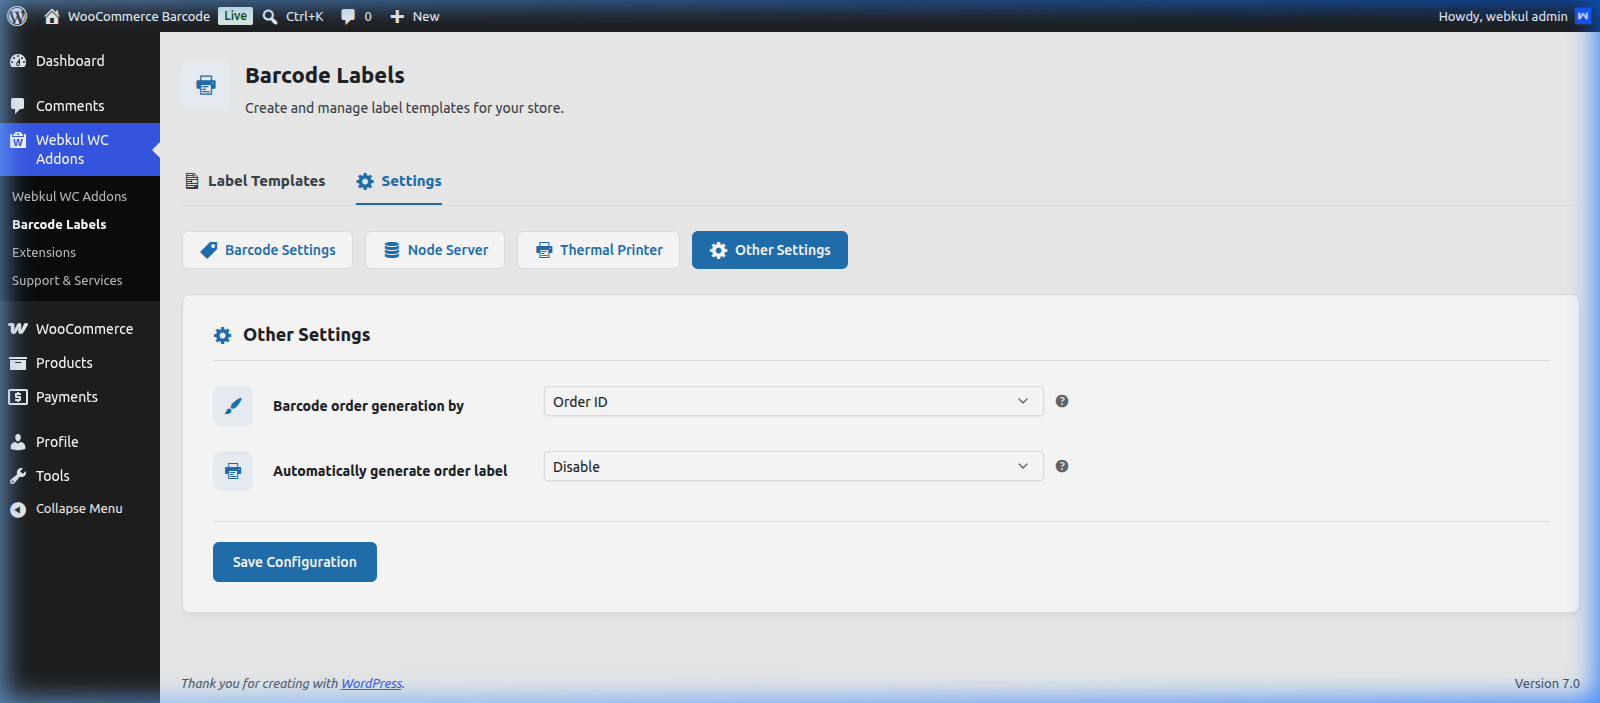
- Barcode order generation by: Choose the unique WooCommerce identifier used to create barcodes for orders:
- Order ID
- Order Key
- Order Number
- Automatically generate order label: Toggle whether order barcodes are generated automatically upon purchase:
- Disable
- Enable
SSL Certificate & Browser Trust Setup
Browsers enforce strict security limits on mixed content. An https:// WooCommerce site cannot communicate with an unencrypted ws:// WebSocket server. The local server must run over secure WebSockets (wss://).
Follow these steps to establish trusted connections:
- Generate the self-signed SSL certs using the server's certificate helper.
- Paste the certificate keys into the Node Server settings tab.
- In Chrome/Edge, navigate to:
chrome://flags/#allow-insecure-localhost - Enable "Allow invalid certificates for resources loaded from localhost" and restart the browser.
[!IMPORTANT] Port Conflicts: If the configured port is currently used by another application (e.g., Apache, webpack dev servers, or local dev tools), update the port in both the Node Server tab and the local desktop app configurations.