
Creating & Managing Happy Hour Rules
Store administrators create and manage all promotional timeframes, customer eligibility rules, and discount criteria from the dedicated Point of Sale → Happy Hours management screen.
Happy Hours Campaigns List
Navigate to Point of Sale → Happy Hours in your WordPress dashboard to view all active, scheduled, and disabled campaigns.
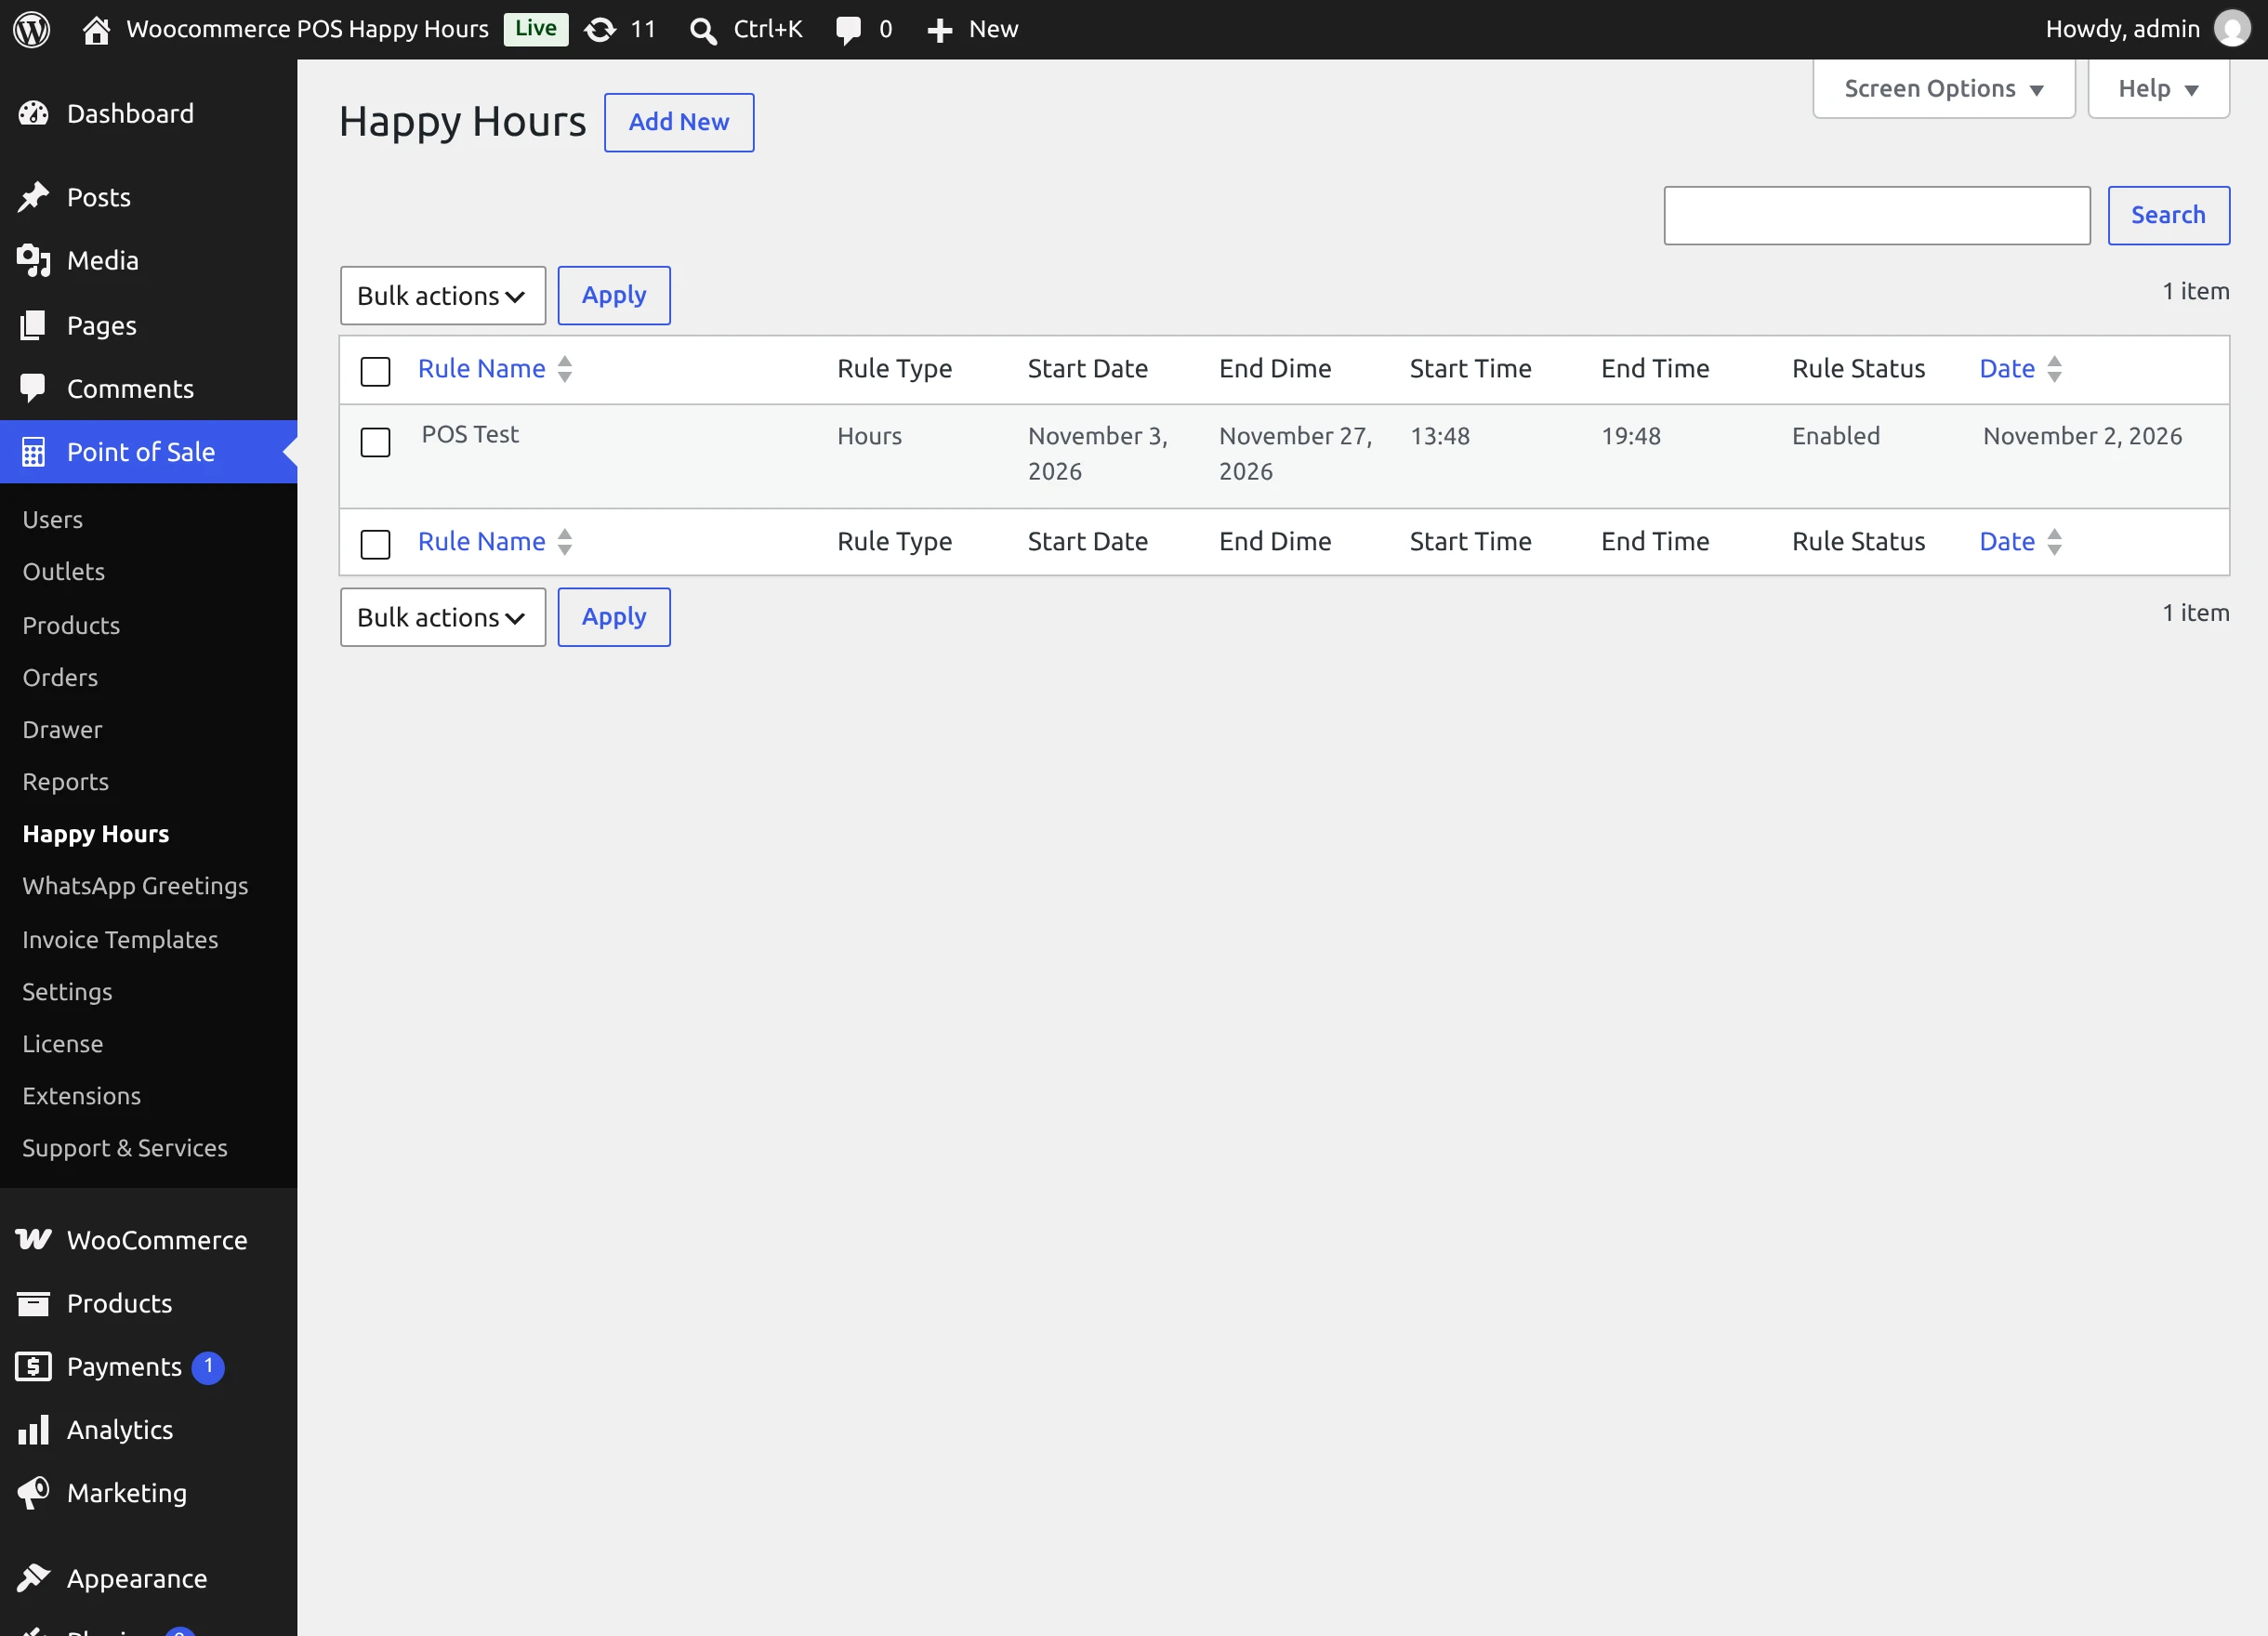
The rules table displays key operational details at a glance:
- Rule Name: The administrative identifier for the promotion.
- Rule Type: The schedule type (
Hours). - Start Date & End Date: The active promotional calendar window.
- Start Time & End Time: The exact time window during which the rule activates.
- Status: Whether the campaign is
EnabledorDisabled. - Created Date: The timestamp when the rule was first established.
- Actions: Quick action links to Edit or Delete an existing campaign.
Adding a New Happy Hour Rule
To launch a new promotion, click the Add New button at the top of the rules list.
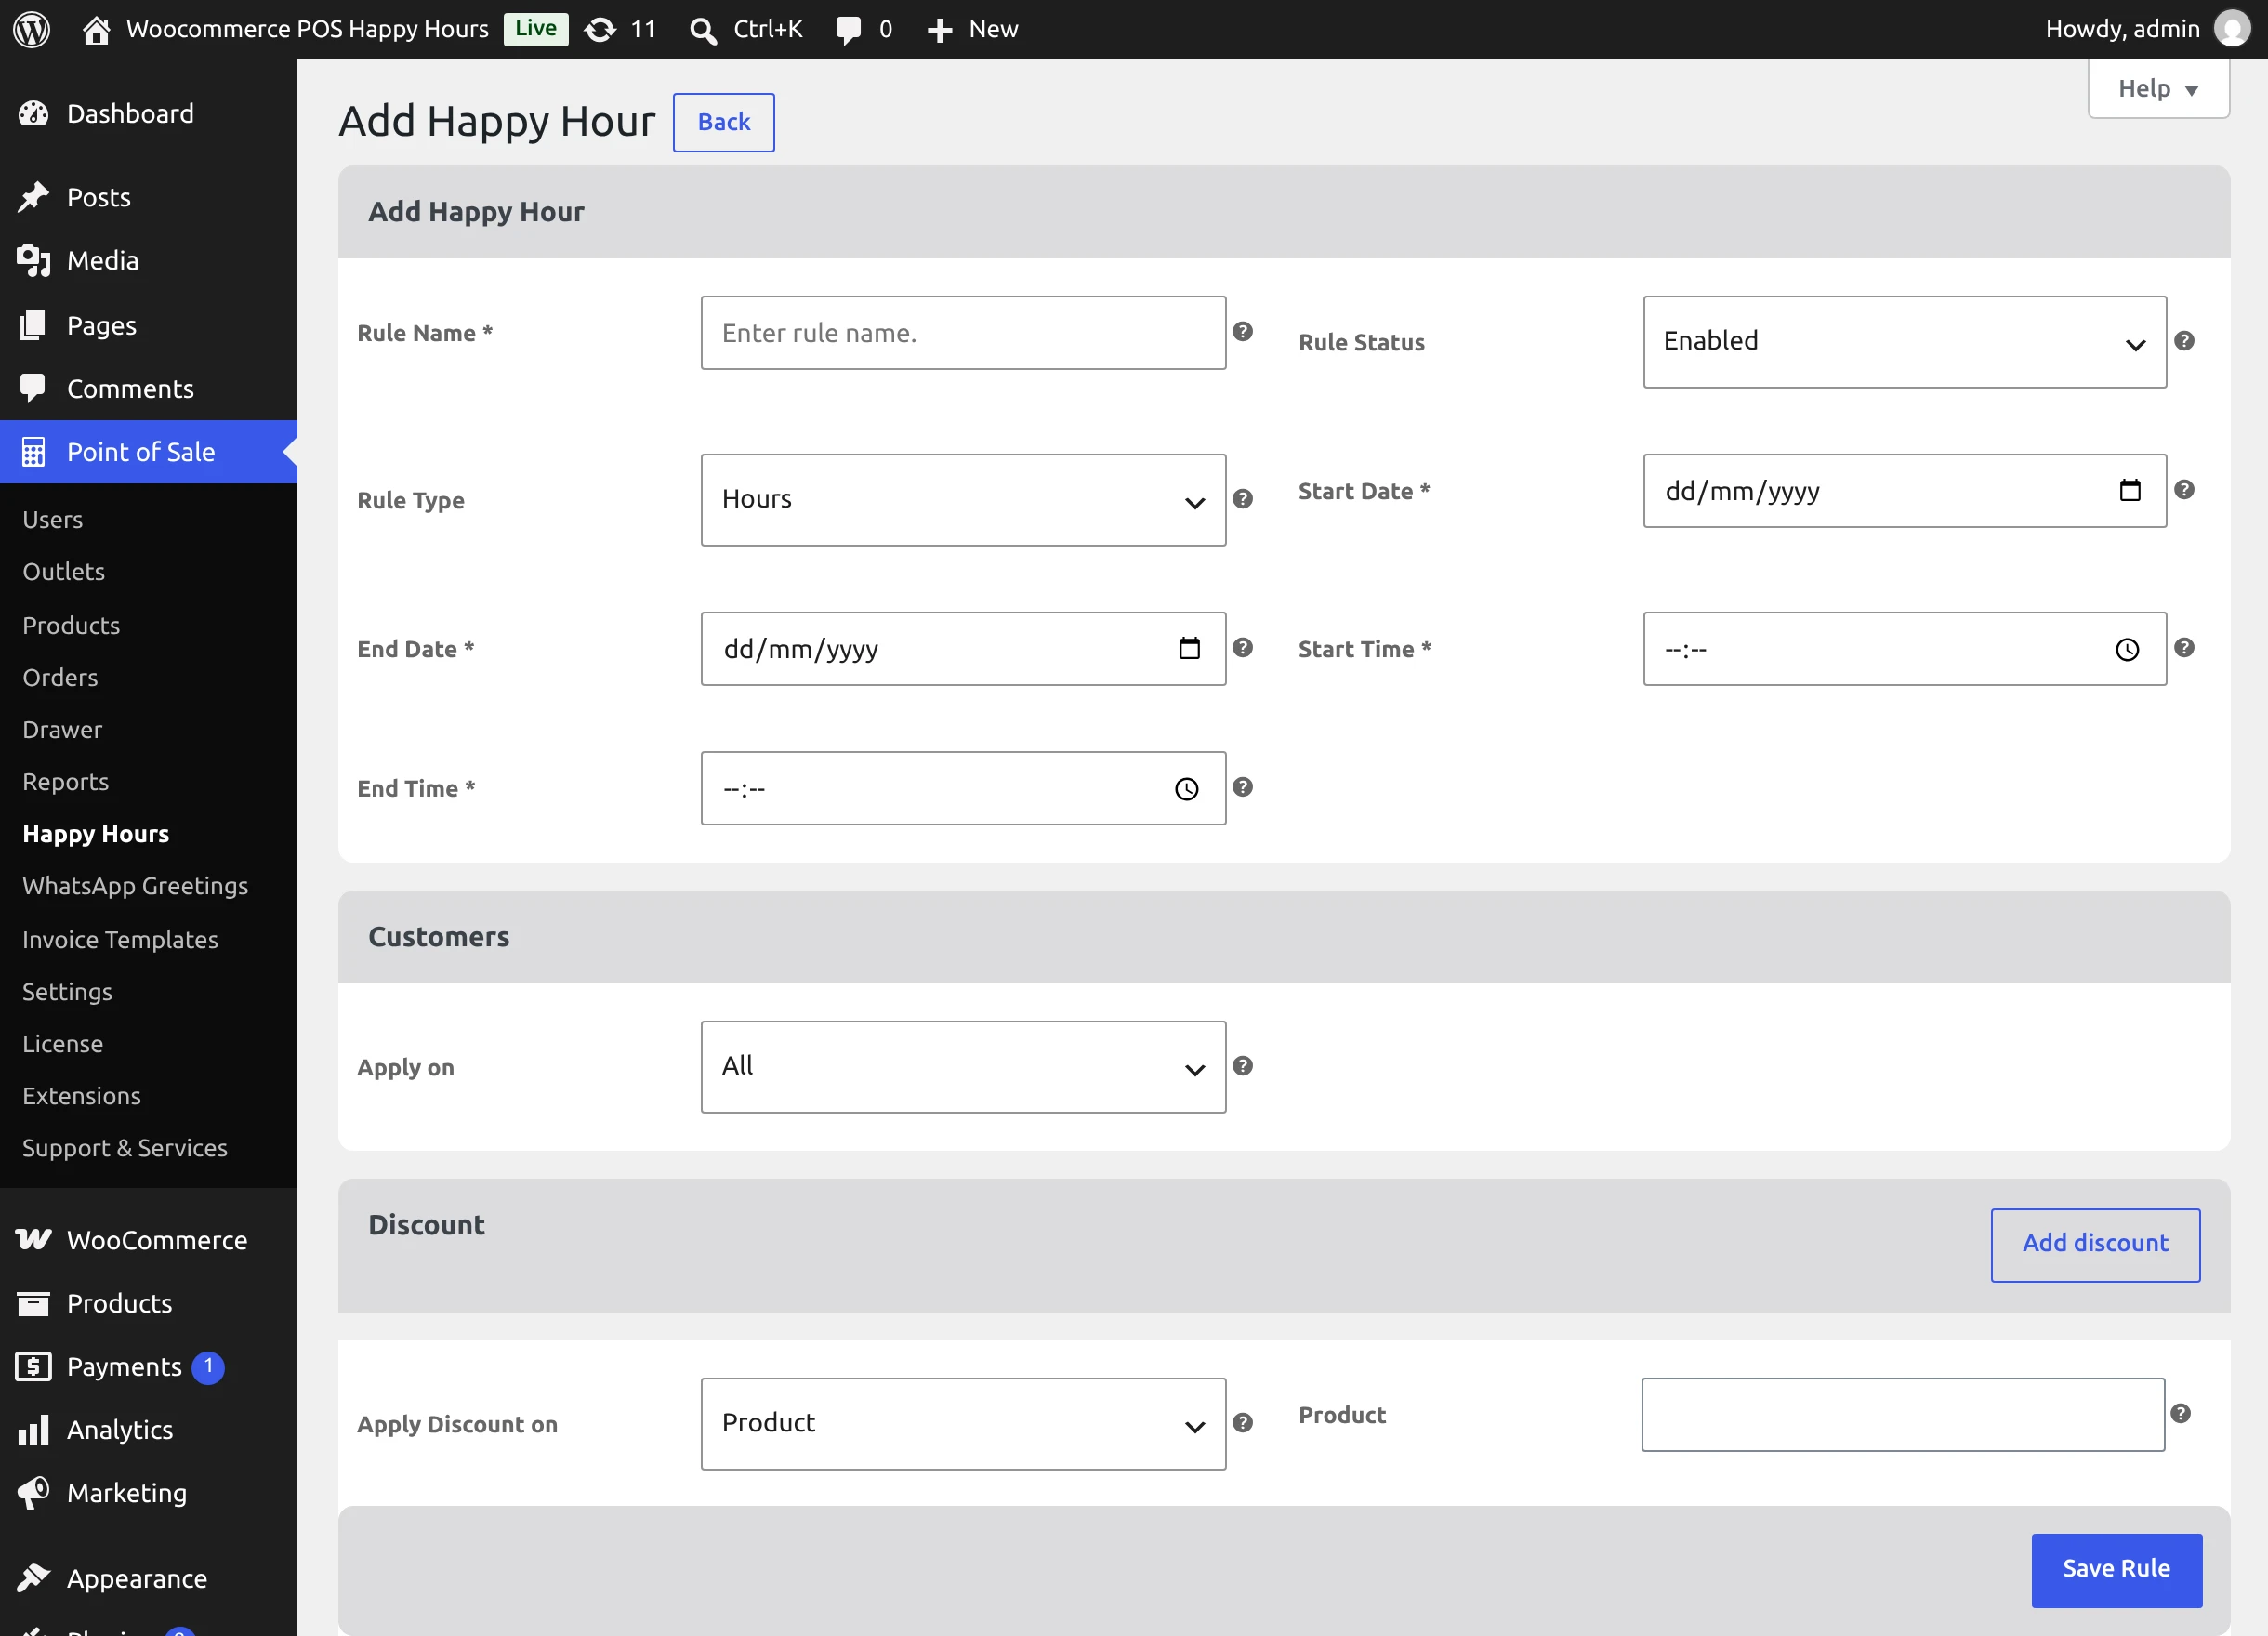
General Information & Timing
- Rule Name: Enter a descriptive name for your internal records (e.g.,
Lunchtime SpecialorWeekend Electronics Flash Sale). - Rule Status: Set to Enabled to make the campaign live immediately during scheduled hours, or Disabled to prepare the campaign in advance.
- Rule Type: Select Hours.
- Start Date: Pick the first calendar date when the discount becomes available (the date picker automatically enforces a minimum of the current date).
- End Date: Select the final calendar date of the promotional window.
- Start Time: Define the daily start time in 24-hour format (e.g.,
12:00or14:30). - End Time: Define the daily cutoff time when standard pricing resumes (e.g.,
15:00or18:00).
Customer Targeting Options
Store owners can choose whether discounts apply universally or exclusively to select shoppers:
- Apply on: All: The promotional pricing is automatically applied to any shopper at the checkout register, including guest walk-ins.
- Apply on: Select Customer(s): Opens an interactive multi-select field allowing you to pick specific registered WooCommerce customer accounts by name or email. Only transactions assigned to these customers will receive the Happy Hour discount at the POS.
Configuring Discount Rules
The Discount section allows you to set up the exact pricing incentives applied during the Happy Hour timeframe.
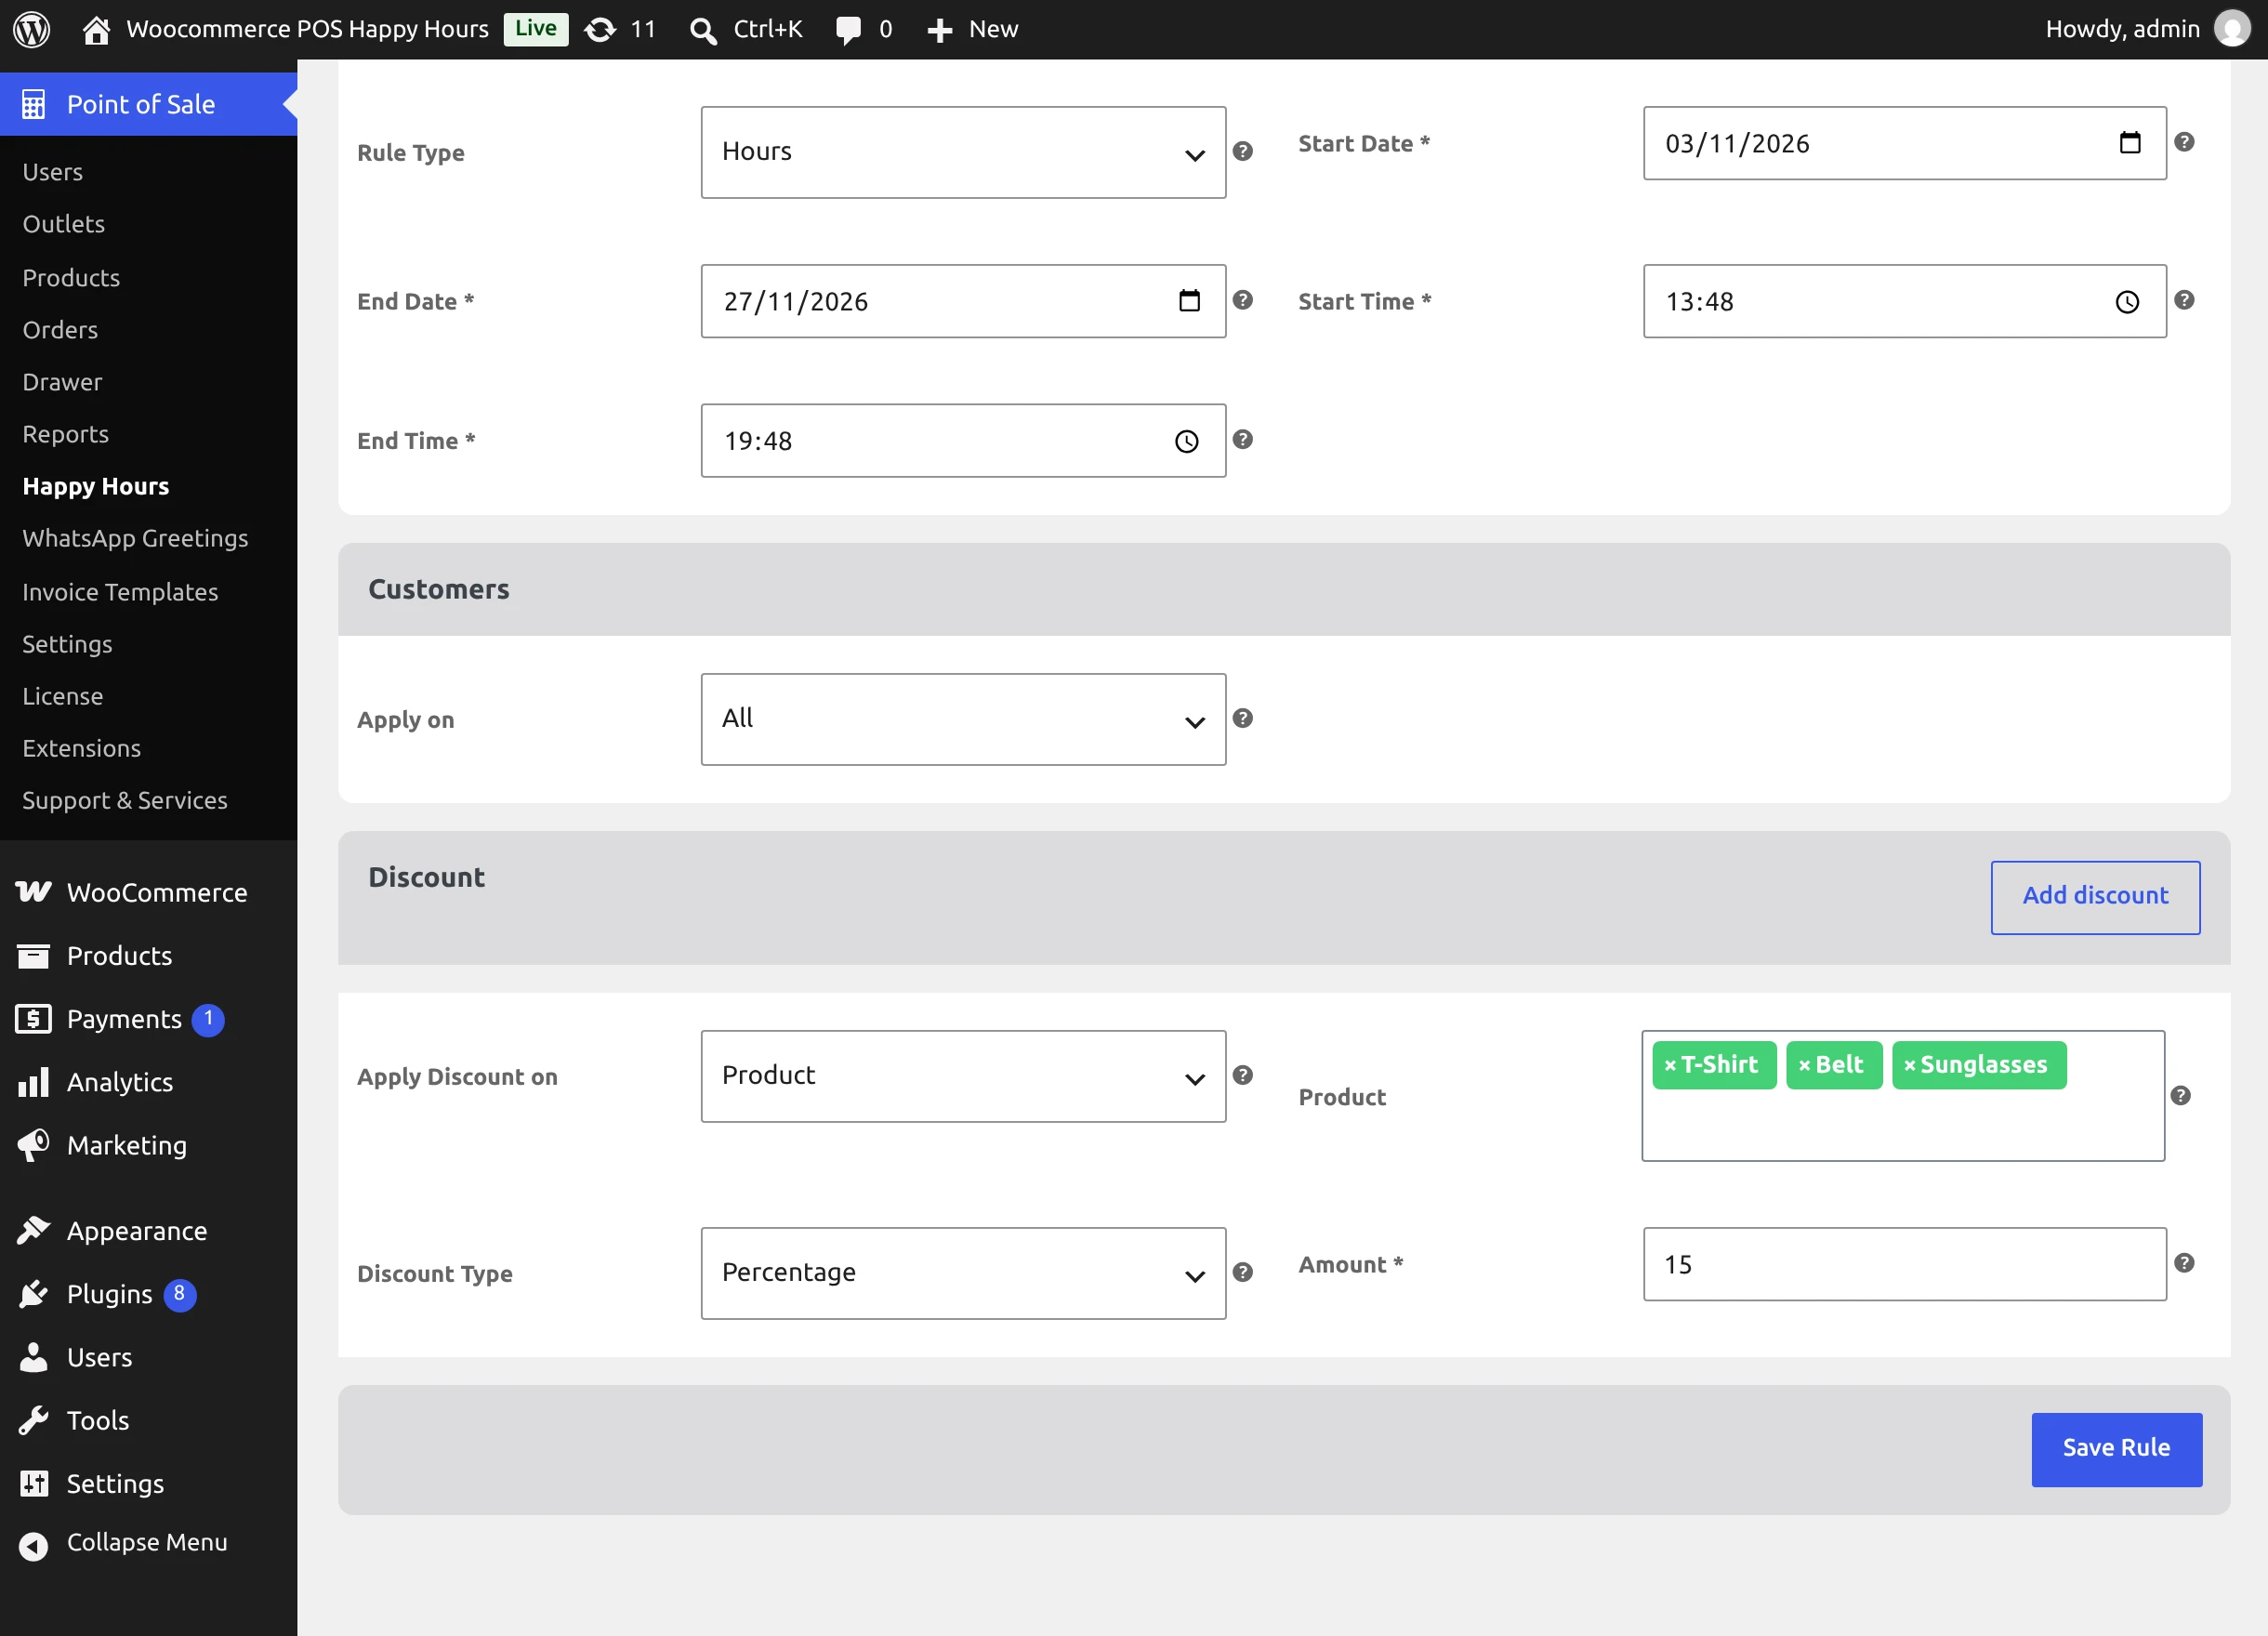
Click the Add discount button to configure one or more discount conditions within the same campaign:
Option 1: Product-Level Discounts
- Apply Discount on: Choose Product.
- Product: Search and select one or more specific catalog products from the multi-select dropdown.
- Discount Type:
Fixed: Deducts a specific currency amount (e.g.,$5.00off each selected item).Percentage: Deducts a percentage from the product retail price (e.g.,15%off).
- Amount: Enter the numeric deduction value.
Option 2: Category-Level Discounts
- Apply Discount on: Choose Product Categories.
- Categories: Select one or more WooCommerce product categories (e.g.,
Apparel,Accessories, orBeverages). - Discount Type: Select
FixedorPercentage. - Amount: Enter the deduction amount applied to every product within the selected categories.
Option 3: Cart Total-Based Discounts
- Apply Discount on: Choose Cart Total.
- Cart From: Specify the minimum basket total required to trigger the discount (e.g.,
$50.00). - Cart Till: Specify the upper basket limit for this tier (e.g.,
$200.00). - Discount Type: Select
FixedorPercentage. - Amount: Enter the total discount deducted from the checkout balance.
Multi-Rule Stacking
You can combine multiple discount blocks inside a single Happy Hour campaign. For example, a single campaign can offer 15% off T-Shirts, $5 off Accessories, and a $10 bonus deduction for orders exceeding $100.
Saving and Managing Rules
- Verify that all required fields, dates, and discount tiers are correctly populated.
- Click Save Rule at the bottom of the page.
- The system validates the input, creates or updates the database record, and displays a success notification.
- If you need to make changes later, simply click Edit under the rule row in the Happy Hours list.
Next step: POS Terminal Cashier Workflow →