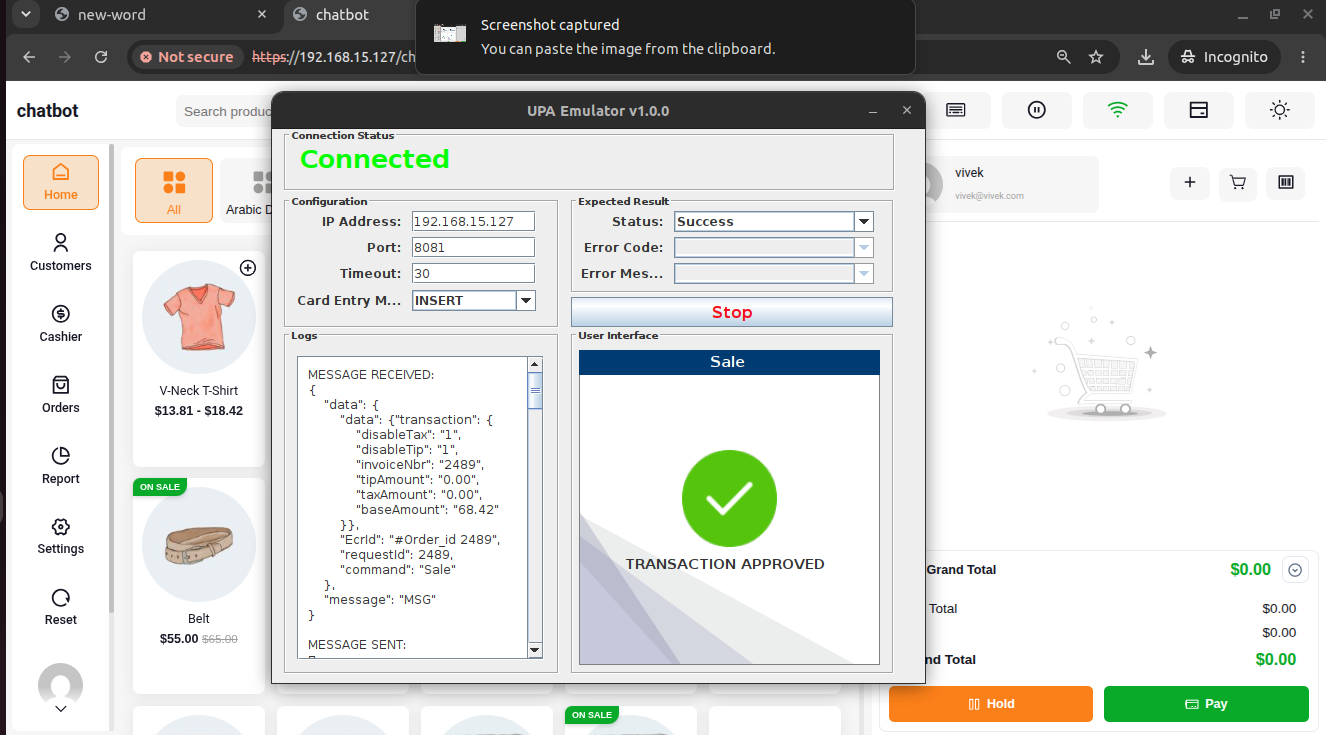
POS Checkout Workflow & Interactive Prompts
This guide details the complete end-to-end checkout workflow when processing an in-store transaction using POS Globalpay Terminal Payment for WooCommerce.
1. Cashier Checkout Selection
- The POS cashier adds items to the shopping cart in WooCommerce POS (e.g., Total:
$68.42). - The cashier clicks Pay at the bottom right of the screen.
- In the payment methods list, select POS Global Pay Terminal.
- Click Confirm Payment.
2. Real-Time Socket Payload Handshake
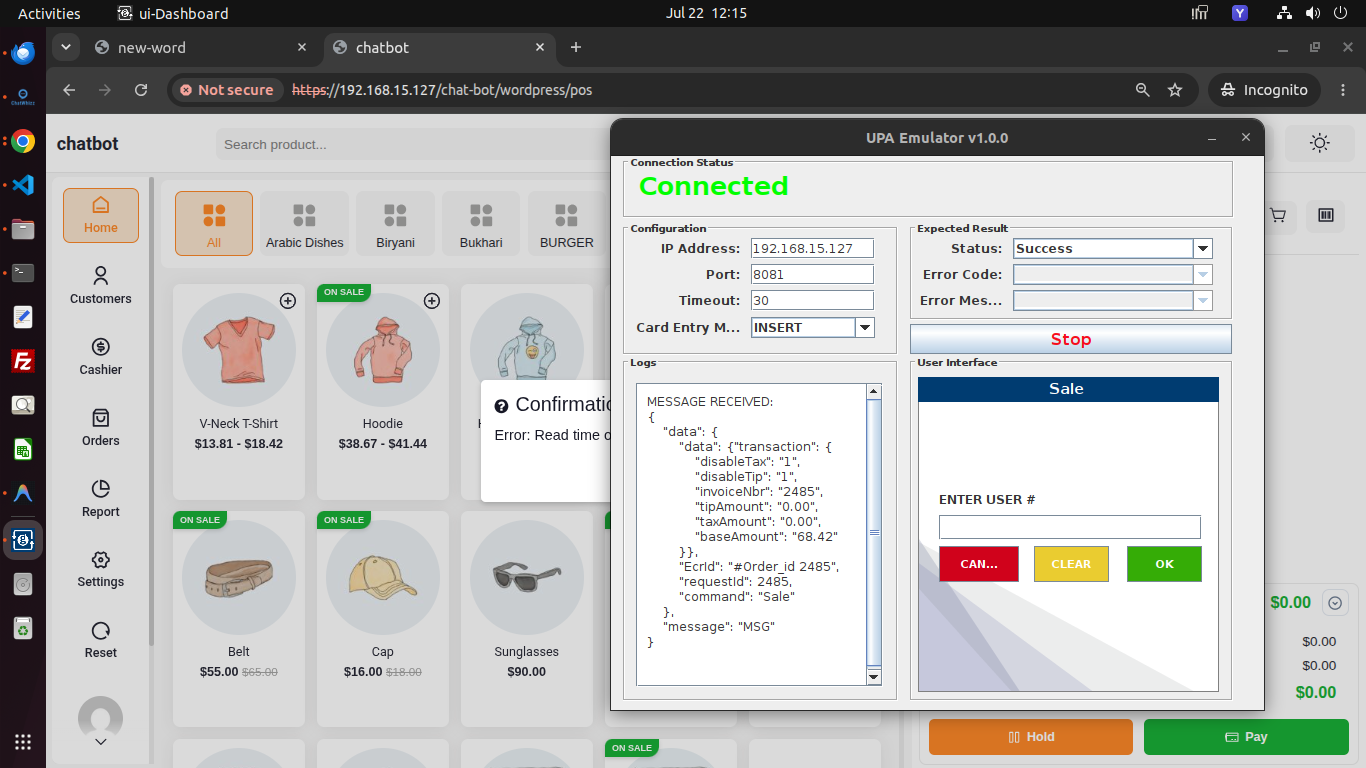
Upon clicking Confirm Payment, POS emits the createGlobalPayPayment socket event to the Node.js socket server:
{
  "command": "Sale",
  "requestId": 2489,
  "EcrId": "#Order_id 2489",
  "message": "MSG",
  "data": {
    "transaction": {
      "baseAmount": "68.42",
      "taxAmount": "0.00",
      "tipAmount": "0.00",
      "invoiceNbr": "2489",
      "disableTax": "1",
      "disableTip": "1"
    }
  }
}

3. Interactive Terminal Prompt Screen Flow
During payment execution, the card reader guides the cashier and customer through a 6-step interactive verification sequence:
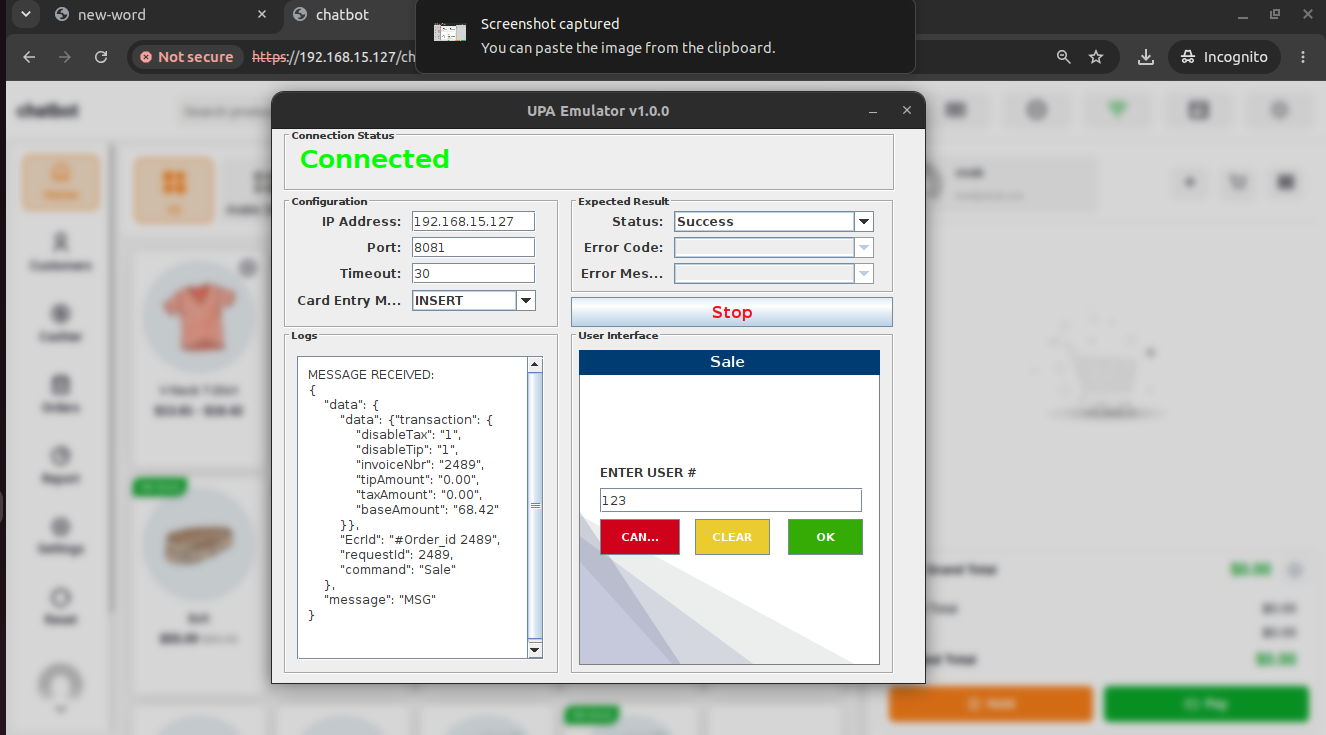
Step 1: User Verification (ENTER USER #)
- Screen: Displays
ENTER USER #prompt. - Action: Cashier enters operator ID (e.g.
123) and clicks OK.
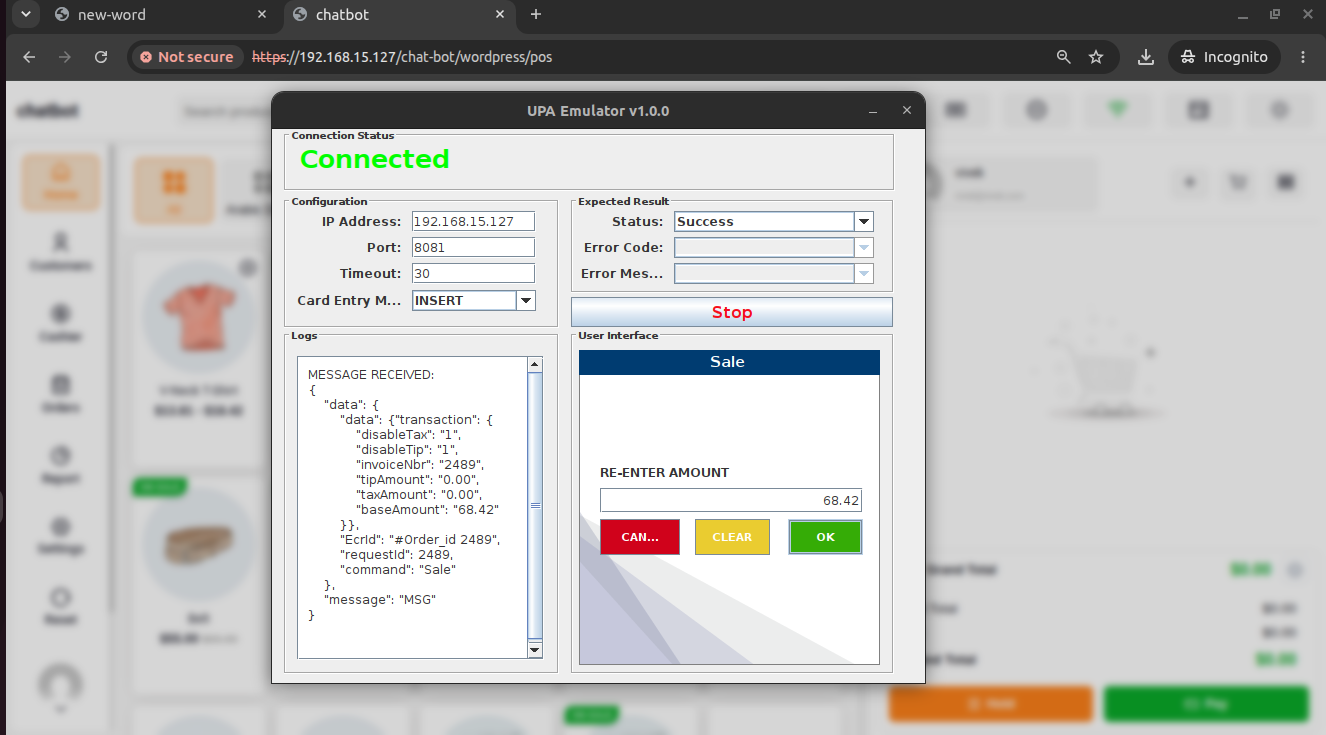
Step 2: Amount Re-Entry (RE-ENTER AMOUNT)
- Screen: Displays
RE-ENTER AMOUNTprompt pre-filled with order total68.42. - Action: Cashier confirms amount accuracy and clicks OK.
Step 3: Card Insertion (CARD ENTRY)
- Screen: Displays
CARD ENTRY (INSERT - SIMULATED)graphic. - Action: Customer inserts, taps, or swipes card on reader.
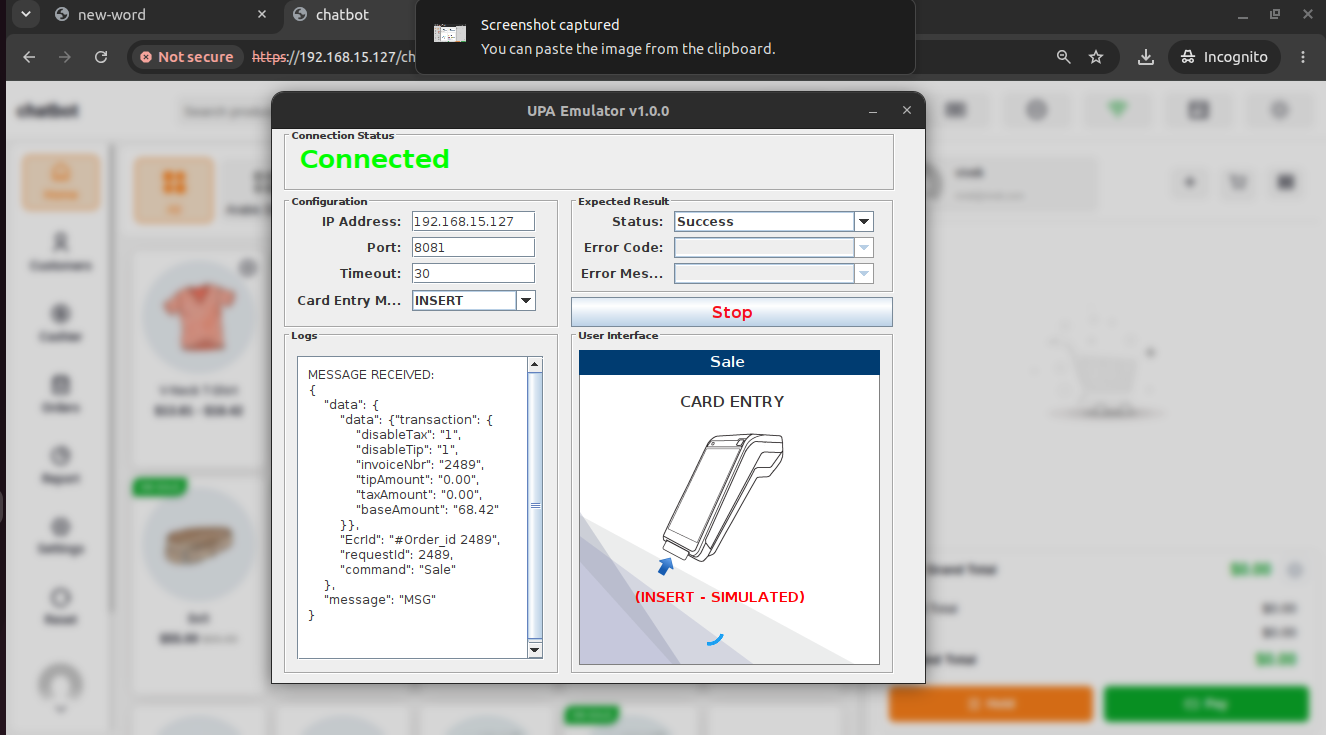
Step 4: PIN Entry (ENTER PIN)
- Screen: Displays
ENTER PIN (***)input field. - Action: Customer inputs secret PIN on pinpad and clicks OK.
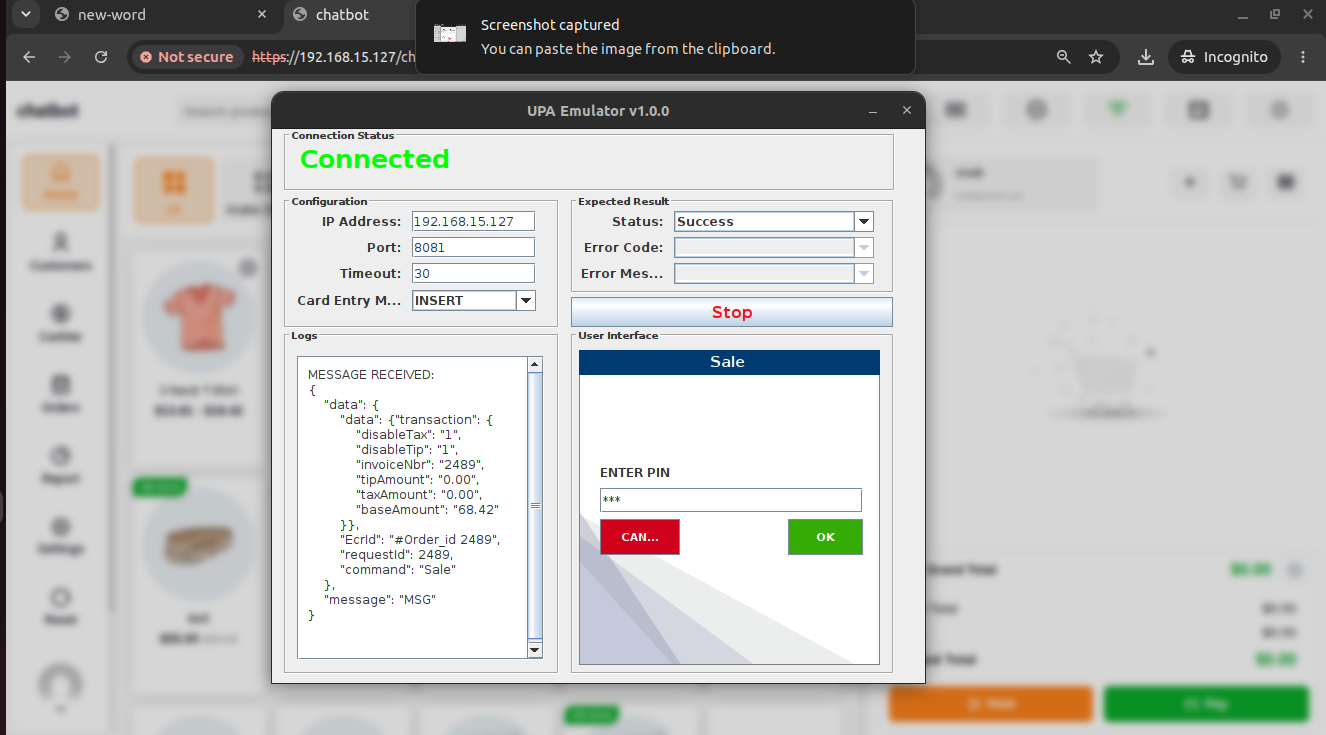
Step 5: Gateway Host Communication (CONTACTING HOST)
- Screen: Displays spinner graphic with
CONTACTING HOST / RECEIVING (OFFLINE - SIMULATED). - Action: Terminal transmits encrypted card data to Globalpay host servers for authorization.
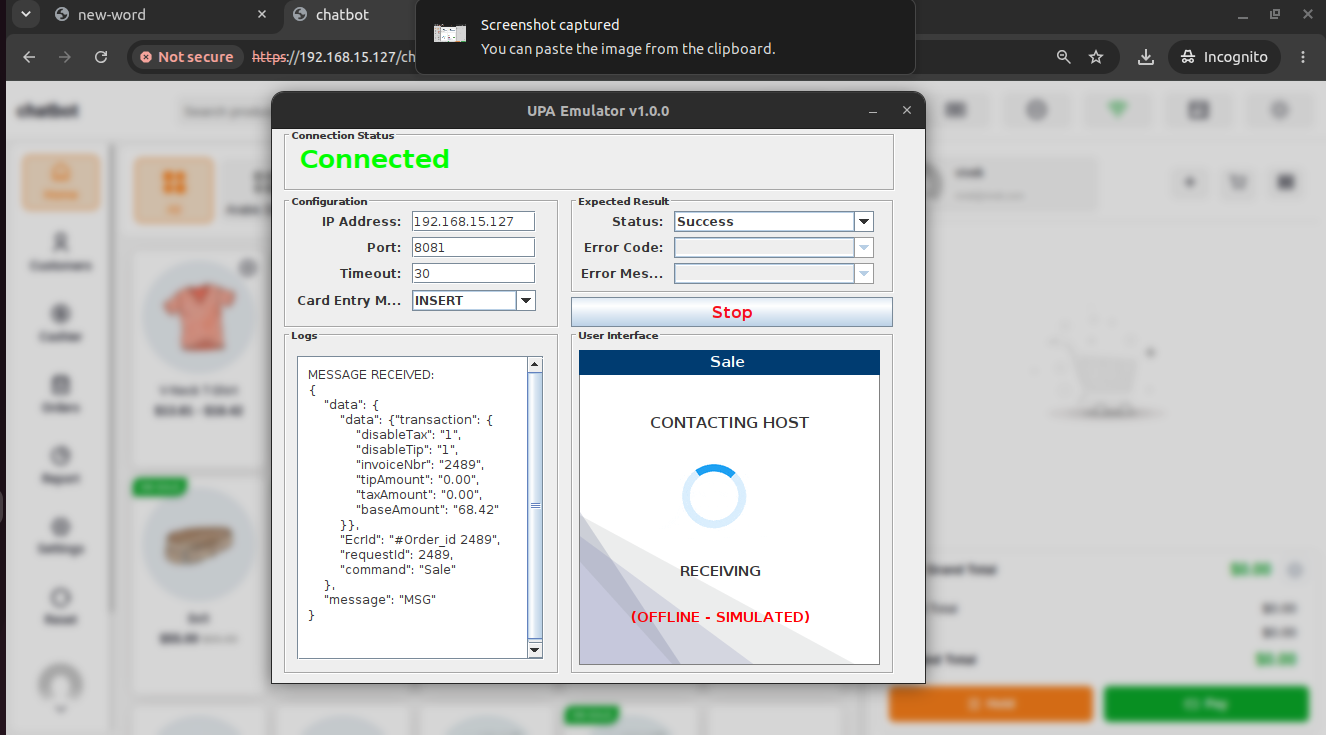
Step 6: Transaction Approval (TRANSACTION APPROVED)
- Screen: Displays green checkmark graphic with
TRANSACTION APPROVED. - Action: Terminal sends approval response callback event
getMobileGlobalPayPaymentto POS.