
Admin Gateway Configuration
The POS Global Payment Terminal Gateway is configured and managed directly within the native WooCommerce Checkout settings tab. This gives store administrators centralized control over payment gateway enablement, default pre-selection, payment titles, customer descriptions, test mode toggles, and Globalpay merchant account credentials.
Accessing Gateway Settings
- Log into the WordPress Administration Dashboard.
- Navigate to WooCommerce → Settings in the left sidebar menu.
- Click on the Payments tab.
- Locate POS Global Payment Terminal Gateway in the payment providers list and click Manage (or click the gateway title link).
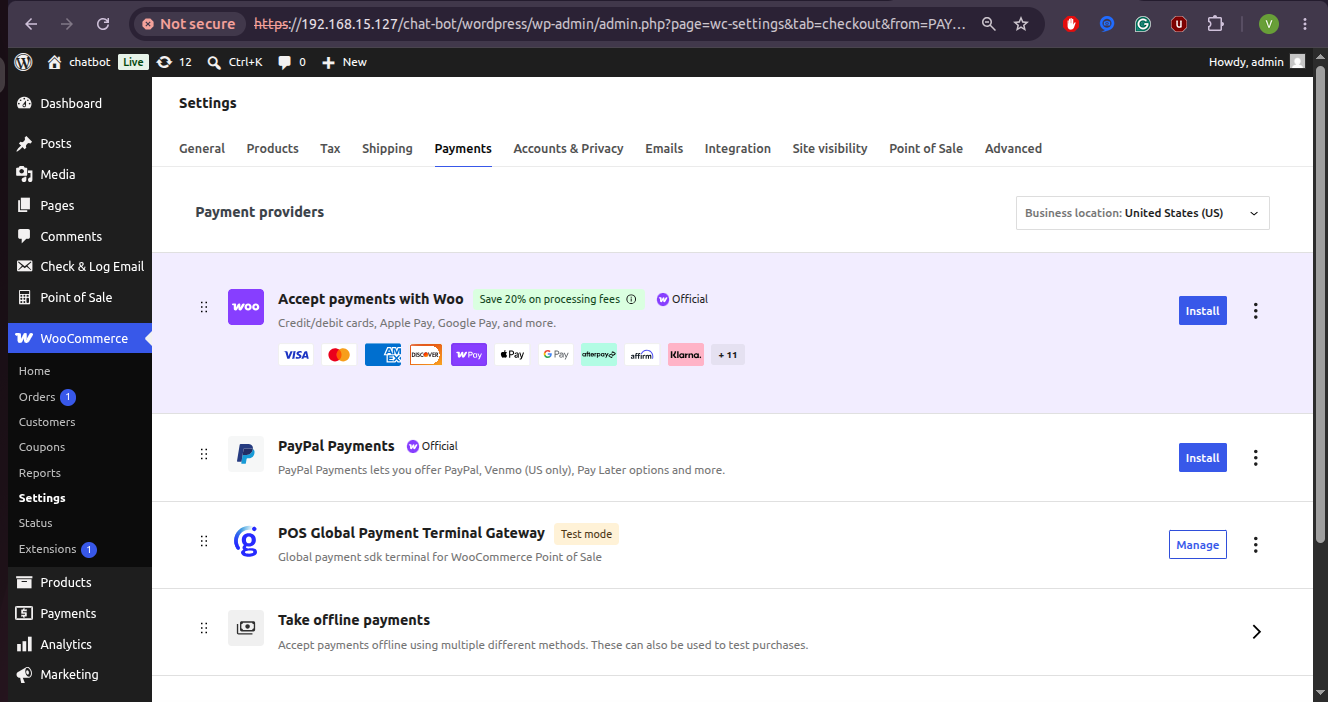
Gateway Settings Breakdown
Clicking Manage opens the gateway administration form:
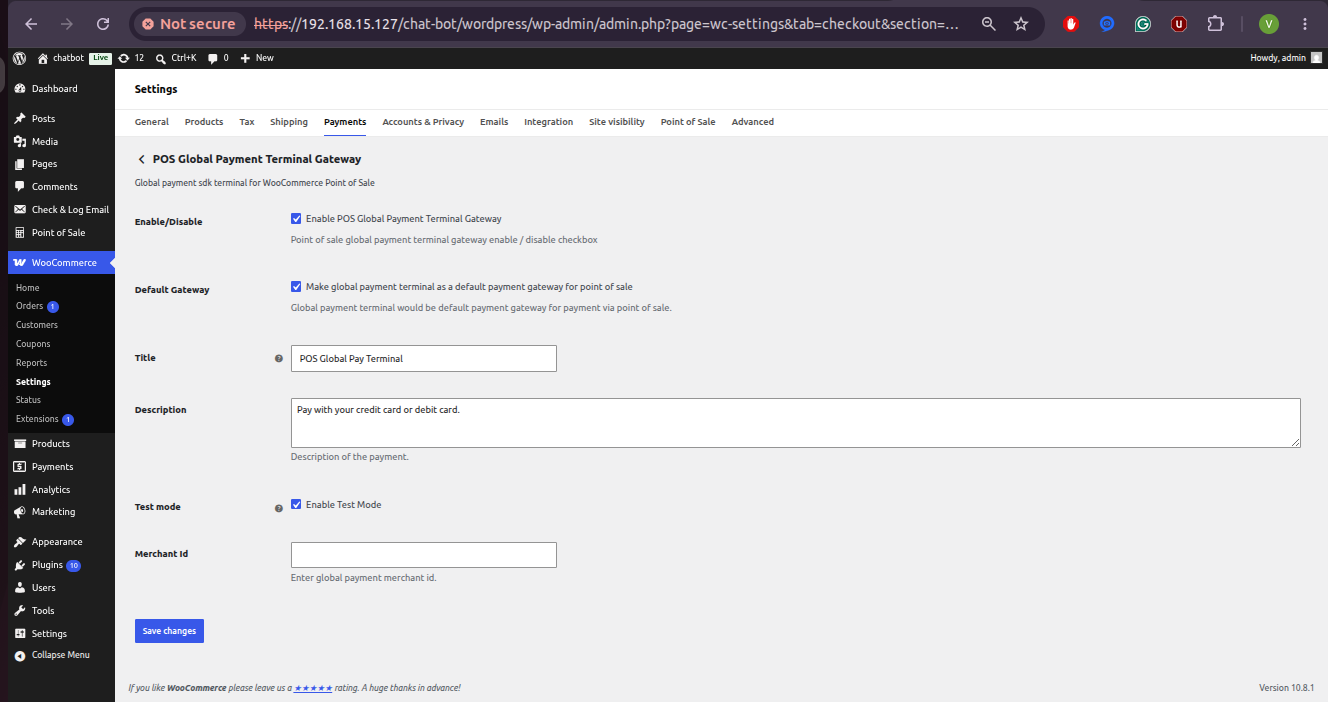
Configuration Options
| Option Field | Control Type | Description | Default Value |
|---|---|---|---|
| Enable/Disable | Checkbox | Check Enable POS Global Payment Terminal Gateway to make the payment gateway active and available on the POS cashier checkout screen. | Checked (yes) |
| Default Gateway | Checkbox | Check Make global payment terminal as a default payment gateway for point of sale to automatically pre-select this method during cashier checkout. | Checked (yes) |
| Title | Text Input | Enter the payment method title displayed to cashiers and customers during checkout (e.g. POS Global Pay Terminal). | POS Global Pay Terminal |
| Description | Textarea | Enter custom instructions or explanatory text shown below the title on the checkout panel. | Pay with your credit card or debit card. |
| Test Mode | Checkbox | Check Enable Test Mode to run in sandbox environment mode (enables testing with the UPA Emulator or test credentials). | Checked (yes) |
| Merchant ID | Text Input | Enter your official Globalpay Merchant Identification number provided by your payment processor. | Blank |
WordPress Plugins List Settings Link
For convenience, the plugin registers a direct settings shortcut on the main WordPress Plugins screen:
- Navigate to Plugins → Installed Plugins.
- Locate POS Globalpay Terminal Payment for WooCommerce.
- Click Settings to navigate directly to the gateway configuration page (
admin.php?page=wc-settings&tab=checkout§ion=wkposglobal_payterminal_payment_terminal).
Note: After making any configuration changes, click Save changes at the bottom of the form. Changes immediately update active POS cashier sessions upon panel refresh.