
Admin Configuration
Once the plugin is installed and activated, store administrators configure storewide try-on policies, visitor access controls, and AI provider integrations through the dedicated settings panel.
Accessing the Configuration Screen
Navigate to Webkul WC Addons → Virtual Try On in your WordPress admin menu.
The configuration interface is organized into two primary cards:
- General Settings — Controls storewide activation and shopper access permissions.
- AI Model Settings — Connects your selected AI vision engine and manages model discovery.
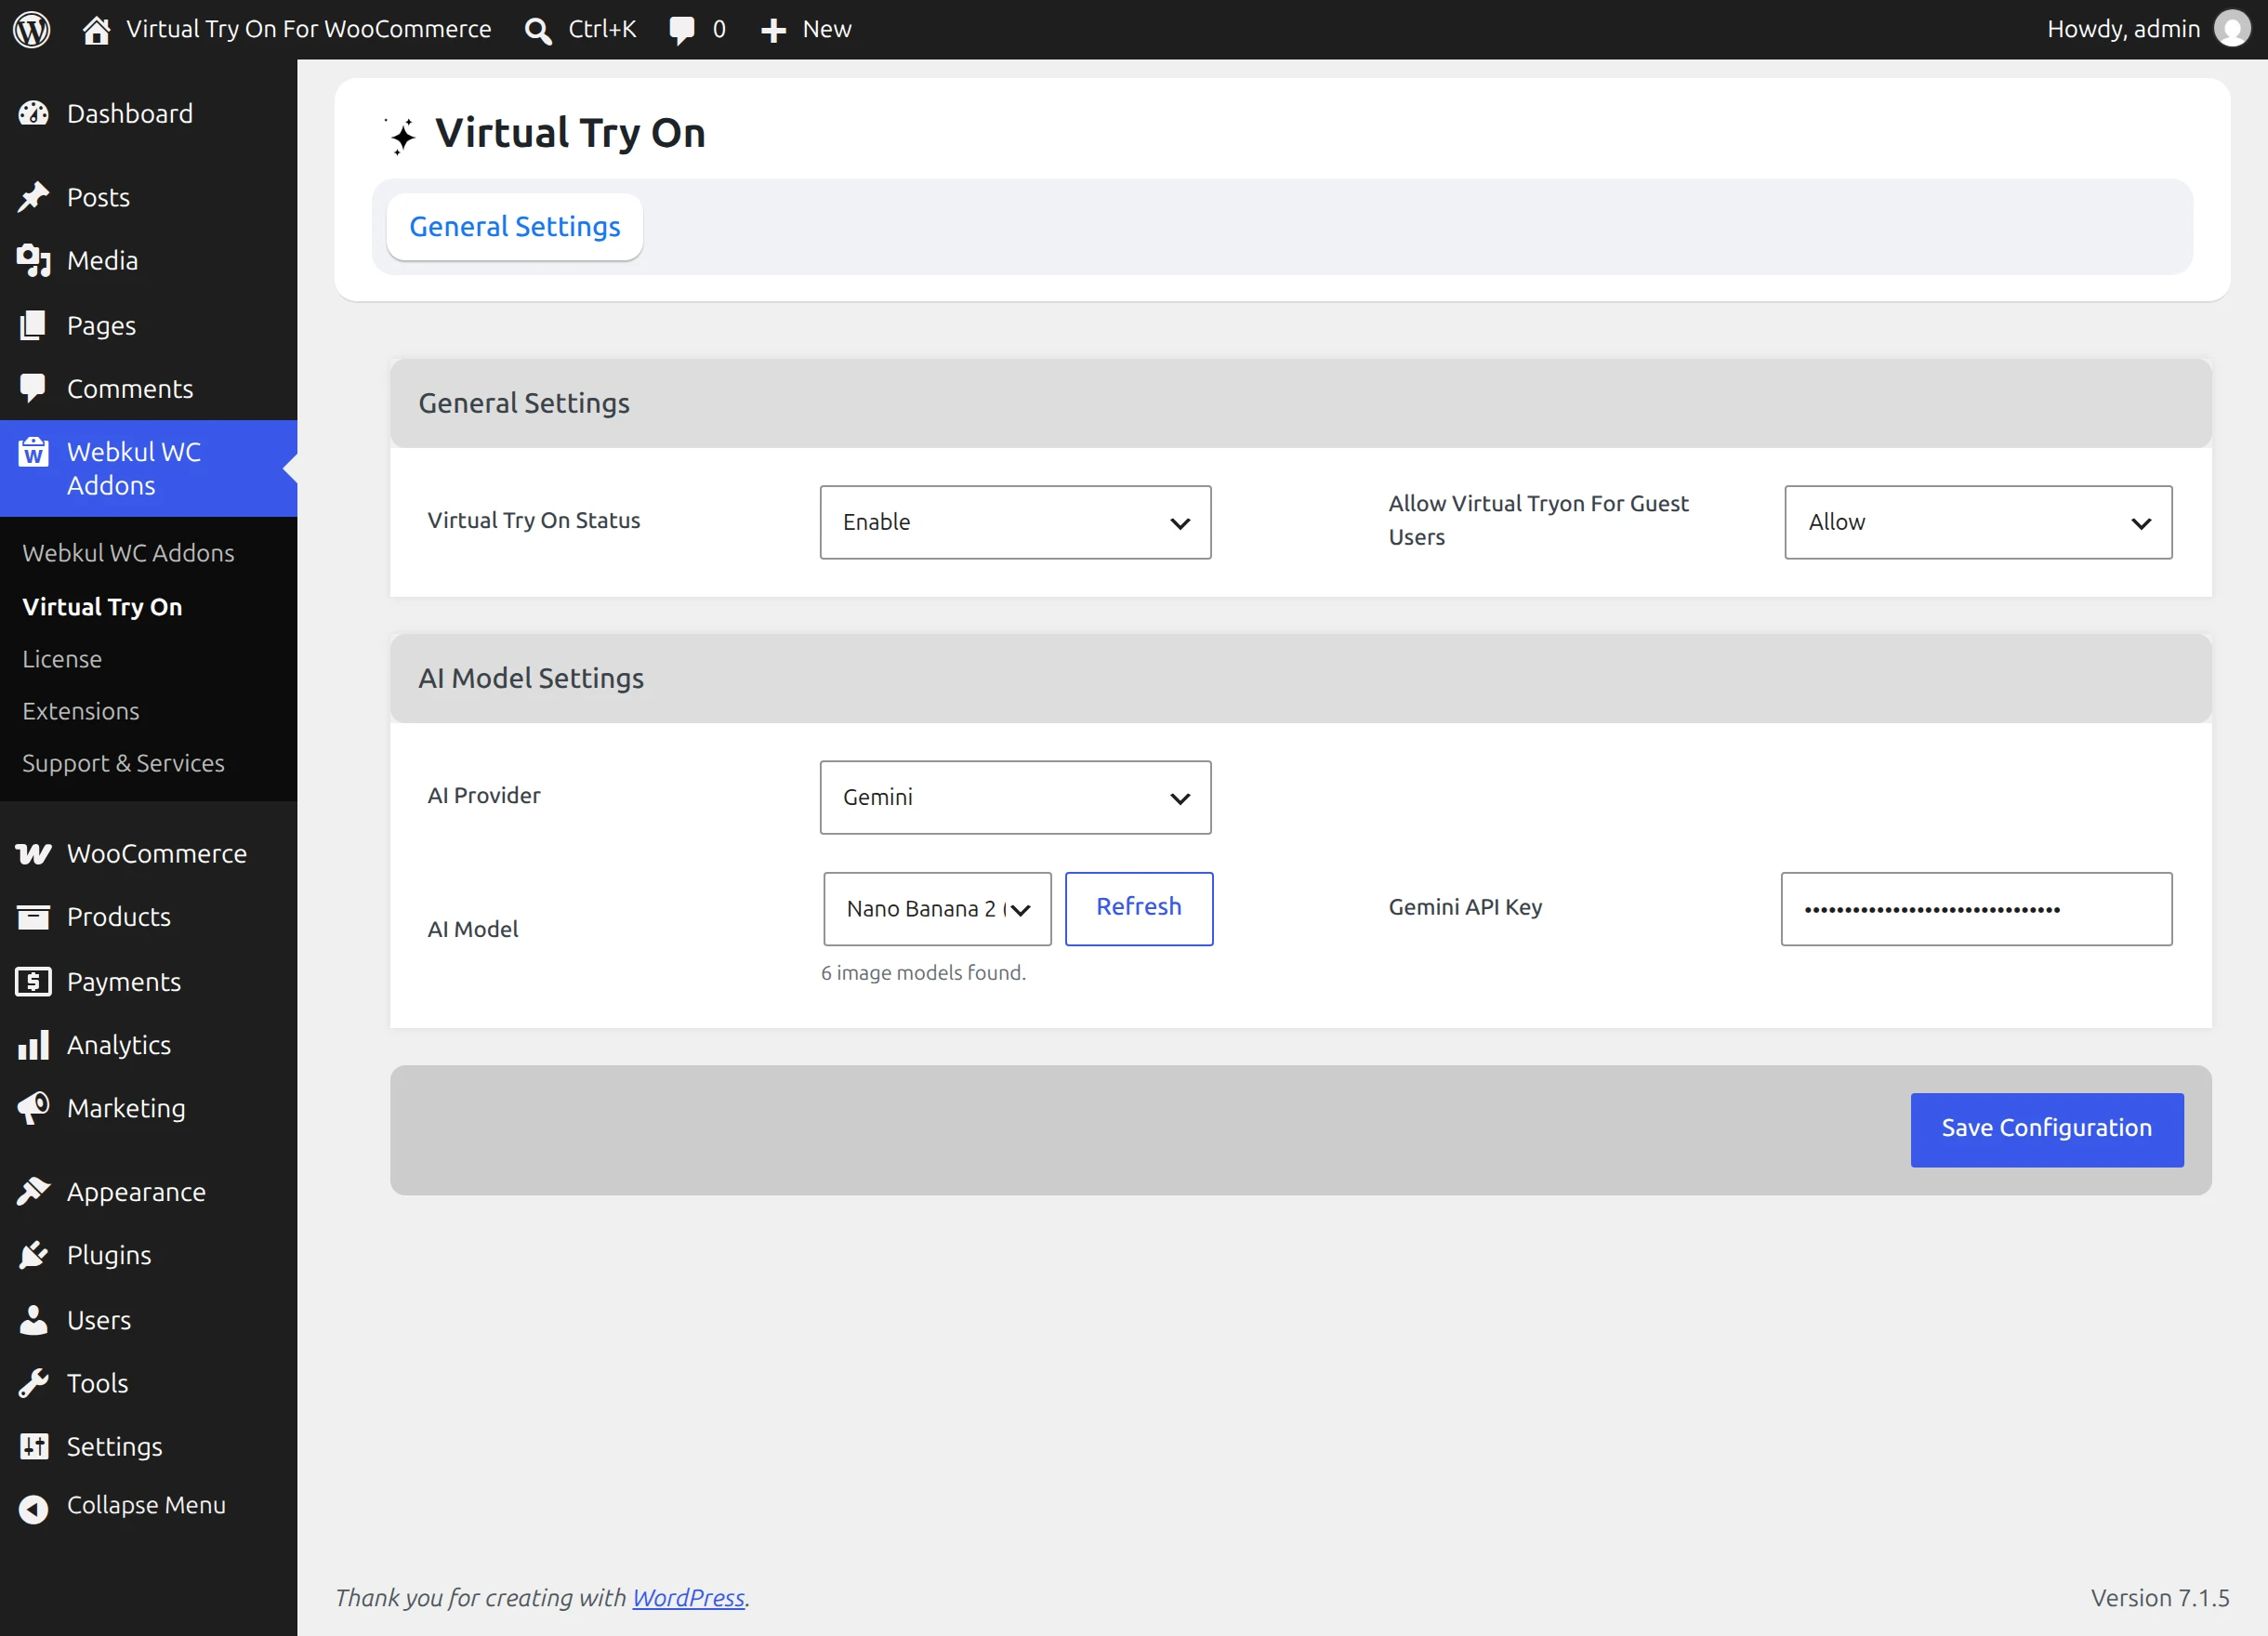
General Settings Card
| Setting | Options | Description | Default / Recommended |
|---|---|---|---|
| Virtual Try On Status | Enable, Disable | Master switch controlling the virtual try-on feature across your entire store. When set to Disable, try-on triggers and modals remain hidden on all storefront product pages and admin edit screens. | Enable |
| Allow Virtual Tryon For Guest Users | Allow, Disallow | Determines whether unregistered guest visitors can use the virtual try-on feature on single product pages. When set to Disallow, only logged-in customer accounts see the try-on button. | Allow |
Conversion Optimization Tip
Setting Allow Virtual Tryon For Guest Users to Allow removes login friction and lets first-time shoppers experience the visual fitting room immediately, driving higher catalog engagement.
AI Model Settings Card
The extension features a flexible, multi-provider architecture. Store owners can select an AI vendor based on existing enterprise credits, geographical latency, or image generation quality preferences.
Selecting an AI Provider
Choose your preferred engine from the AI Provider dropdown:
- Gemini (Google AI Studio)
- OpenAI (OpenAI API)
- Qwen (Alibaba Cloud Model Studio / DashScope)
- Custom (Private AI Proxies, Gateways, or Custom Model Endpoints)
Standard Providers: Gemini, OpenAI, and Qwen
When Gemini, OpenAI, or Qwen is selected, the panel reveals the provider-specific credentials interface:
- API Key: Enter the secret API key provided by your AI vendor. The field is masked for security so credentials cannot be viewed over your shoulder.
- AI Model: Select the desired image model ID from the dropdown (e.g.
gemini-3.1-flash-image,gemini-2.5-flash-image, orqwen-image-edit). - Refresh Button: Click Refresh to query the provider's model catalog dynamically via an authenticated AJAX call. The system validates the entered key and populates all available image models automatically.
- Model Status Indicator: A live status label next to the refresh button informs you of the results (e.g., “3 image models found” or “Enter the API key to load models”).
Custom AI Provider Setup
When choosing Custom, the panel displays dedicated endpoint routing parameters for merchants hosting their own image models or routing requests through an internal API proxy:
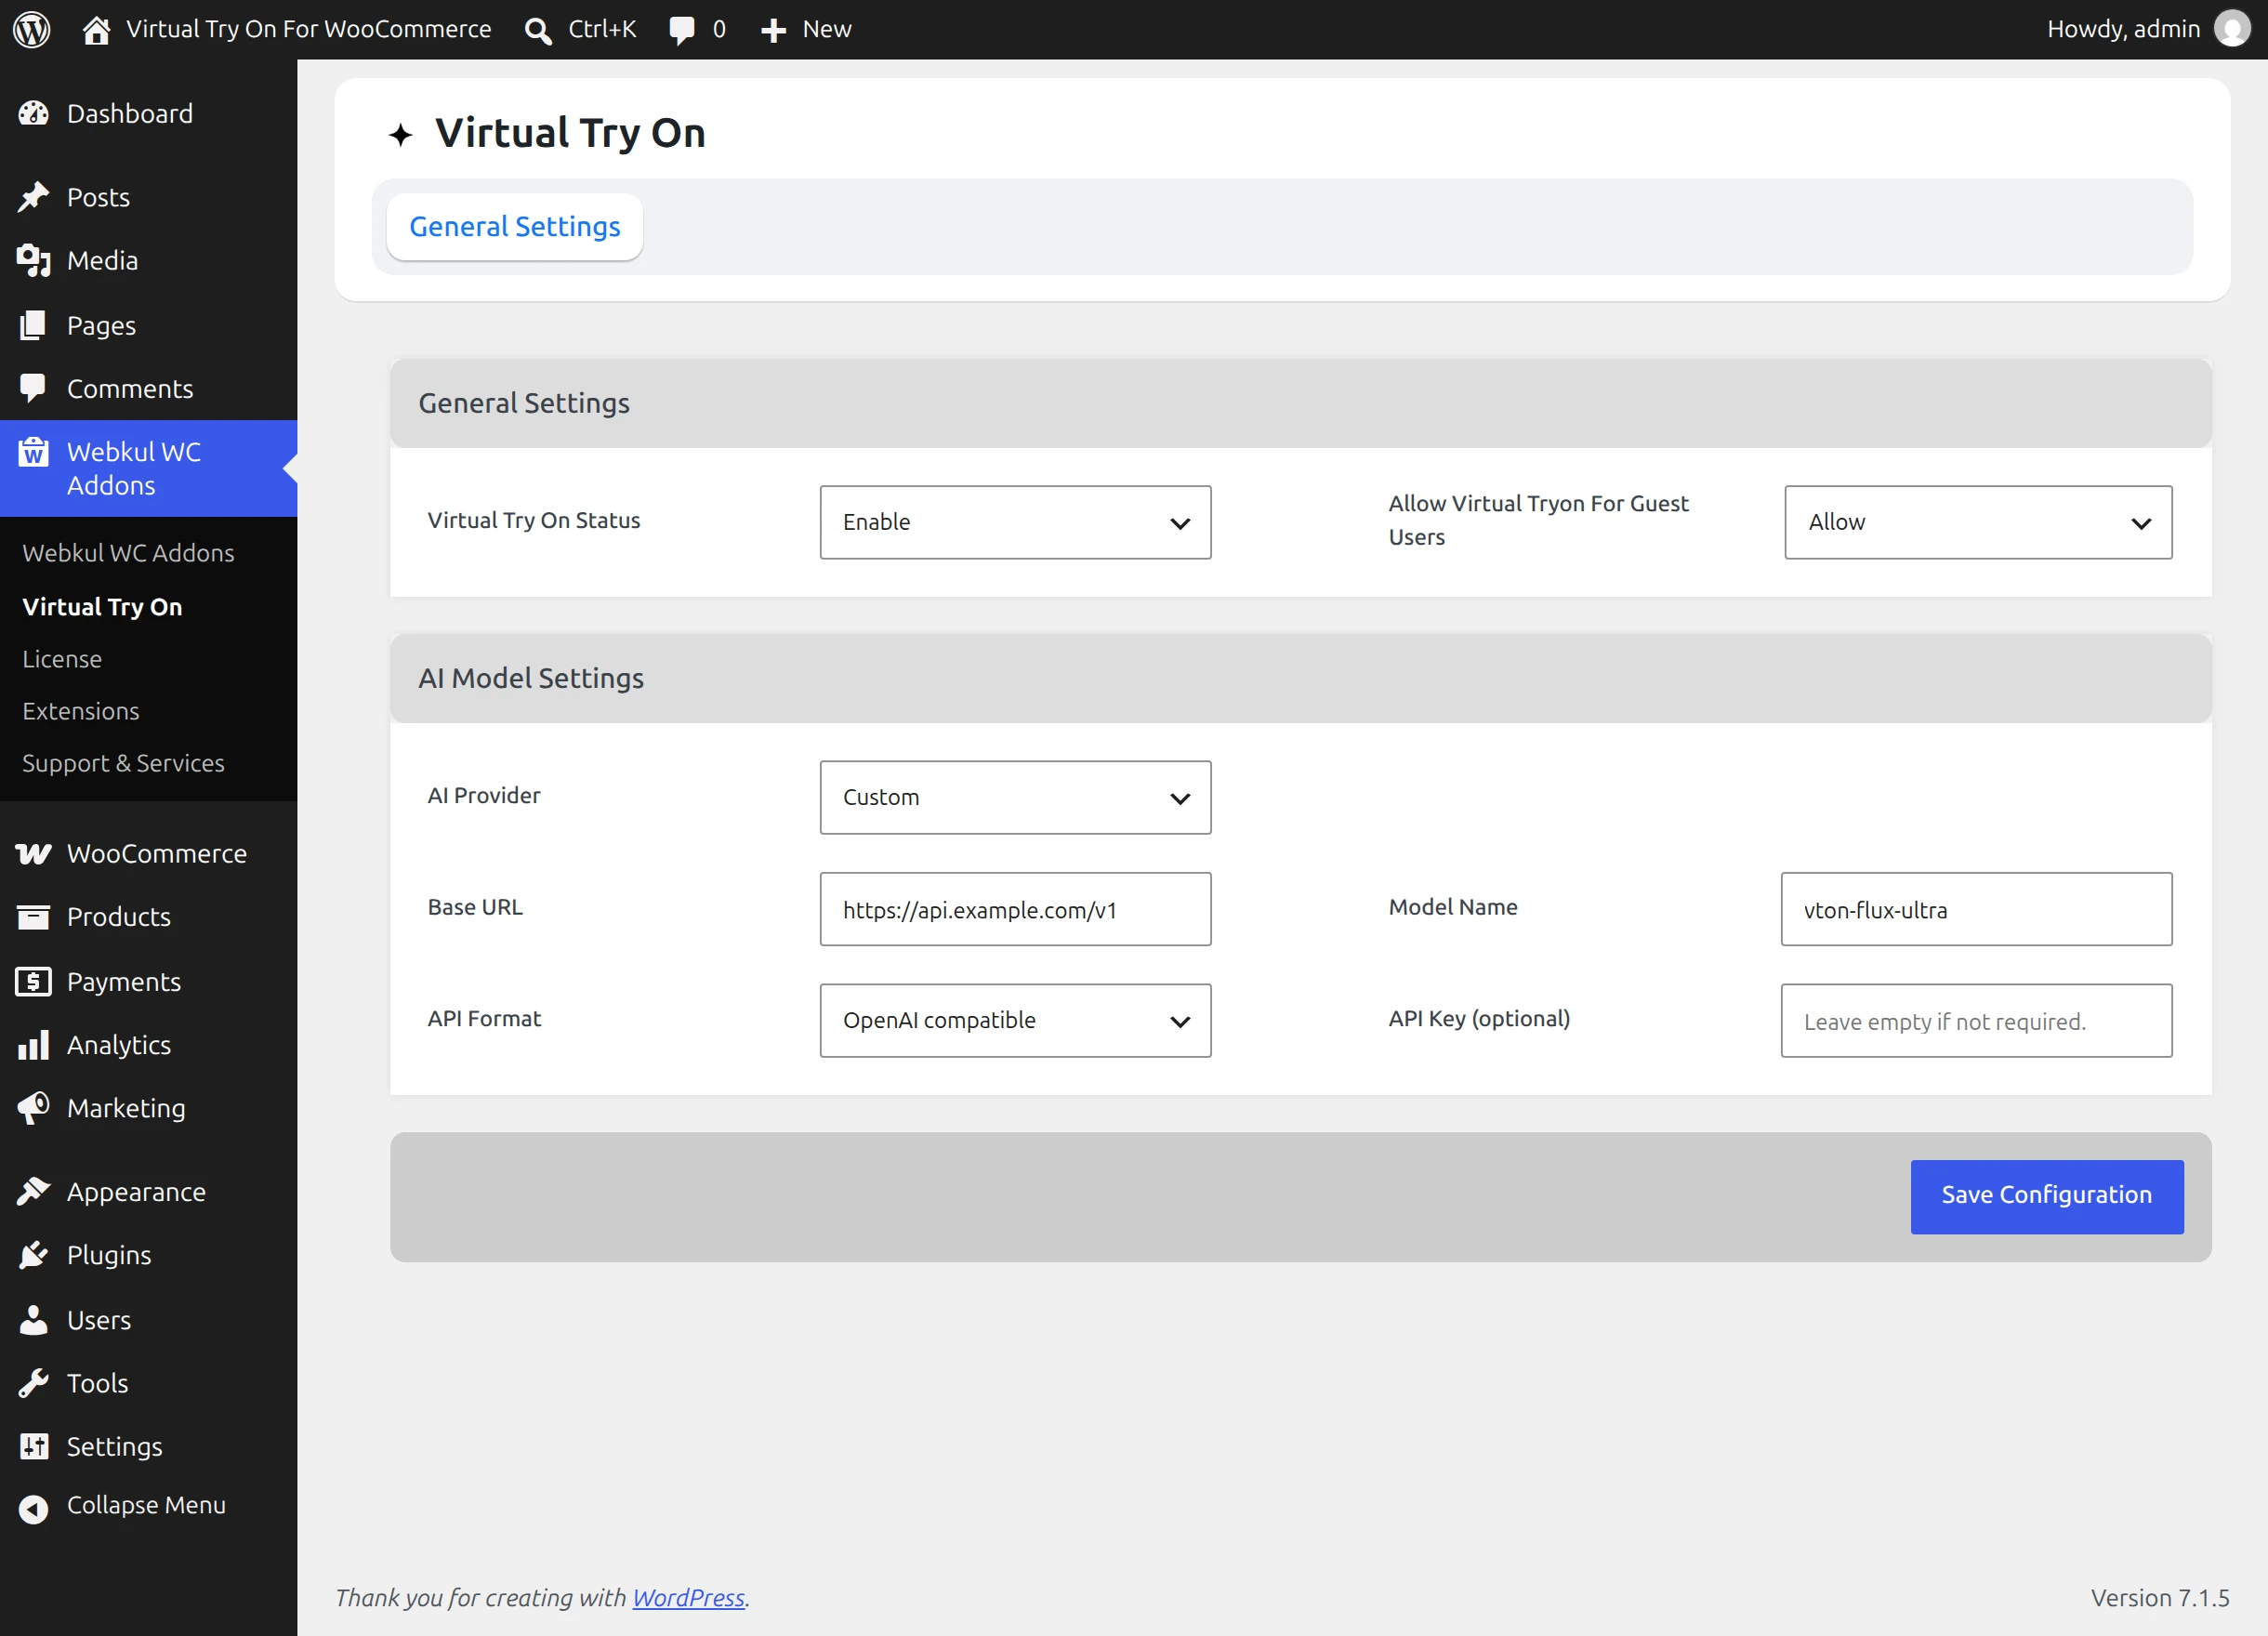
| Field | Format | Purpose | Example |
|---|---|---|---|
| Base URL | Valid URL (http or https) | Root endpoint of your custom AI service. Must be reachable from your WordPress web server. | https://api.example.com/v1 |
| Model Name | Alphanumeric identifier | Exact model name passed in request payloads. | vton-flux-ultra |
| API Format | OpenAI compatibleGemini compatibleQwen (DashScope) compatible | Request/response adapter used by the backend when packaging prompts and images. | OpenAI compatible |
| API Key (optional) | String | Authorization token or Bearer key passed in request headers. Leave empty if your local server or proxy does not require authentication. | Optional / Bearer token |
Saving and Validation Rules
Click Save Configuration at the bottom of the form to apply changes. The extension enforces strict validation checks:
- If Virtual Try On Status is set to
Enableand a standard provider is selected, the API Key cannot be empty. - If Virtual Try On Status is set to
Enableand the Custom provider is selected, the Base URL and Model Name cannot be empty. - Model names are sanitized and verified against the regular expression pattern
^[A-Za-z0-9._:/@+-]+$to block invalid characters.
Upon successful save, an administrative notice confirms:
Settings saved successfully.
Next, review AI Provider Setup for detailed instructions on acquiring keys for each supported platform.