
Product Configuration
In addition to storewide settings, Virtual Try On for WooCommerce provides granular, per-product configuration. This allows merchants to enable try-on only on relevant clothing categories (e.g. tops, jackets, trousers) while leaving non-apparel items unaffected.
Navigating to Product Settings
- In WordPress Admin, navigate to Products → All Products.
- Click on the product you wish to configure (e.g., Shirt or Dress).
- Scroll down to the Product Data box below the main content editor.
- In the left vertical tabs list, click on the Virtual Try On tab.
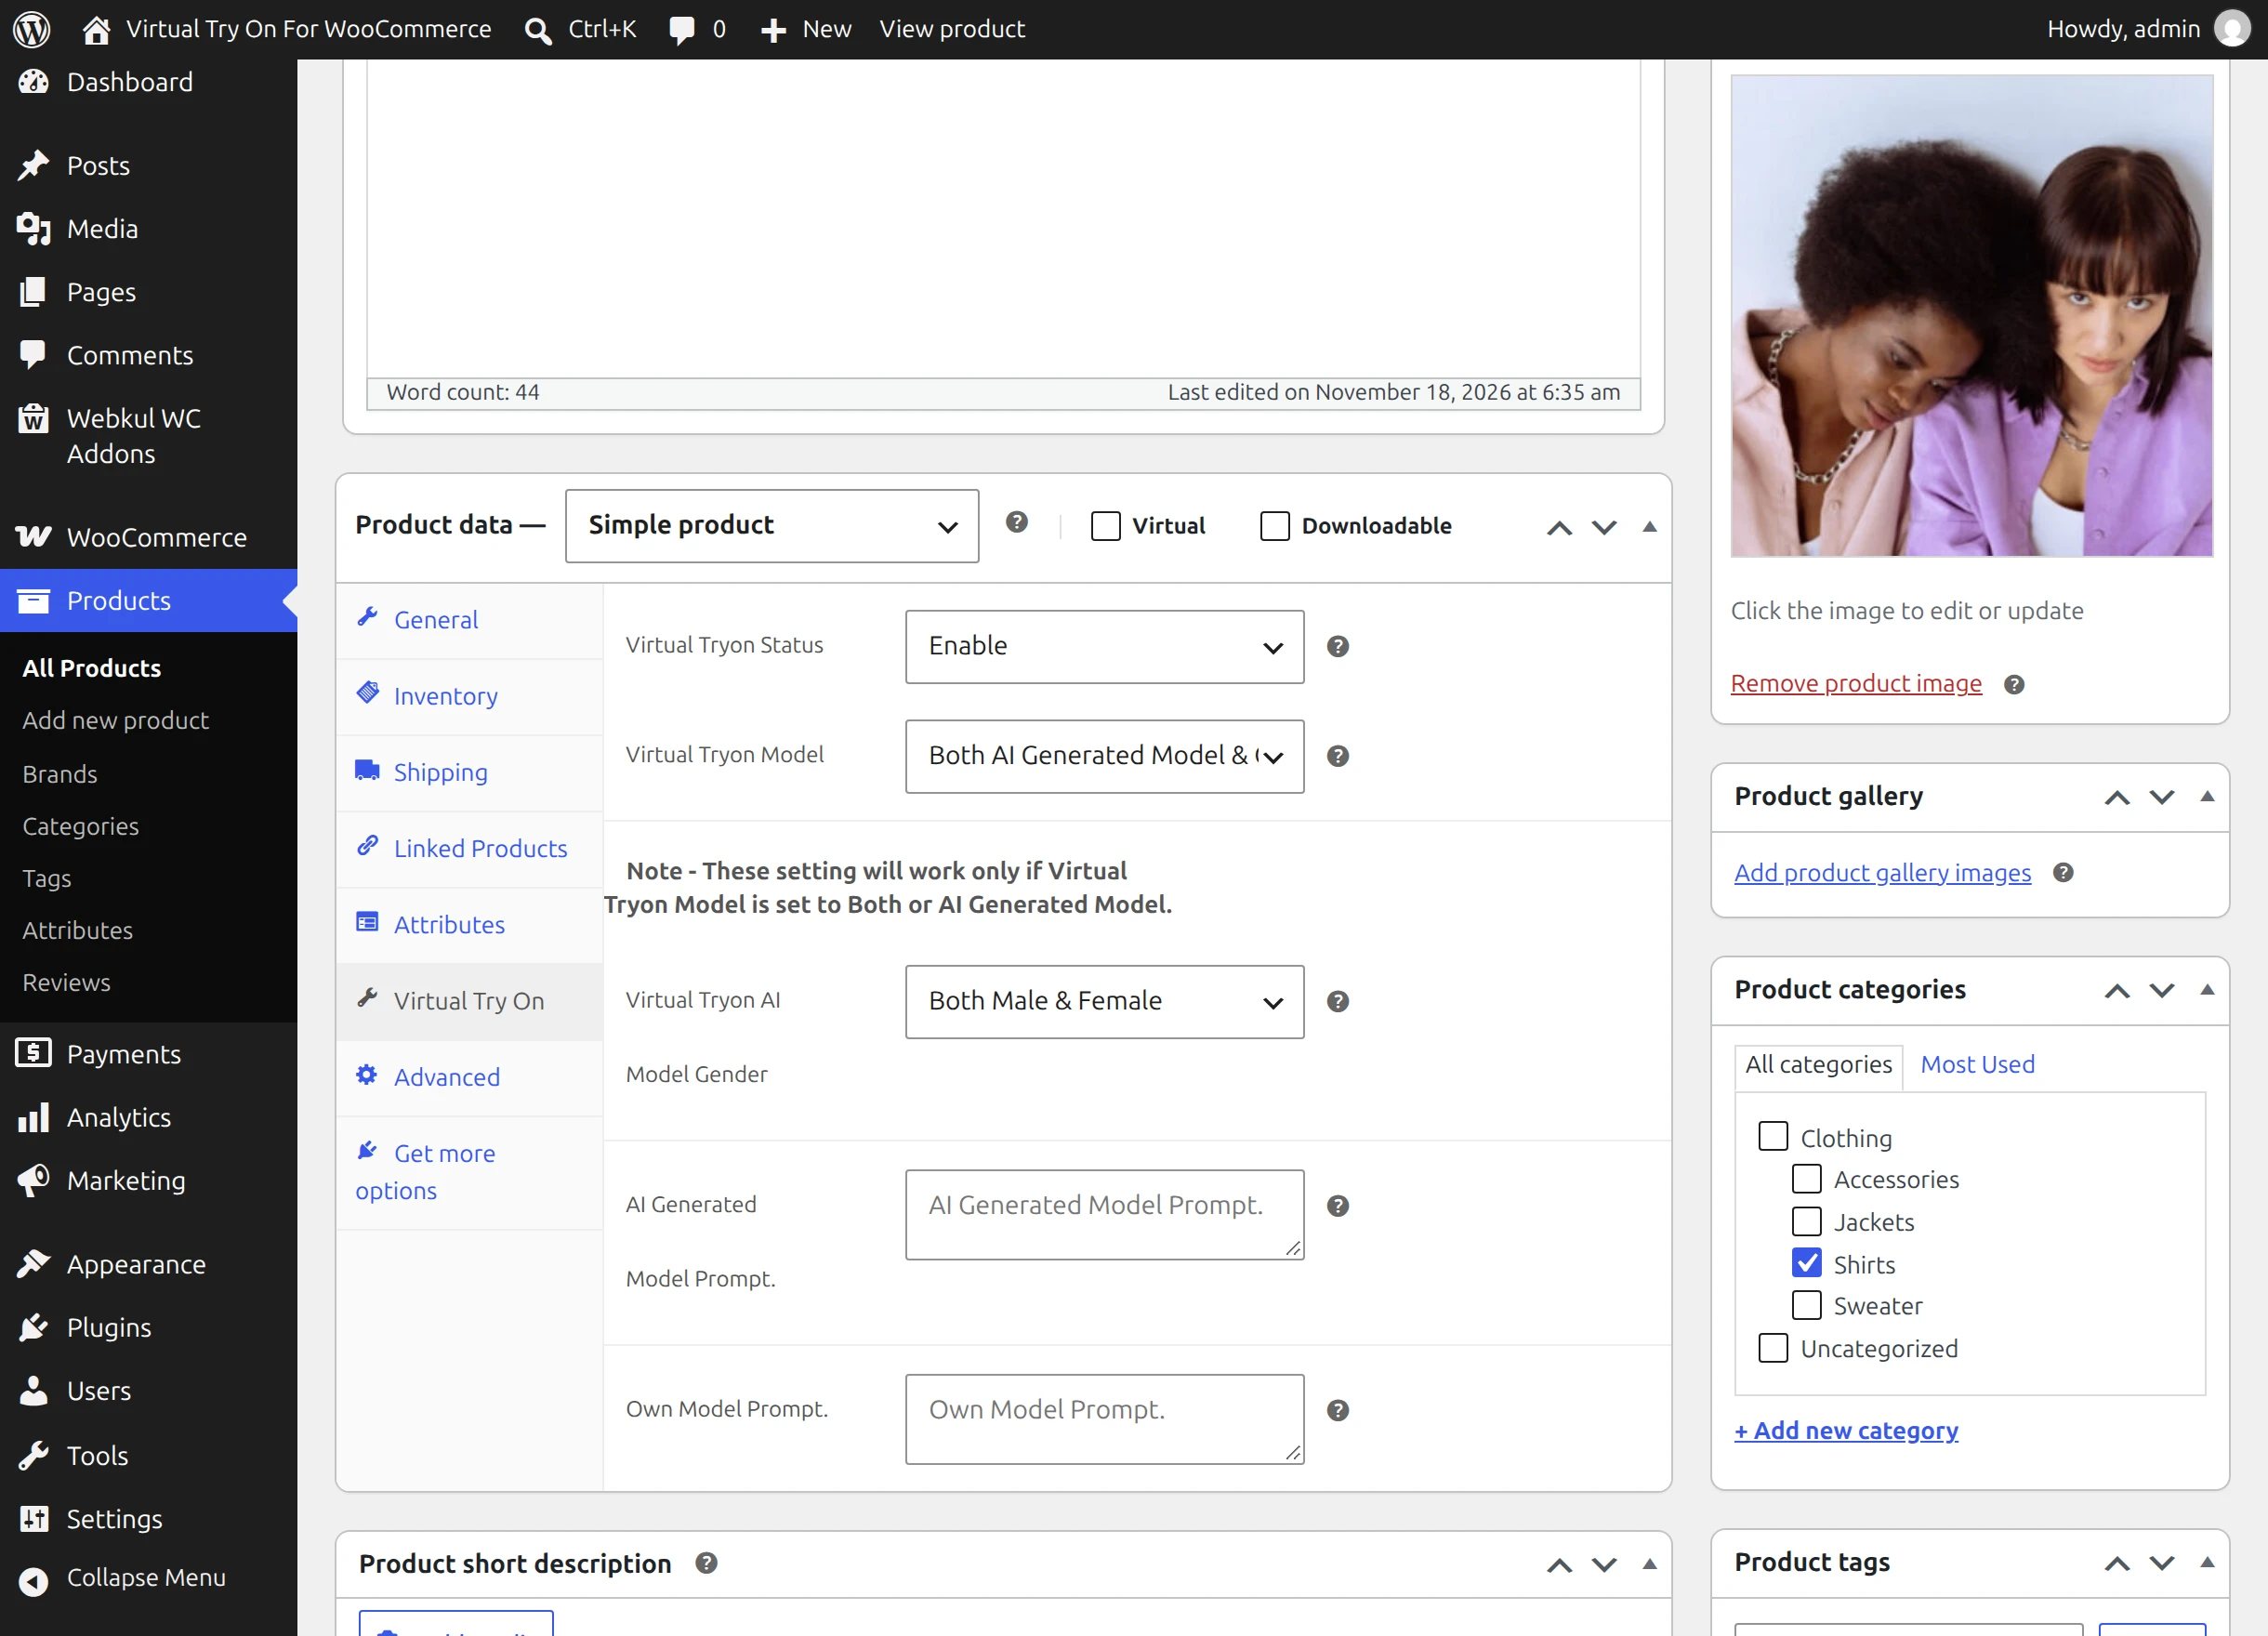
Product Settings Reference
| Field | Options | Description |
|---|---|---|
| Virtual Tryon Status | EnableDisable | Controls whether the virtual try-on button appears on the store page for this specific product. Set to Enable to activate try-on features on this item. |
| Virtual Tryon Model | Both AI Generated Model & Own ModelAI Generated ModelOwn Model | Defines which try-on methods are available to shoppers on this product. Choosing AI Generated Model restricts shoppers to virtual models, while Own Model requires personal photo upload. |
| Virtual Tryon AI Model Gender | Both Male & FemaleMaleFemale | Constrains the gender options presented to shoppers. For example, on a men's blazer, set this to Male so shoppers only see male virtual models. Applies when Model is set to Both or AI Generated Model. |
| AI Generated Model Prompt | Textarea (Text Template) | Customizes the prompt dispatched to the AI model when generating a virtual model. Leave empty to use the verified default prompt. |
| Own Model Prompt | Textarea (Text Template) | Customizes the inpainting prompt used when fitting clothing onto a customer's uploaded photograph. Leave empty to use the verified default prompt. |
Dynamic Prompt Variables
When customizing the AI Generated Model Prompt, you can embed dynamic variables that the frontend engine automatically substitutes based on customer choices:
| Variable | Replacement Value | Example |
|---|---|---|
${gender} | Chosen gender value (male or female) | male |
${age} | Selected model age | 28 |
${skinColor} | Selected skin complexion key | fair, tan, deep |
${bodyType} | Selected build option | small, mid, plus |
${country} | Two-letter ISO country code | US, GB, IN, FR |
When to Customize Prompts
For the majority of stores, the built-in prompts produce optimal fittings. Only customize these fields if your brand requires specific background lighting (e.g., "studio white background"), stylized aesthetic tones, or custom regional styling instructions.
Saving Product Settings
After adjusting options in the Virtual Try On tab, scroll up and click the blue Update button (or Publish for new products) to persist your configuration.