
Admin Gallery Generator
One of the most powerful administrator features of Virtual Try On for WooCommerce is the Catalog Gallery Generator. Rather than scheduling expensive external model shoots or using third-party design software, store owners can generate photorealistic model visuals directly within the WordPress product edit screen and attach them to the WooCommerce product gallery in a single click.
Accessing the Generator
- In WordPress Admin, navigate to Products → All Products and open any apparel product.
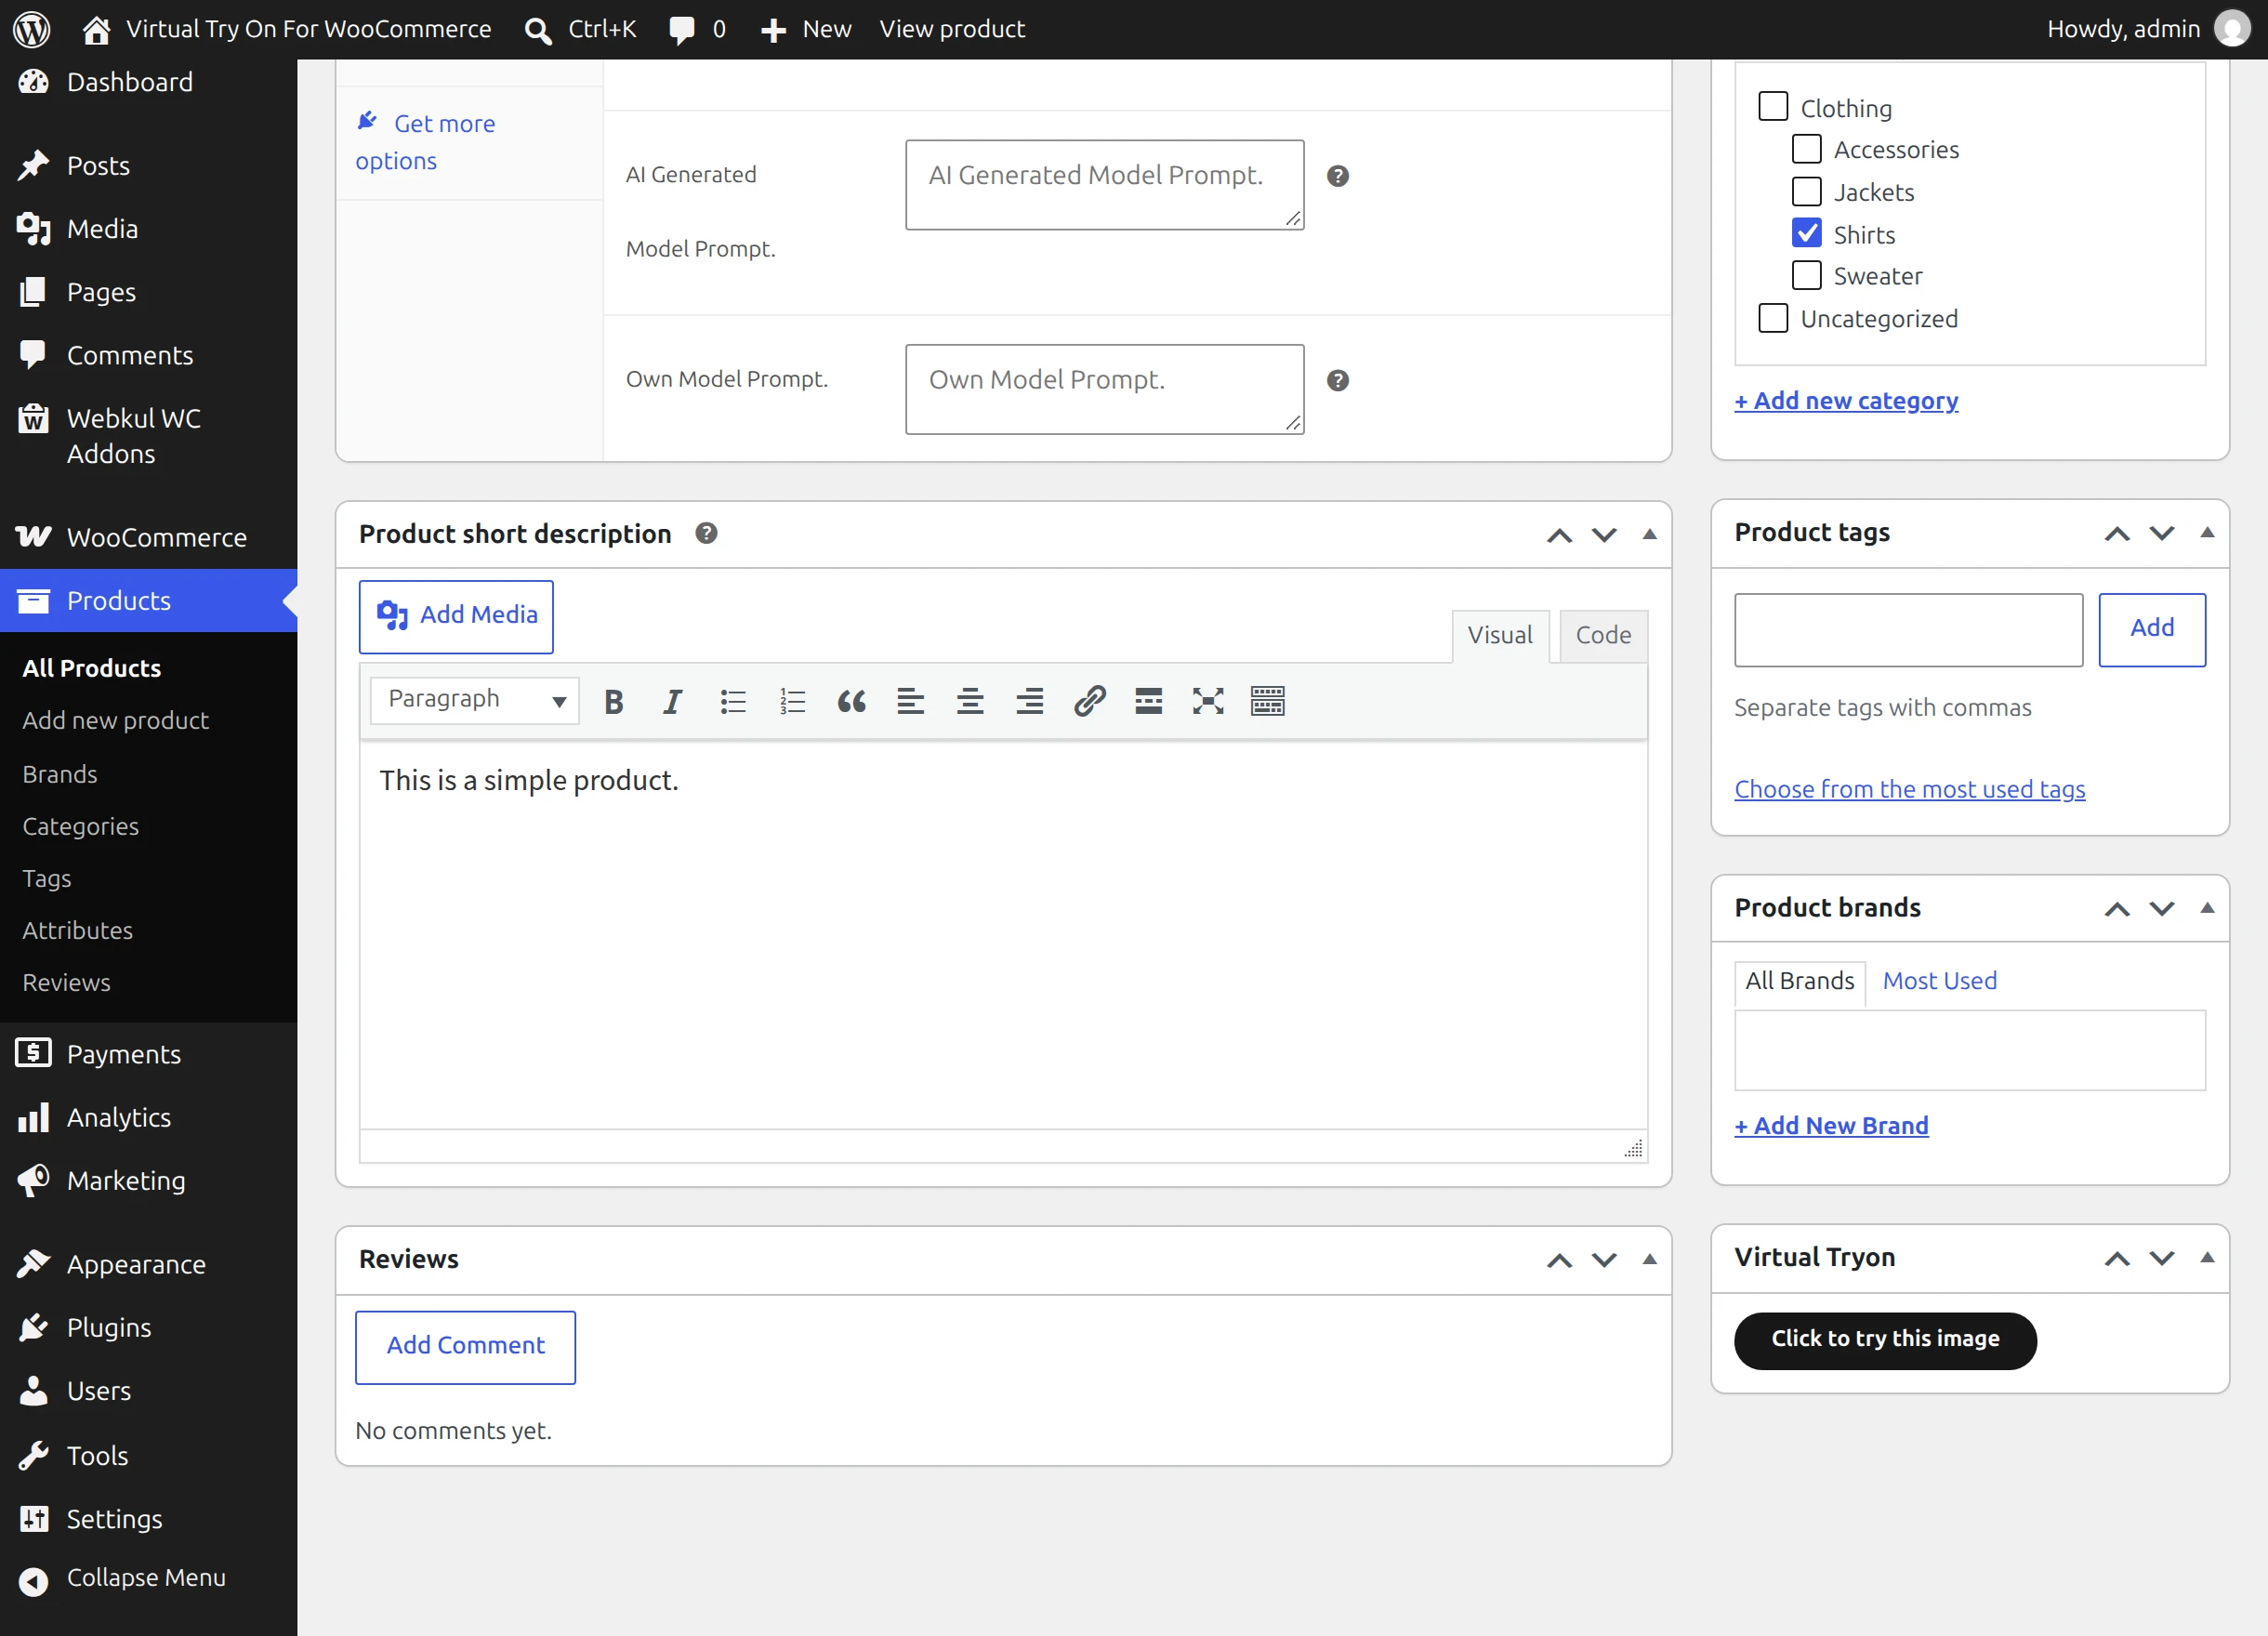
- In the right-hand sidebar, locate the Virtual Tryon metabox.
- If the product has a featured thumbnail image uploaded, the metabox displays the blue button: Click to try this image.
Product Image Prerequisite
The try-on engine requires a base featured image. If no product thumbnail is assigned, the metabox displays an alert: "Kindly upload the product image to apply virtual tryon." Upload a featured product image and save the product before proceeding.
Step-by-Step Generation Workflow
Step 1: Open the Admin Try-On Modal
Click Click to try this image. The full interactive Virtual Try On modal opens over the product editor.
Step 2: Configure Desired Model Demographics
Adjust the model attributes to match your marketing requirements:
- Country: Sets demographic visual context.
- Color: Adjust or refine garment tone.
- Model Age: Specify model age (e.g. 25).
- Model Gender: Select Male or Female.
- Model Body Build: Choose Small, Mid, or Plus.
- Model Skin Color: Select from 8 tones (Very Fair to Deep).
Step 3: Generate the Try-On Image
Click the blue TRY NOW button. The server-side engine queries your configured AI provider and renders the garment fitted onto the specified model.
Step 4: Sideload into Product Gallery
Once generation completes, a prompt appears above the rendered preview:
Save this picture in the product gallery [ Yes ] [ No ]
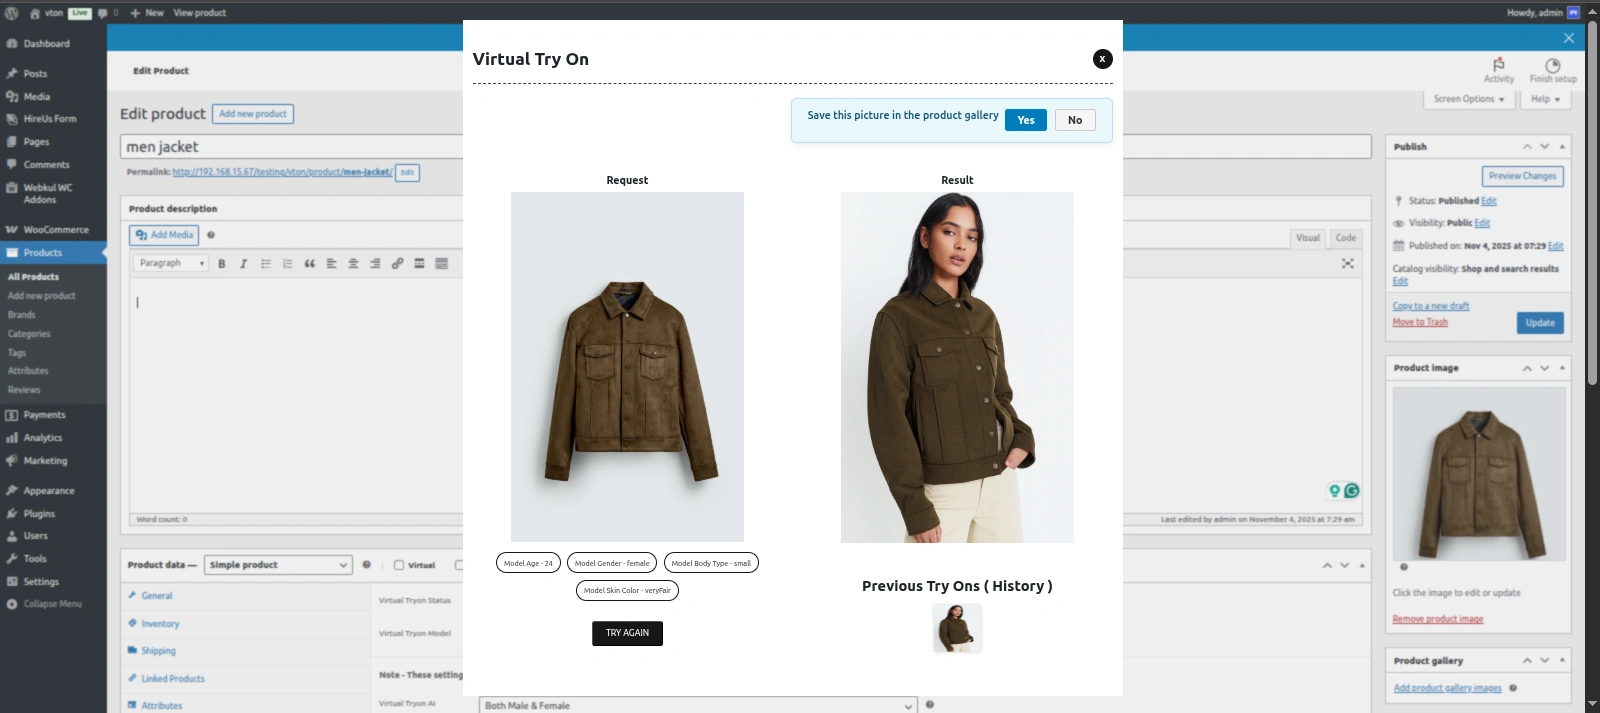
- Click Yes. The button temporarily updates to Saving... while the backend securely processes the file.
- The image is sideloaded into the WordPress Media Library with full metadata.
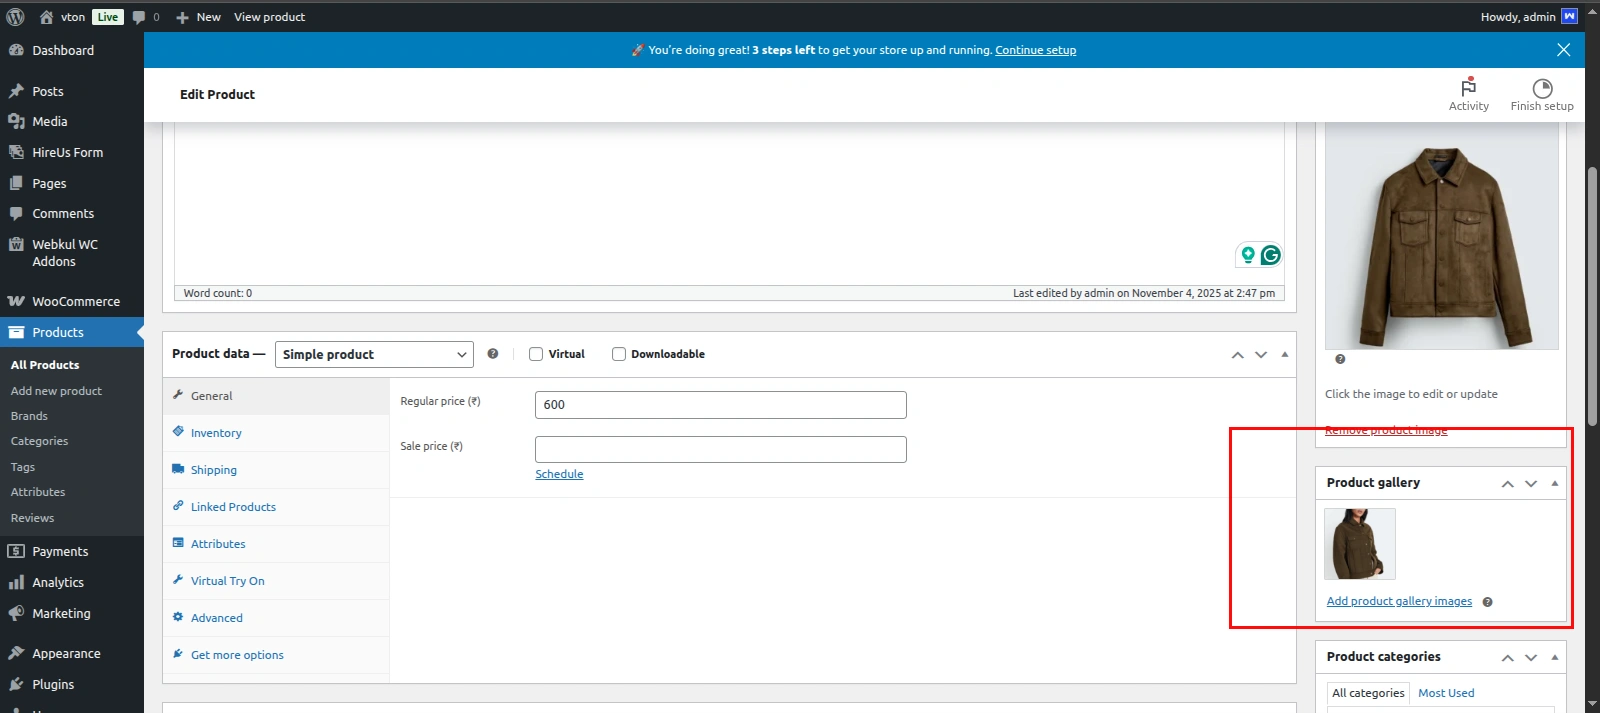
- The attachment ID is appended to the product's gallery image array.
- The product edit page automatically reloads, displaying your new AI model visual directly inside the Product gallery box:
Technical Safeguards
The sideload handler (wkvton_set_image_gallery) incorporates rigorous security checks:
- Nonce Verification: Protected by WordPress cryptographic nonces (
wkvton-admin-nonce) to prevent unauthorized cross-site requests. - Upload Size Bounds: Image sizes are checked against
wkvton_max_gallery_image_size(defaults to server upload limit or 5 MB). Excessively large payloads are rejected with: "Image size exceeds the maximum limit of %s." - Image Corruption Check: Every uploaded payload is verified with
getimagesize()to guarantee binary image integrity before attachment registration.