Customer Screen Setup
Every outlet has its own dining room display, so every outlet has its own configuration. Open Restaurant POS → Outlets, edit the outlet, and select the Customer Screen tab.
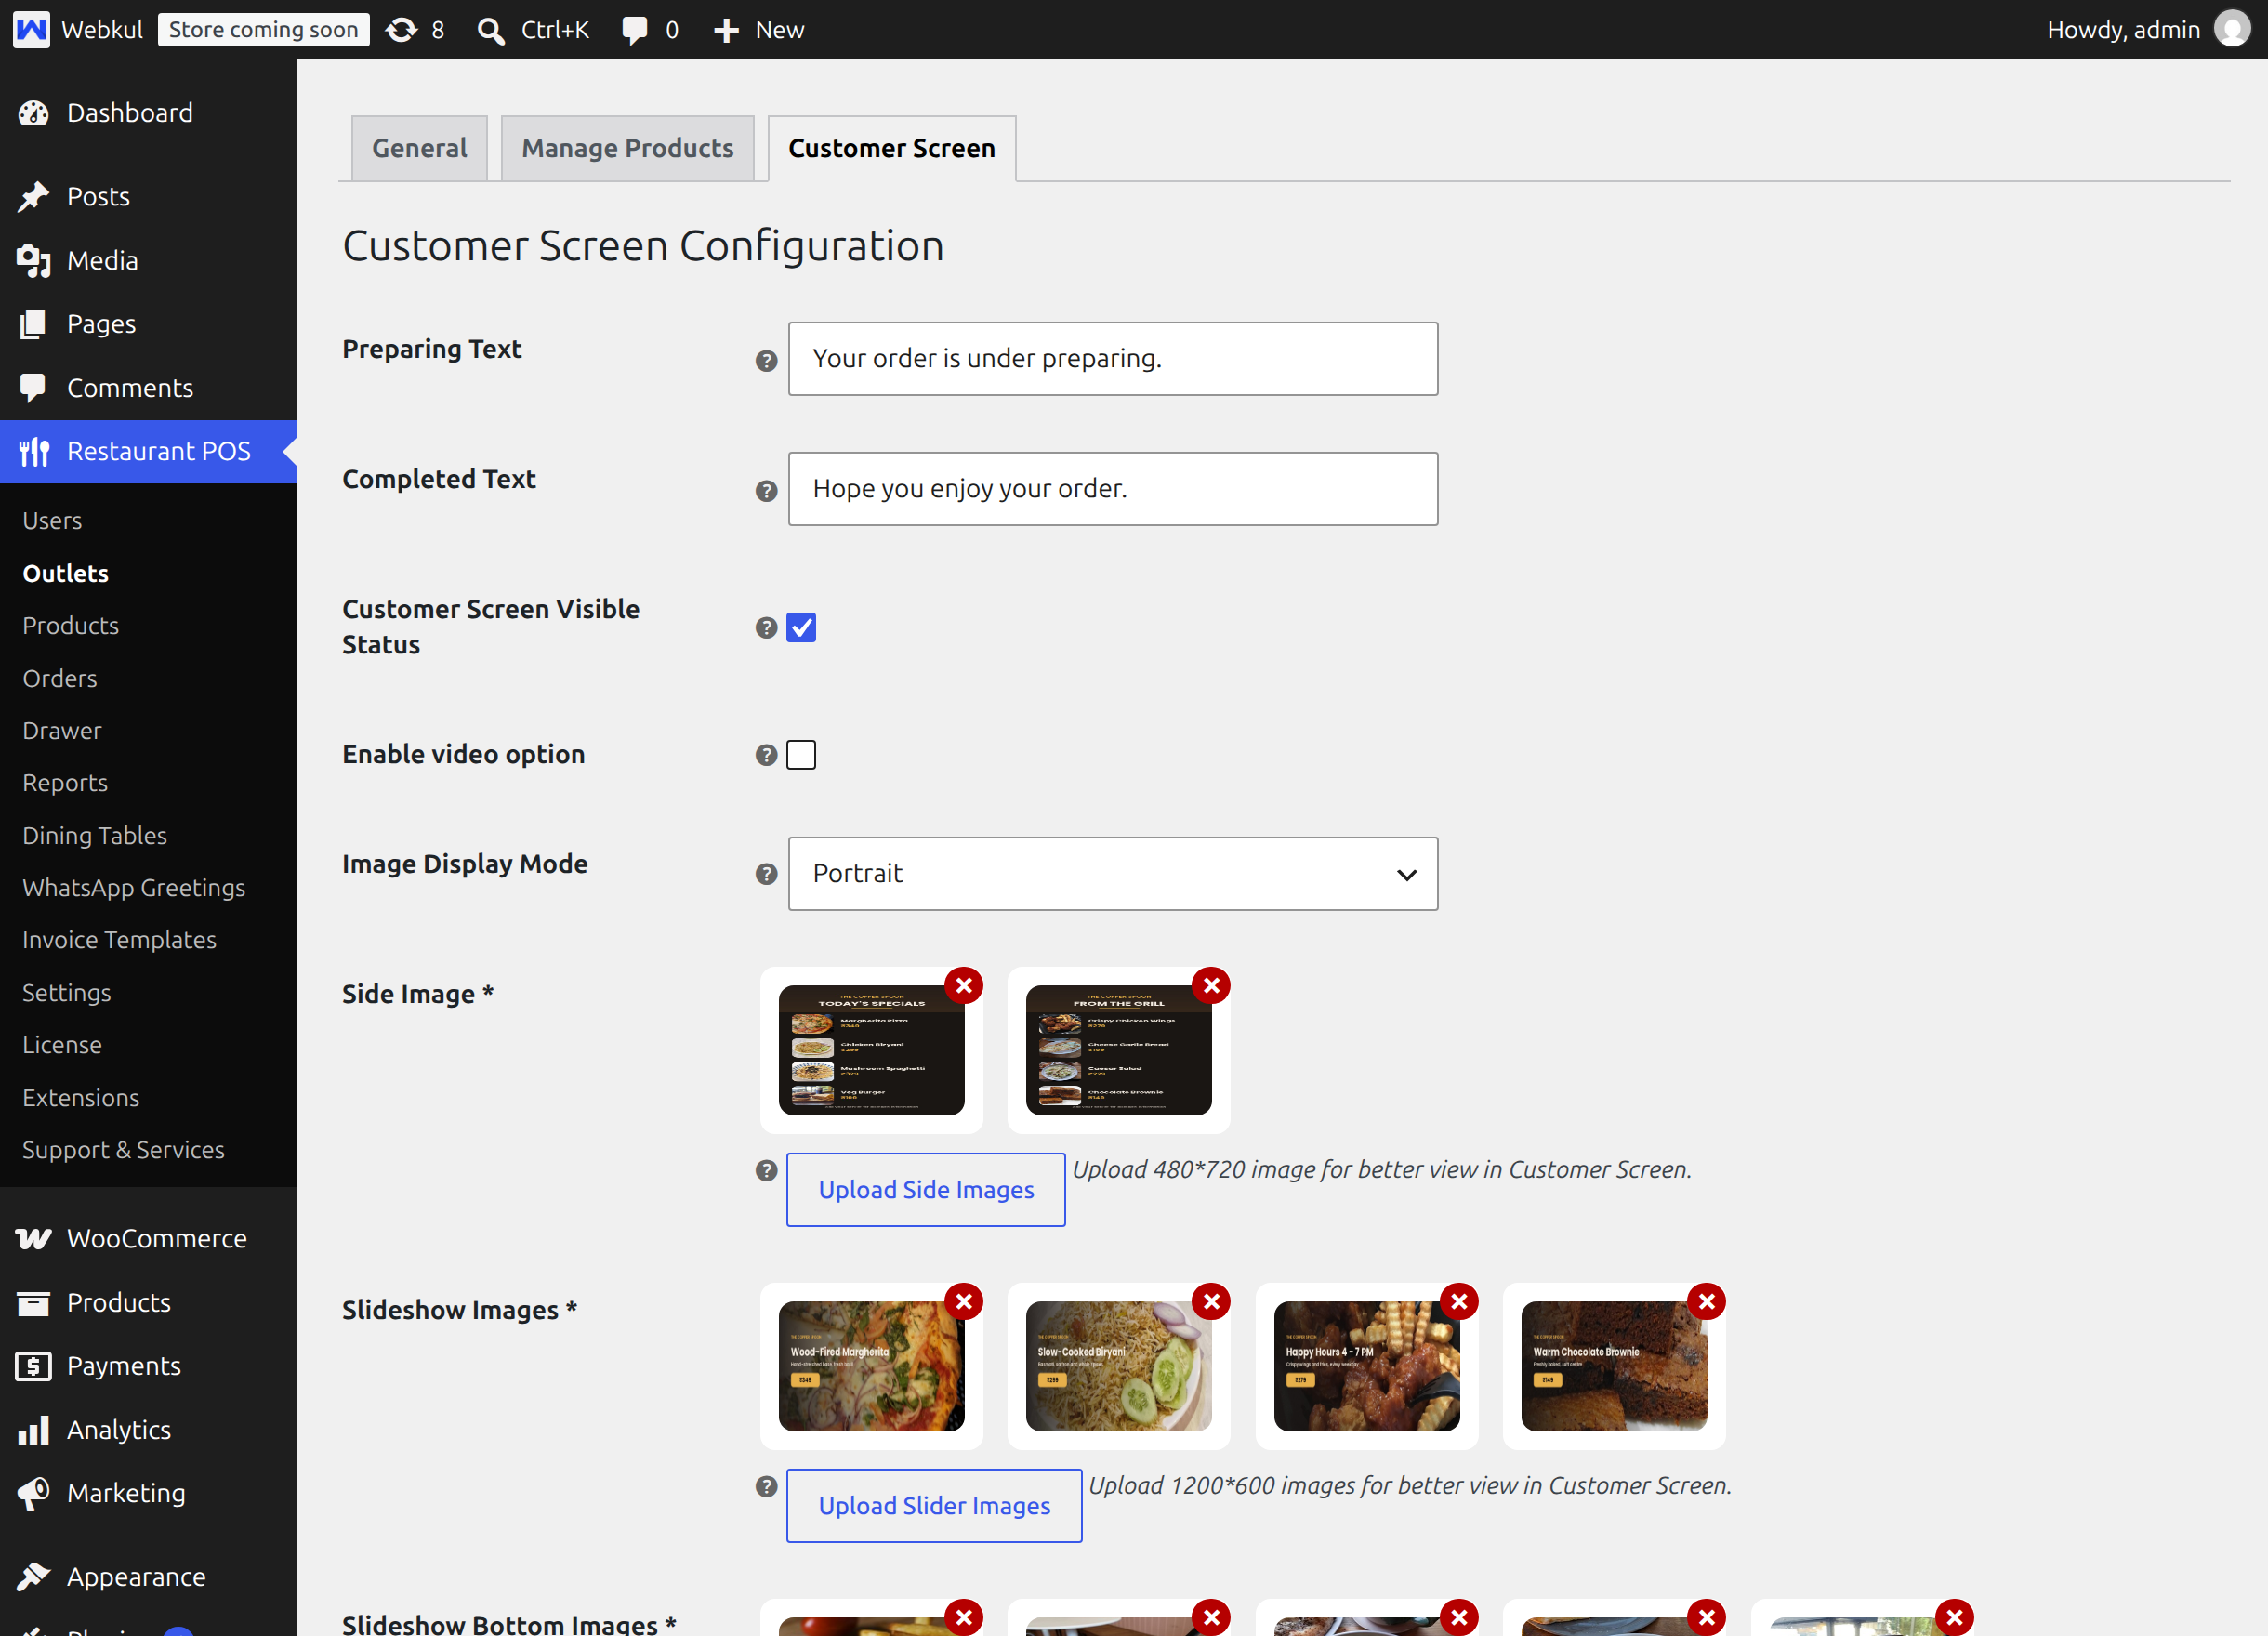
Select Save Changes at the bottom when you are done. The form checks the artwork before saving, and lists anything missing at the top of the page.
Wording
| Setting | Description | Default |
|---|---|---|
| Preparing Text | The line shown under every order that is being cooked | Your order is under preparing. |
| Completed Text | The line shown under every order that is ready | Hope you enjoy your order. |
Keep both short. They are repeated under every order card on a screen people read from across the room.
What the screen shows
| Setting | Description | Default |
|---|---|---|
| Customer Screen Visible Status | Ticked, the display shows the live order board and falls back to the slideshow when there is nothing to show. Unticked, it shows the slideshow only and never lists orders. | Ticked |
Untick it for a display in a window or a waiting area where you want promotion rather than order numbers.
Images or video
| Setting | Description | Default |
|---|---|---|
| Enable video option | Ticked, the large area plays your video on a loop and a card slider runs beside it. Unticked, the large area runs the slideshow images. | Unticked |
| Customer screen video | The video file, chosen from the media library. Required when video is enabled. | — |
Whether the video controls are visible is a global choice, on the General Settings page under Other Setting.
Artwork
Four image slots, each with an upload button that opens the WordPress media library. Remove an image with the red cross on its thumbnail.
| Slot | Where it appears | How many | Suggested size |
|---|---|---|---|
| Side Image | Beside the order lists, as a menu board | At least one. Portrait mode uses the first image, Landscape mode uses the first two | 480 x 720 |
| Slideshow Images | The large slideshow, when video is off | Minimum four | 1200 x 600 |
| Slideshow Card Images | The card slider beside the video, when video is on | Minimum four | 600 x 1200 |
| Slideshow Bottom Images | The strip along the bottom, always shown | Minimum four | 250 x 250 |
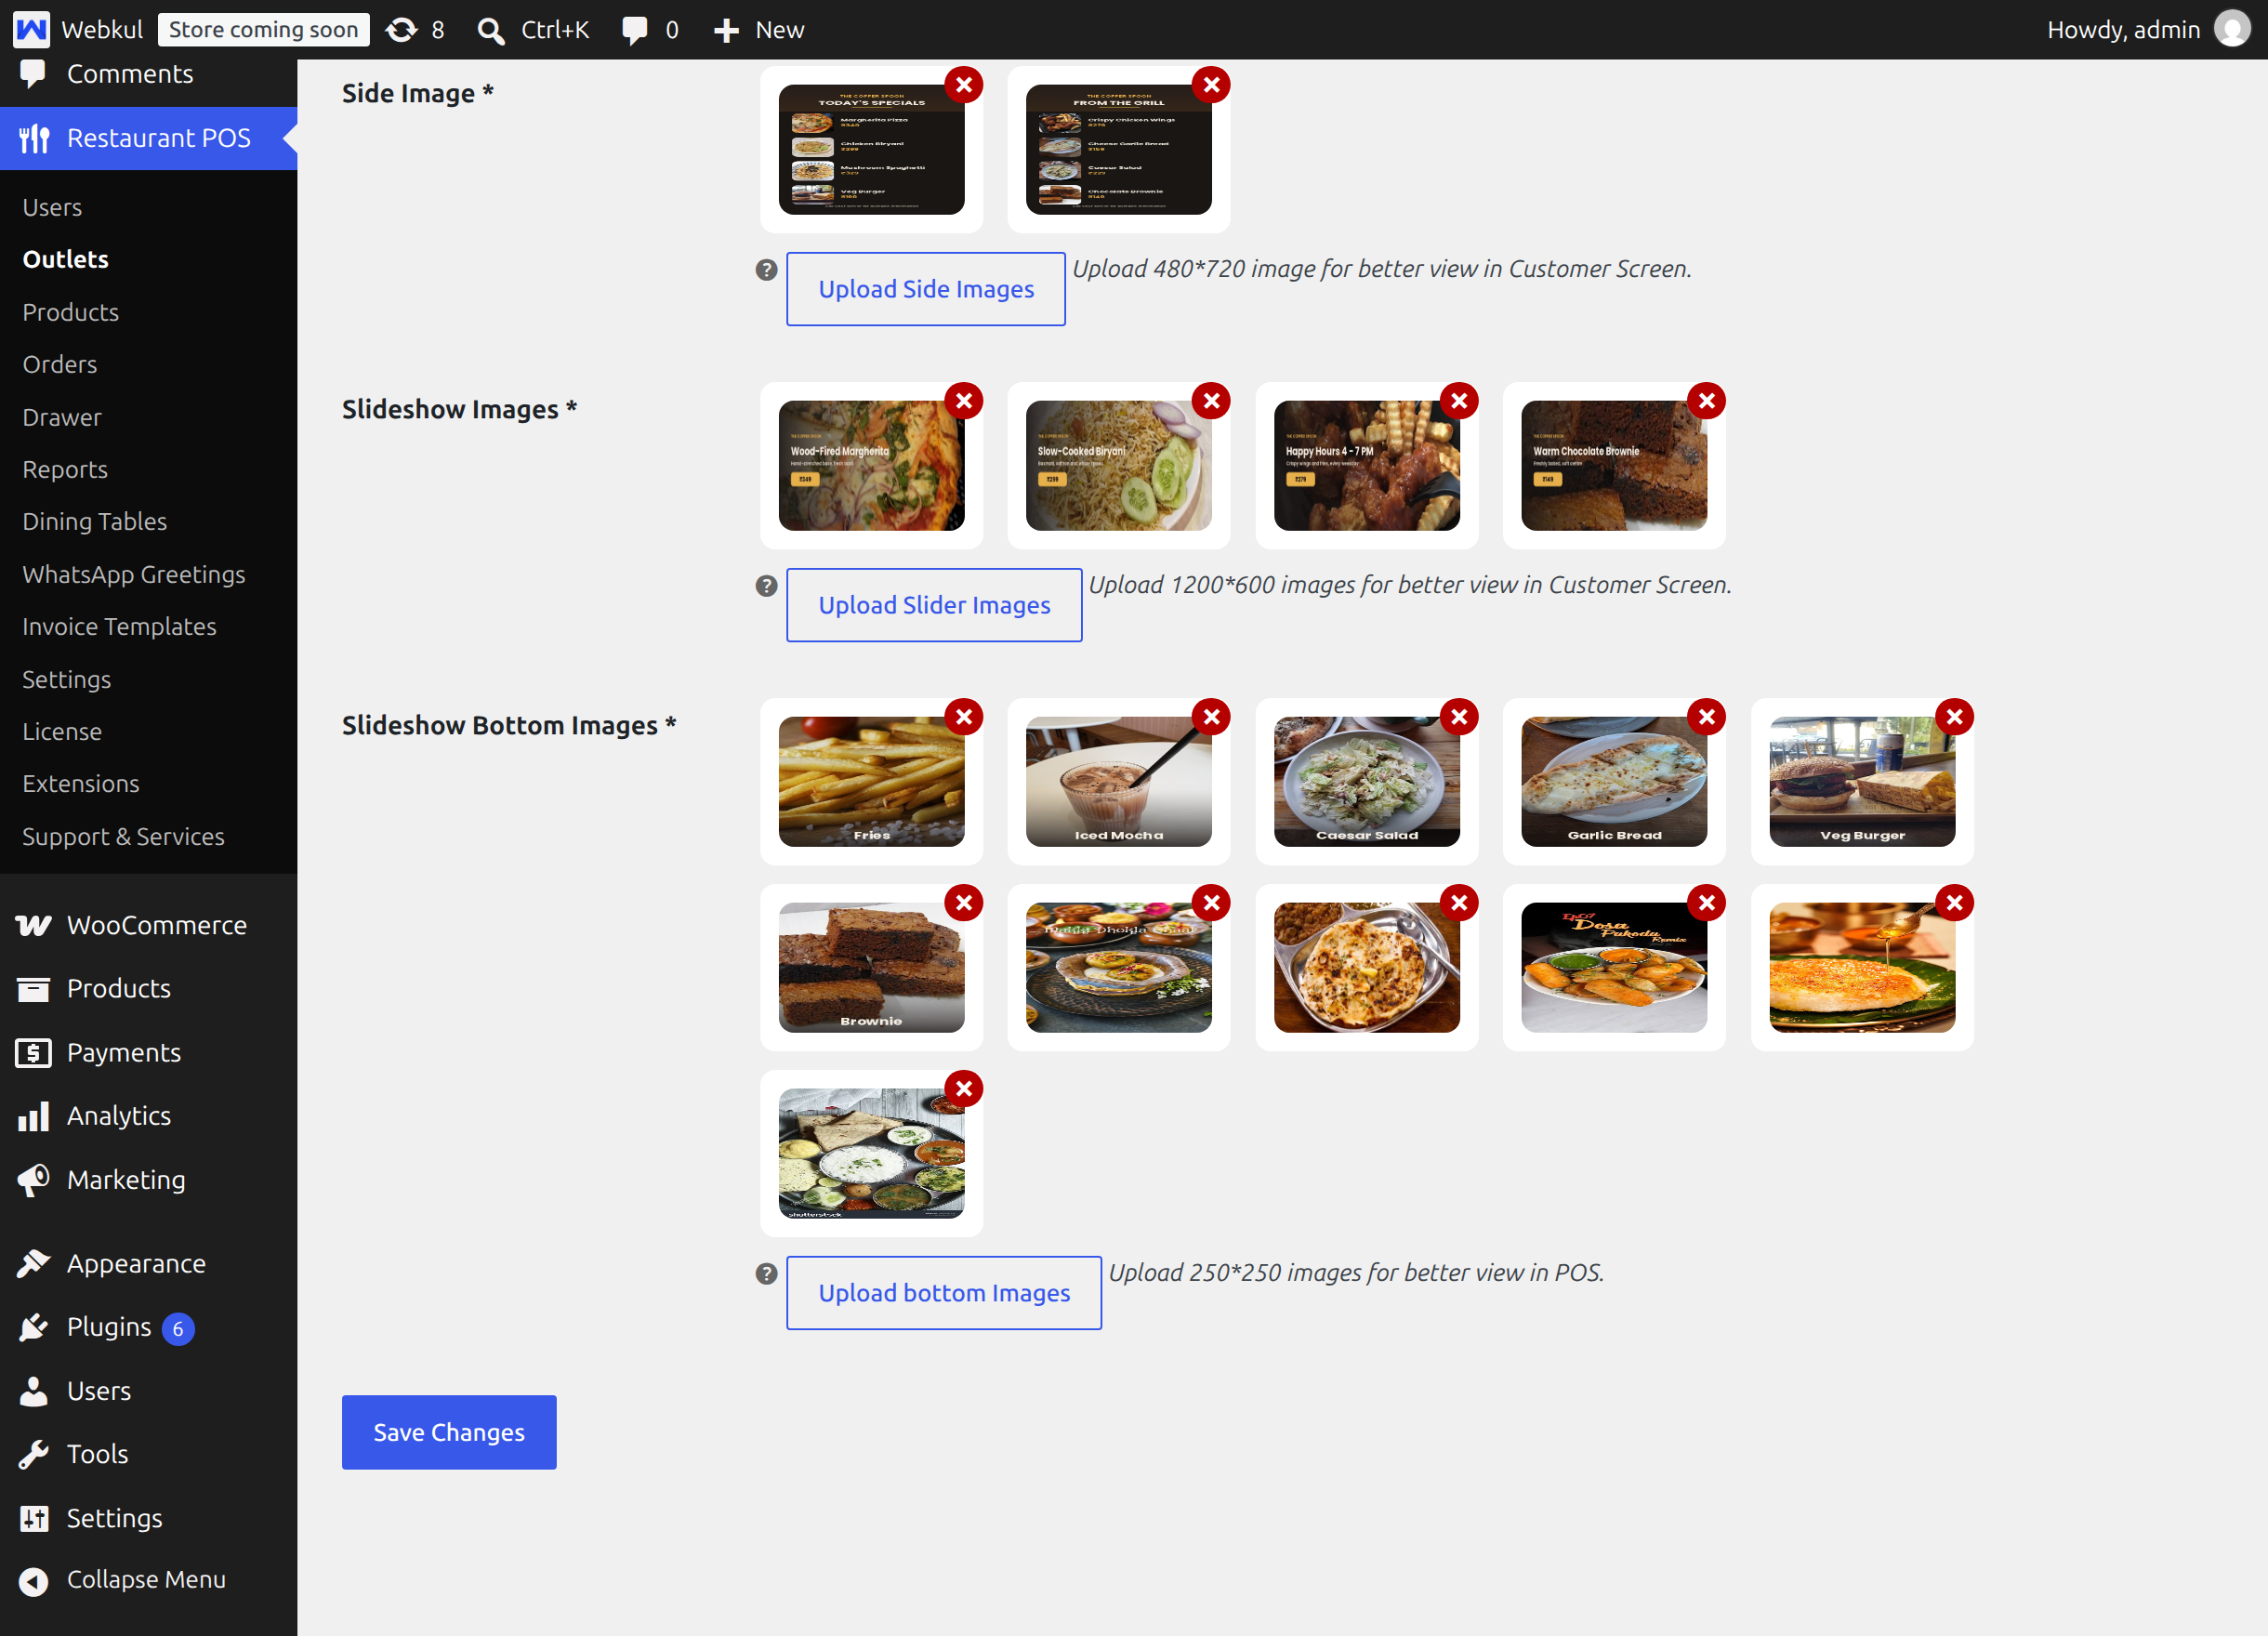
Image Display Mode
| Choice | Result |
|---|---|
| Portrait | One tall image is shown beside the order lists. |
| Landscape | The first two images are shown stacked beside the order lists. |
Pick the one that matches the artwork you have. Portrait suits a single full menu; landscape suits two half sheets, for example a food menu above a drinks menu. Both are shown side by side on Customer Screen.
What the form checks before it saves
If any of these rules is broken, the page reports it and nothing is saved.
| Message | What to do |
|---|---|
| Please select side image. | Upload at least one side image. |
| Please select minimum 4 slider images. | With video off, the slideshow needs four or more images. |
| Please select minimum 4 slider card images. | With video on, the card slider needs four or more images. |
| Please select minimum 4 bottom slider images. | The bottom strip needs four or more images. |
| Please select a video. | Video is enabled but no file has been chosen. |
| Nonce does not varify. | The page had been open too long. Reload it and make the change again. |
A successful save reports Configuration Saved Successfully.
Open the display
Go back to Restaurant POS → Outlets. The Customer Screen column has an Open button on every row, which opens that outlet's display in a new tab at the correct address.
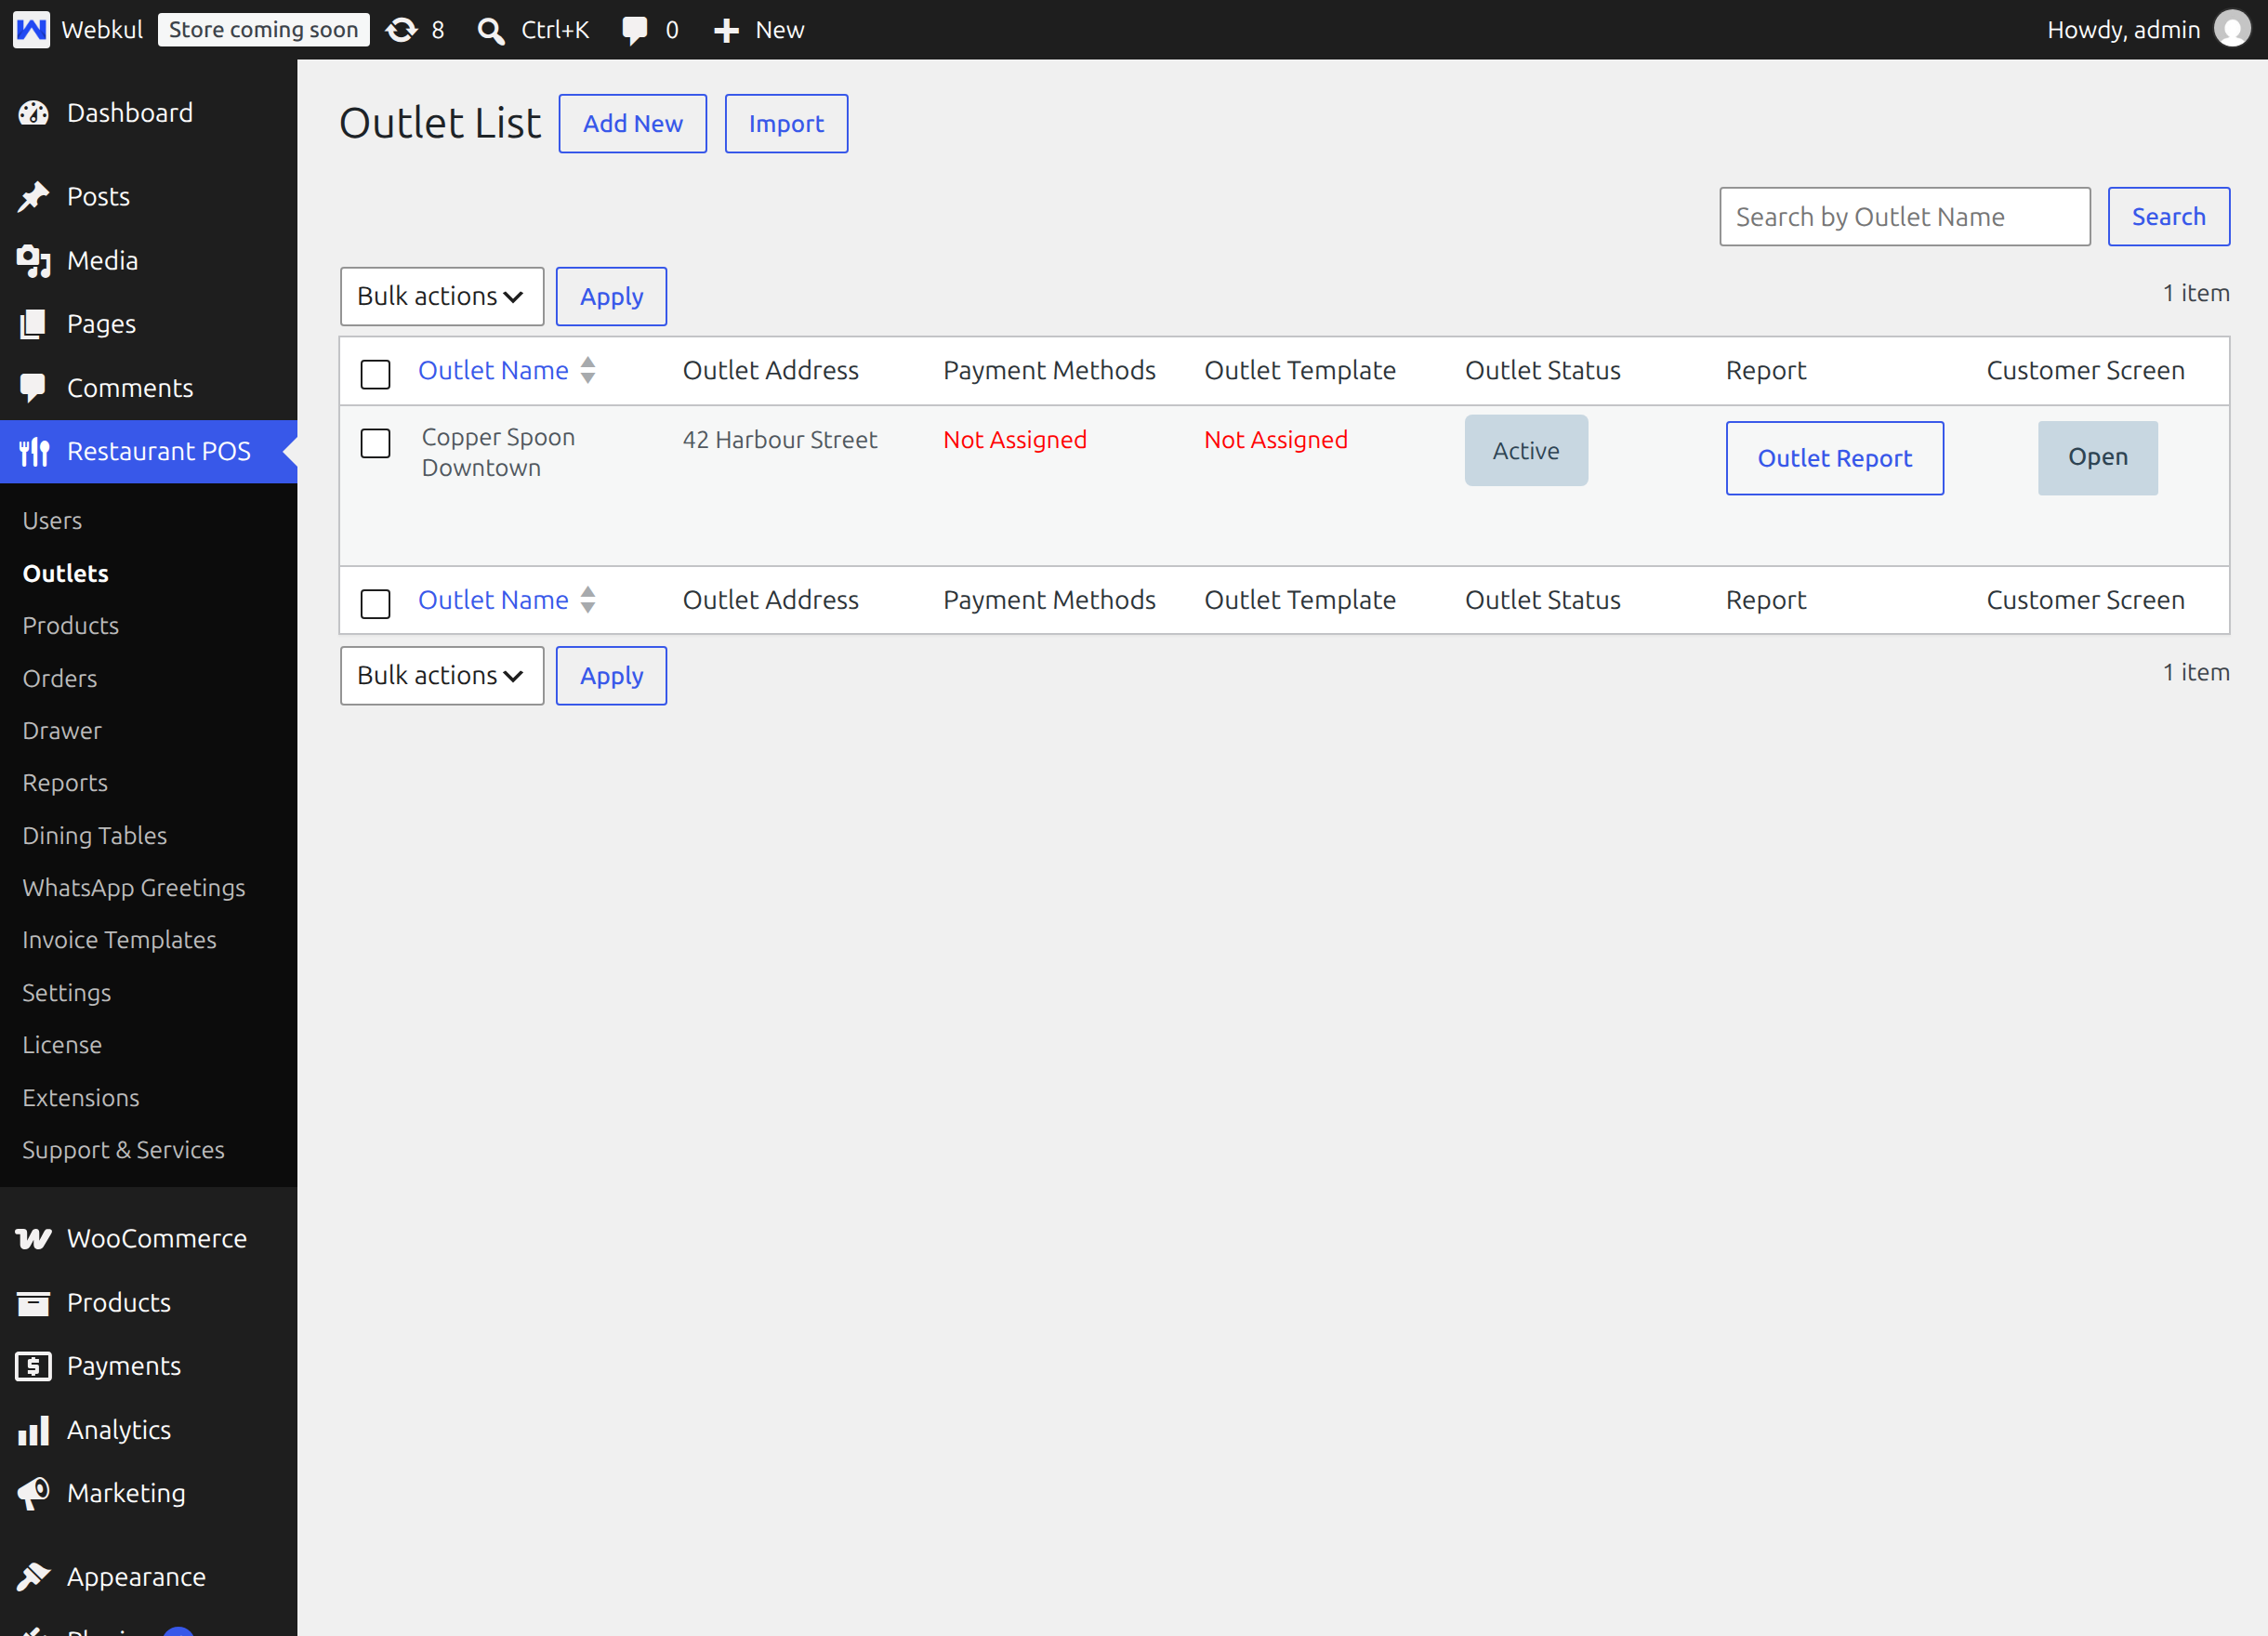
Put that address on the screen in the dining room, and use the full screen button in the display's own header to hide the browser chrome.
Tips
After changing anything on this tab, reload the dining room display once. The screen keeps its configuration from the moment it was opened, so a display that has been running for hours will not pick up new artwork on its own.
Next step
Continue with Sending Orders From The POS, or read Customer Screen to see what diners will be looking at.