
Installation and Activation
Requirements
| Requirement | Version |
|---|---|
| WordPress | 6.5 or newer |
| WooCommerce | 9.1 or newer |
| PHP | 7.4 or newer |
| WooCommerce Point of Sale by Webkul | 6.0.0 or newer |
| Restaurant Point of Sale by Webkul | Optional, but required for the dine in workflow |
Version 2.0.0 is tested against WordPress 6.7, WooCommerce 11.1.0, PHP 8.4 and WooCommerce Point of Sale 7.1.1. Newer releases usually work, but those are the versions this build was checked on.
Before you configure this module, finish the Point of Sale set up it sits on top of: the General, Customer, Payment, Invoice Printer, Appearance and Endpoints tabs under Restaurant POS → Settings, and at least one outlet under Restaurant POS → Outlets. Every kitchen ticket is keyed to an outlet, so nothing works until one exists.
The module also needs a live channel — either a Firebase project you own or the Point of Sale Node server. Firebase needs nothing installed on your server. The Node server (the Socket channel) needs Node.js 14 or newer on the web server and PHP's shell_exec or exec function enabled. You can install and activate first and choose the channel afterwards — see Real Time Connection.
Install the plugin
- In the WordPress admin go to Plugins → Add New → Upload Plugin.
- Choose the plugin zip file and select Install Now.
- Select Activate Plugin.
You can also upload the plugin folder to wp-content/plugins/ over FTP and then activate it from Plugins → Installed Plugins.
Note
WordPress lists this module under its packaged name, RESPOS Kitchen And Customer Screen. That is the row to look for on Plugins → Installed Plugins, on the Point of Sale Module License screen, and in the activation notice quoted below.
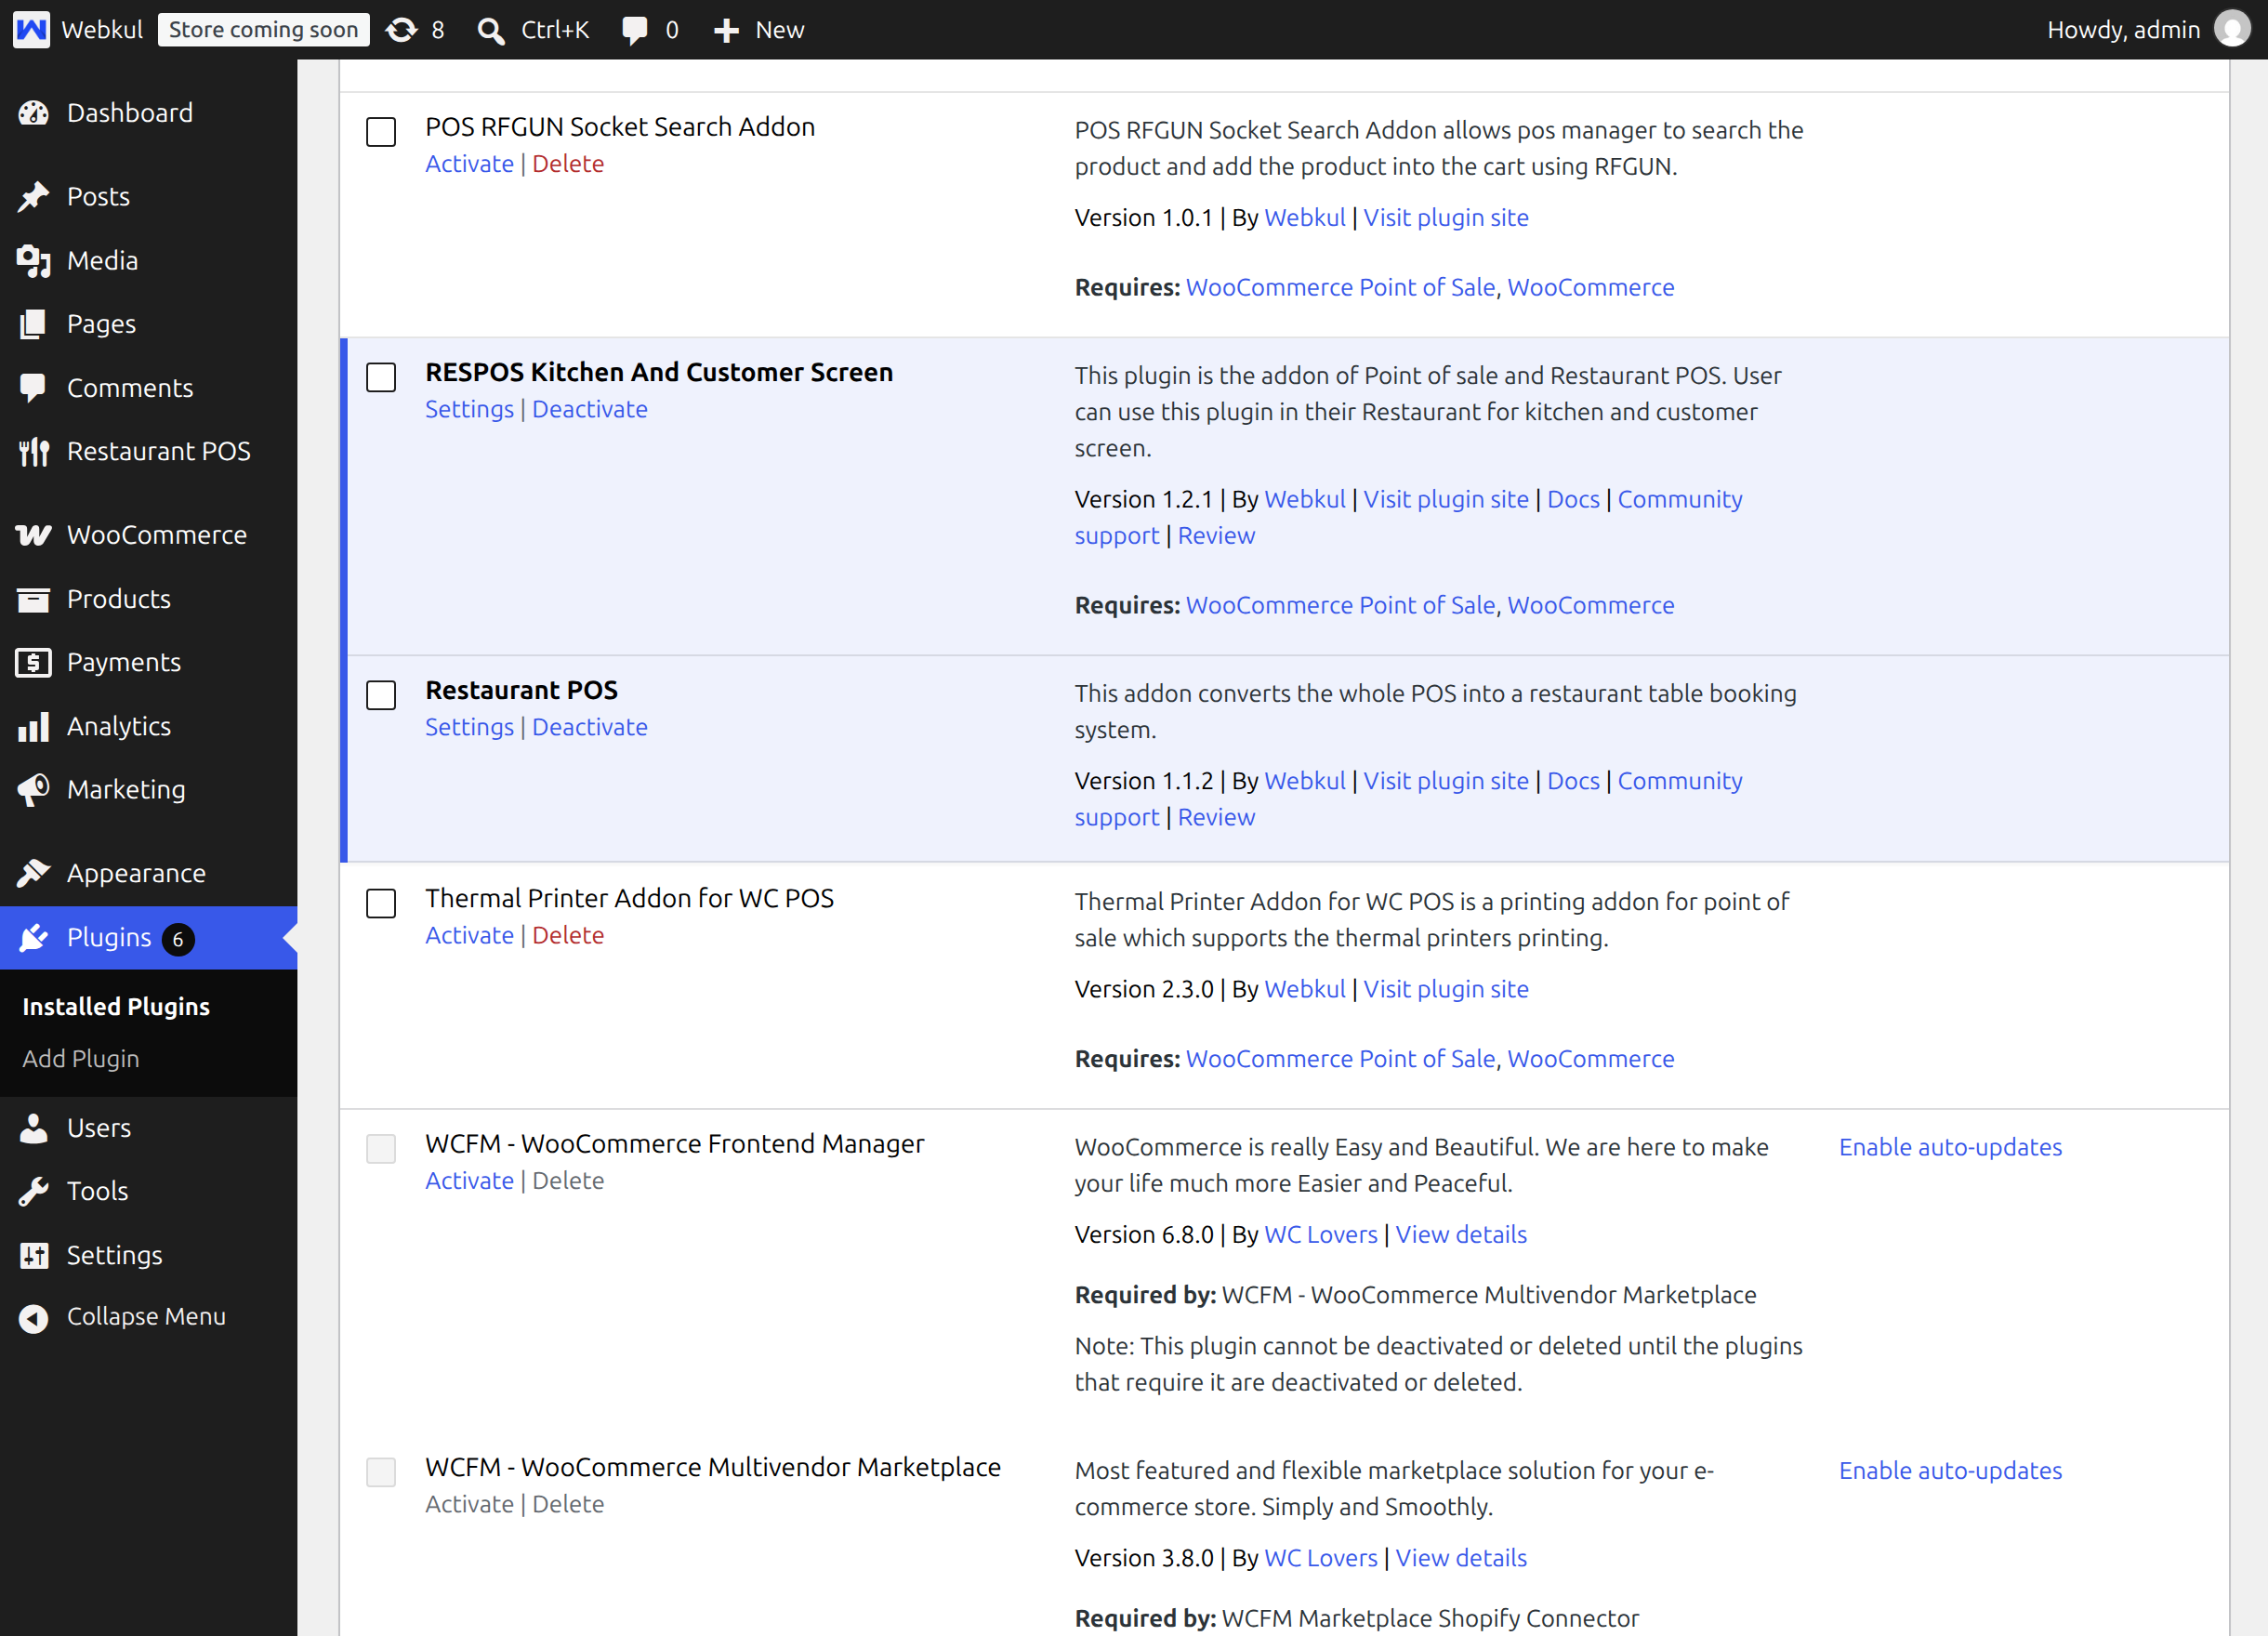
What activation sets up
Activation is not just switching the plugin on. It also:
- adds the Kitchen User role to WordPress;
- creates the two tables the customer screen and the Socket channel use;
- publishes the kitchen web app files so the display can be installed on a tablet;
- registers the module with the Point of Sale Node server, so the Socket channel works if you choose it.
On a multisite network this runs for every site, and any site created later is set up automatically.
Important
Activate WooCommerce Point of Sale before this module. If the Point of Sale plugin is missing, the admin shows the notice "RESPOS Kitchen And Customer Screen is activated but not effective. It requires Point of Sale and Restaurant Point of Sale (optional) in order to work at Point of Sale end." and none of the settings, screens or roles appear. Activating the Point of Sale plugin and then deactivating and reactivating this one clears it.
Check that it is running
Three quick checks tell you the module loaded correctly.
- Restaurant POS → Settings now has a Kitchen & Customer Screen tab.
- Restaurant POS → Outlets now has a Customer Screen column with an Open button on each row.
- Restaurant POS → Users now has a User Role column.
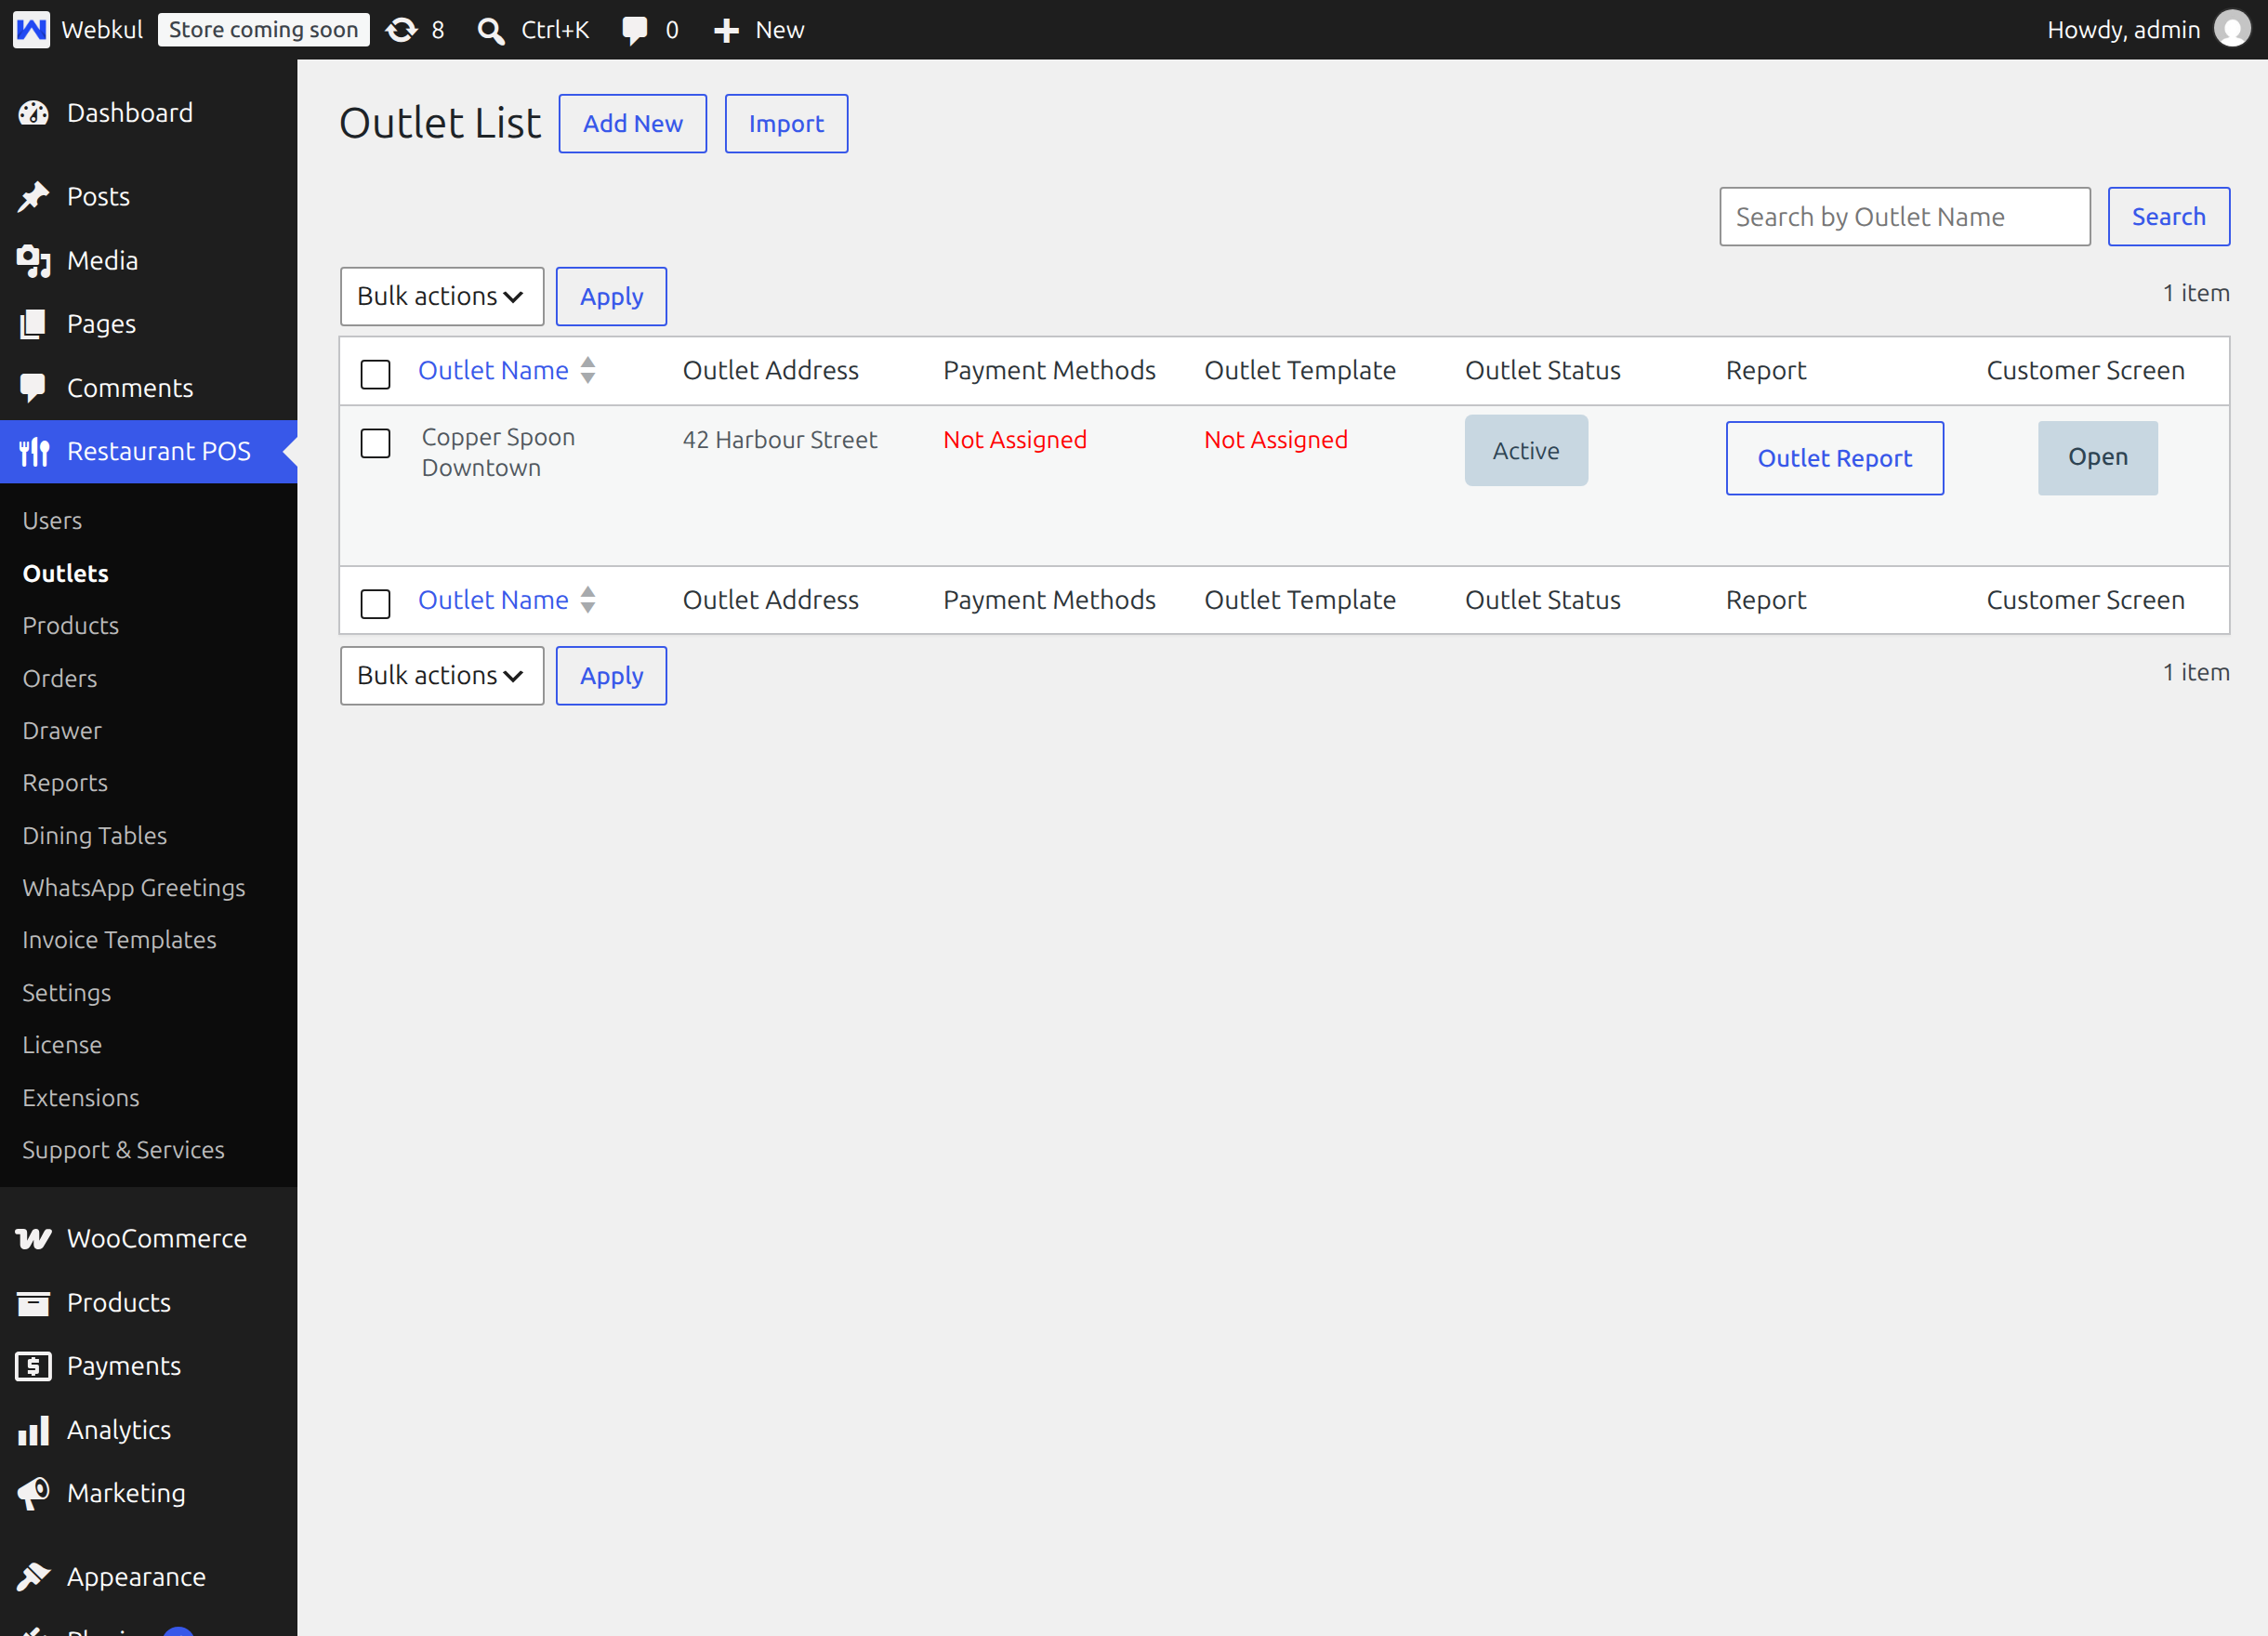
Set up in this order
Once the module is active, work through these six pages.
- Licence and Updates — activate the module with your purchase code. Leaving any Webkul module unactivated blocks checkout on the site, so do this first.
- Real Time Connection — pick Firebase or Socket and enter the details. Nothing appears on either screen until this is done.
- General Settings — the slideshow behaviour and the kitchen web app.
- Endpoints and URLs — rename the two public addresses if you want to.
- Kitchen Users — create the account the kitchen signs in with.
- Customer Screen Setup — the wording and the artwork for each outlet.
Updating the module
A CodeCanyon purchase can be updated from the WordPress Plugins screen once an Envato API token is saved on Restaurant POS → License. A Webkul Store purchase is updated by downloading the new version from your store account and uploading it over the current one. Both are explained step by step on Licence and Updates.
One point is worth knowing: the kitchen web app files in your site root are rewritten on activation only. If you change the kitchen web app name, colours or icons and the installed app on a tablet still shows the old ones, deactivate and reactivate the plugin to republish them.
Next step
Continue with Licence and Updates.