
Licence and Updates
Every active Webkul module on a Point of Sale site has to be activated with the purchase code from the order it came from. Kitchen and Customer Screen for Restaurant POS is no exception, and activation is what also turns on plugin updates.
Do this straight after Installation, before you start configuring.
Where licences are managed
Go to Restaurant POS → License. Every active Webkul module on the site is listed on one screen, including this one.
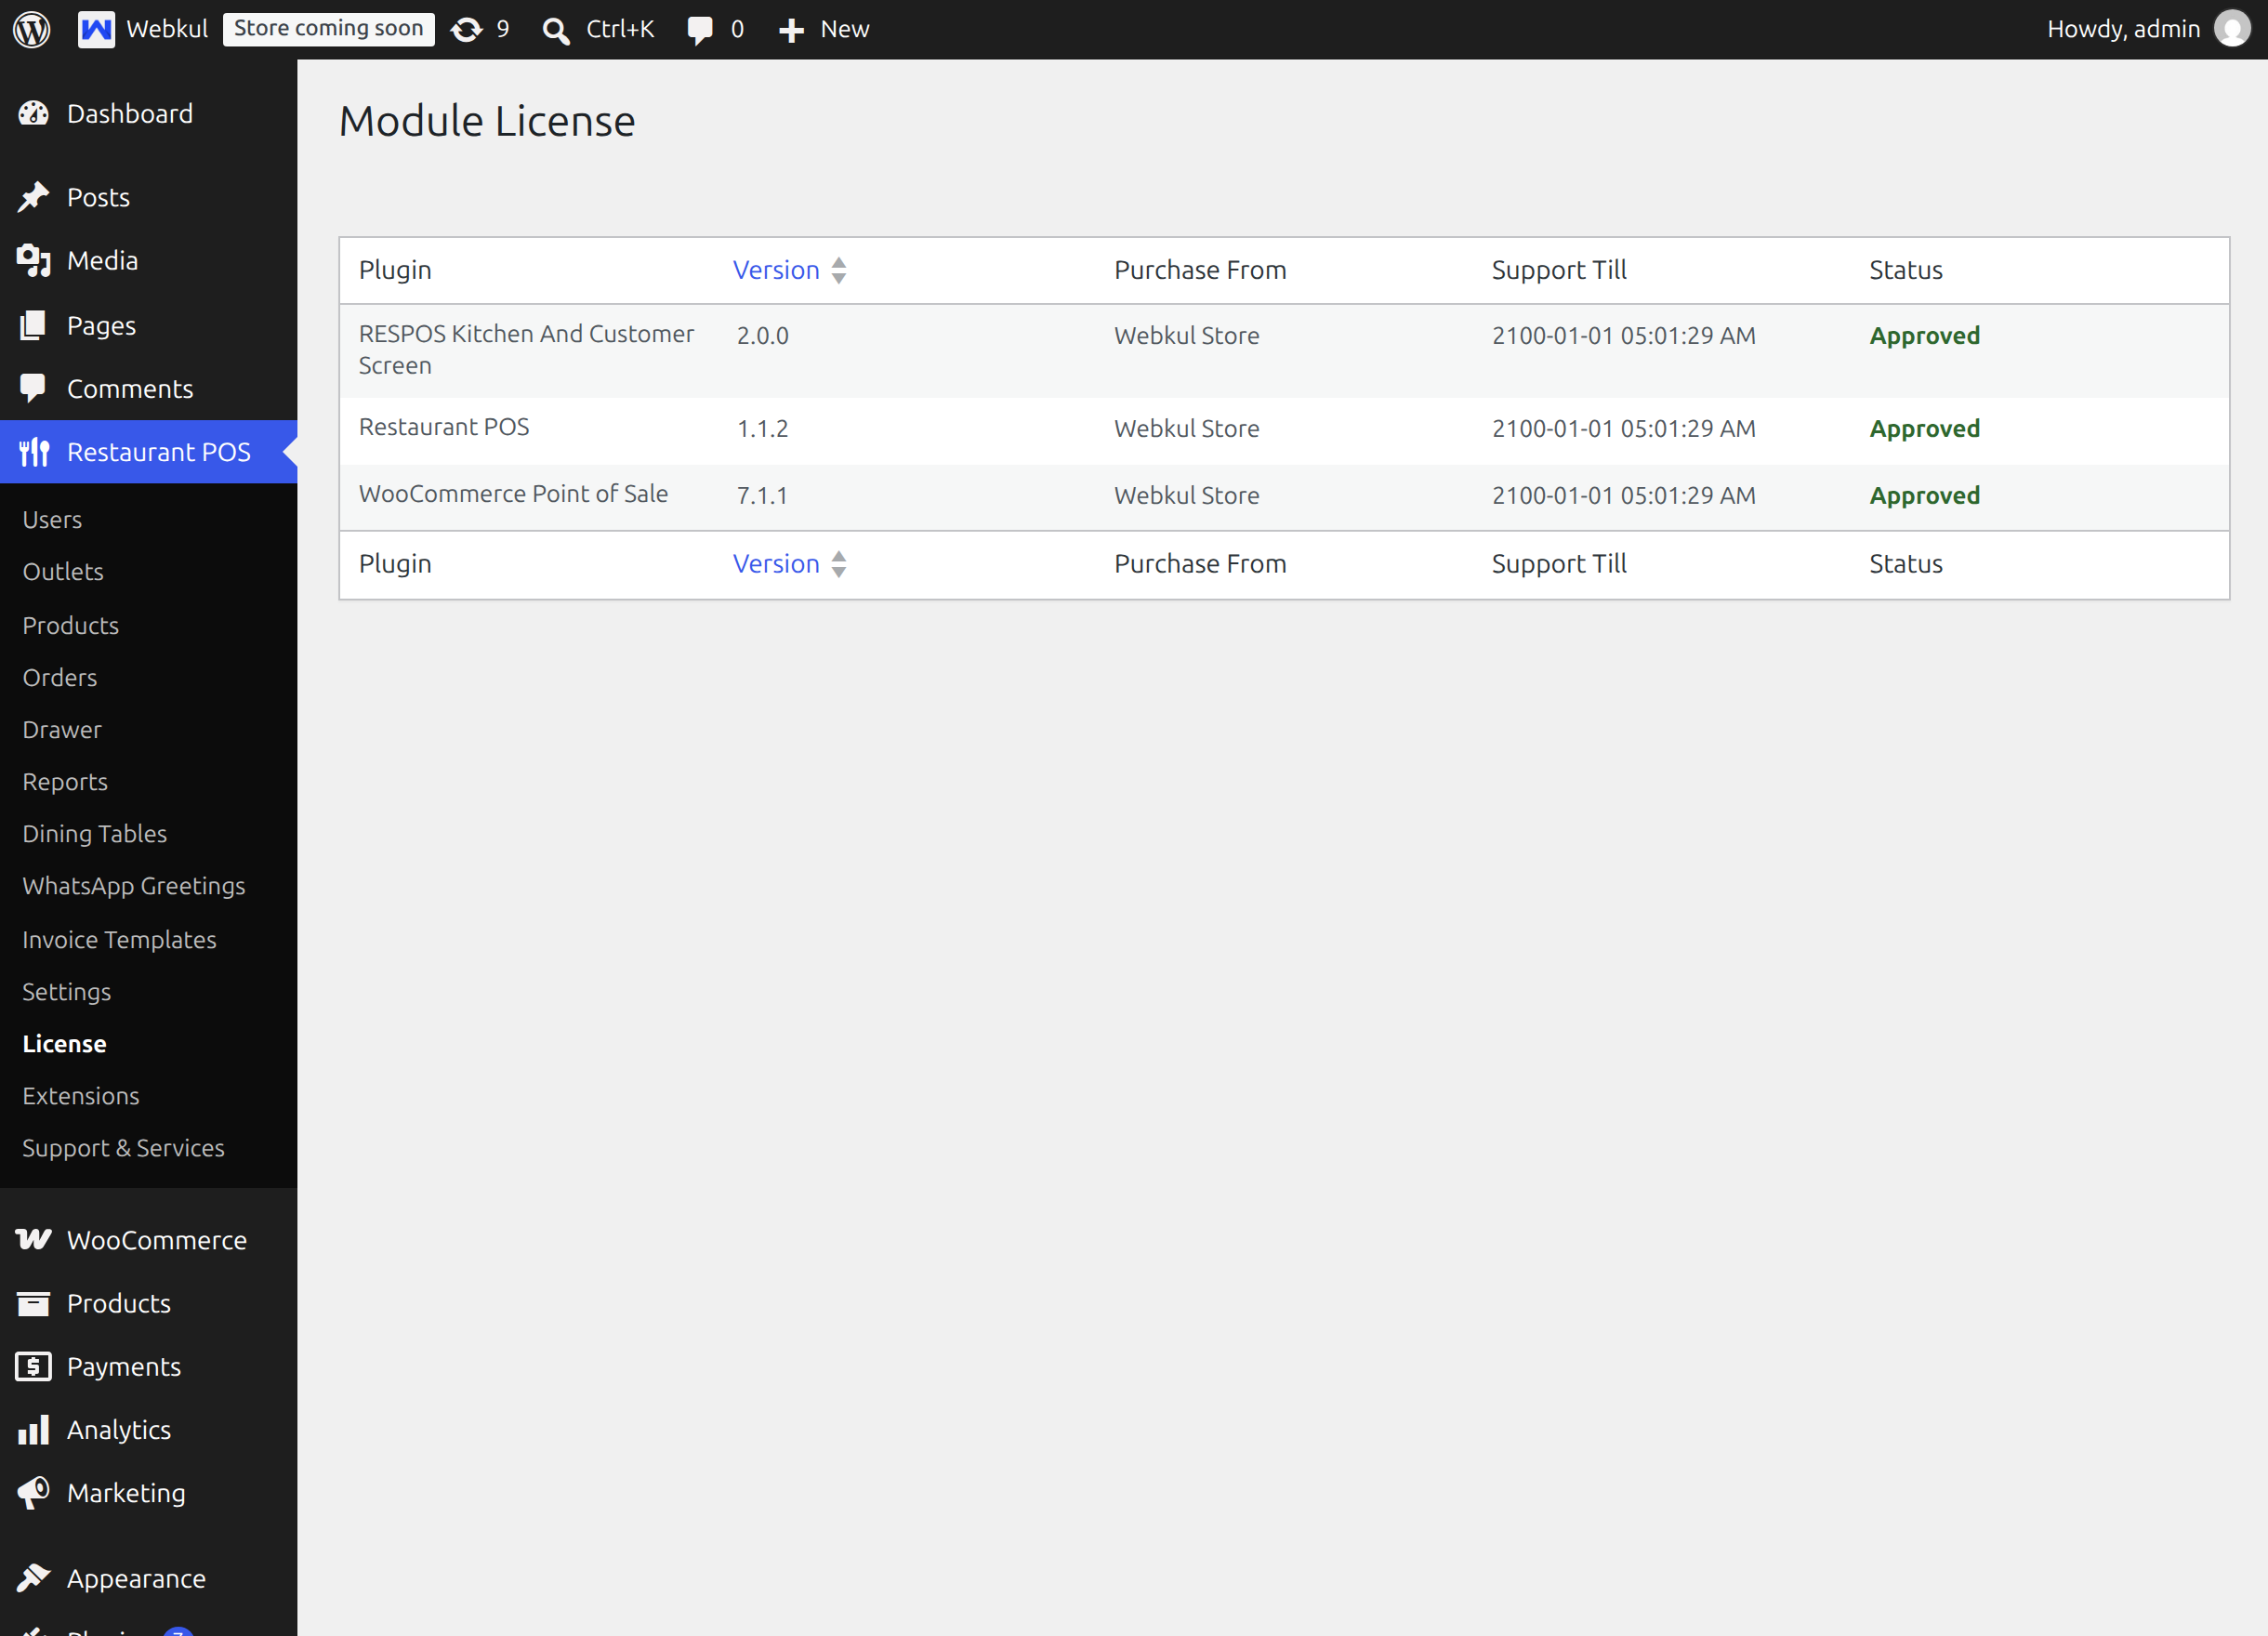
| Column | What it tells you |
|---|---|
| Plugin | The module name |
| Version | The version installed right now |
| Purchase From | Where the licence came from — Webkul Store or Codecanyon |
| Support Till | The date support runs until, or Pending while the module is not activated |
| Status | Activate, Approved or an Extend Support button — see below |
The three statuses
| Status | Meaning | What to do |
|---|---|---|
| Activate button | The module has no valid purchase code yet | Select Activate and enter the purchase code from your order |
| Approved | The module is activated and in support | Nothing. This is the state you want |
| Extend Support button | Support has run out | Select it to renew, then use Sync Support to pull the new date in |
After extending support, the Sync Support button stays disabled for a few minutes while the store catches up. Hovering it explains how long is left.
Activating the module
- Go to Restaurant POS → License.
- Find RESPOS Kitchen And Customer Screen in the list — that is how this module is named in WordPress.
- Select Activate in the Status column.
- Paste the purchase code from your Webkul Store or CodeCanyon order and confirm.
The screen answers Purchase Code Saved when it is accepted. Two things can go wrong:
| Message | Cause |
|---|---|
| Purchase Code is not Correct | The code does not match this module or this order |
| Please provide valid details | A required field was left empty |
Step by step instructions with pictures, including where to find the code on each store, are in Webkul's licence activation guide.
Why activation matters
Warning
Leaving a Webkul module unactivated does not just remove support. The Module License screen states it plainly: all active modules must be activated with valid purchase codes. If any module remains unactivated, customers will be unable to complete the checkout process, and a mandatory activation notice will be displayed in the website footer.
While anything is unactivated, the WordPress admin also shows a standing notice — Webkul Module License Activation Required — with a link to this screen. A user who is not an administrator sees the same notice asking them to contact the administrator instead.
Getting updates
Activating the licence does not install new versions by itself. How an update reaches you depends on where you bought the module — the Purchase From column on the Module License screen shows which applies to you.
Bought on CodeCanyon: update from the Plugins screen
Connect your Envato account once, and new versions can then be installed from the WordPress Plugins screen with one click.
Create an Envato API personal token. Sign in to build.envato.com with the Envato account that bought the plugin. Name the token, for example WooCommerce Store, and enable exactly these three permissions:
- View and search Envato sites
- Download your purchased items
- List purchases you've made
Accept the terms and select Create Token. Copy the token straight away.
Save it in WordPress. Go to Restaurant POS → License. Below the module list is the Envato Token Settings section. Paste the token into Envato Token and select Save Changes.
Test it. Select Test API Connection. The result beside the button should read Connected.
Update. When a new version is released, the plugin row on Plugins → Installed Plugins shows an notice — There is a new version of RESPOS Kitchen And Customer Screen available. Select View version … details to read what changed, then update now. The same update is also listed under Dashboard → Updates.
| Result of Test API Connection | What to do |
|---|---|
| Connected. | Nothing. Updates will appear on the Plugins screen |
| Invalid token. | The token was mistyped or deleted. Create a new one and save it again |
| Token have some required permission missing. | Create a new token with all three permissions above |
| Token have additional permissions. | The token has more than the three permissions. Create a new token with only those three |
Note
The Envato Token Settings section is shown only when at least one module on the Module License screen was bought on CodeCanyon.
Webkul's own walkthrough, with pictures of the Envato screens, is How to Get Updates of Webkul Modules Directly on the Plugins page.
If you would rather not connect a token, download the latest version from Downloads in your CodeCanyon account and upload it as described below.
Bought on the Webkul Store: download and upload
The Envato token does not apply to a Webkul Store purchase. Download the latest version of the plugin from your account on the Webkul Store, then install it over the current one:
- Go to Plugins → Add New → Upload Plugin.
- Choose the new zip file and select Install Now.
- WordPress notices that the plugin is already installed and compares the two versions. Select Replace current with uploaded.
Your settings, outlets, customer screen artwork and Kitchen User accounts are stored in the database, so they are kept. If you cannot find the download, raise a ticket with Webkul support.
Important
After updating this module, the kitchen web app files in your site root are not rewritten automatically. If the installed kitchen app on a tablet shows an old name, colour or icon, deactivate and reactivate the plugin once. See General Settings.
Next step
Continue with Real Time Connection.