Customer Screen
The customer screen is the display diners look at. It is a public page with no sign in, showing which order numbers are being cooked and which are ready to collect.
Open it from Restaurant POS → Outlets using the Open button in the Customer Screen column, which carries the right outlet in the address. See Endpoints and URLs.
The order board
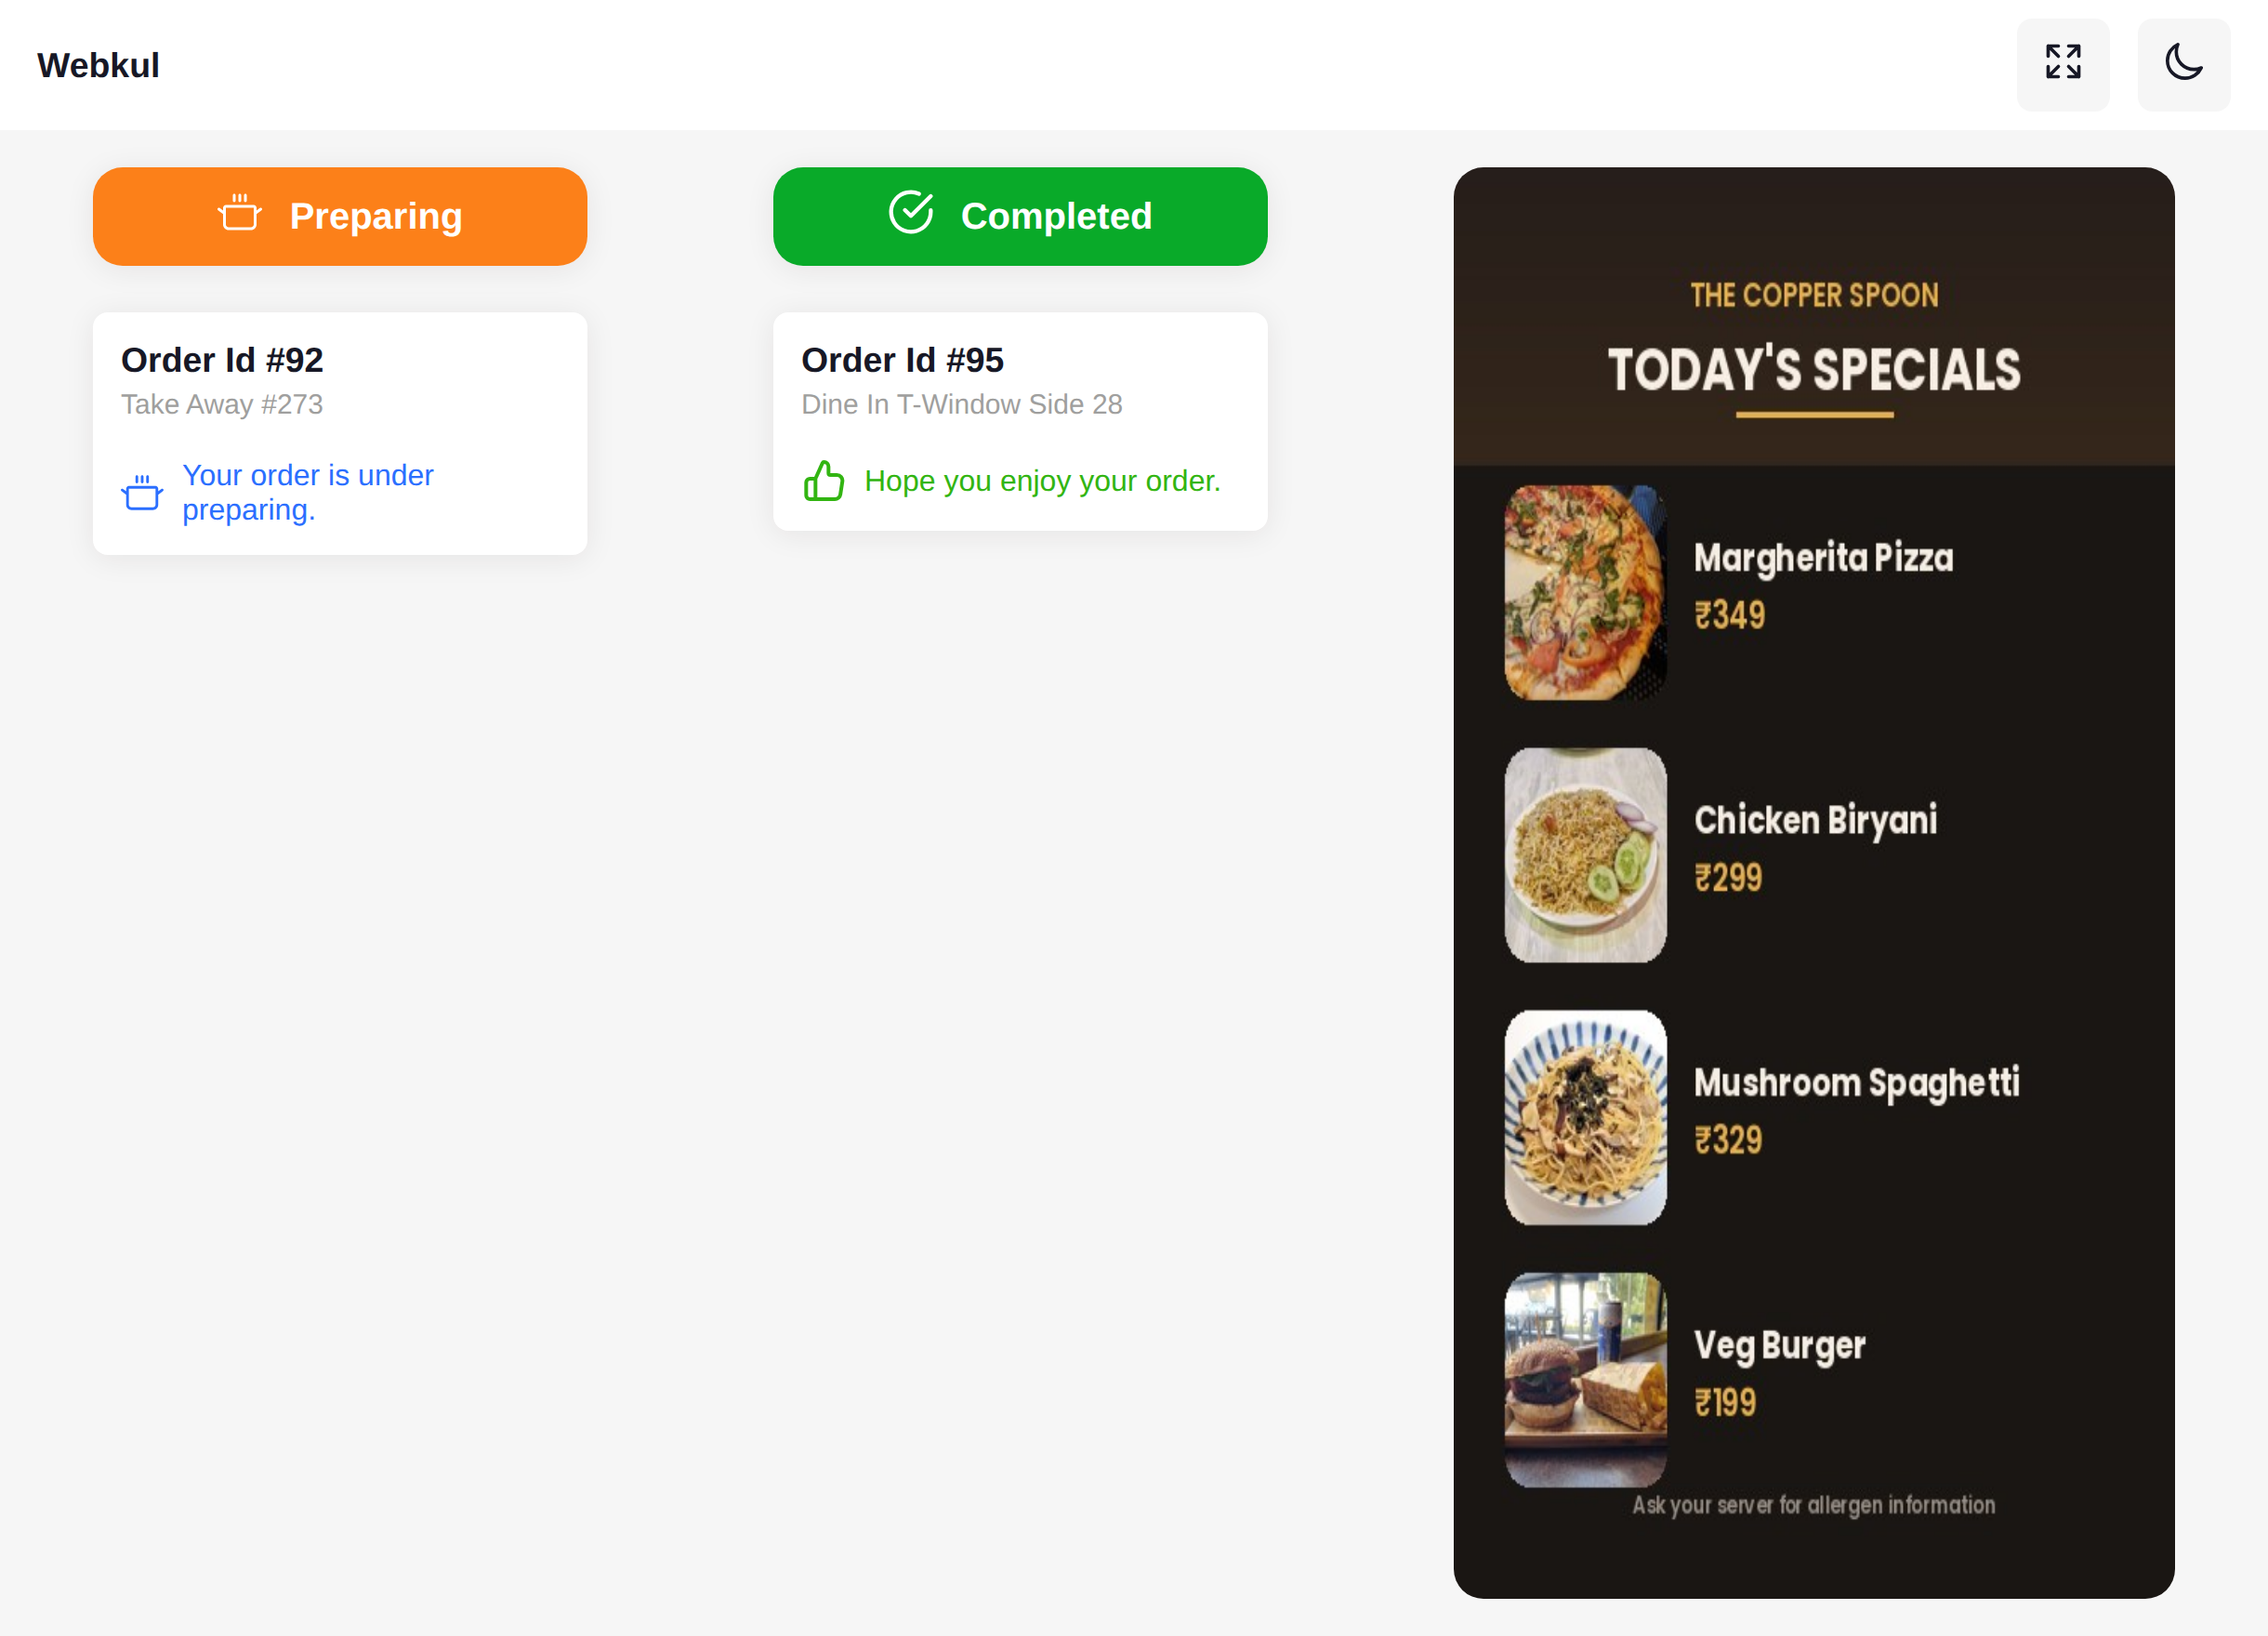
Two lists sit side by side.
| List | Contains | Line underneath |
|---|---|---|
| Preparing | Every ticket the kitchen has started | Your Preparing Text |
| Completed | Every ticket the kitchen has finished | Your Completed Text |
Each card shows the order number and, under it, either Take Away with the WooCommerce order number or Dine In with the table name and booking number, so a diner can find their own order at a glance.
Both lists update the instant the kitchen touches a ticket. A ticket the kitchen has sent disappears from the board.
When a list has nothing in it, it shows No orders found with an illustration rather than an empty space.
To the right of the lists is your side image — usually the menu board. Portrait mode shows one tall image, which is what the screenshot above uses.
Switch Image Display Mode to Landscape on the outlet and the screen stacks the first two side images instead, so a food board and a drinks board can run together.
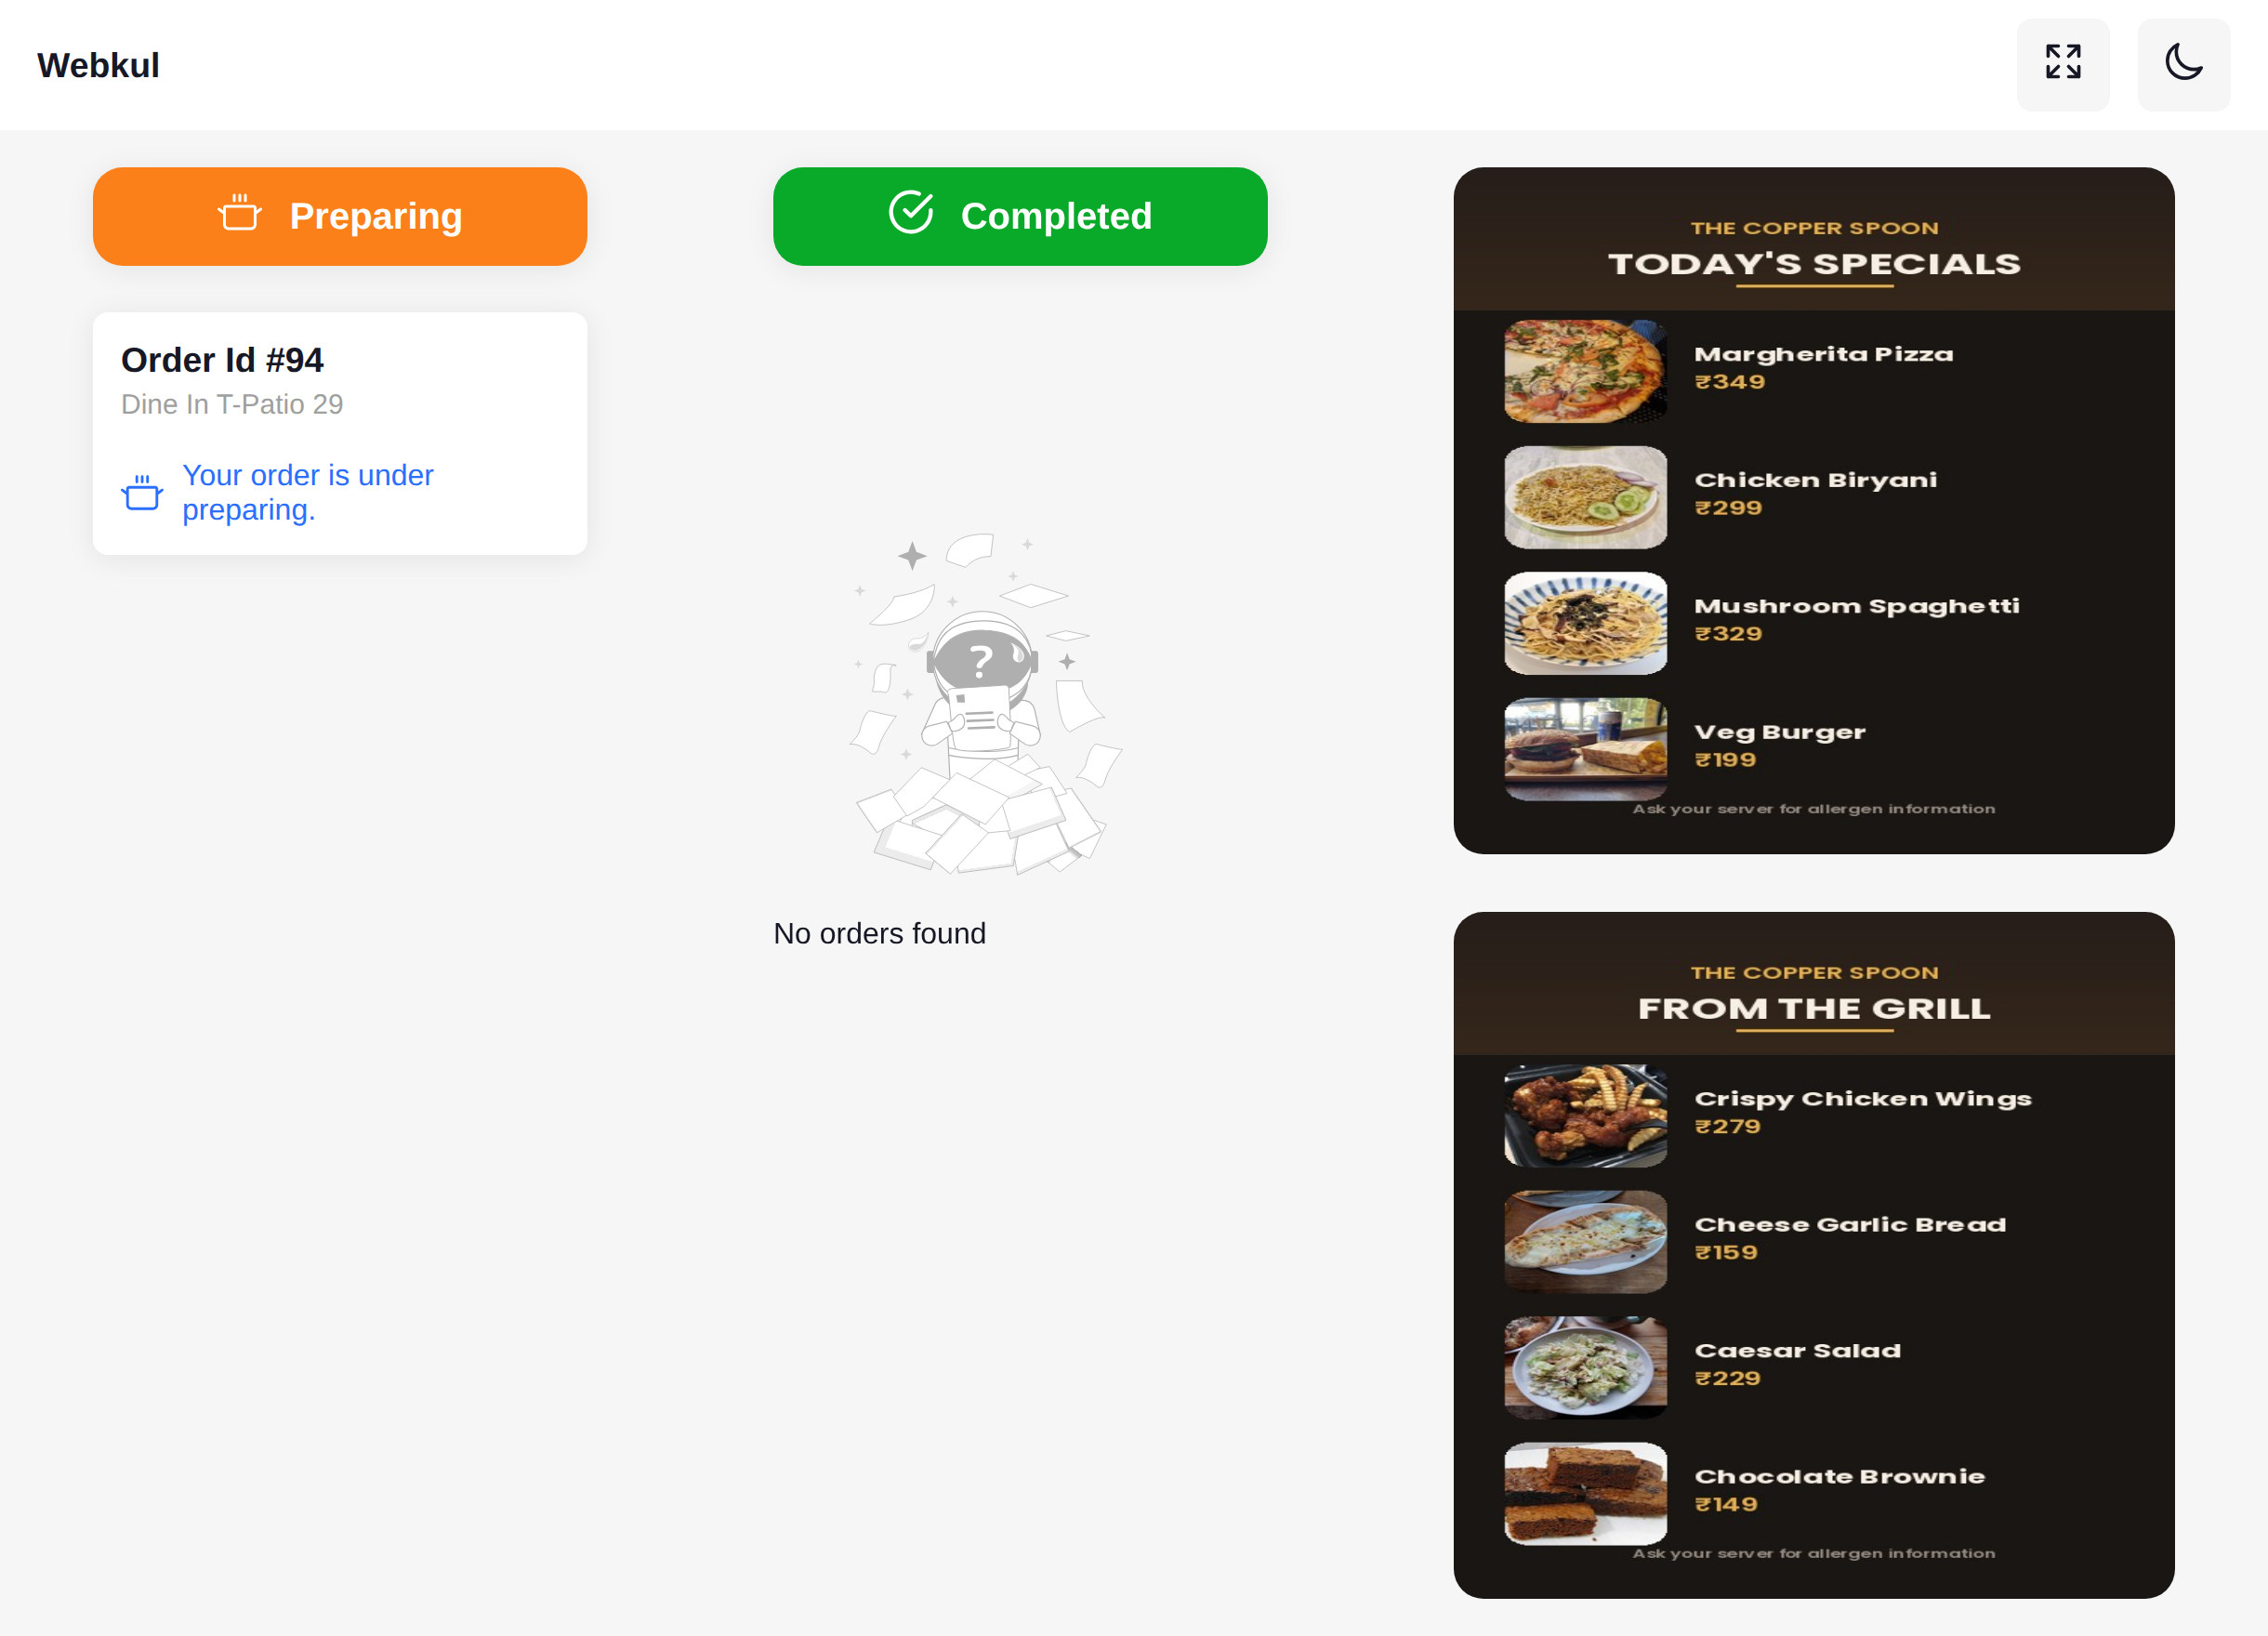
The mode is set per outlet on Customer Screen Setup.
The slideshow
When there is nothing on the order board, the screen fills with your promotional slideshow instead, so a quiet dining room never shows an empty display.
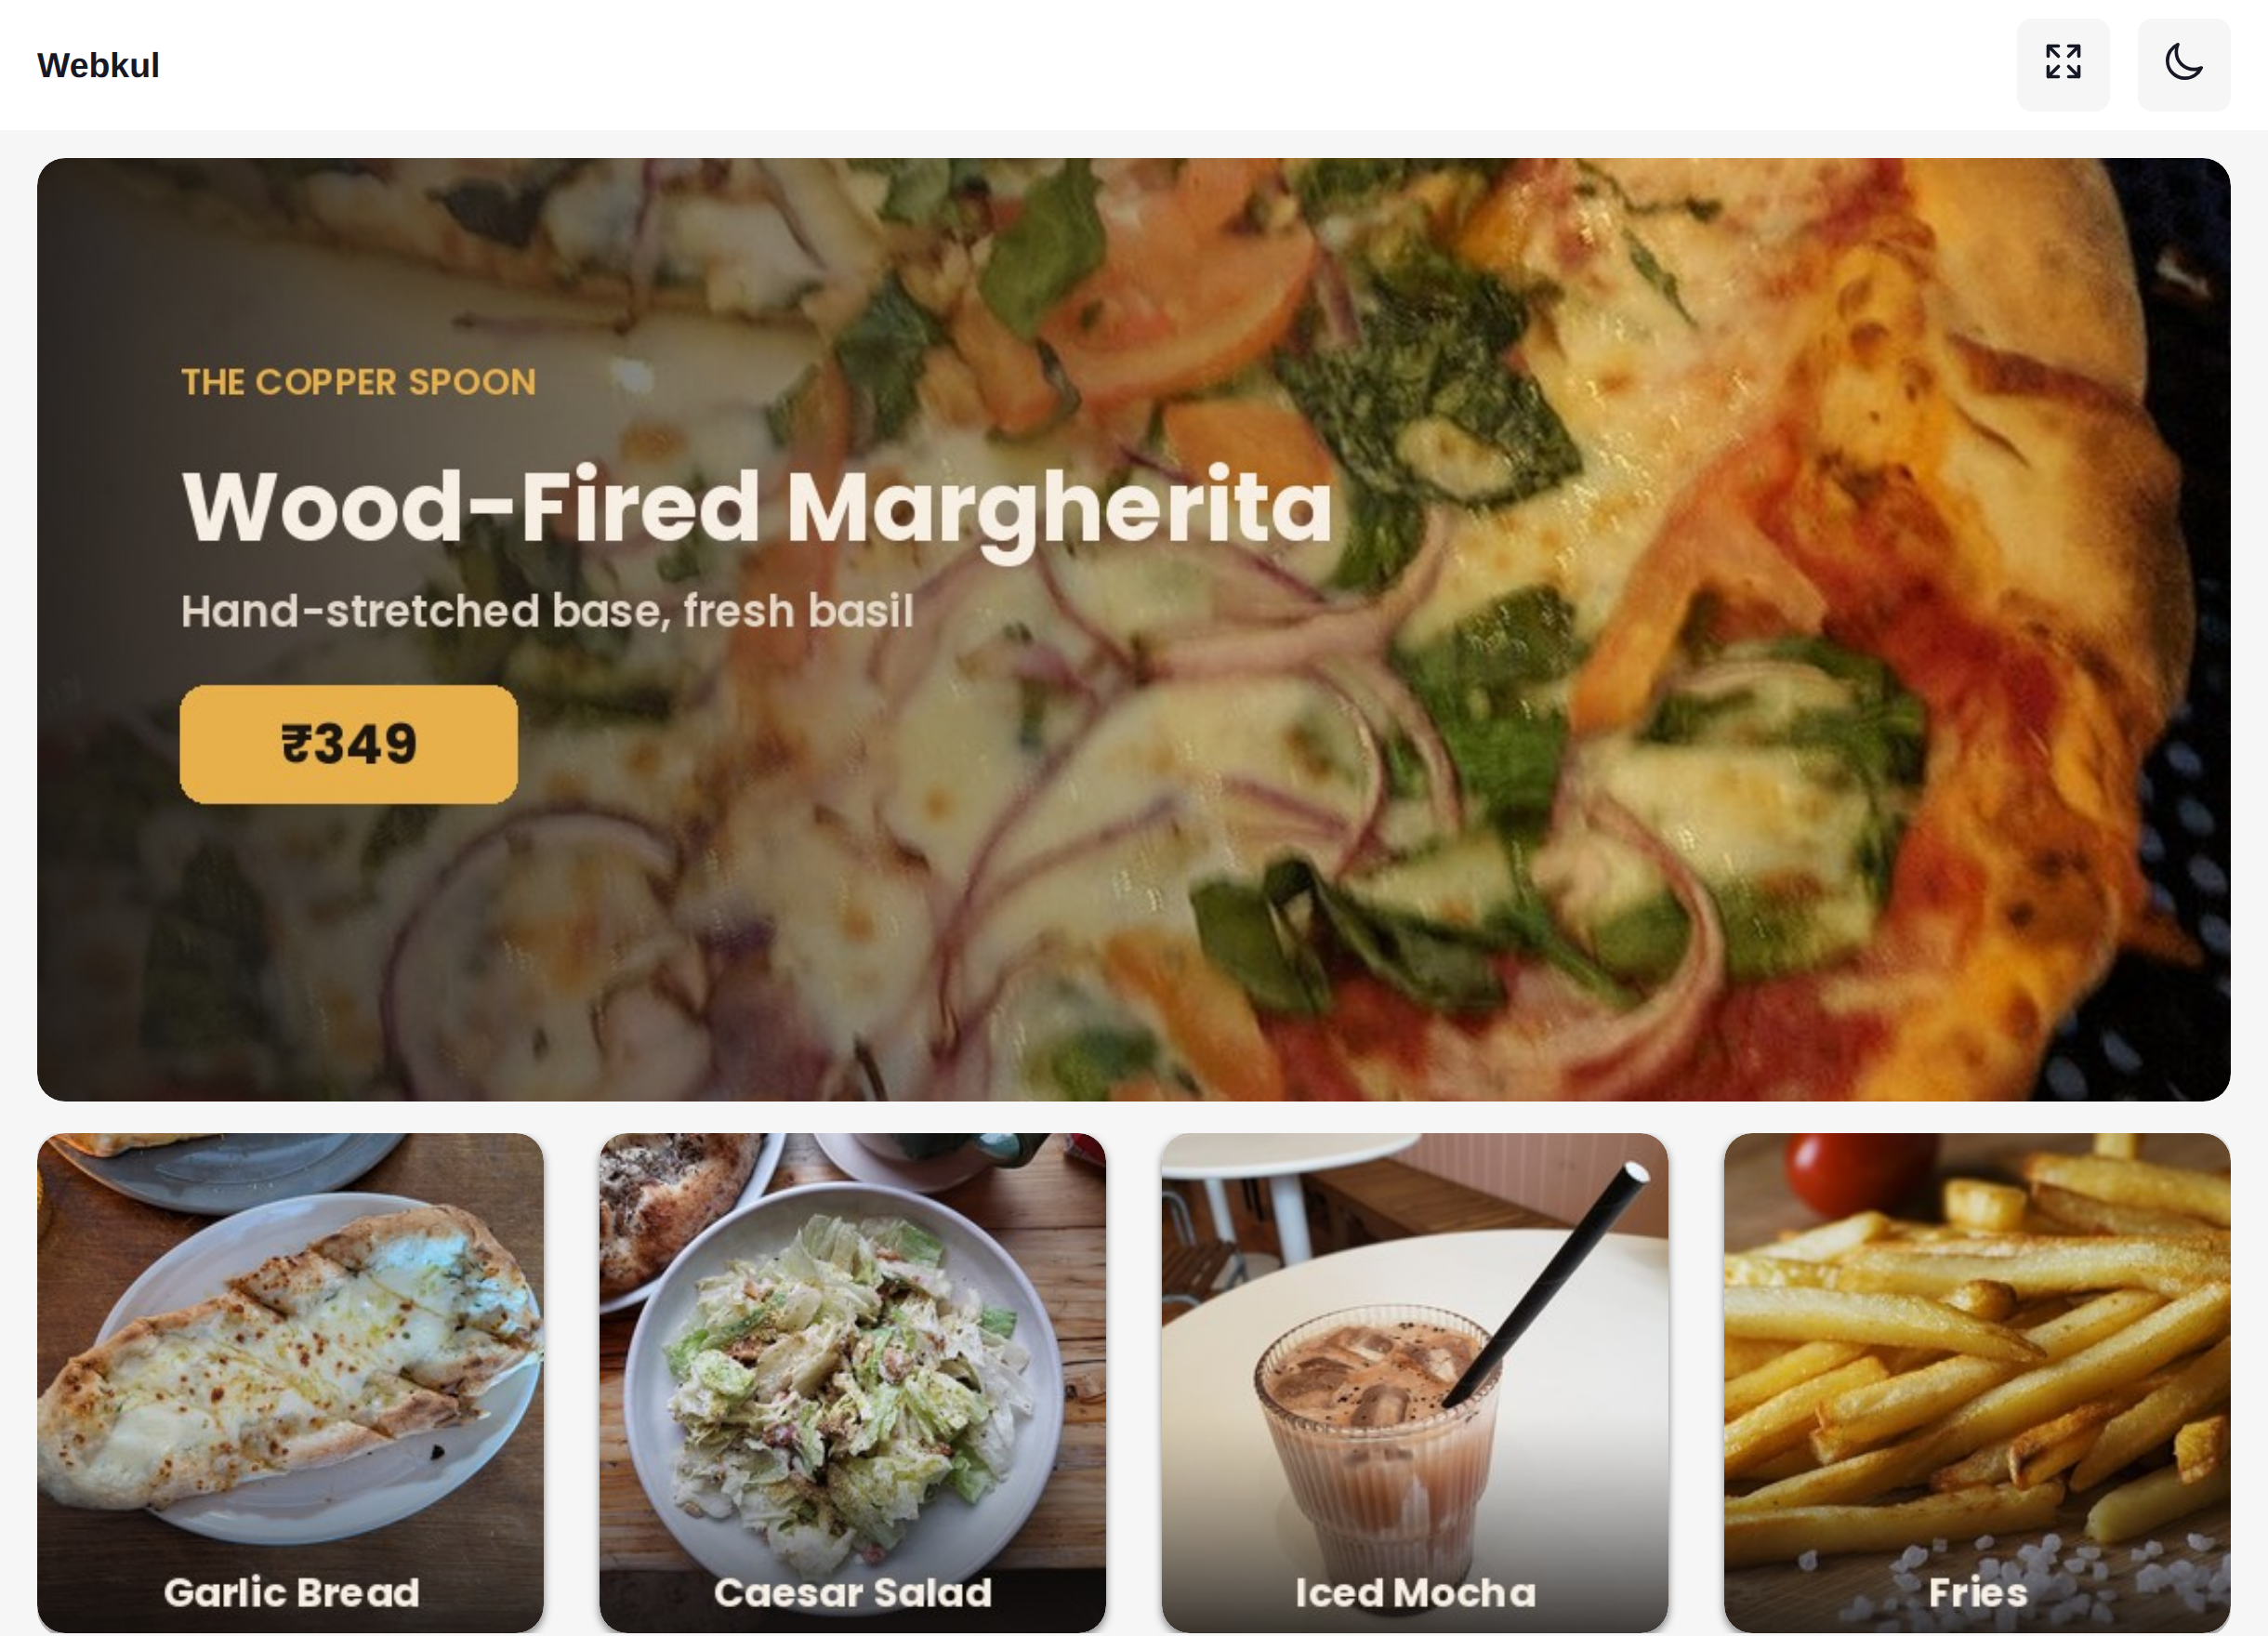
The slideshow has two parts:
- The large area runs either your slideshow images or, when video is enabled for the outlet, your video on a loop with a card slider beside it.
- The bottom strip of small images runs at all times, under both the order board and the slideshow.
Slide effect, direction, delay and speed for all three sliders are set once for the whole store on General Settings. The images themselves are set per outlet on Customer Screen Setup.
If no slideshow images have been uploaded, the screen shows an animated welcome panel carrying your store name instead.
Turning the order board off
If you want the display to promote rather than to inform — a window screen, or a waiting area — untick Customer Screen Visible Status on the outlet. The screen then runs the slideshow permanently and never lists orders.
Setting up the display
- Open the address from the outlet list on the machine driving the screen.
- Bookmark it so the display can be restored quickly after a reboot.
- Select the full screen button in the display's own header to hide the browser toolbar.
- Use the moon button if a dark screen suits the room better. The choice is remembered on that device.
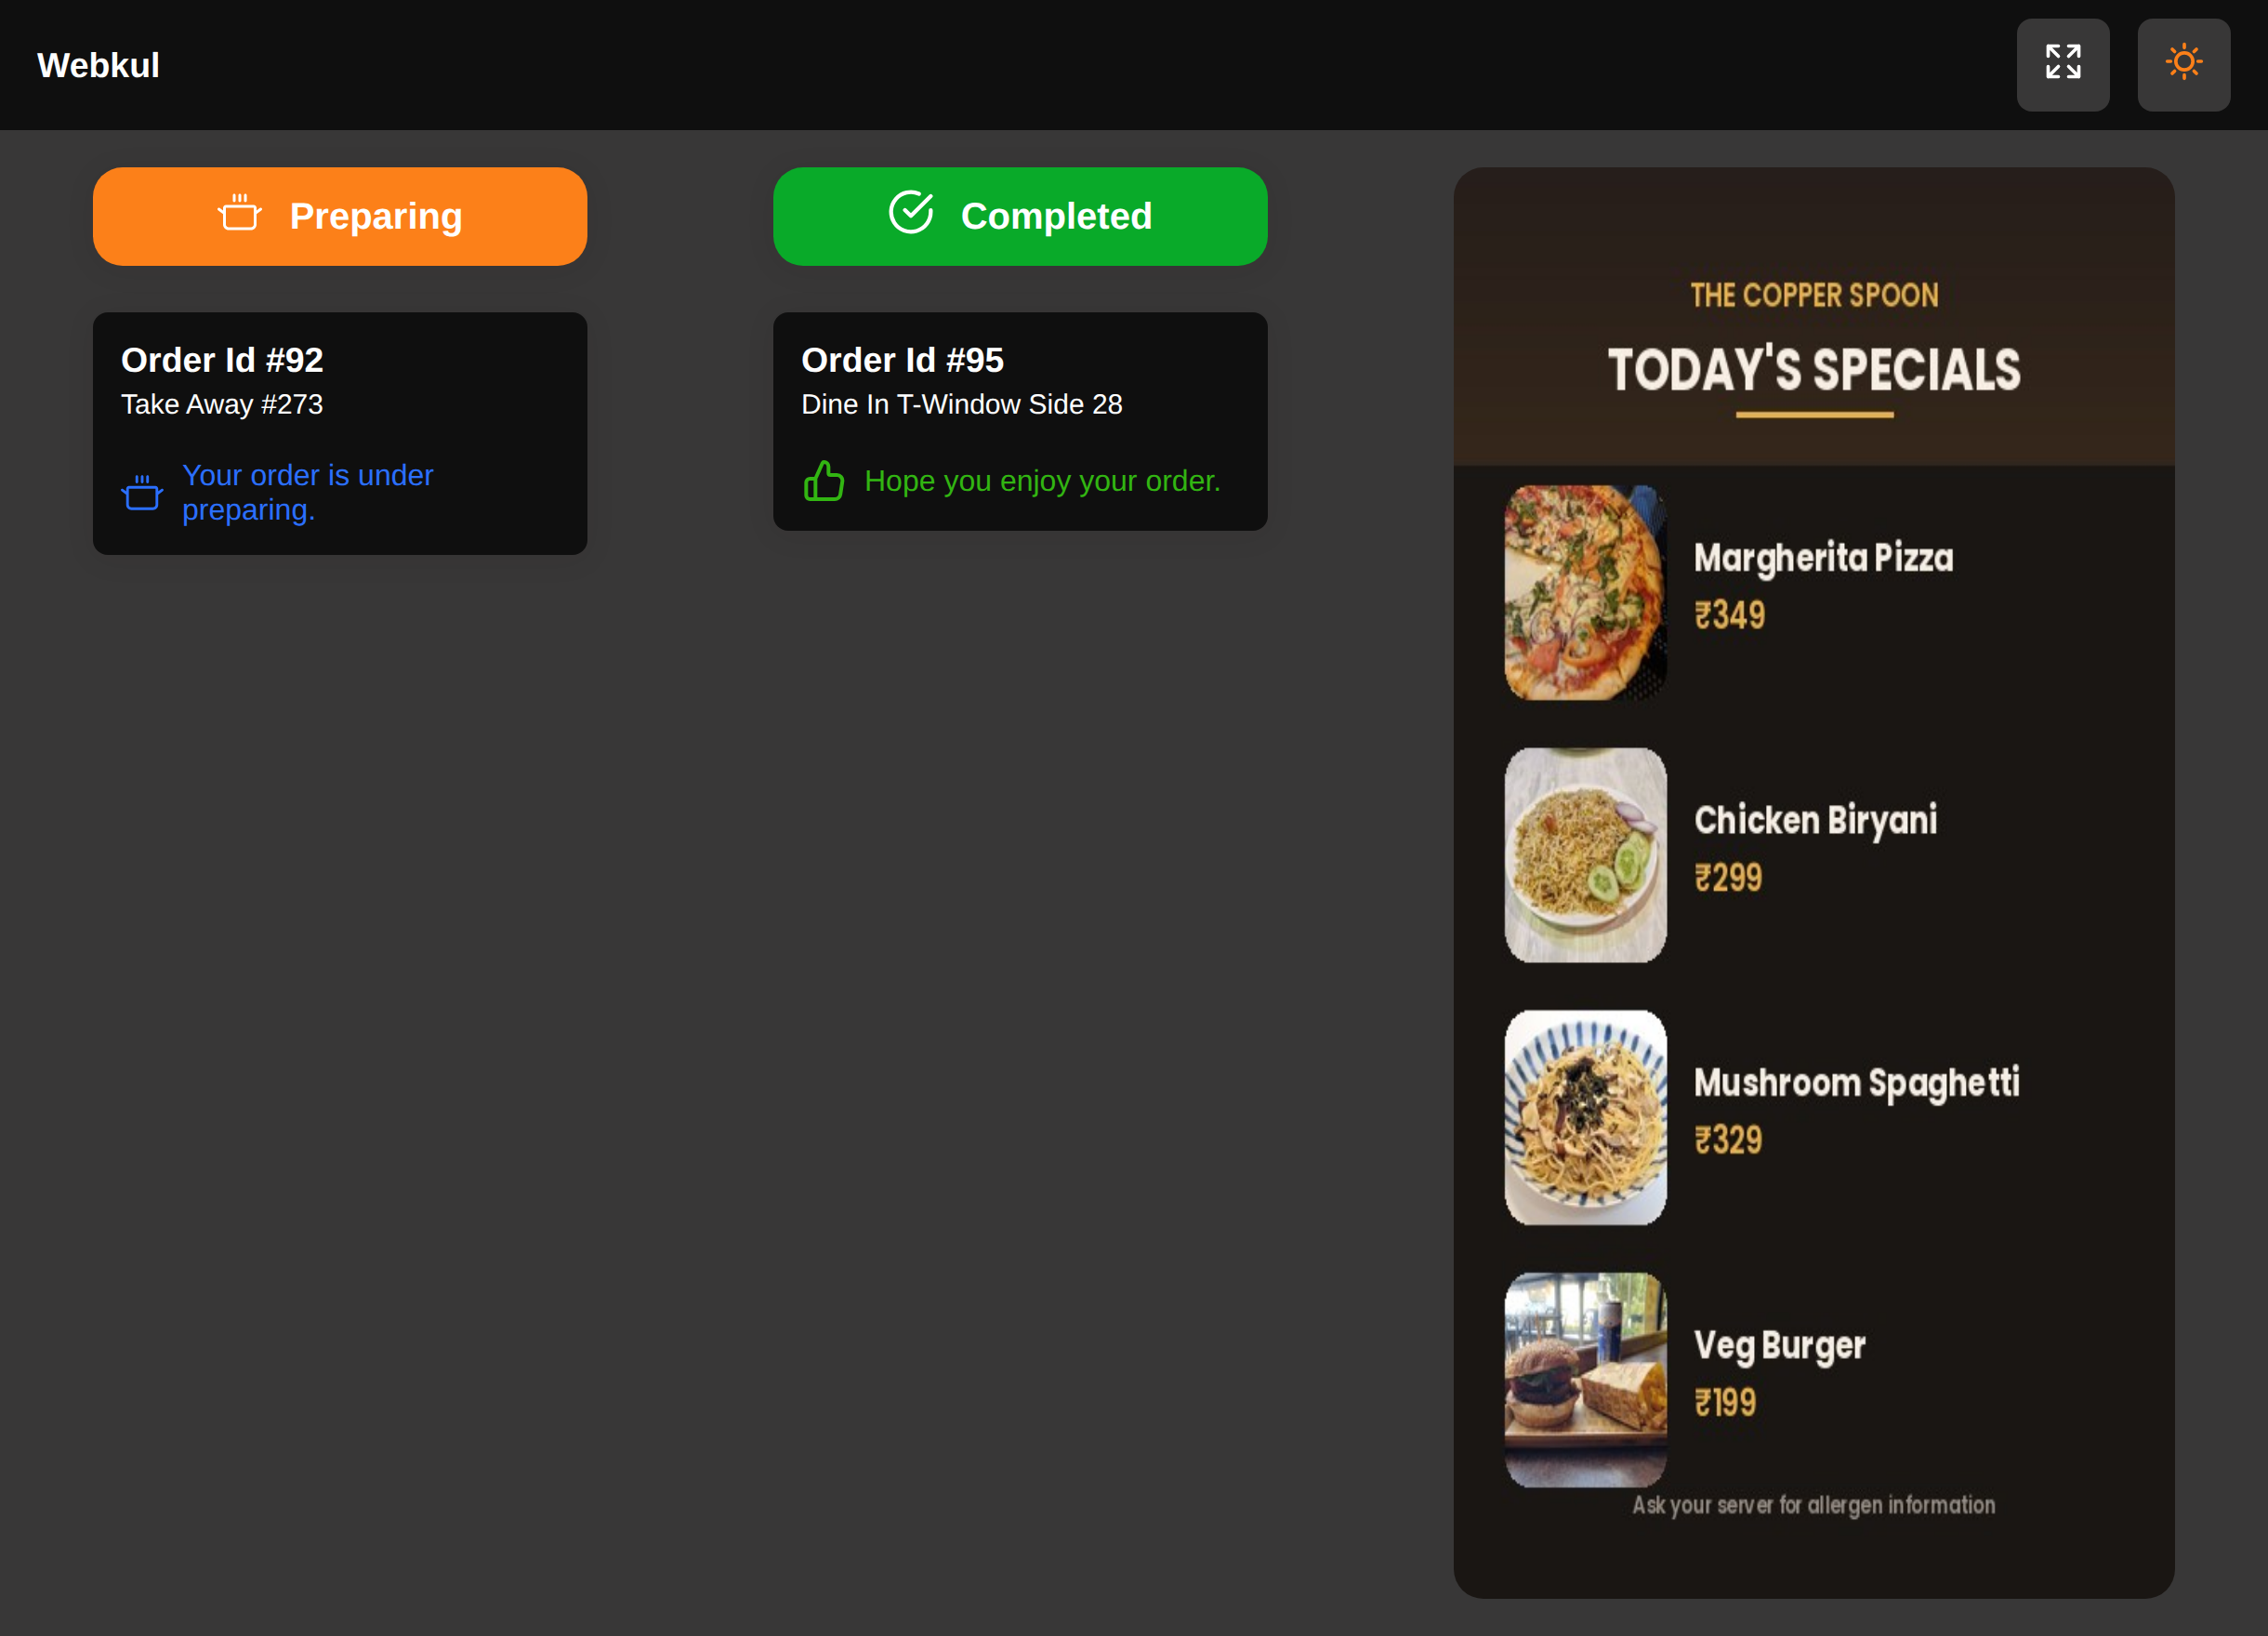
Dark mode is easier on the eye in a dimly lit dining room and gentler on a display that stays on all evening. It changes only the panels and text; your own artwork is shown exactly as uploaded.
The logo in the header and the accent colour on the display come from the Point of Sale's own General and Appearance settings — see General Settings.
Set the machine's browser to open that bookmark automatically at start up, and the screen will restore itself unattended.
Tips
Reload the display after changing anything on the outlet's Customer Screen tab. A screen that has been running since this morning keeps the wording and artwork it started with.
Two things worth knowing
- The screen is a public page. Anybody who knows the address can open it. It shows order numbers, table names and your artwork — never customer names, contact details, prices or payment information.
- Each outlet has its own display. A ticket sent at one outlet never appears on another outlet's screen.
Next step
For the full status model behind both screens, read Order Lifecycle.