
Admin Setup Wizard
The Admin Setup Wizard connects the store's own Printify shop and sets the main sync defaults in four steps.
When it opens
- Automatically, once, right after the plugin is activated.
- The first time you open Marketplace → Printify Connect while setup has not been completed.
You can reopen it at any time from:
- Re-run Setup Wizard on the Connection screen
- The Setup Wizard link under the plugin in Plugins
- Help → Setup Wizard → Open setup wizard at the top of the Printify Connect screen
Have your Printify API token ready before you start.
Step 1 — Welcome
The first screen lists the four steps: API Token, Select Shop, Sync Settings and All Set!. Links to the User Guide, a Watch Video tutorial and Need Support are available on every step.
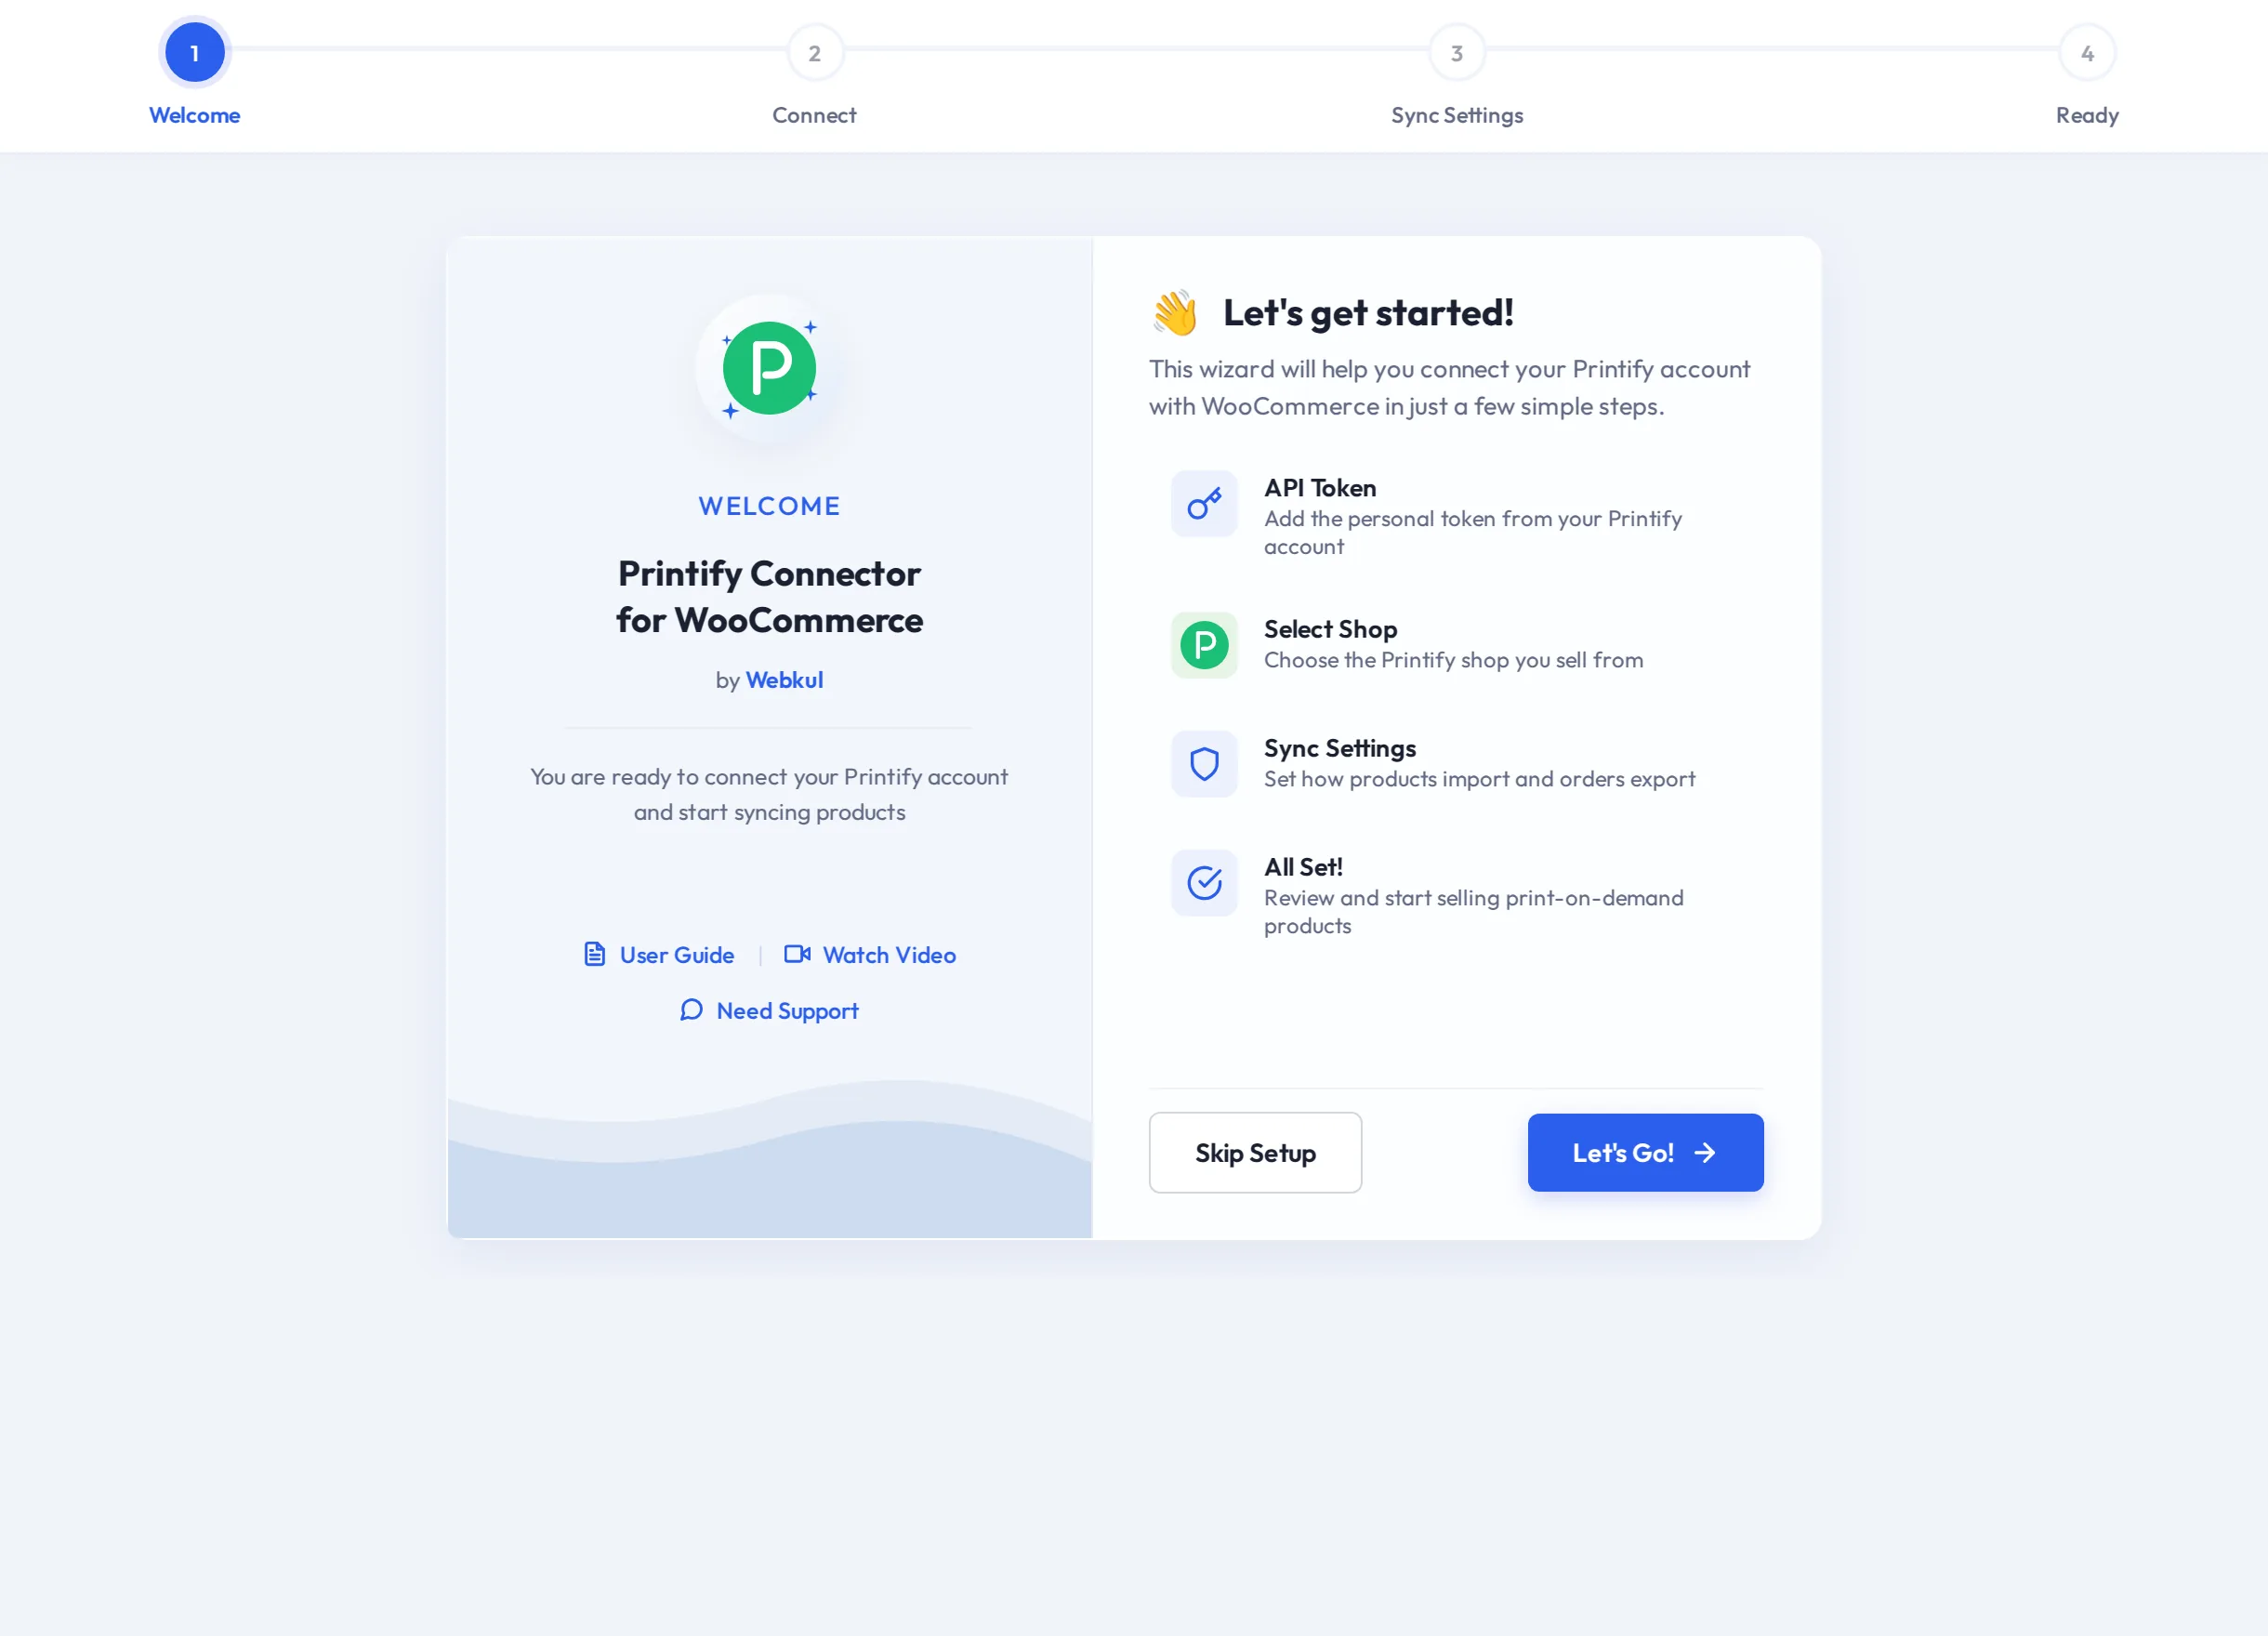
Select Let's Go! to begin, or Skip Setup to go straight to the connector and connect later from the Connection screen.
Step 2 — Connect
- Paste your Printify token into API Token. If a token is already saved, you can leave the field blank to keep it.
- Select Verify Token.
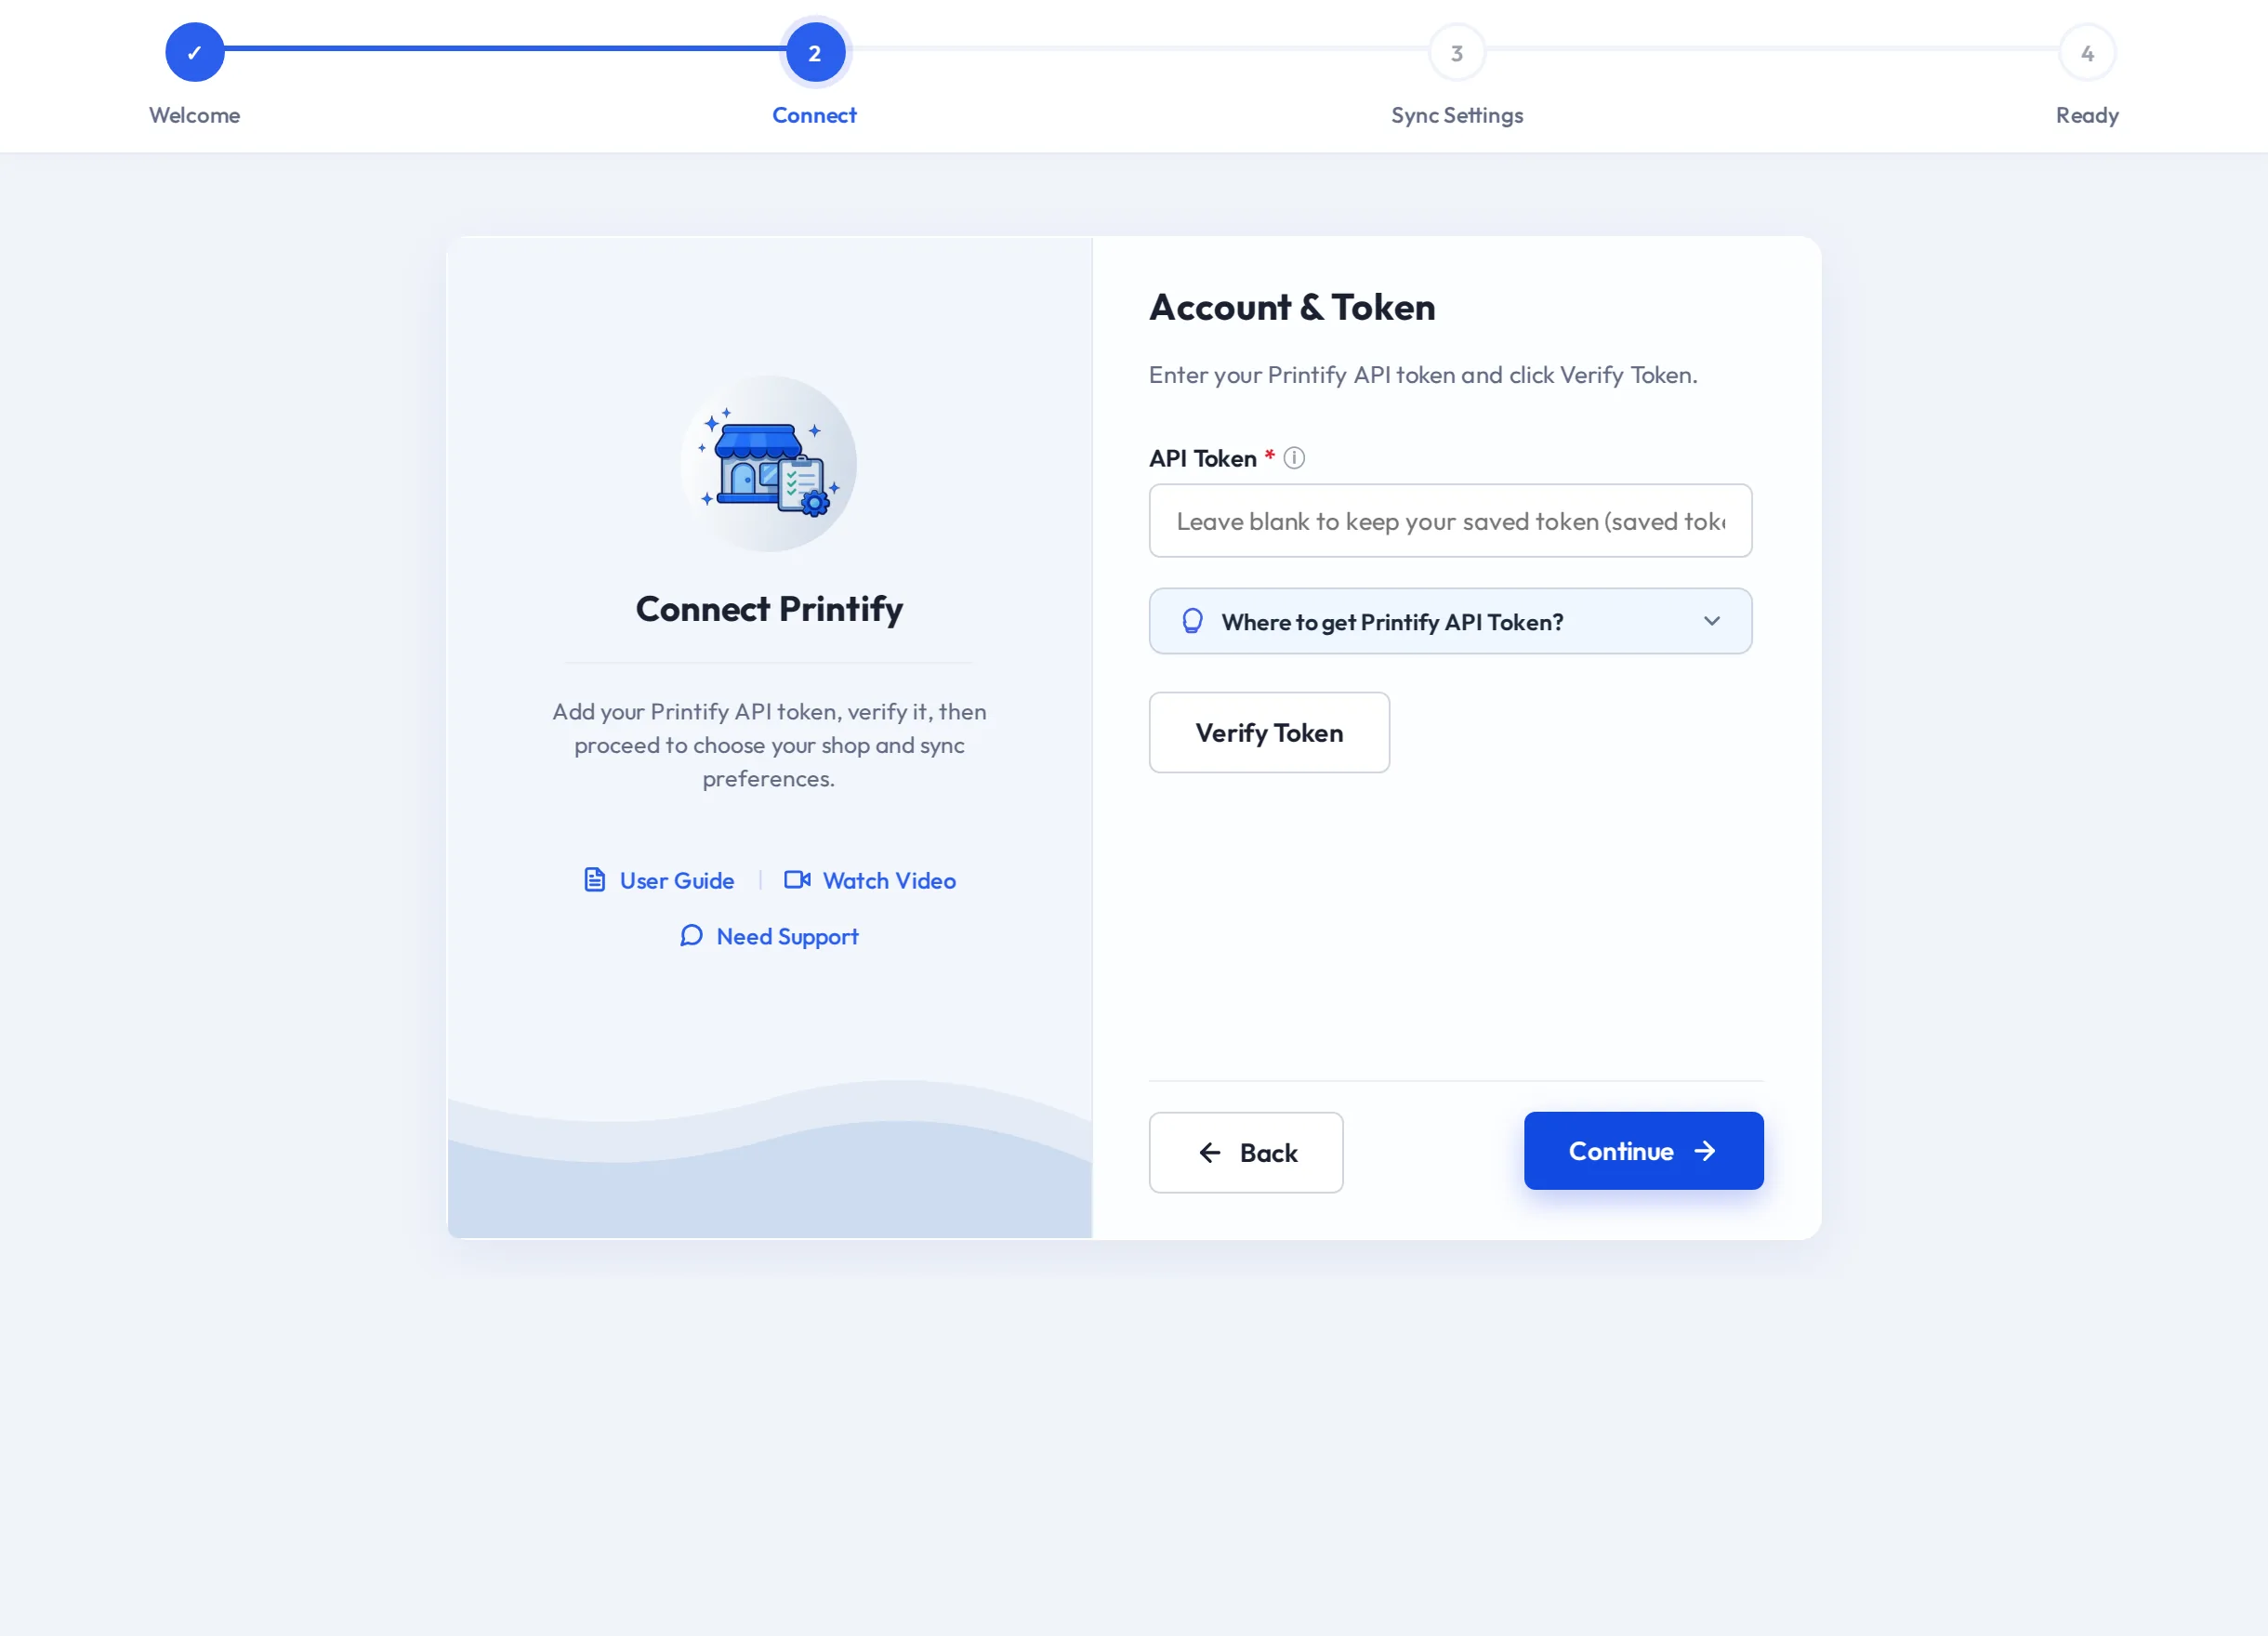
When Printify accepts the token, the wizard confirms Token verified successfully! Click Continue to proceed.
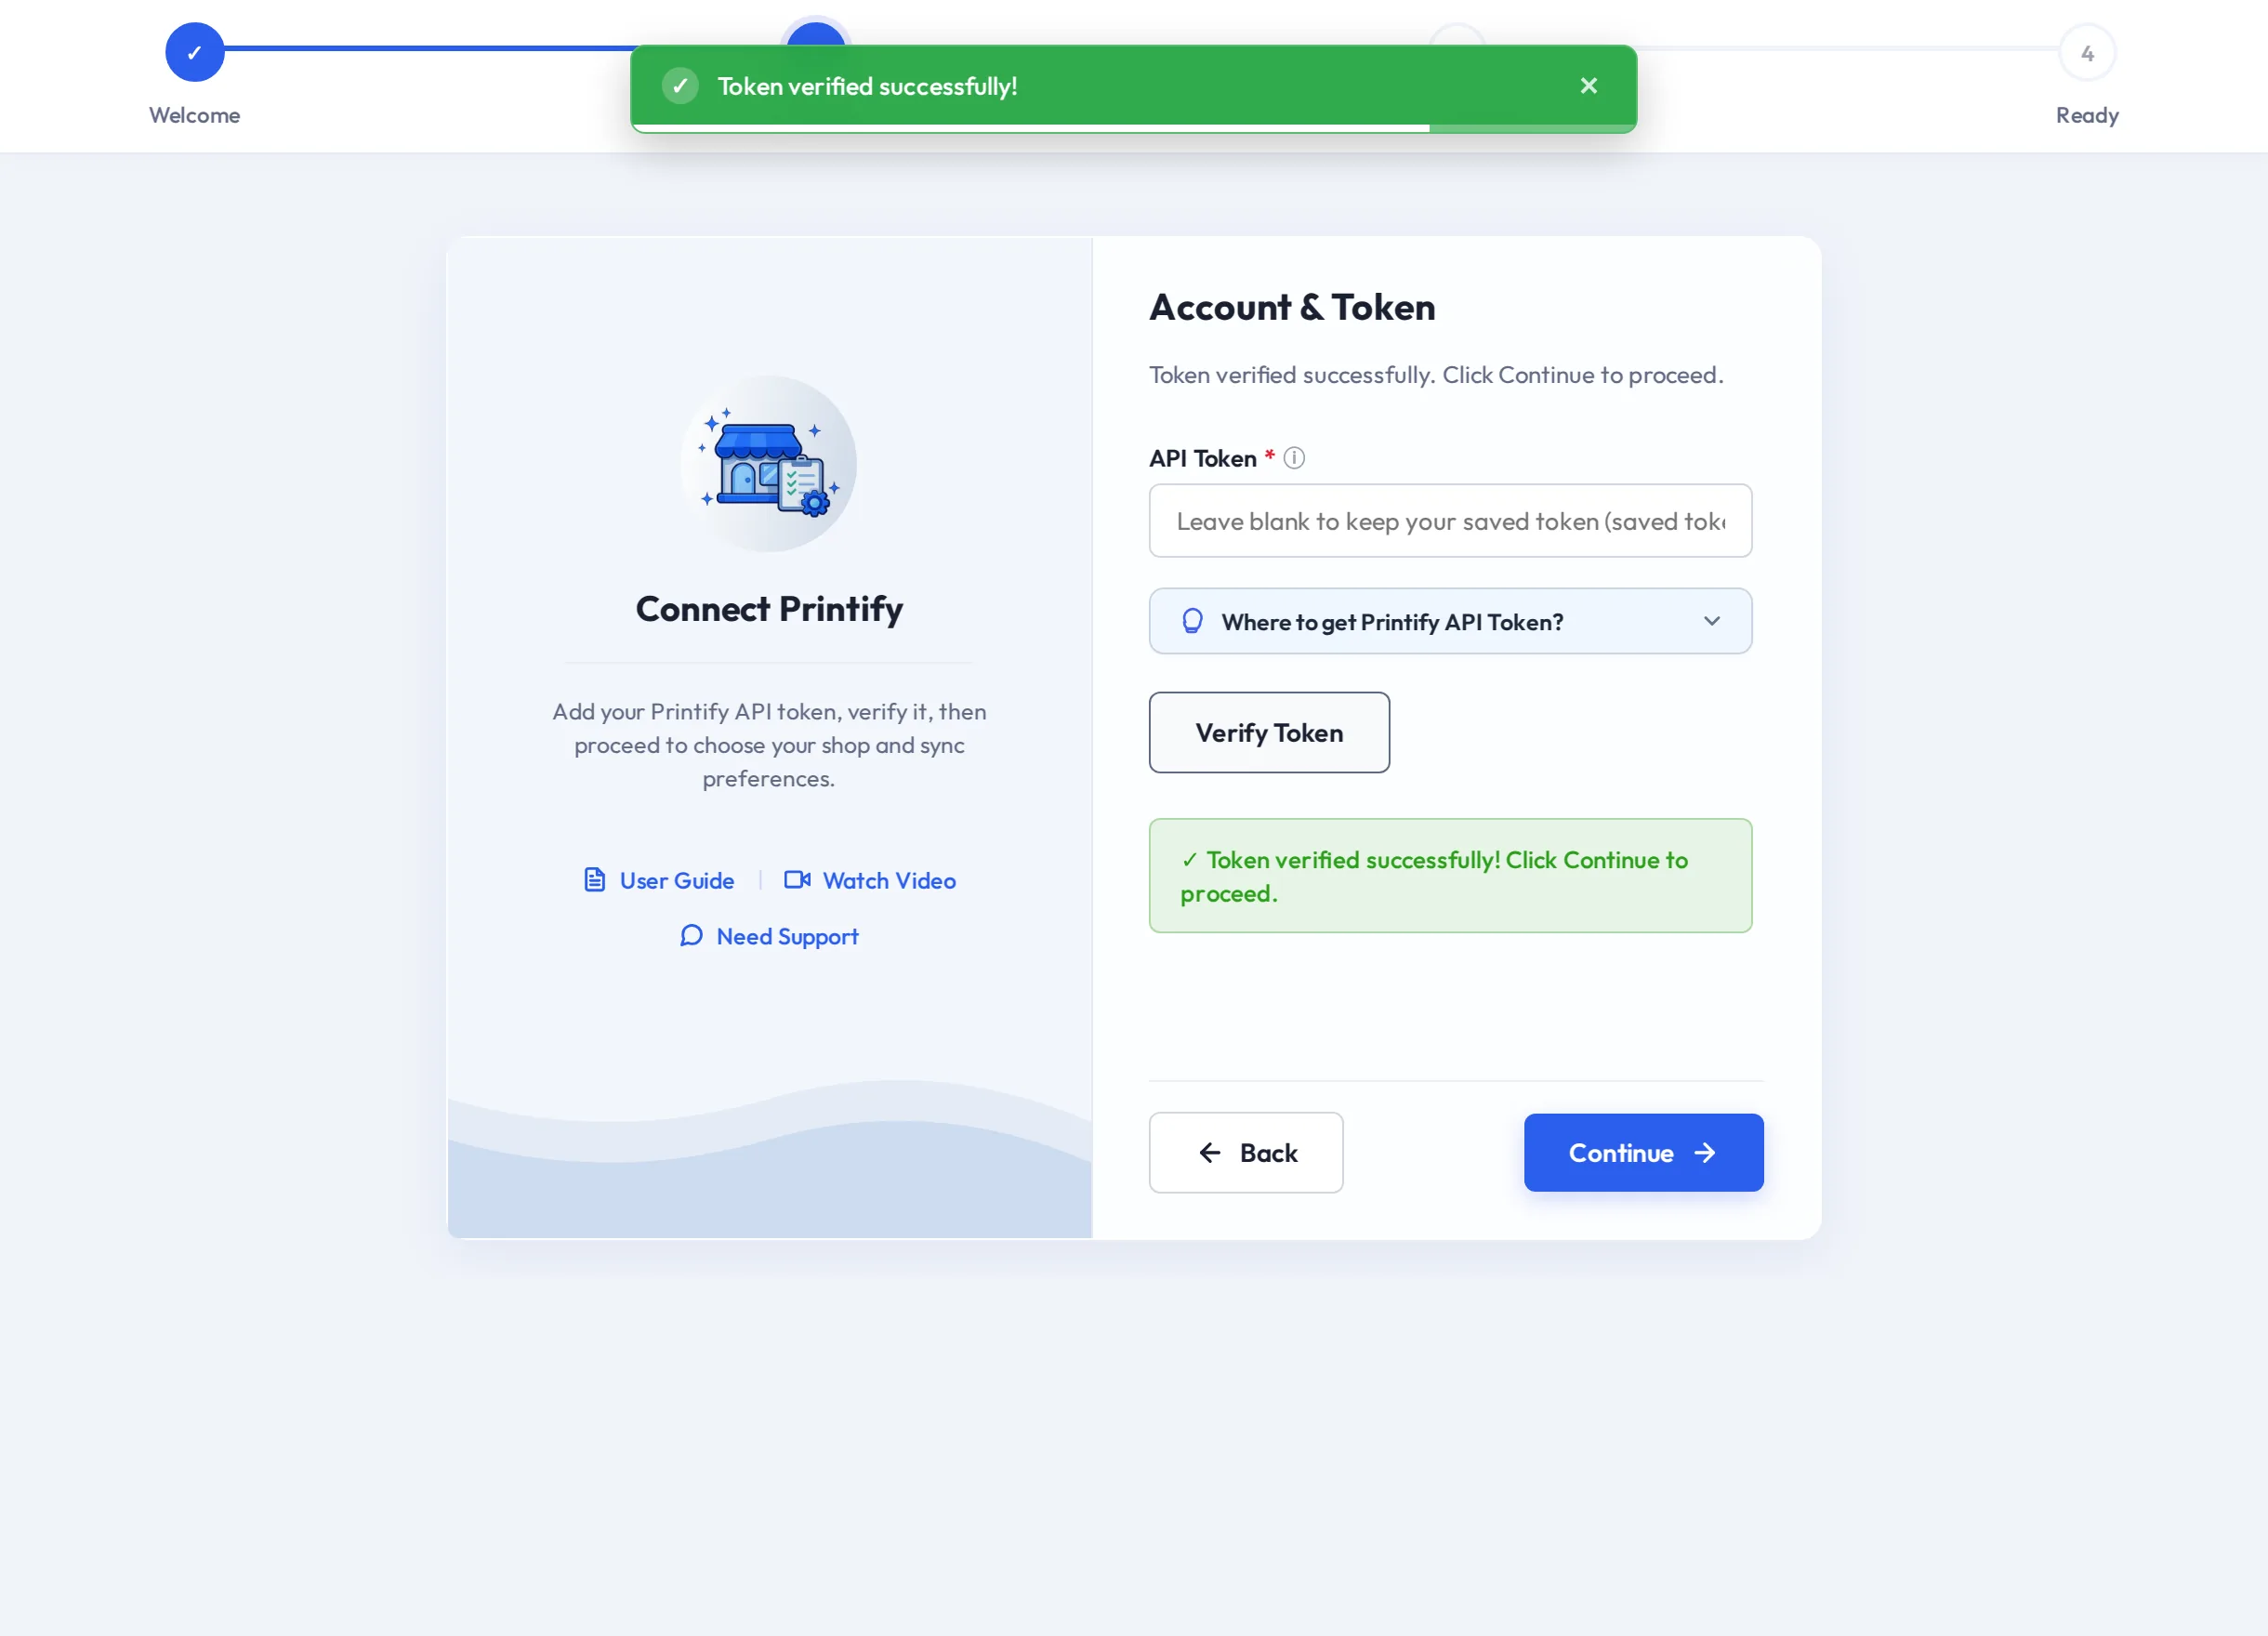
- Select Continue.
Step 3 — Sync Settings
Choose the shop and the defaults for imported products and new orders.
| Field | What it does |
|---|---|
| Printify Shop | The Printify shop that products and orders sync with. Lists every shop the token can access. Required. |
| Default Category | WooCommerce category given to every imported product. |
| Import Products As | Publish puts products on sale at once. Draft keeps them hidden for review. |
| Auto Export Orders | Enable sends new orders that contain Printify products to Printify as soon as they are placed. |
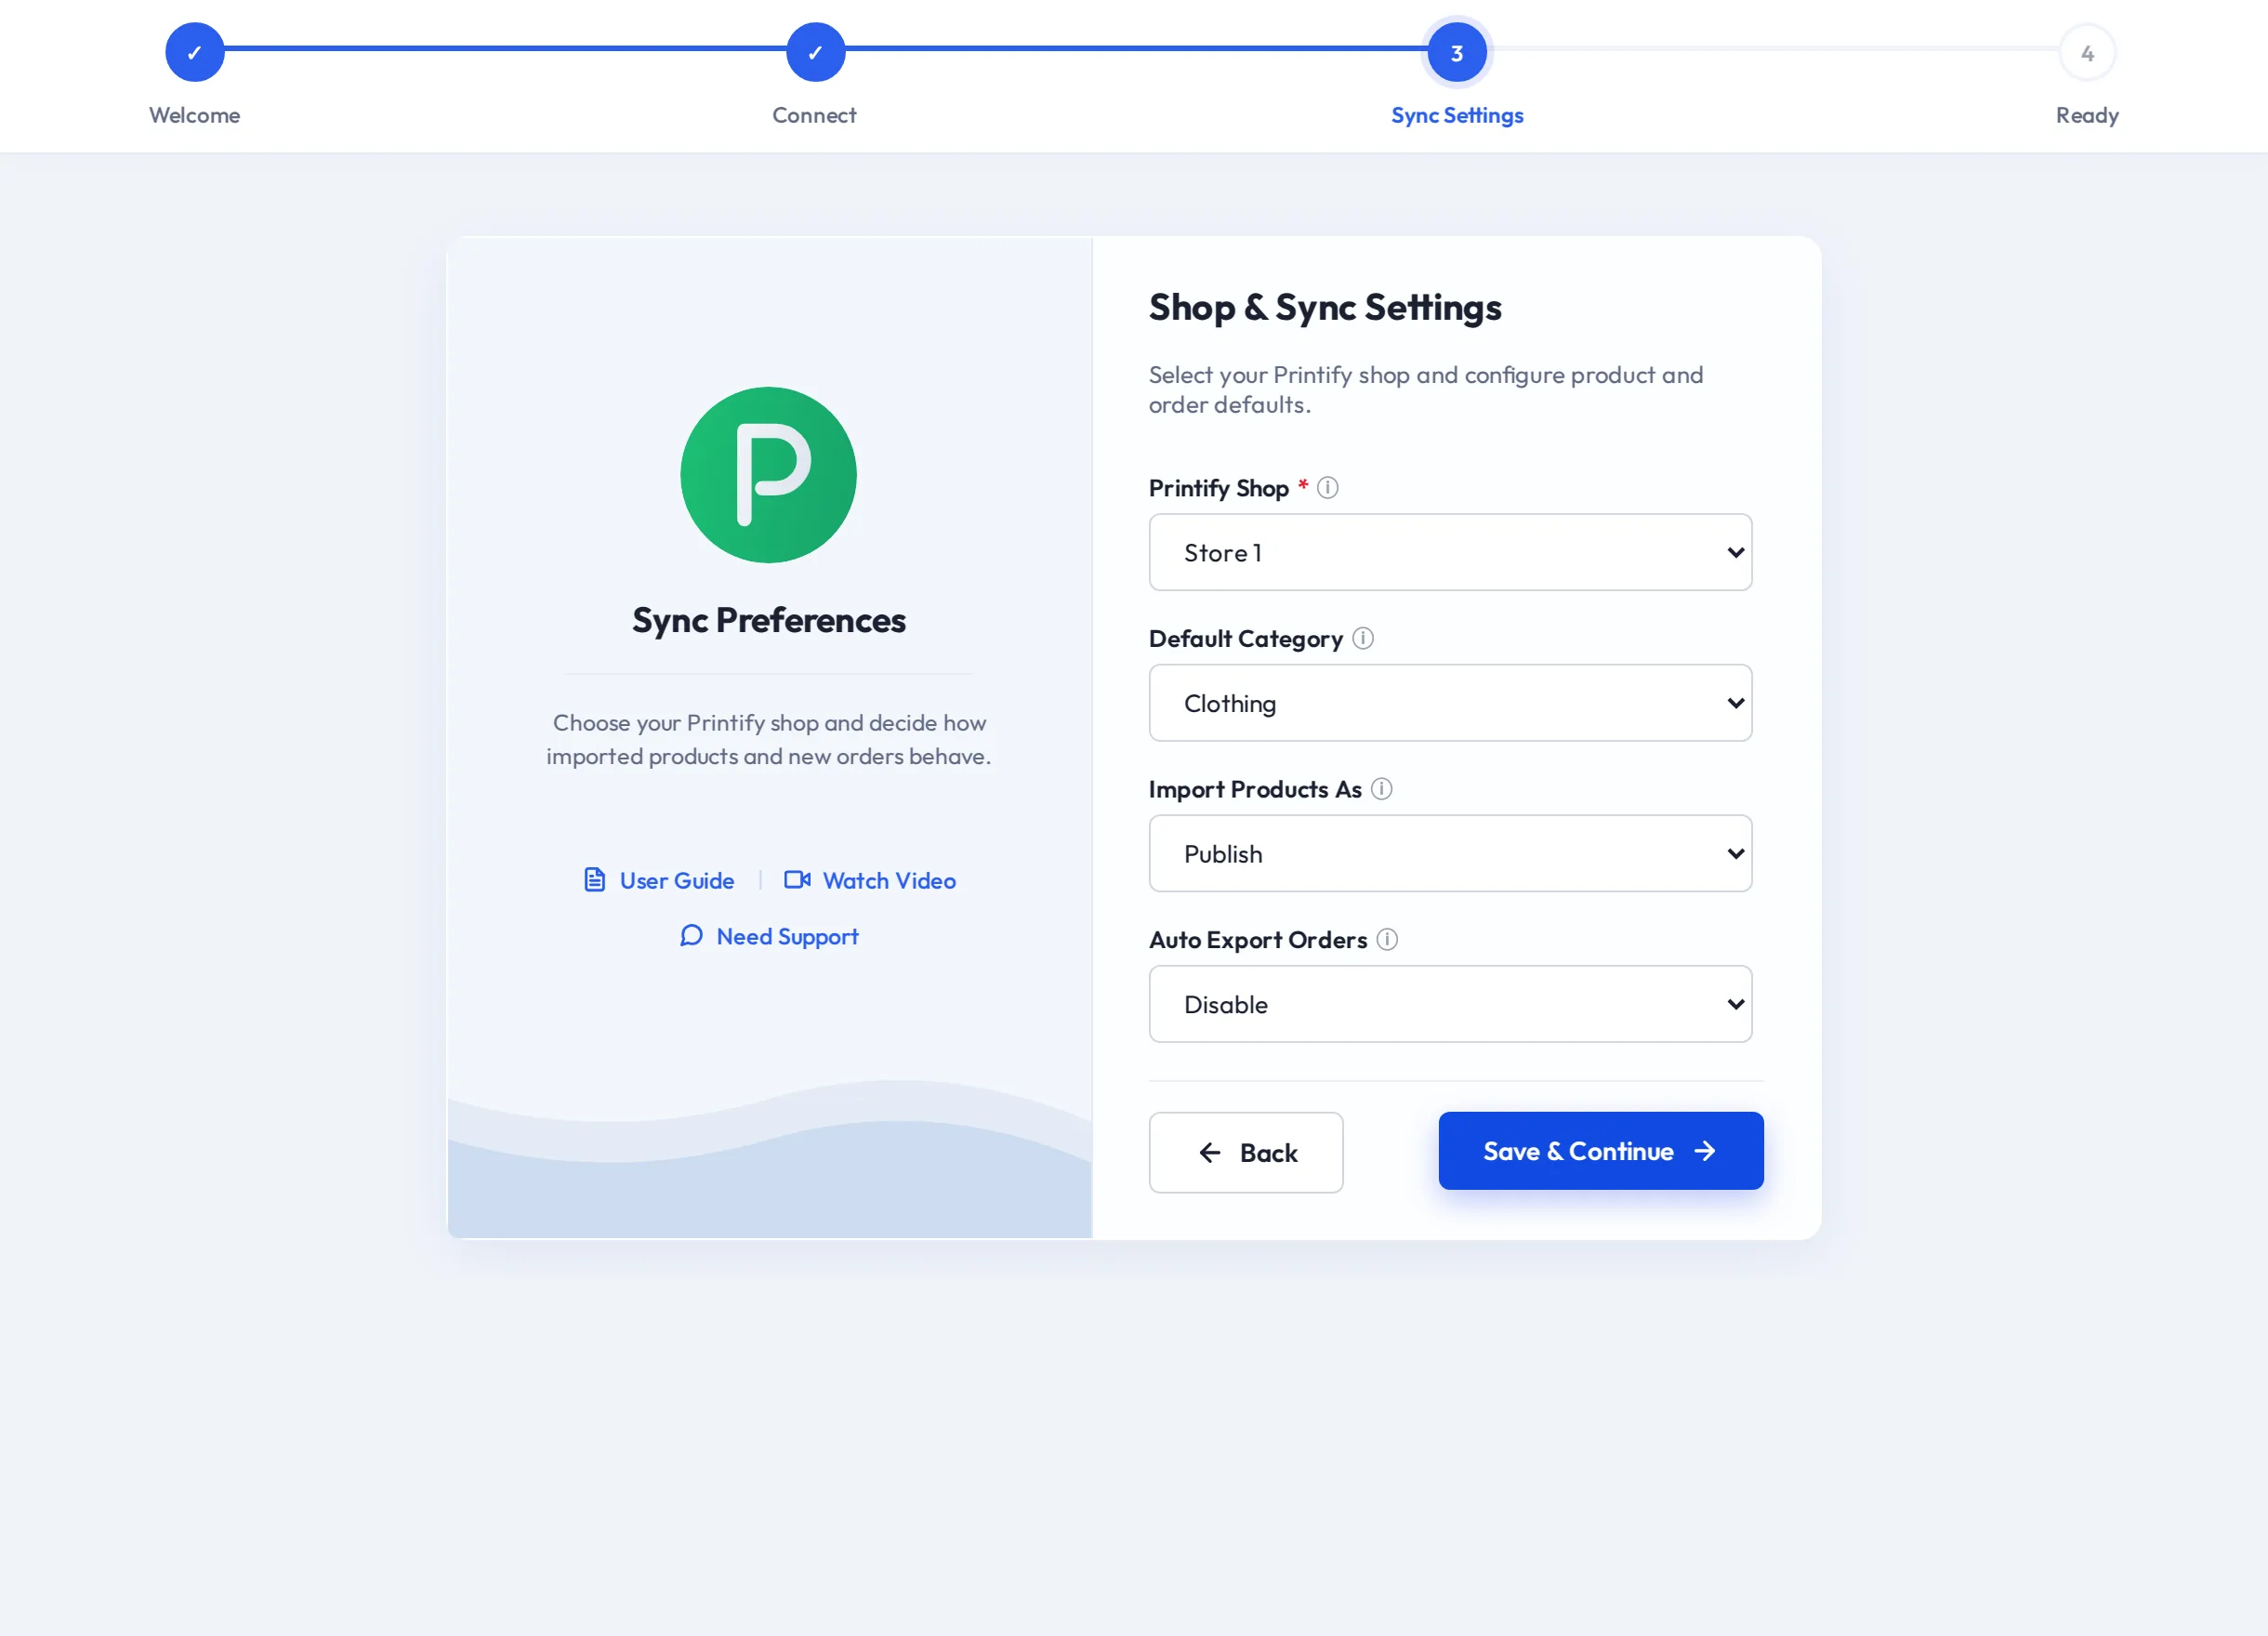
Select Save & Continue. The wizard saves the connection, registers the Printify webhooks and saves these settings.
Step 4 — Ready
The last step confirms You are All Set! and summarises the Connection Status, Printify Shop, Default Category, Import Products As and Auto Export Orders.
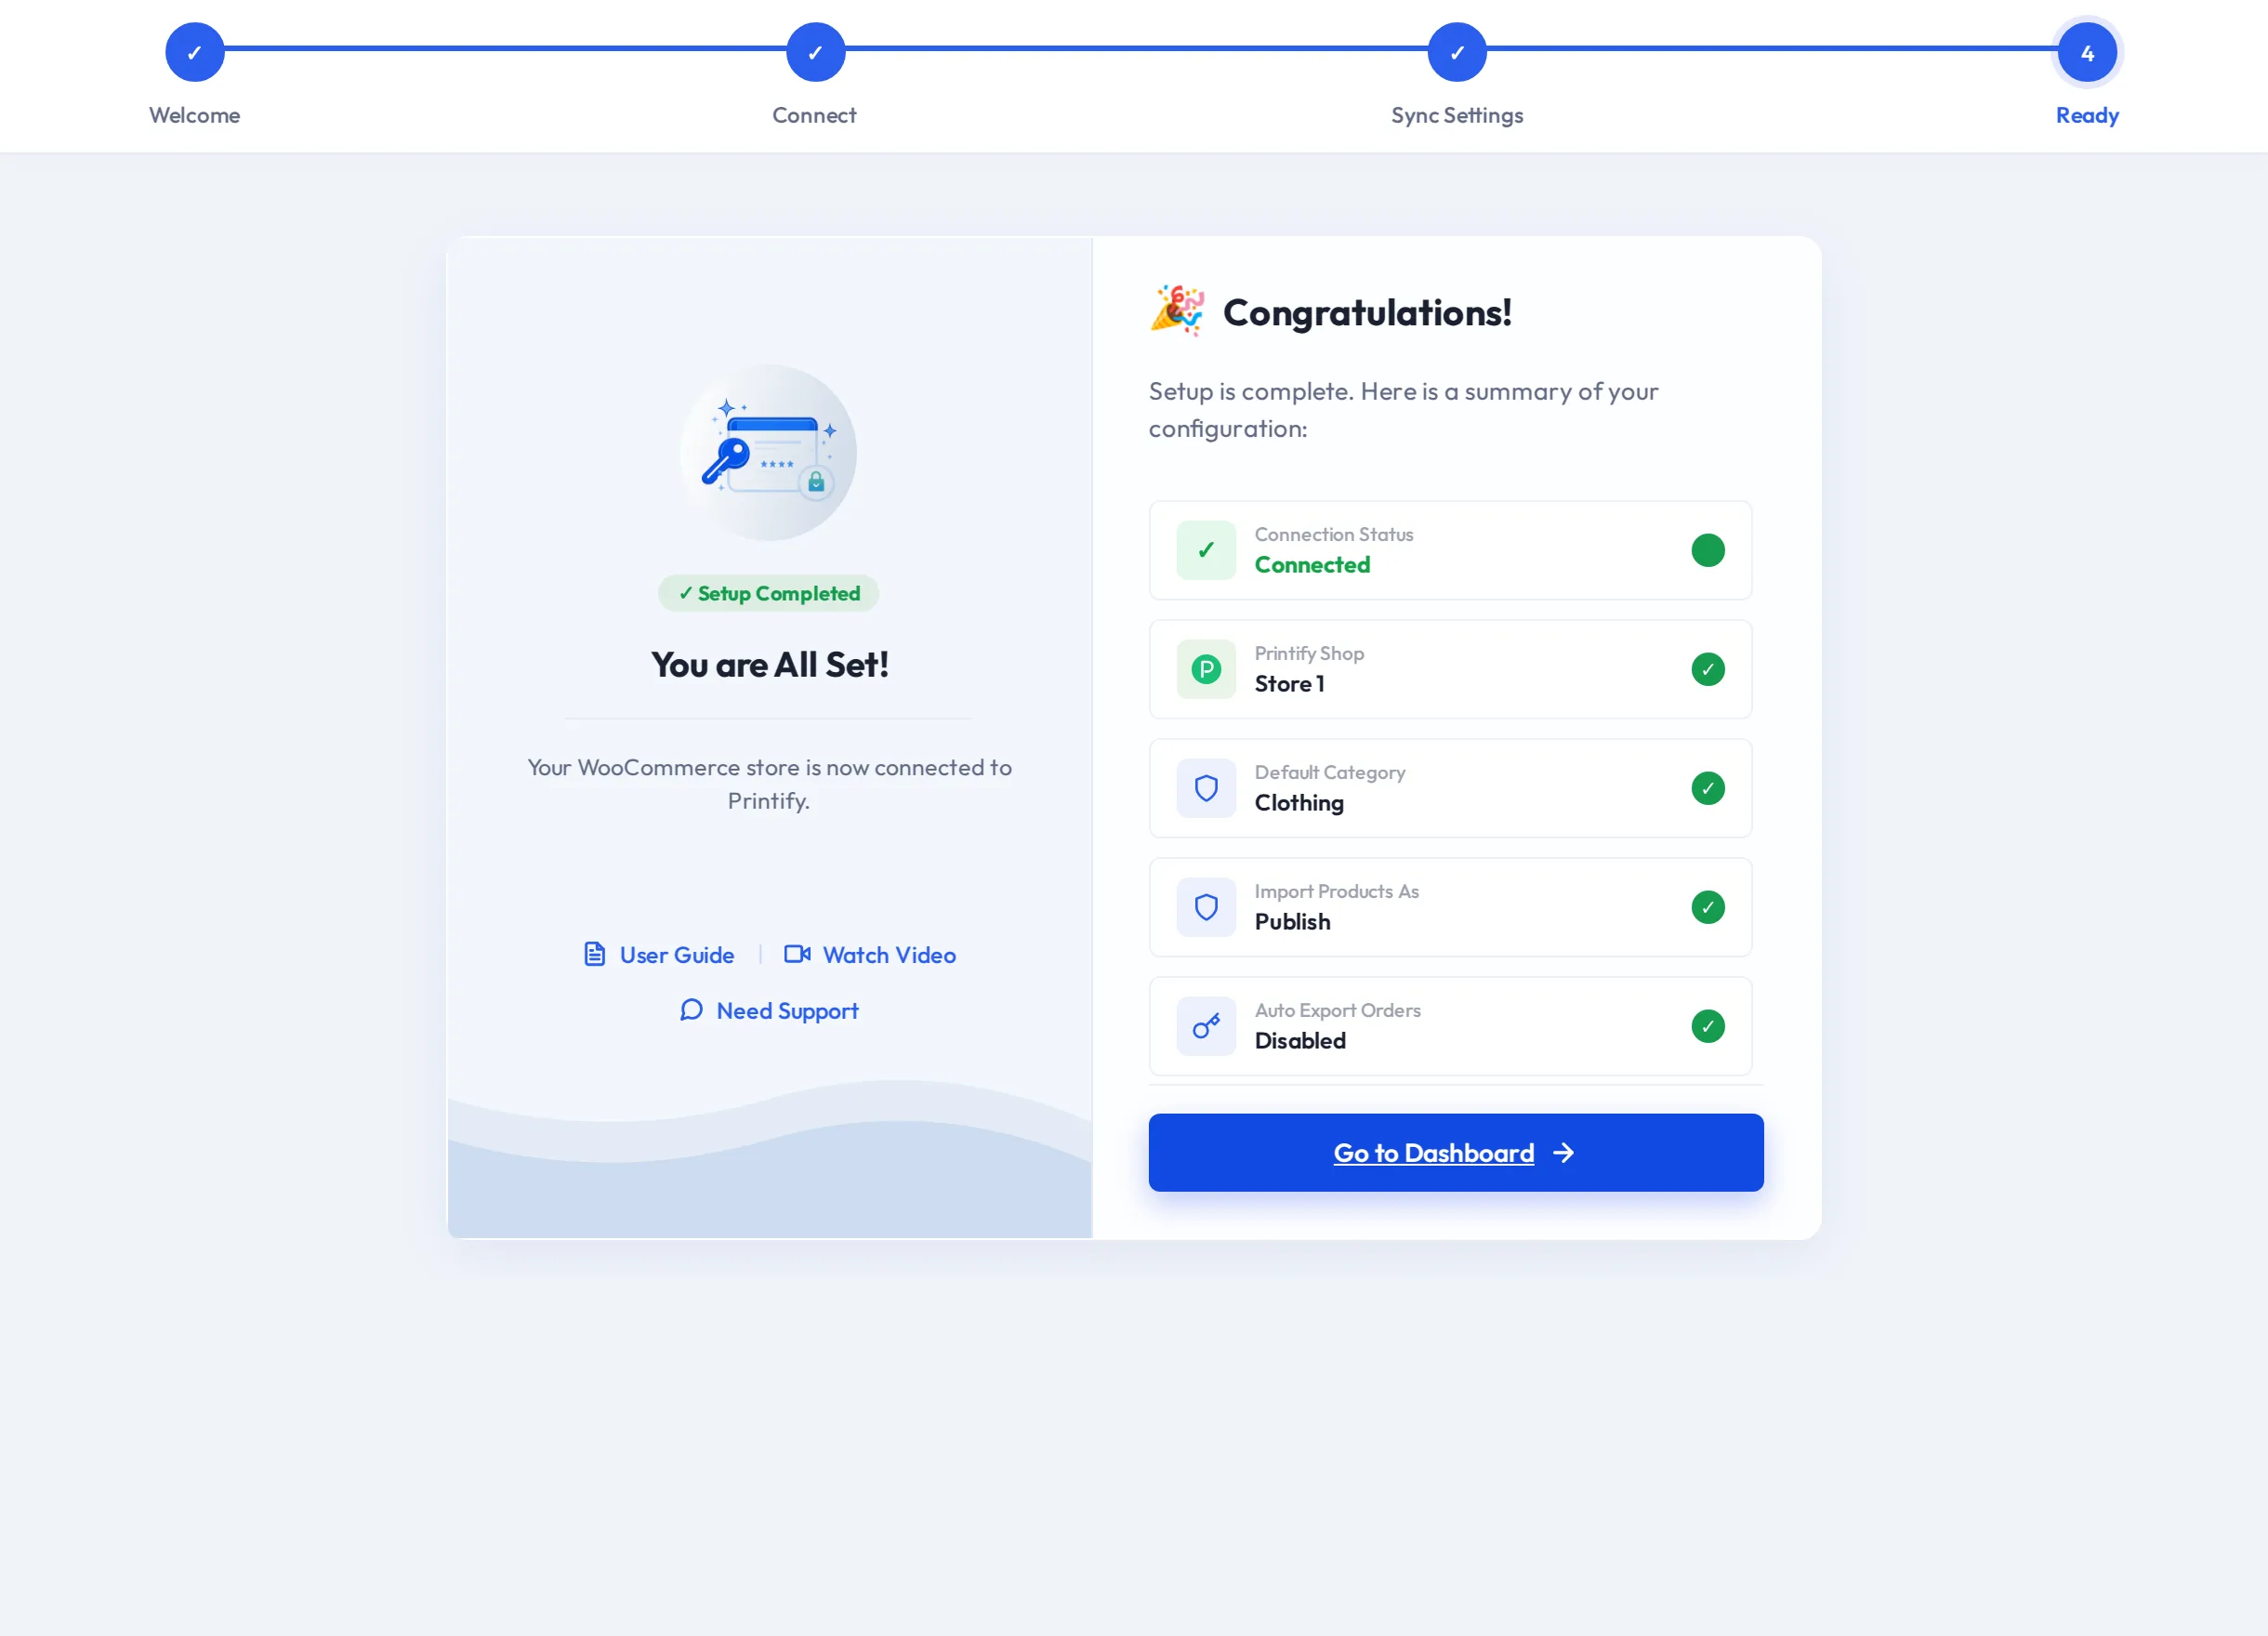
Select Go to Dashboard to open Marketplace → Printify Connect.
If something goes wrong
| Message | What to do |
|---|---|
| API token is required. | Paste the token before selecting Verify Token |
| The API token you entered is not valid. Please check it and try again. | Copy the token again, or generate a new one in Printify |
| No Printify shops are available for this token. | Create a shop in Printify, or use a token from the account that owns the shop |
| Please click "Verify Token" to verify your API token before continuing. | Select Verify Token, then Continue |
| This API token cannot access the selected Printify shop. | Choose one of the shops listed for this token |
| This Printify store is already connected to another account. | Pick a different shop, or disconnect it from the other account first |
| Your session has expired. Please reload the page and try again. | Reload the page and repeat the step |
What to do next
- Imported Products — bring your Printify catalogue into WooCommerce
- Sync Settings — choose what updates automatically
- Vendor Setup Wizard — share with your vendors