
Get Printify API Token
The connector signs in to Printify with a Personal Access Token. The admin and each vendor generate their own token from their own Printify account.
Before you start
- You need a Printify account with at least one shop. The token only gives access to the shops in that account.
- Keep the token private. Anyone who has it can read and change your Printify shop.
Generate the token
- Log in to Printify and open Account Settings (
printify.com/app/account/api). - Go to My Profile → Connections.
- Scroll down to Personal Access Tokens and select Generate.
- Enter a name for the token, for example
WooCommerce Store, choose the scopes and select Generate Token. - Copy the token string. Printify shows it only once.
The same steps are shown inside the plugin: select Where to get Printify API Token? under the API Token field.
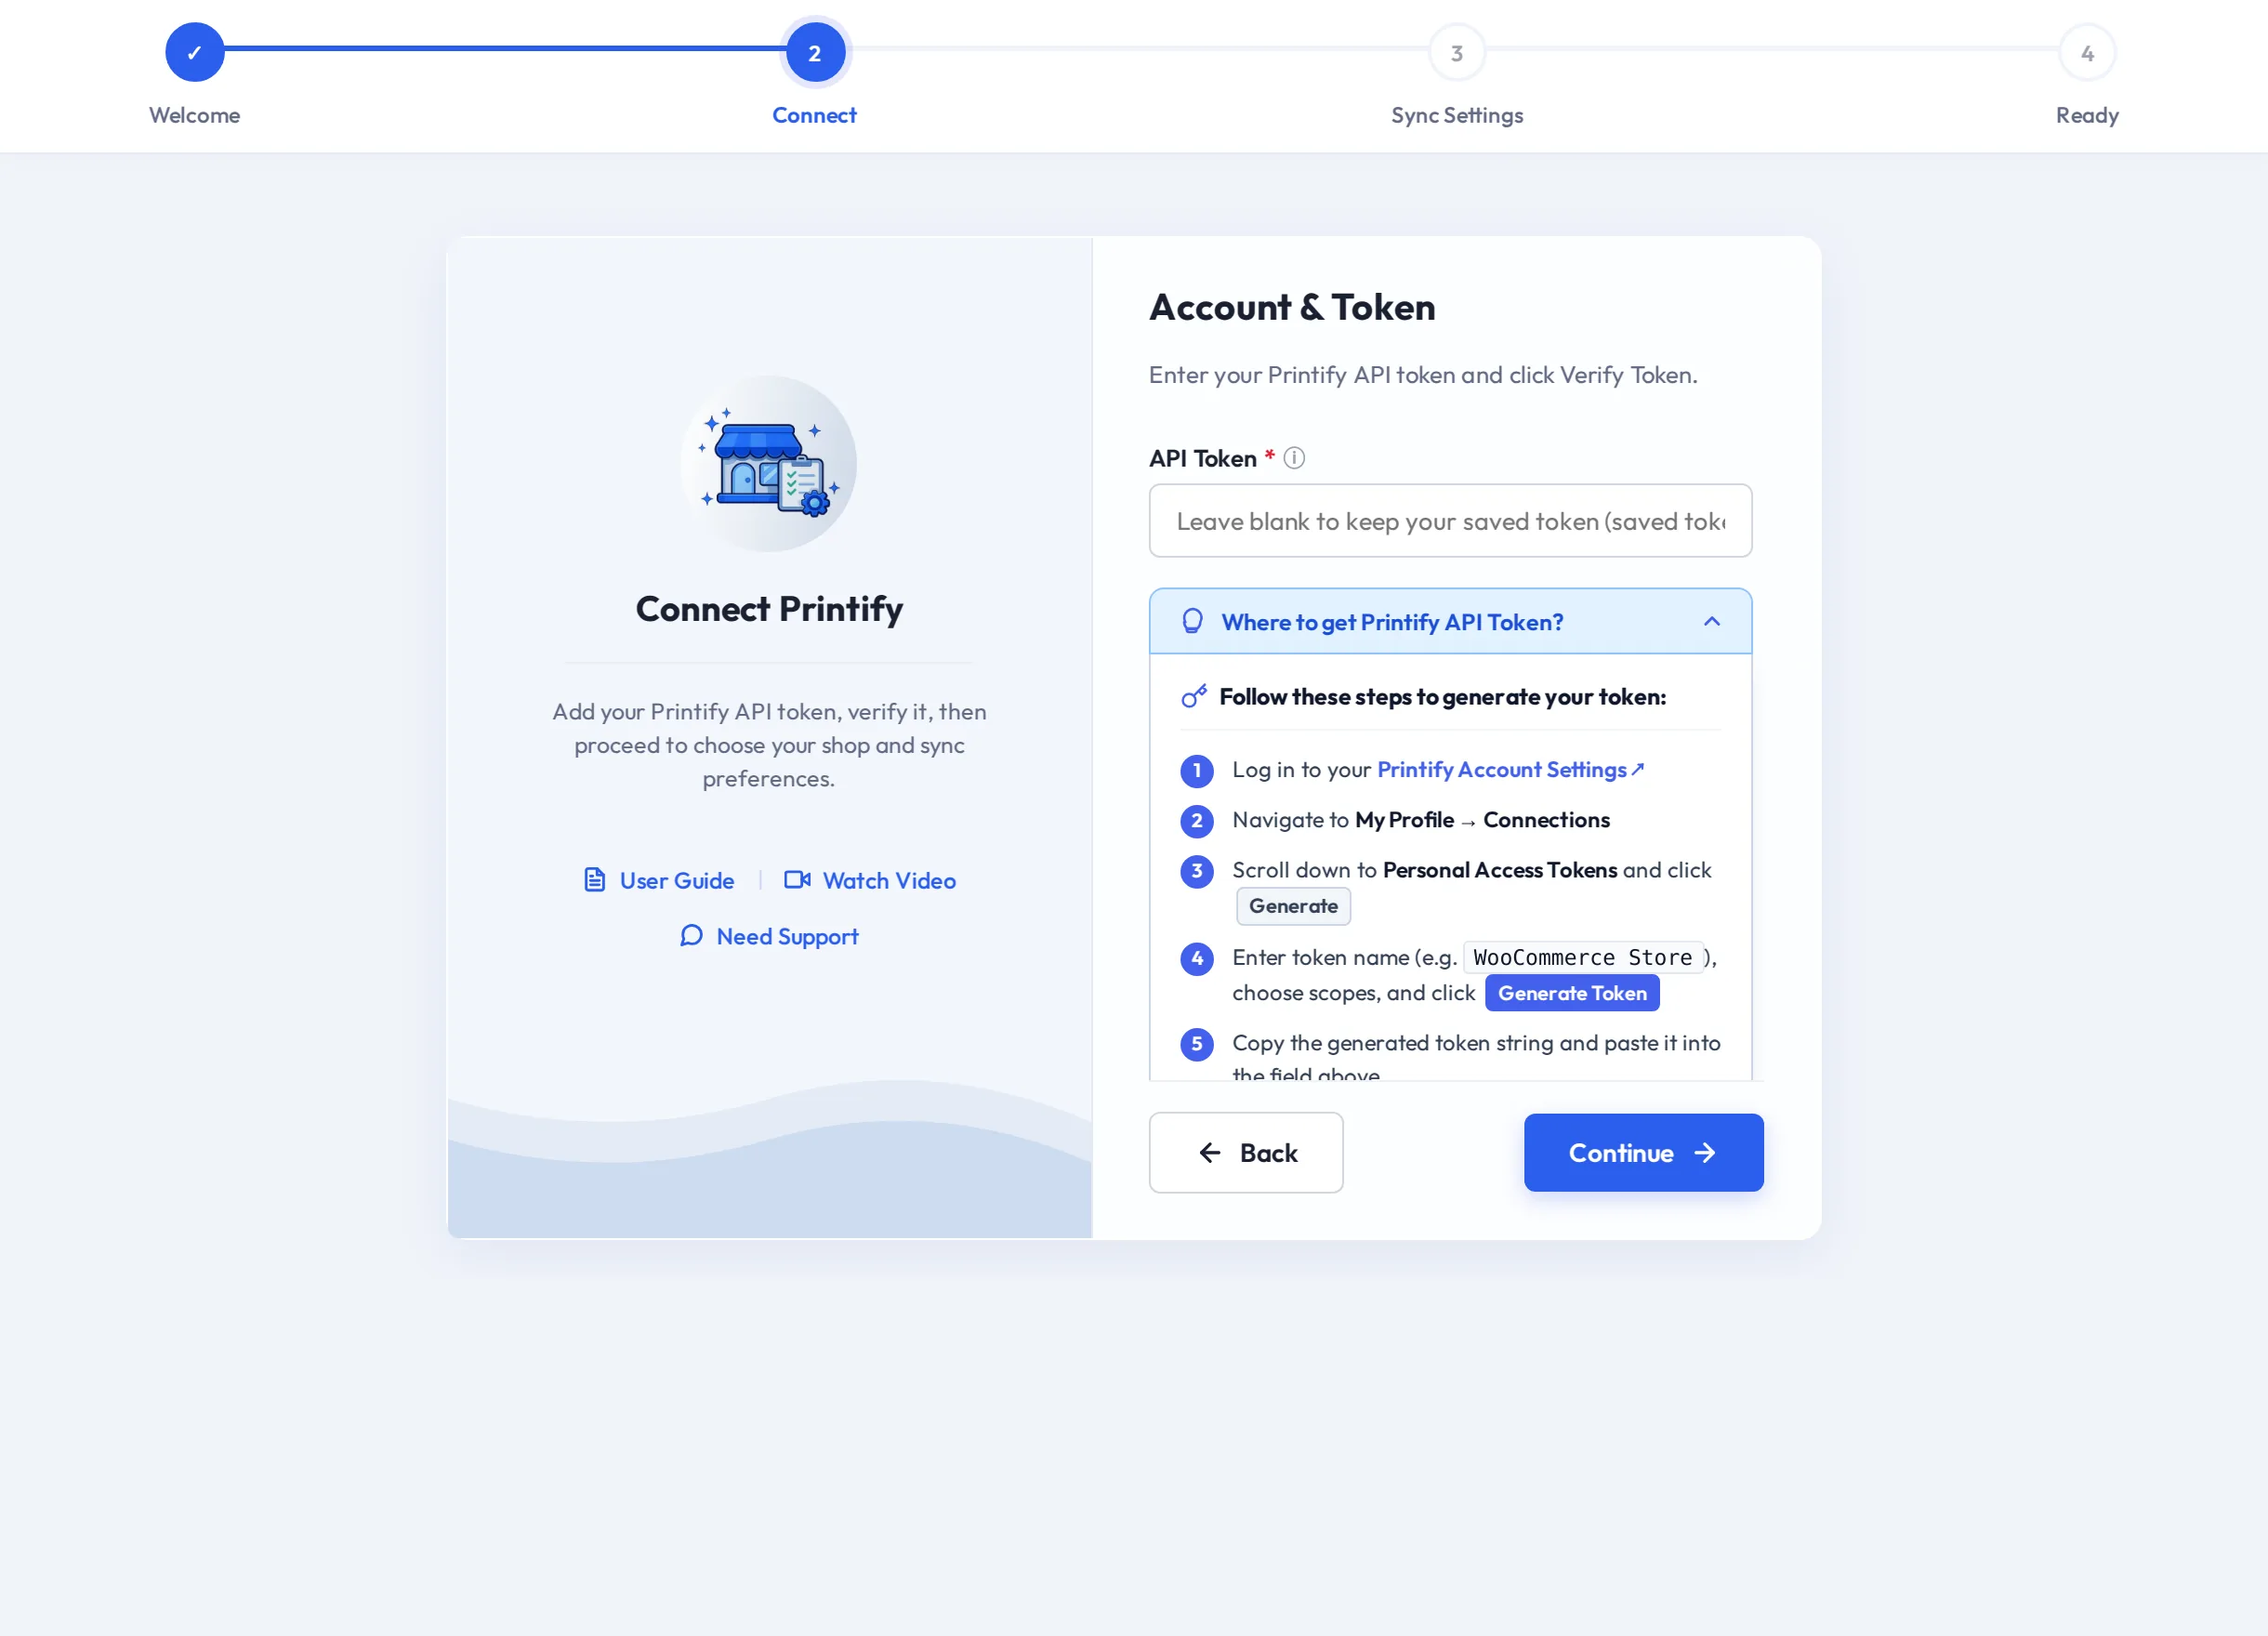
Choose scopes that cover shops, products, orders and webhooks. The connector reads your shops and products, creates orders and registers webhooks. If you give the token fewer scopes, those actions are refused by Printify.
Use the token
Paste the token into the API Token field in the Admin Setup Wizard, the Vendor Setup Wizard or the Connection screen, then select Verify Token or Connect.
If you regenerate or revoke the token
The connector stops working with the old token at once, and the Connection screen shows Token Rejected. Generate a new token and use Connect Again / Change Shop to paste it.