
Installation
Installing the connector is a normal WordPress plugin installation, done once by the marketplace admin.
Before you start
| Requirement | Minimum | Why |
|---|---|---|
| WordPress | 6.7 | Plugin platform |
| PHP | 7.4 | Plugin platform |
| WooCommerce | 10.0 | Products, orders and order statuses |
| Multi Vendor Marketplace for WooCommerce (Webkul) | 6.0 | Vendor accounts and the vendor dashboard |
| A Printify account | — | With at least one shop and a Personal Access Token |
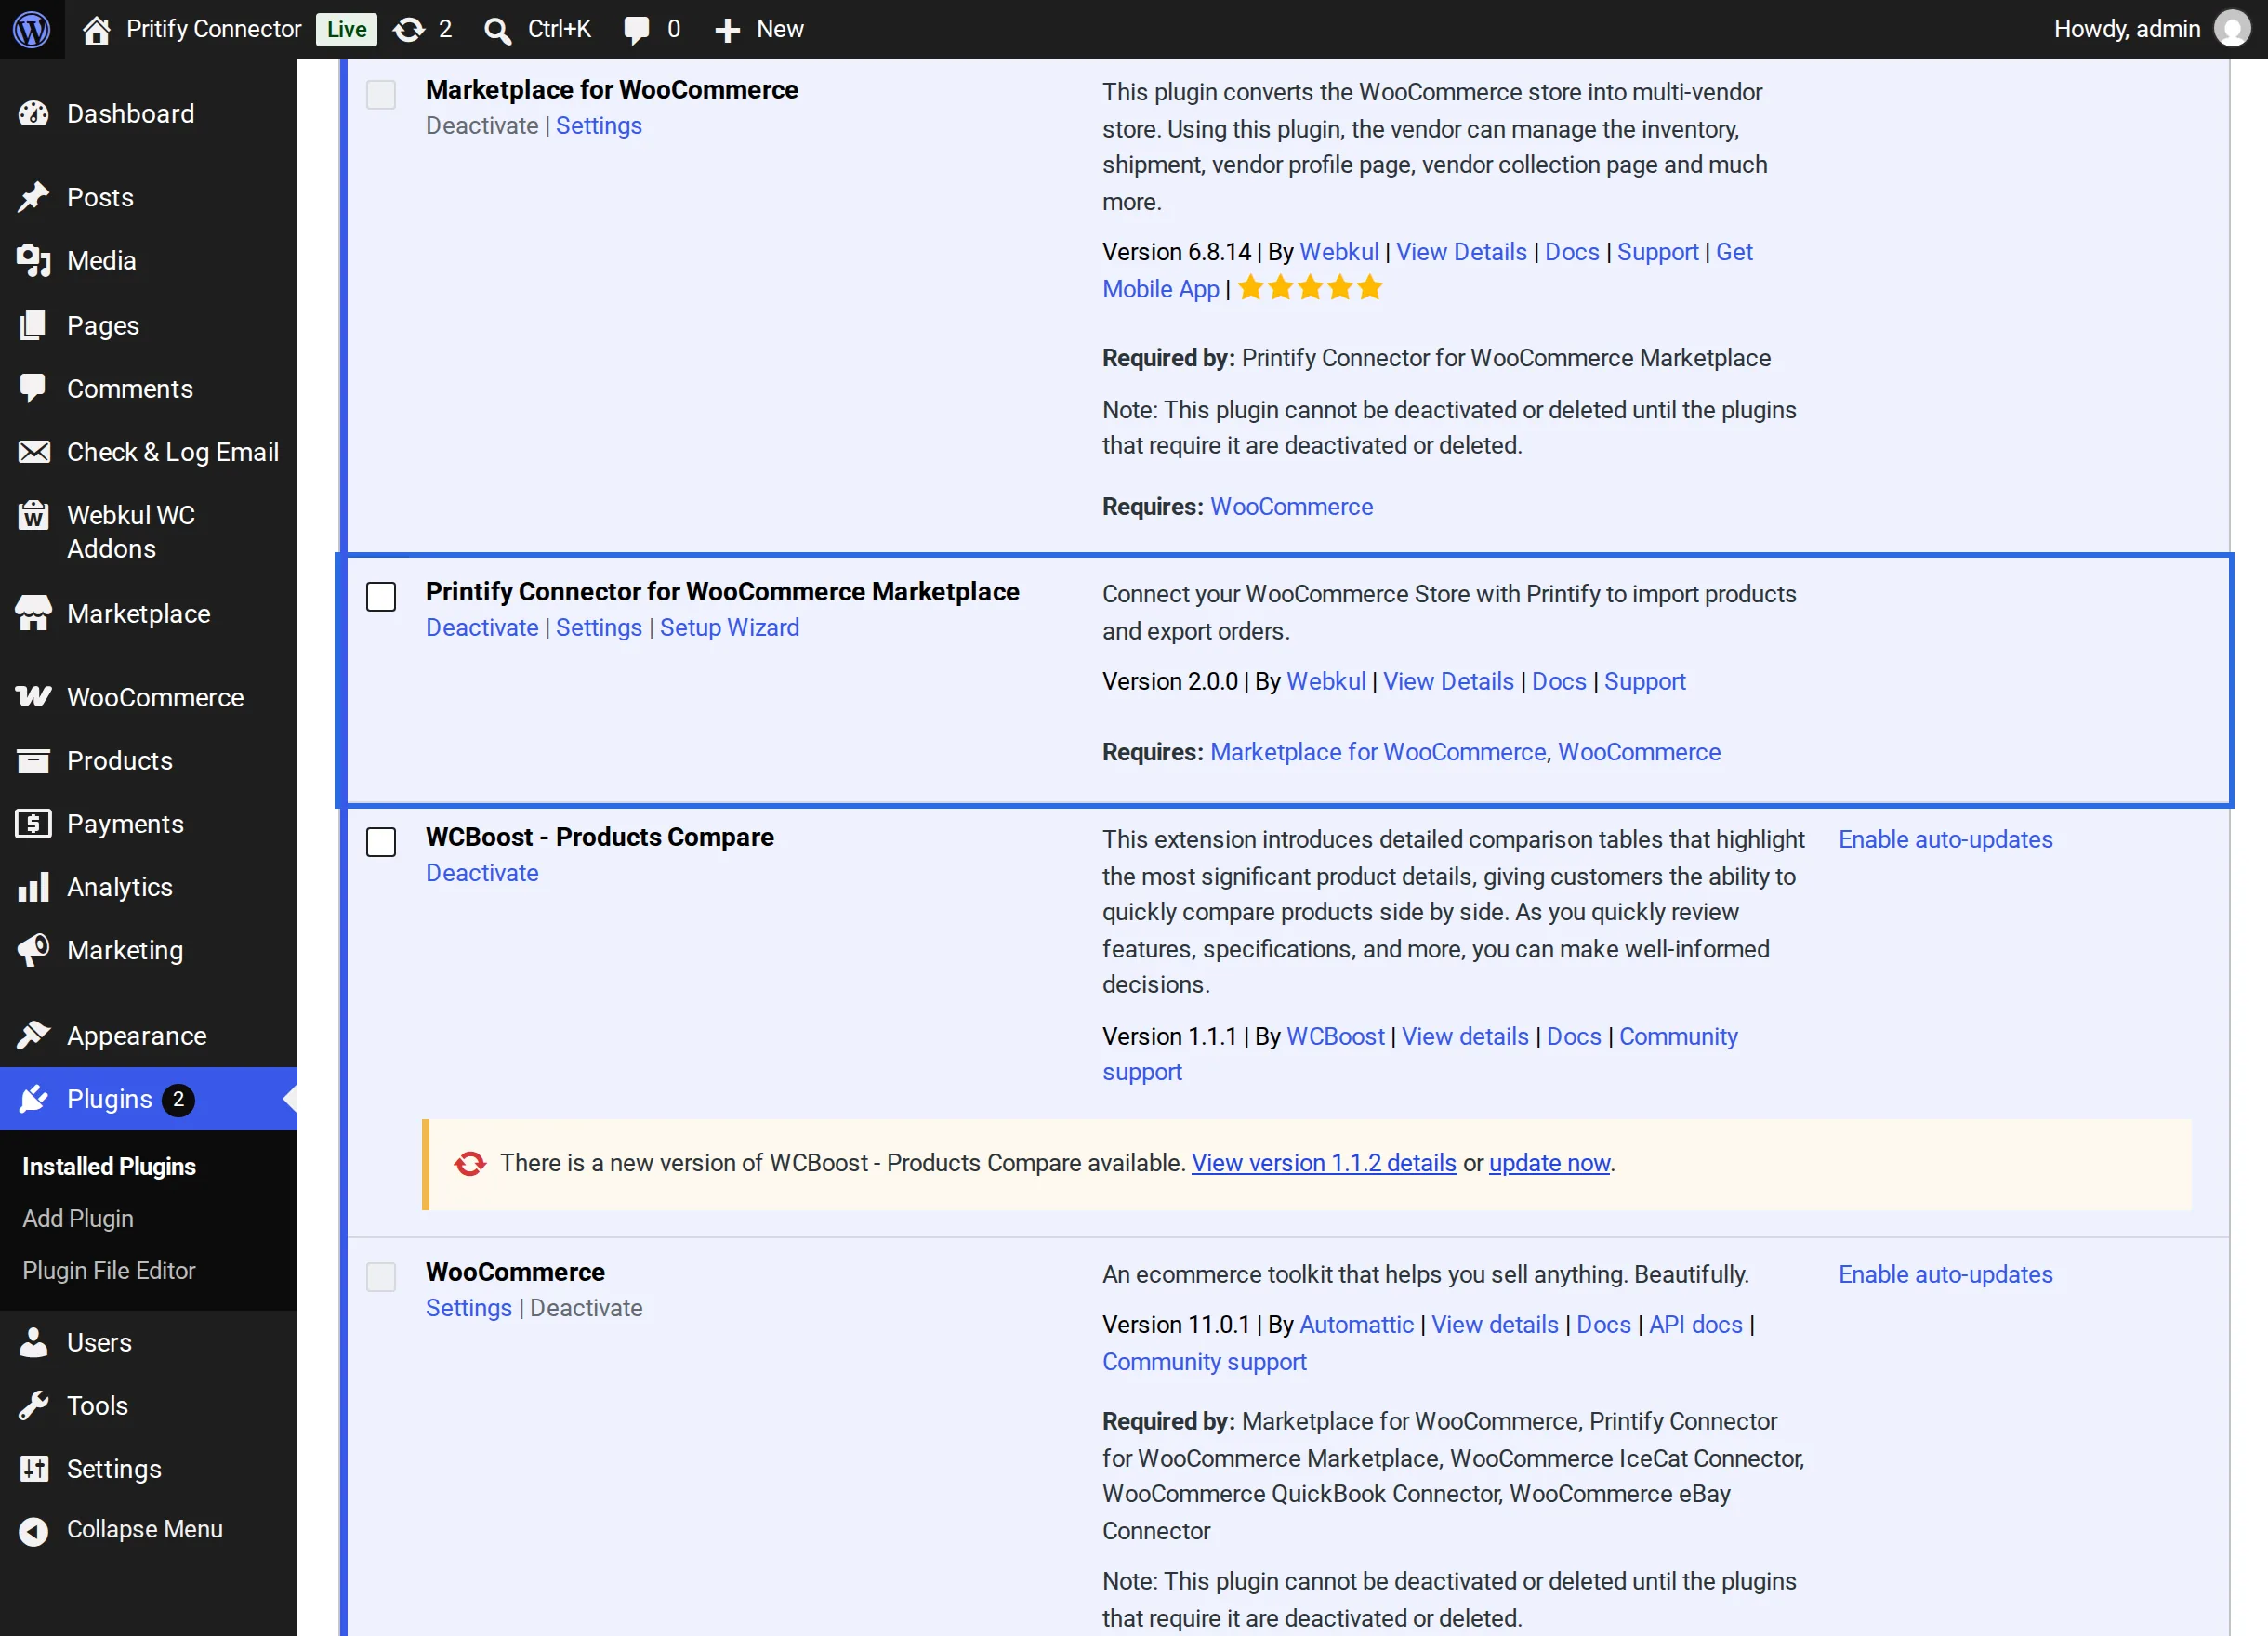
WordPress lists WooCommerce and Marketplace as required plugins, so the connector cannot be activated until both are active.
Step 1 — Upload and activate the plugin
- Go to Plugins → Add New Plugin → Upload Plugin.
- Choose the
printify-connector-for-woocommerce-marketplacezip file and select Install Now. - Select Activate Plugin.
The plugin now appears in the plugins list with Settings and Setup Wizard links, plus Docs and Support links under its description.
Step 2 — Run the setup wizard
Right after activation you are taken to the Admin Setup Wizard. Follow it to connect the store's own Printify shop, or select Skip Setup and do it later from Marketplace → Printify Connect.
Step 3 — Save permalinks if the vendor page is missing
Vendors reach the connector at My Account → Printify Connector. If a vendor sees a "page not found" error on that link, go to Settings → Permalinks and select Save Changes once to refresh the site's links.
Step 4 — Tell your vendors
Each vendor connects their own Printify shop. Point them at the Vendor Setup Wizard.
Translation
The plugin is translation ready. The template file wkmp_printify.pot is in the plugin's languages folder. Create your .po and .mo files from it with a tool such as Poedit, or with a translation plugin.
Deactivating or deleting
Deactivating or deleting the plugin leaves the products already created in WooCommerce in place. To stop Printify sending updates to the site, use Disconnect Account on the Connection screen before removing the plugin.