
Installation
Installing the connector takes a few minutes. You will upload the plugin, activate it, and land in the Setup Wizard ready to connect.
Before You Install
✅ WordPress 6.7+ with WooCommerce 10.0+ installed and active ✅ PHP 7.4 or higher on your server ✅ An administrator account on your WordPress site ✅ The plugin ZIP file downloaded from your Webkul purchase ✅ (For the next step) an Intuit account to create a free developer app
Method 1: WordPress Admin Upload (Recommended)
Step 1: Open the plugin uploader
- Log in to your WordPress admin panel.
- Go to Plugins → Add New Plugin.
- Click Upload Plugin at the top of the page.
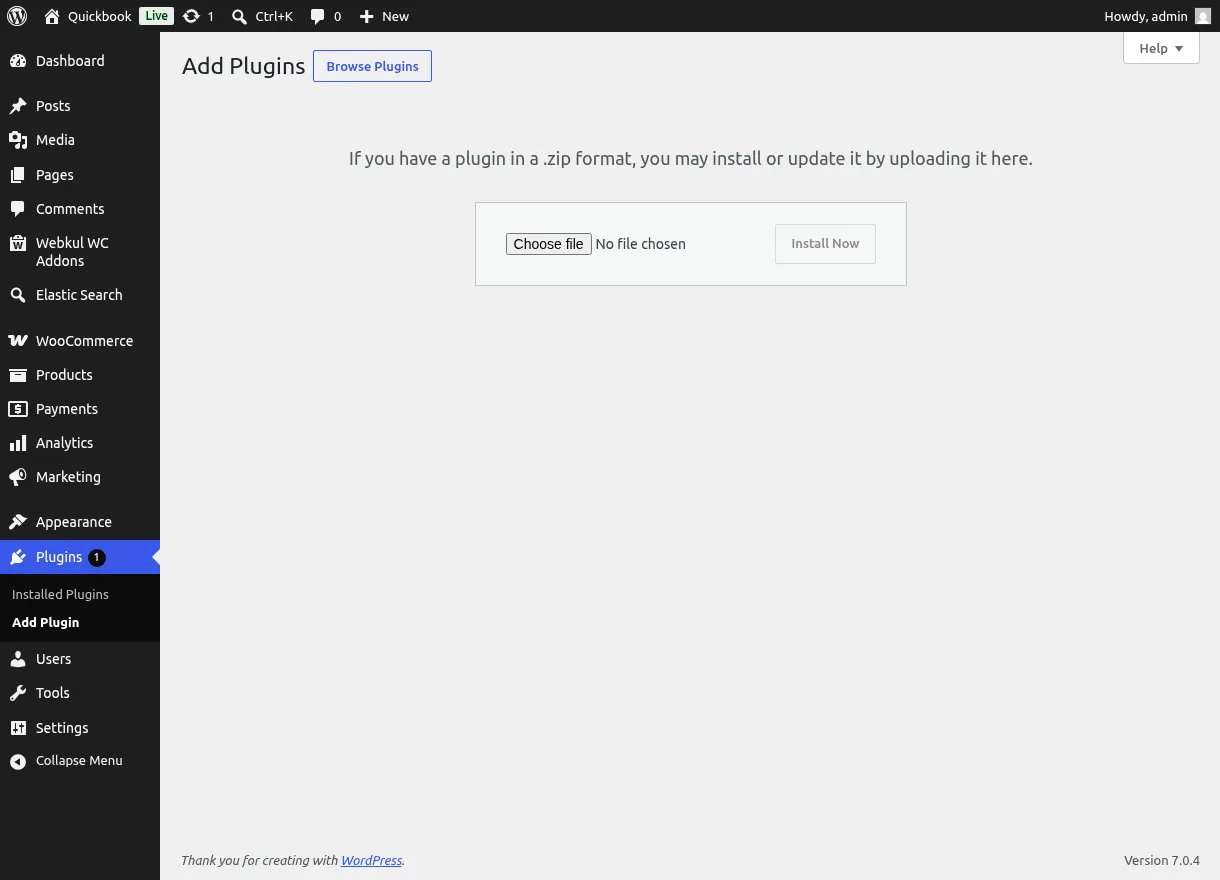
Step 2: Upload and install
- Click Choose File and select the plugin ZIP you downloaded.
- Click Install Now and wait for the upload to finish.
Step 3: Activate
- Click Activate Plugin when installation completes.
- On activation you are redirected to the QuickBooks Connector Setup Wizard.
Method 2: FTP / SFTP Upload
- Unzip the downloaded package on your computer.
- Upload the extracted plugin folder to
/wp-content/plugins/on your server. - In WordPress admin, go to Plugins, find WooCommerce QuickBook Connector, and click Activate.
Verify the Installation
After activation, confirm everything is in place:
- Go to Plugins and check that WooCommerce QuickBook Connector is listed as active.
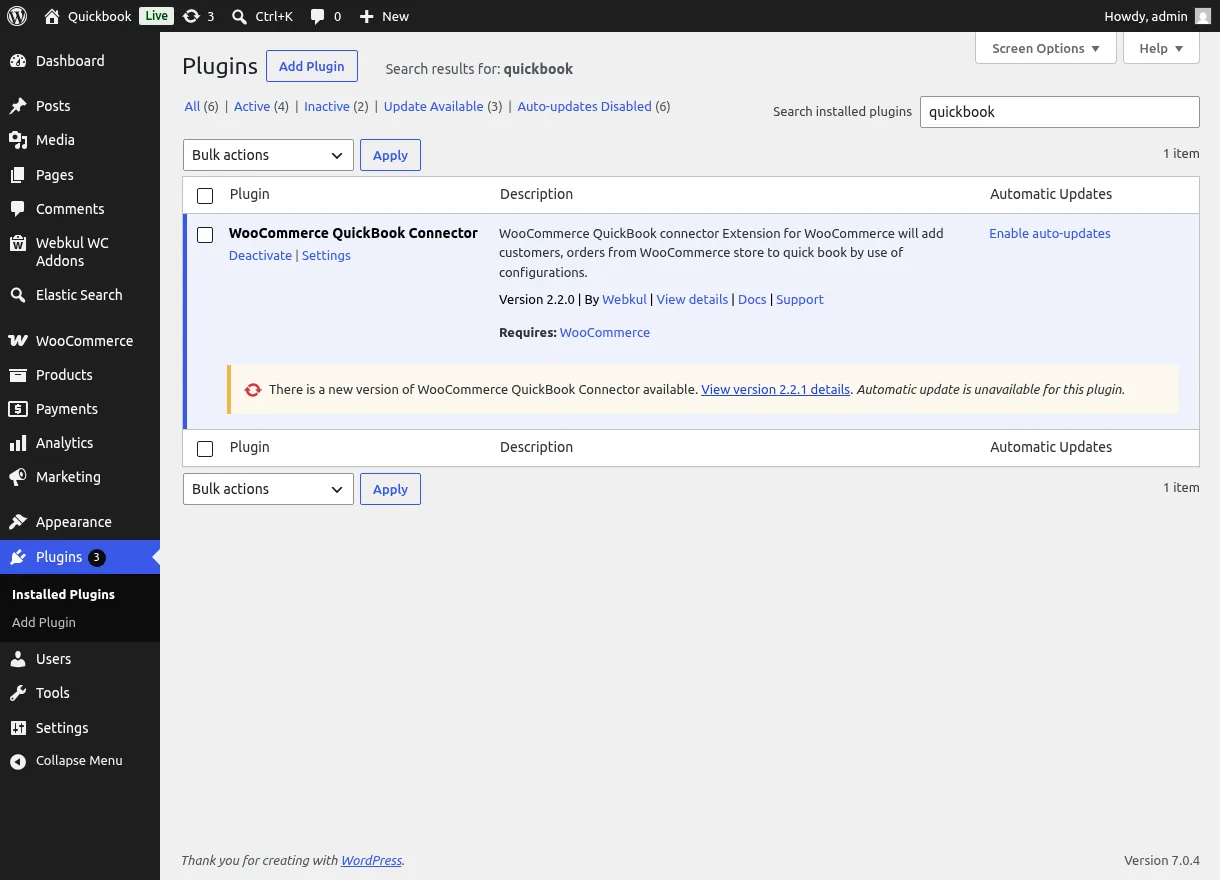
- A new menu Webkul WC Addons → WC Quick Book Connector appears in the admin sidebar.
- The plugin row offers Settings, Docs, and Support shortcut links.
WooCommerce must be active
The connector requires WooCommerce. If WooCommerce is missing or inactive, WordPress will prevent the plugin from running, and a notice about required submodules can appear if the plugin package is incomplete — re-upload the original ZIP in that case.
Prepare Your Intuit Developer App
The connector talks to QuickBooks through an Intuit app that belongs to you. In short, you will:
- Sign in at developer.intuit.com and create a free app for QuickBooks Online with the Accounting scope.
- Copy the app's Client ID and Client Secret — the wizard asks for both.
- Register the connector's two Redirect URIs in the app.
The full walkthrough — including where each key lives, Development vs Production key pairs, and the free sandbox company — is on its own page:
Sandbox first
Intuit gives every developer account a free sandbox company. Connect in Sandbox / Development mode first, test your sync end to end, then switch to Live / Production with your production app keys.
Next steps: Get Your Intuit Credentials → · Run the Setup Wizard →