
Orders
The Orders tab shows every WooCommerce order with its QuickBooks sync state and lets you push orders to QuickBooks on demand. Combined with Auto Sync, it becomes your reconciliation dashboard.
Open Webkul WC Addons → WC Quick Book Connector → Orders.
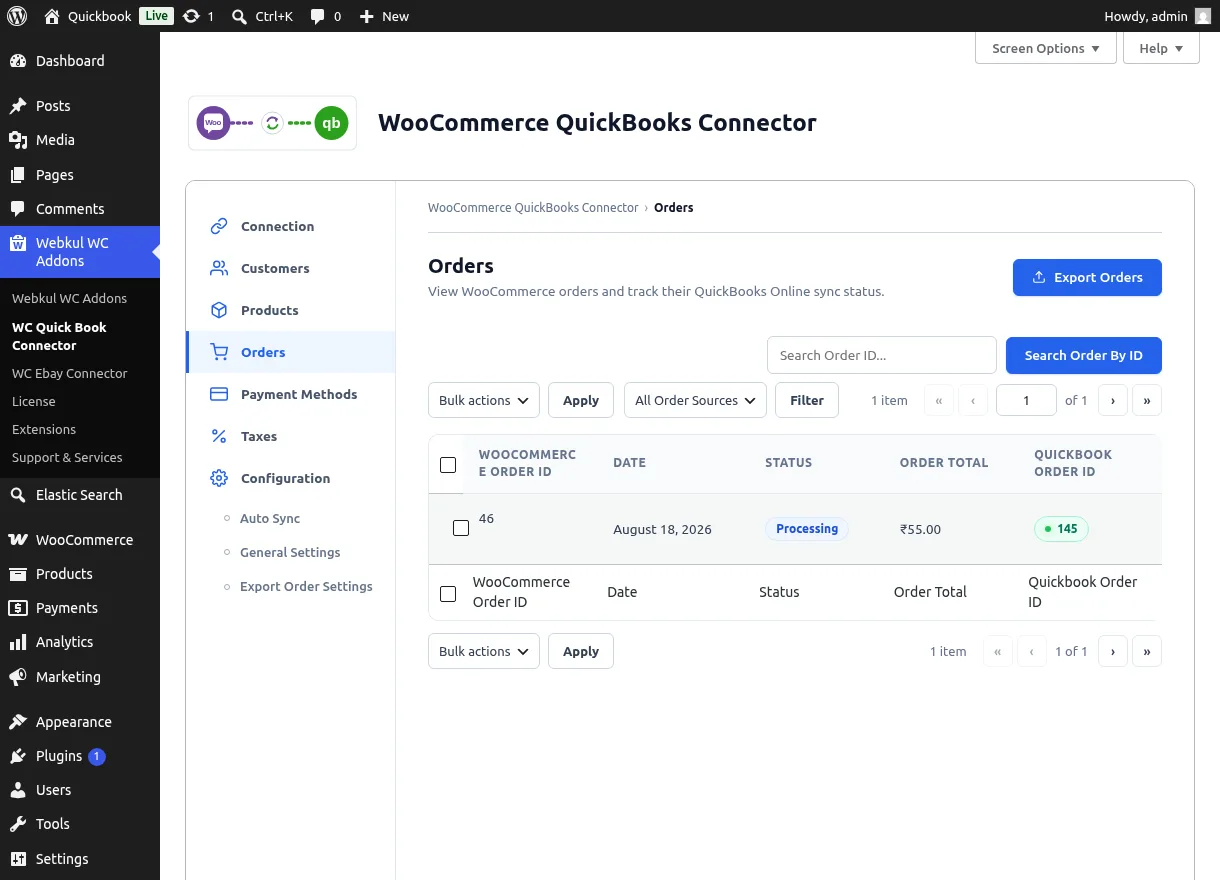
Reading the List
| Column | Meaning |
|---|---|
| WooCommerce Order ID | The order number |
| Date / Status / Order Total | Order details at a glance |
| Quickbook Order ID | Green pill with the QuickBooks transaction ID, or a red Not Synced pill |
| Order Source | WooCommerce or POS badge (POS orders are recognized when a Webkul POS plugin is active) |
- Search Order By ID finds a specific order.
- The All Order Sources filter narrows the list to POS or WooCommerce orders.
Exporting Orders
- Tick the orders to export (a red Not Synced pill marks the candidates).
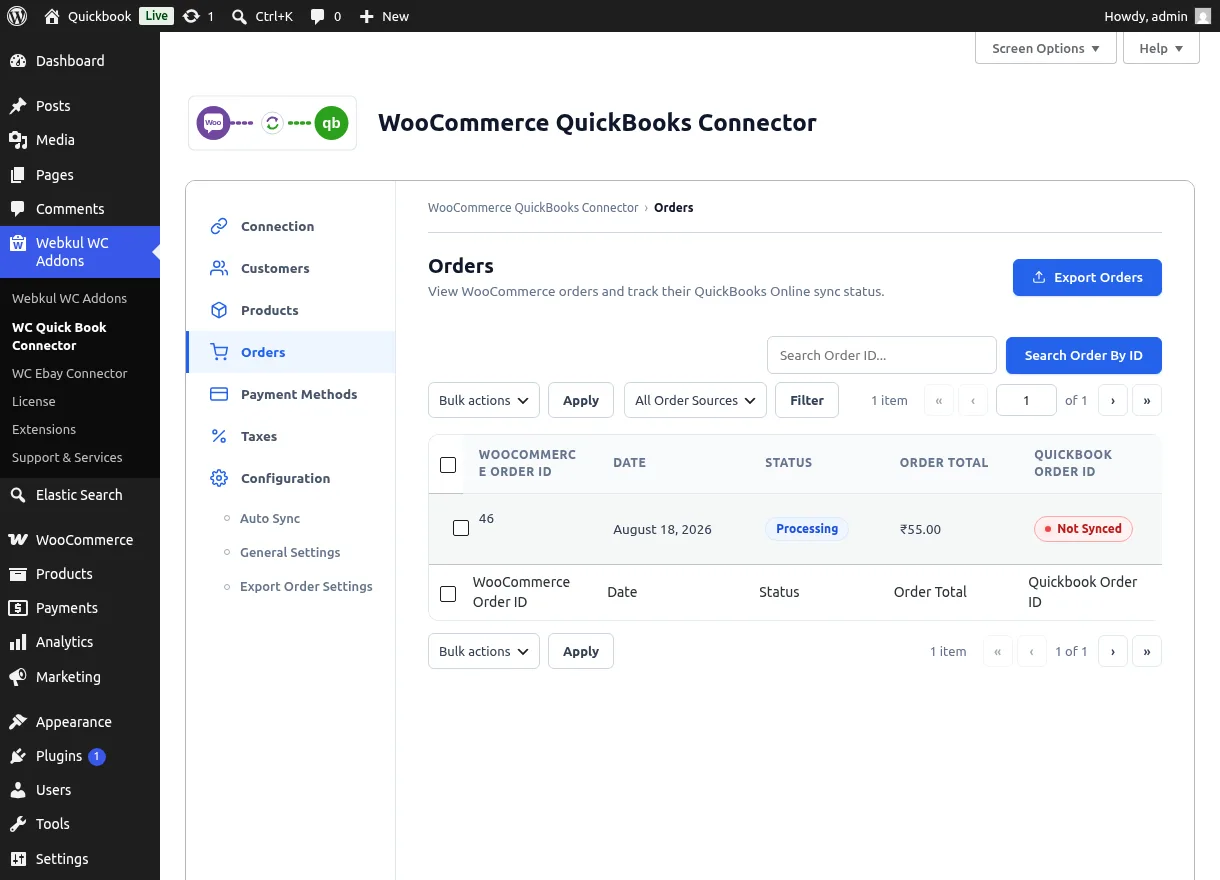
- Click Export Orders and keep the page open while the progress panel runs.
- When the export finishes, the order shows a green pill with its QuickBooks order ID.
The order is created in QuickBooks as the transaction type chosen in Export Order Settings, attached to the mapped customer, using your mapped taxes and account defaults.
Prefer hands-off?
Set Auto Export Orders in Auto Sync Settings and orders will export themselves the moment they reach your chosen status. Payments and refund receipts can follow automatically too.
Sync Status on the WooCommerce Orders Screen
You don't have to open the connector to check sync state — the standard WooCommerce → Orders screen gains a QuickBooks column: a green check means exported, a red cross means not yet.
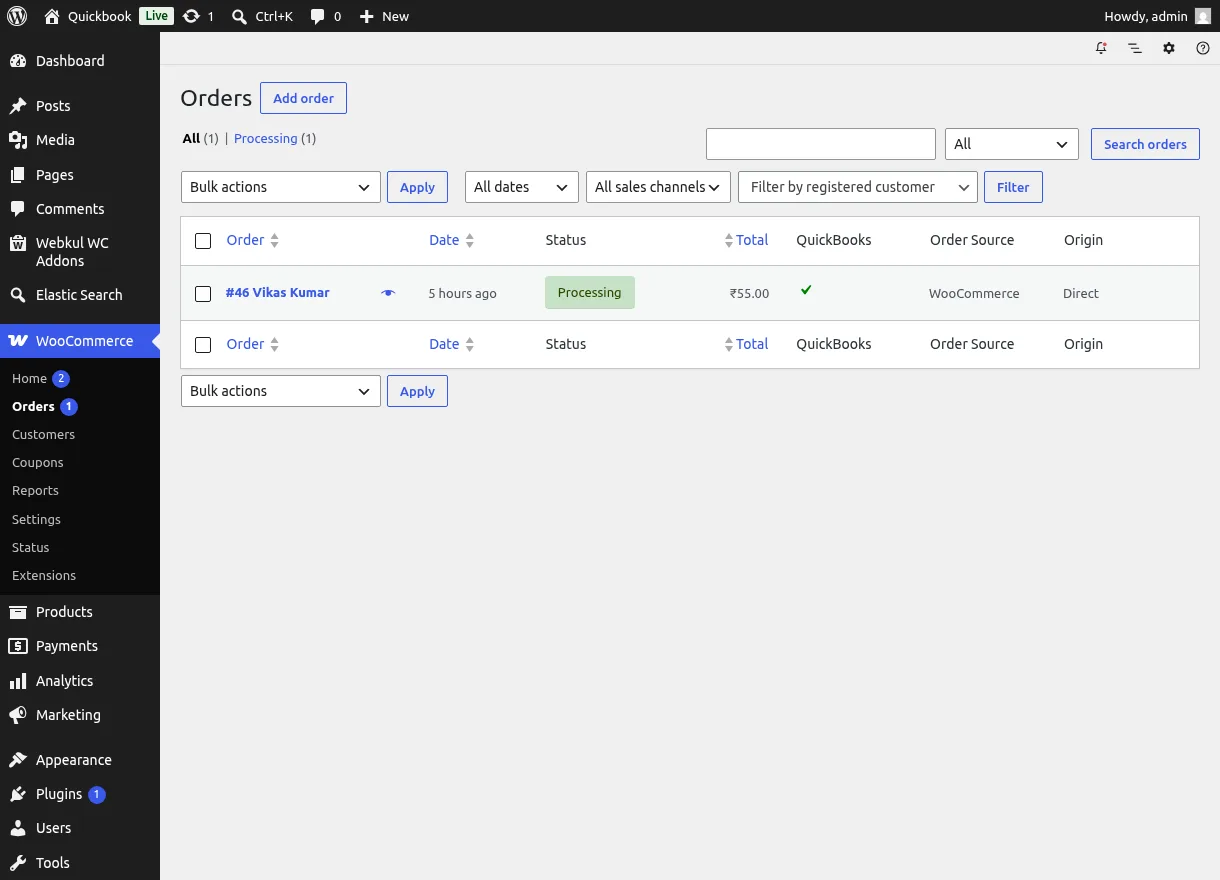
On stores using WordPress's classic order storage, the order edit screen additionally shows a QuickBooks Status side panel with the QuickBooks order number and a one-click Export on QuickBooks / Update in QuickBooks button.
Cancellations and Refunds
- Cancelled orders — with Void orders in QuickBooks enabled in Export Order Settings, cancelling a synced order voids its QuickBooks transaction.
- Refunds — with Auto Generate Refund Receipt enabled in Auto Sync Settings, refunding an order creates a matching QuickBooks refund receipt.
Row Actions
- Edit — opens the order in WooCommerce.
- Delete — permanently deletes the order and its mapping (confirmation dialog shown); also available as a bulk action.
Related Features
- Export Order Settings — transaction type, dates, and classification for exports
- Payment Methods — how the payment behind each order is recorded