
Setup Wizard
The Setup Wizard walks you through connecting your store to QuickBooks Online in four steps — Welcome, Environment, Credentials, and Ready — ending with a live connection test, so you know the link works before you sync anything.
Have your keys ready
The wizard asks for your Intuit app's Client ID and Client Secret. If you don't have them yet, follow Get Your Intuit Credentials first — it takes about five minutes.
When the Wizard Opens
- Automatically after activation — activating the plugin redirects you straight into the wizard.
- Until setup is completed, opening the connector dashboard also redirects to the wizard.
- Any time later via the Re-run Setup Wizard button on the Connection Settings page, or the QuickBook Setup Wizard entry in the screen's Help tab.
The wizard runs as a clean full-screen page outside the normal admin chrome, with a progress bar across the top showing all four steps.
Step 1 — Welcome
The welcome screen previews everything the wizard will do — Choose Environment, QuickBooks API Credentials, Test Connection, and All Set! — with quick links to the user guide, video walkthrough, and support desk.
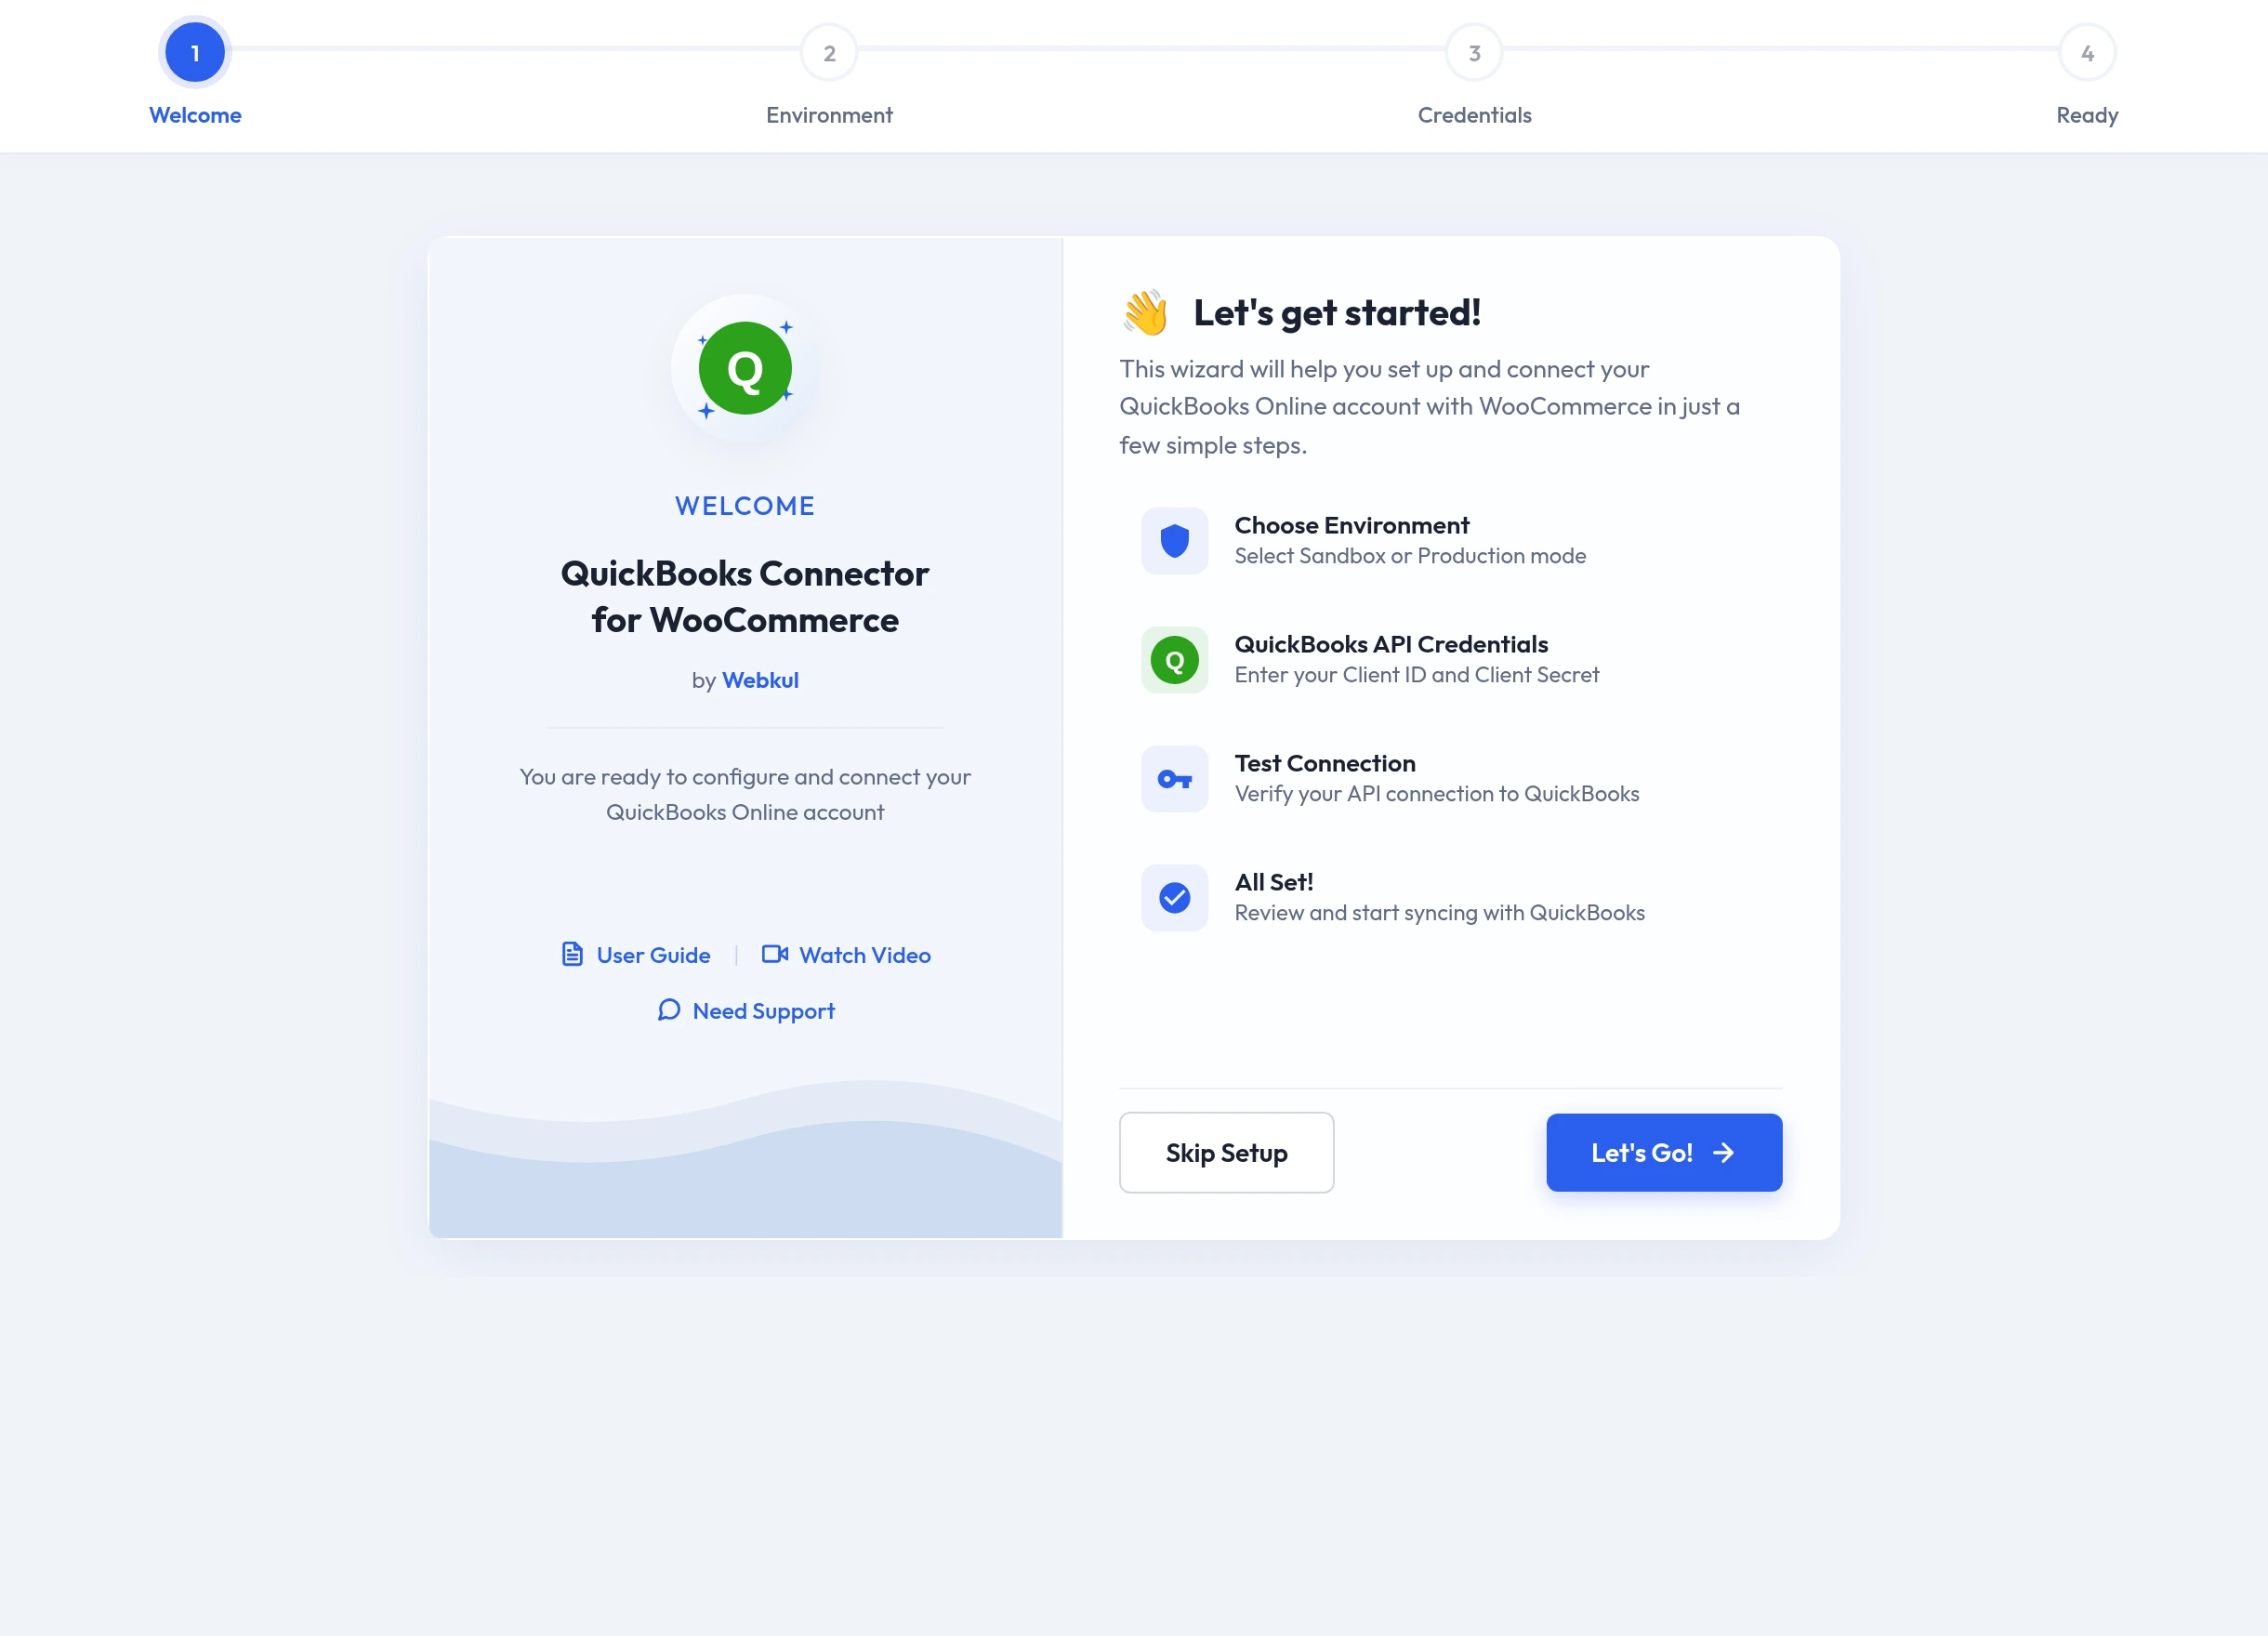
- Click Let's Go! to begin.
- Skip Setup exits to the dashboard; you can finish the connection later from Connection Settings.
Step 2 — Environment
Choose how the connector talks to QuickBooks. The progress bar marks Welcome as done and highlights Environment.
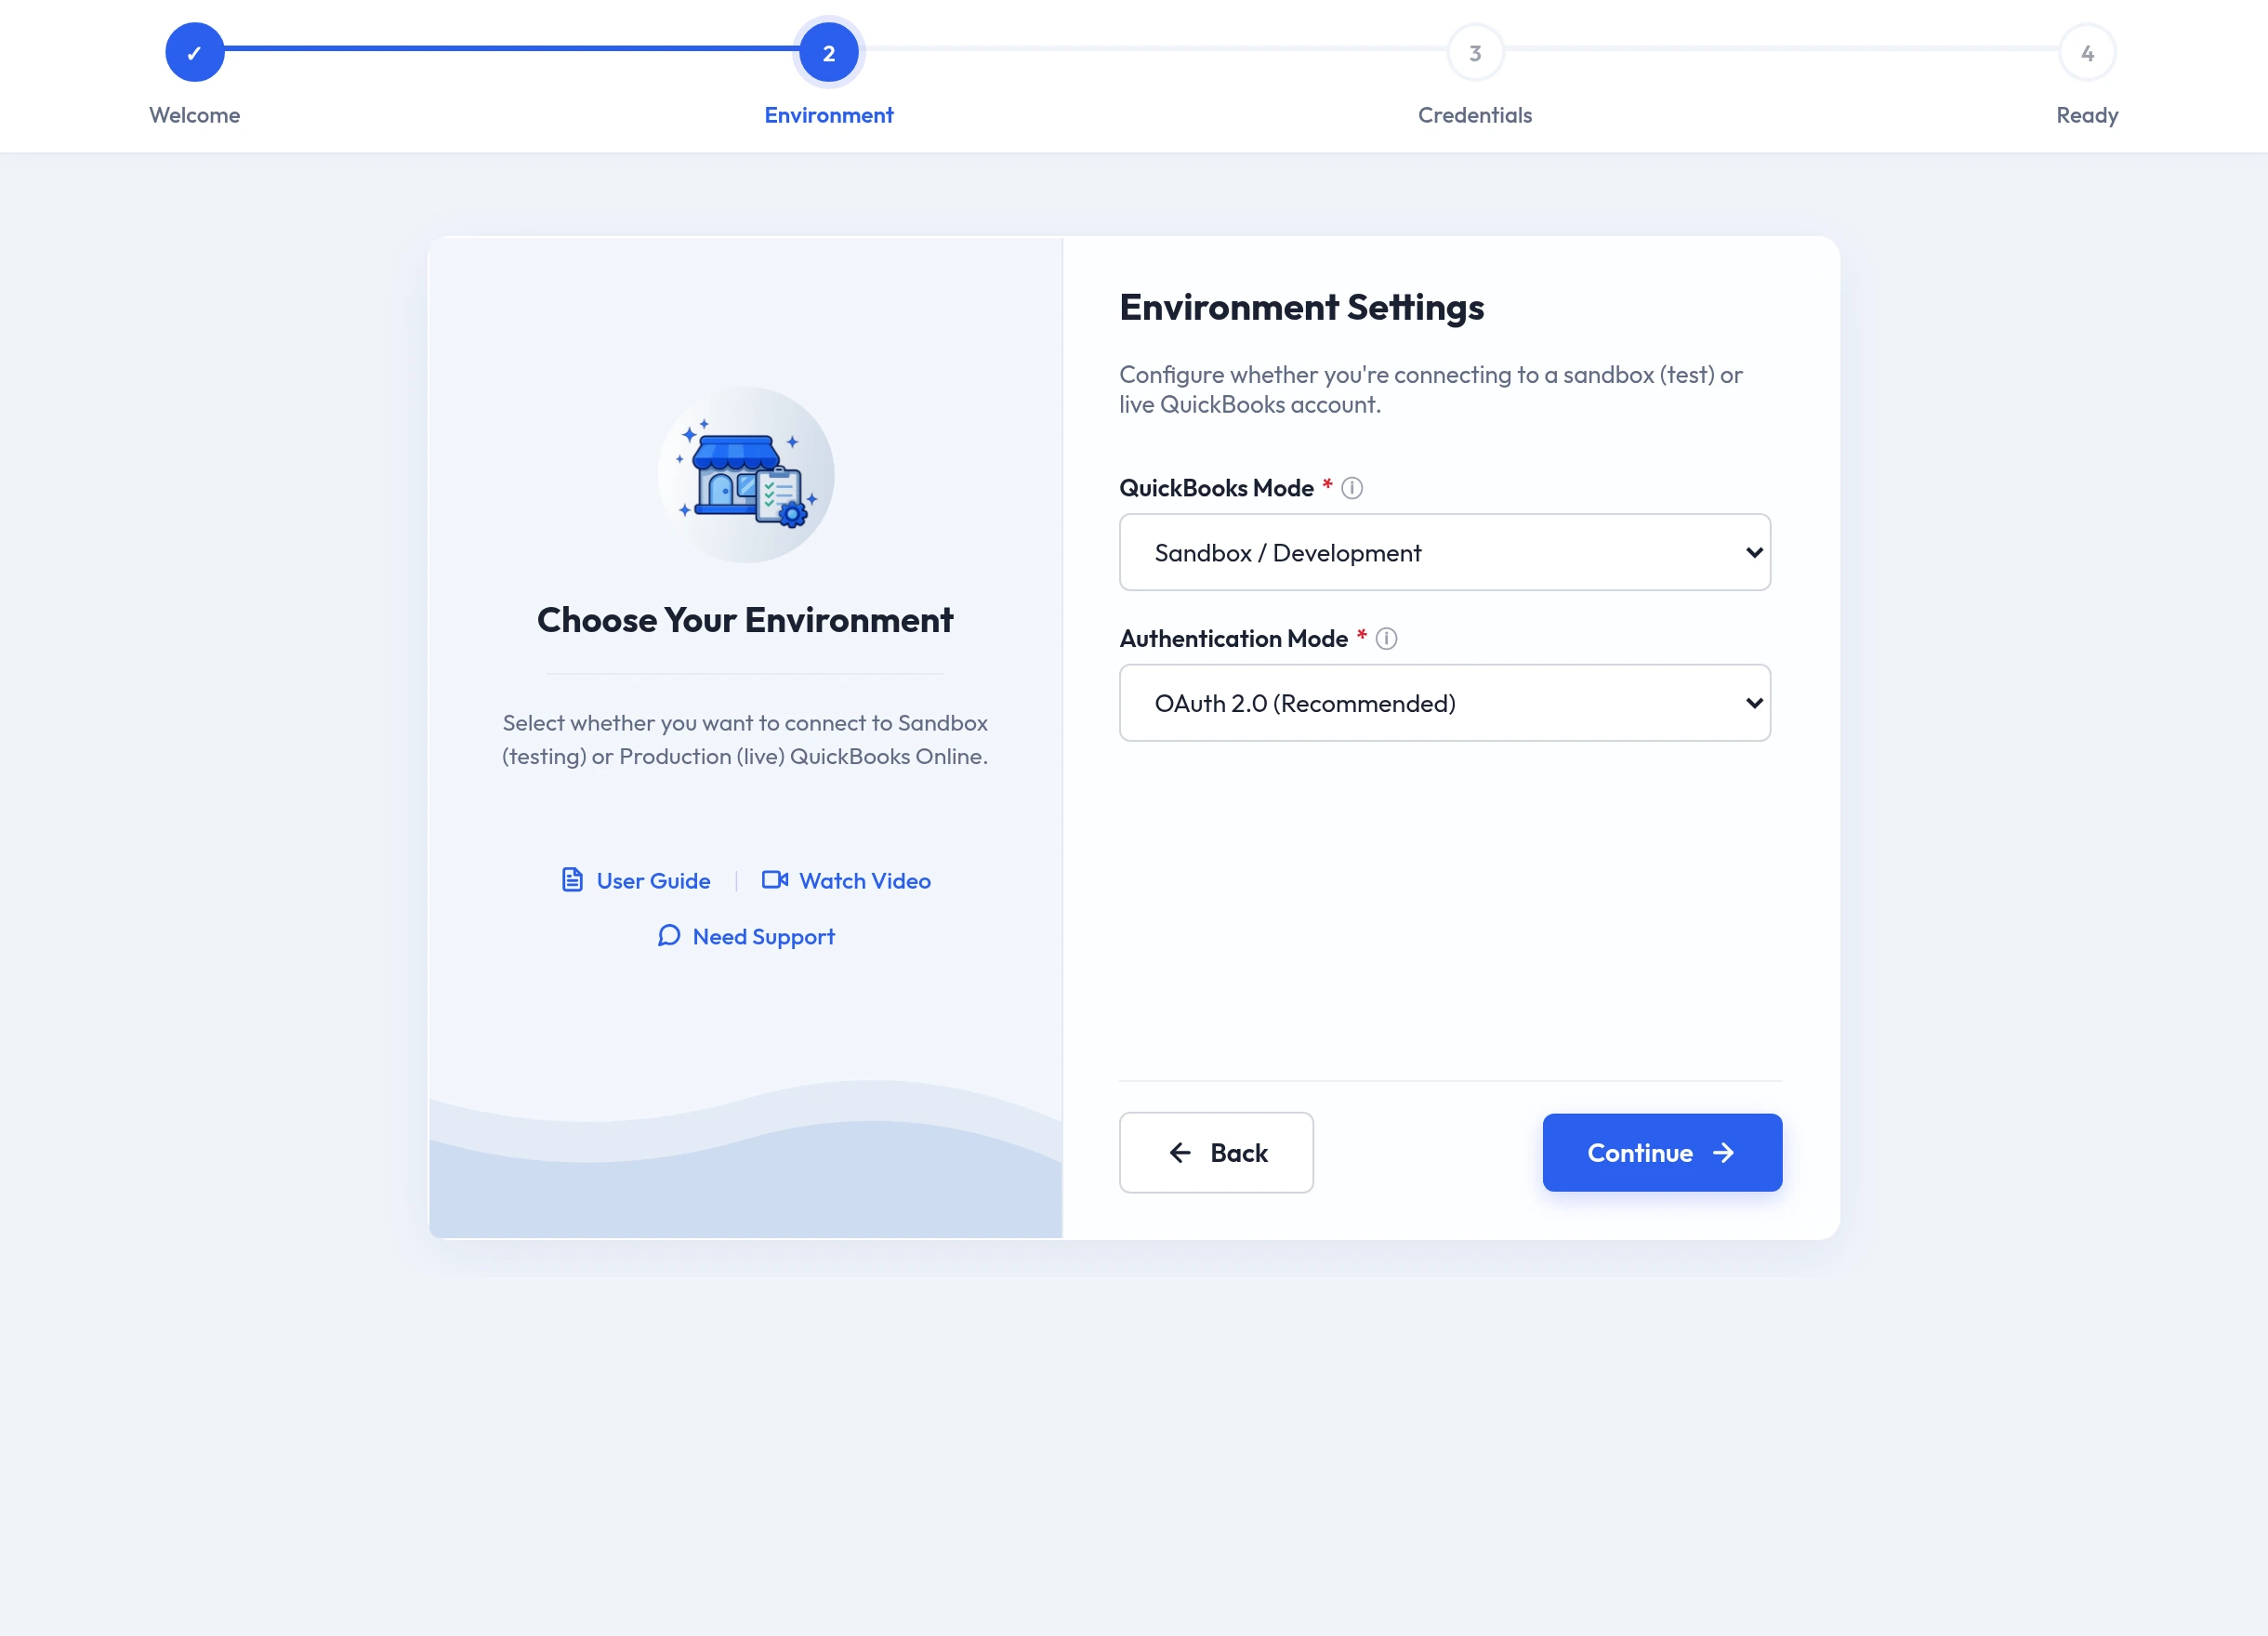
| Setting | Options | Use |
|---|---|---|
| QuickBooks Mode | Sandbox / Development · Production / Live | Sandbox connects to Intuit's free sandbox company — ideal for testing. Production connects to your real books. |
| Authentication Mode | OAuth 2.0 (Recommended) · OAuth 1.0 (Deprecated) | Keep OAuth 2.0 unless you have a legacy Intuit setup. |
Match your keys to the mode
Intuit issues separate key pairs for Development and Production. The mode you pick here must match the key pair you enter in Step 3 — see Get Your Intuit Credentials.
Click Continue.
Step 3 — Credentials & Authorization
This is where your store and QuickBooks actually shake hands.
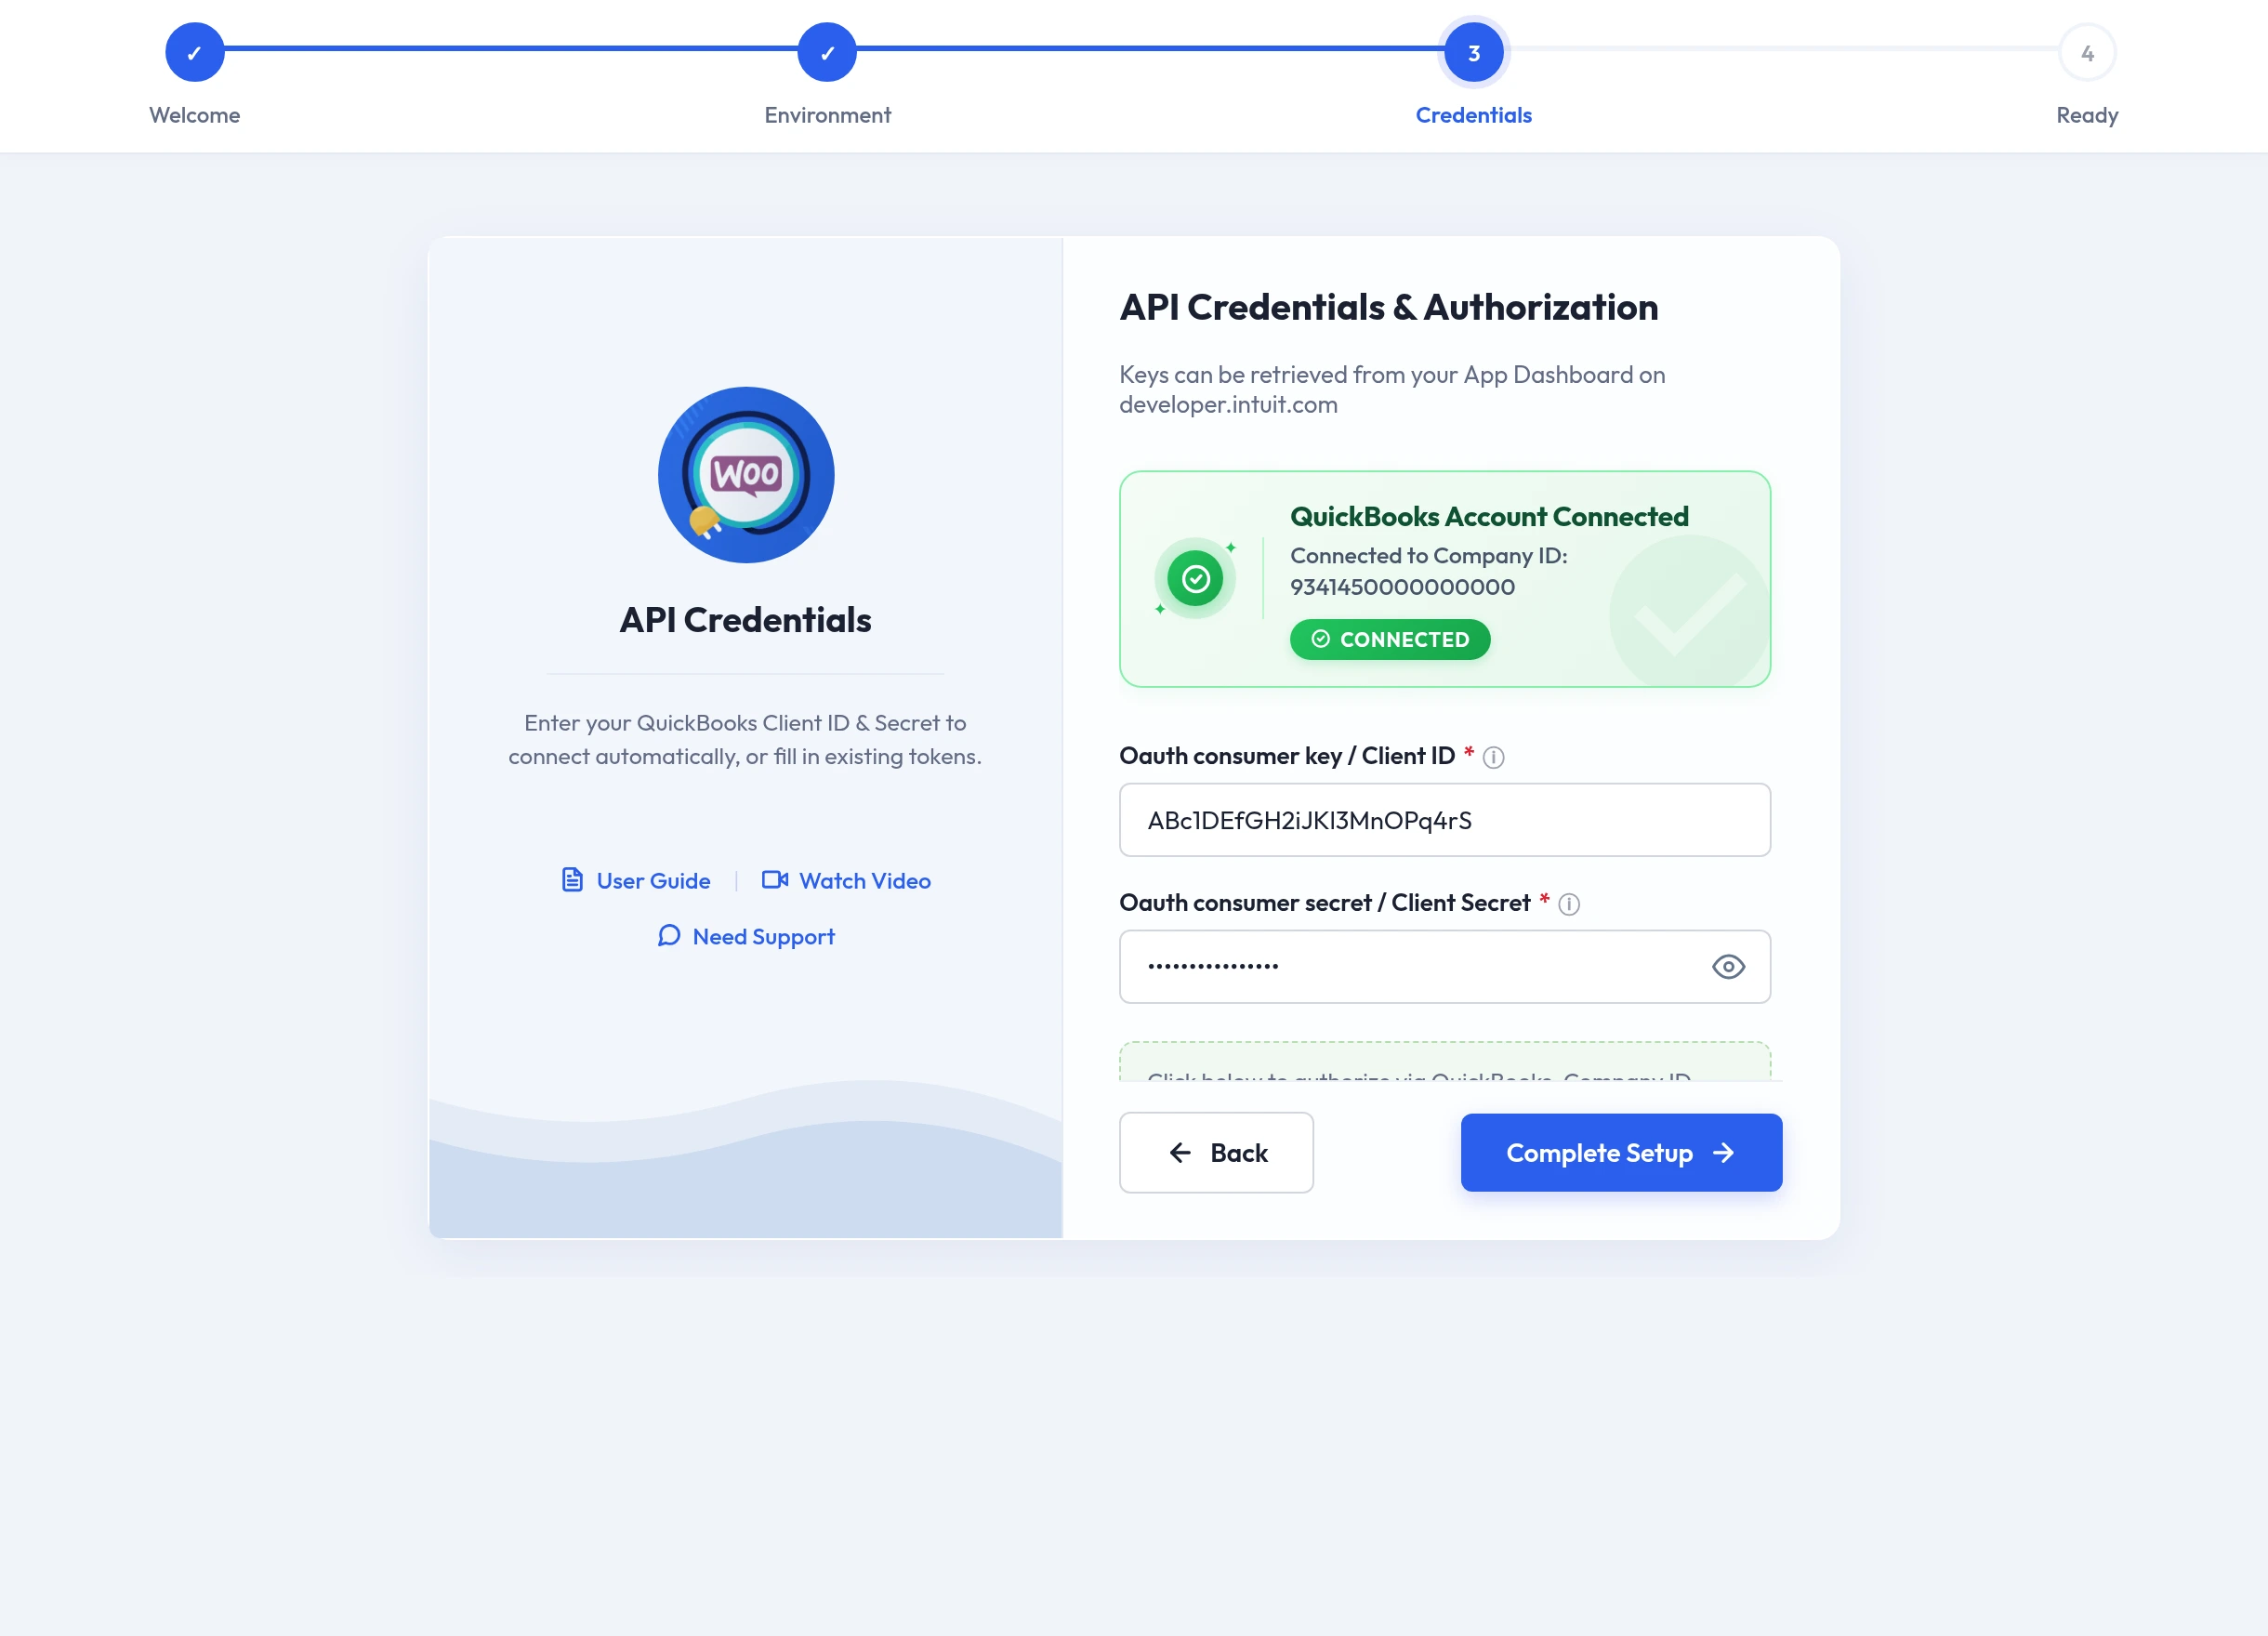
- Enter the Client ID (OAuth consumer key) and Client Secret (OAuth consumer secret) from your Intuit app — both are required. The secret field has a show/hide toggle.
- Make sure both Redirect URIs are registered in your Intuit app (see Step 4 of the credentials guide).
- Click Connect with QuickBooks. An Intuit window opens — sign in, pick the QuickBooks company to link, and approve access.
- On success the wizard shows a green QuickBooks Account Connected banner with your Company ID, and fills in the Access Token and Refresh Token automatically. (Prefer manual control? Expand the token fields and paste an existing Company ID and tokens instead.)
- Click Complete Setup. The wizard saves the settings and runs a live connection test against QuickBooks — it only moves on when the test passes; a failed test restores your previous working values untouched.
Messages you may see
| Message | Meaning |
|---|---|
| "Client ID and Client Secret are required." | One of the two app keys is empty |
| "QuickBooks is not authorized yet. Please click 'Connect with QuickBooks'…" | Authorization hasn't run — tokens are missing |
| "Successfully connected to QuickBooks Online!" | The live test passed and everything is saved |
| "Unable to connect to QuickBooks. Please verify your credentials, Company ID, or authentication tokens." | The test failed — check keys, mode, and redirect URIs |
Step 4 — Ready
Setup is complete. The final screen shows a Congratulations! summary of your configuration: connection status, environment mode, authentication, Company ID, and client credentials — each with a green check.
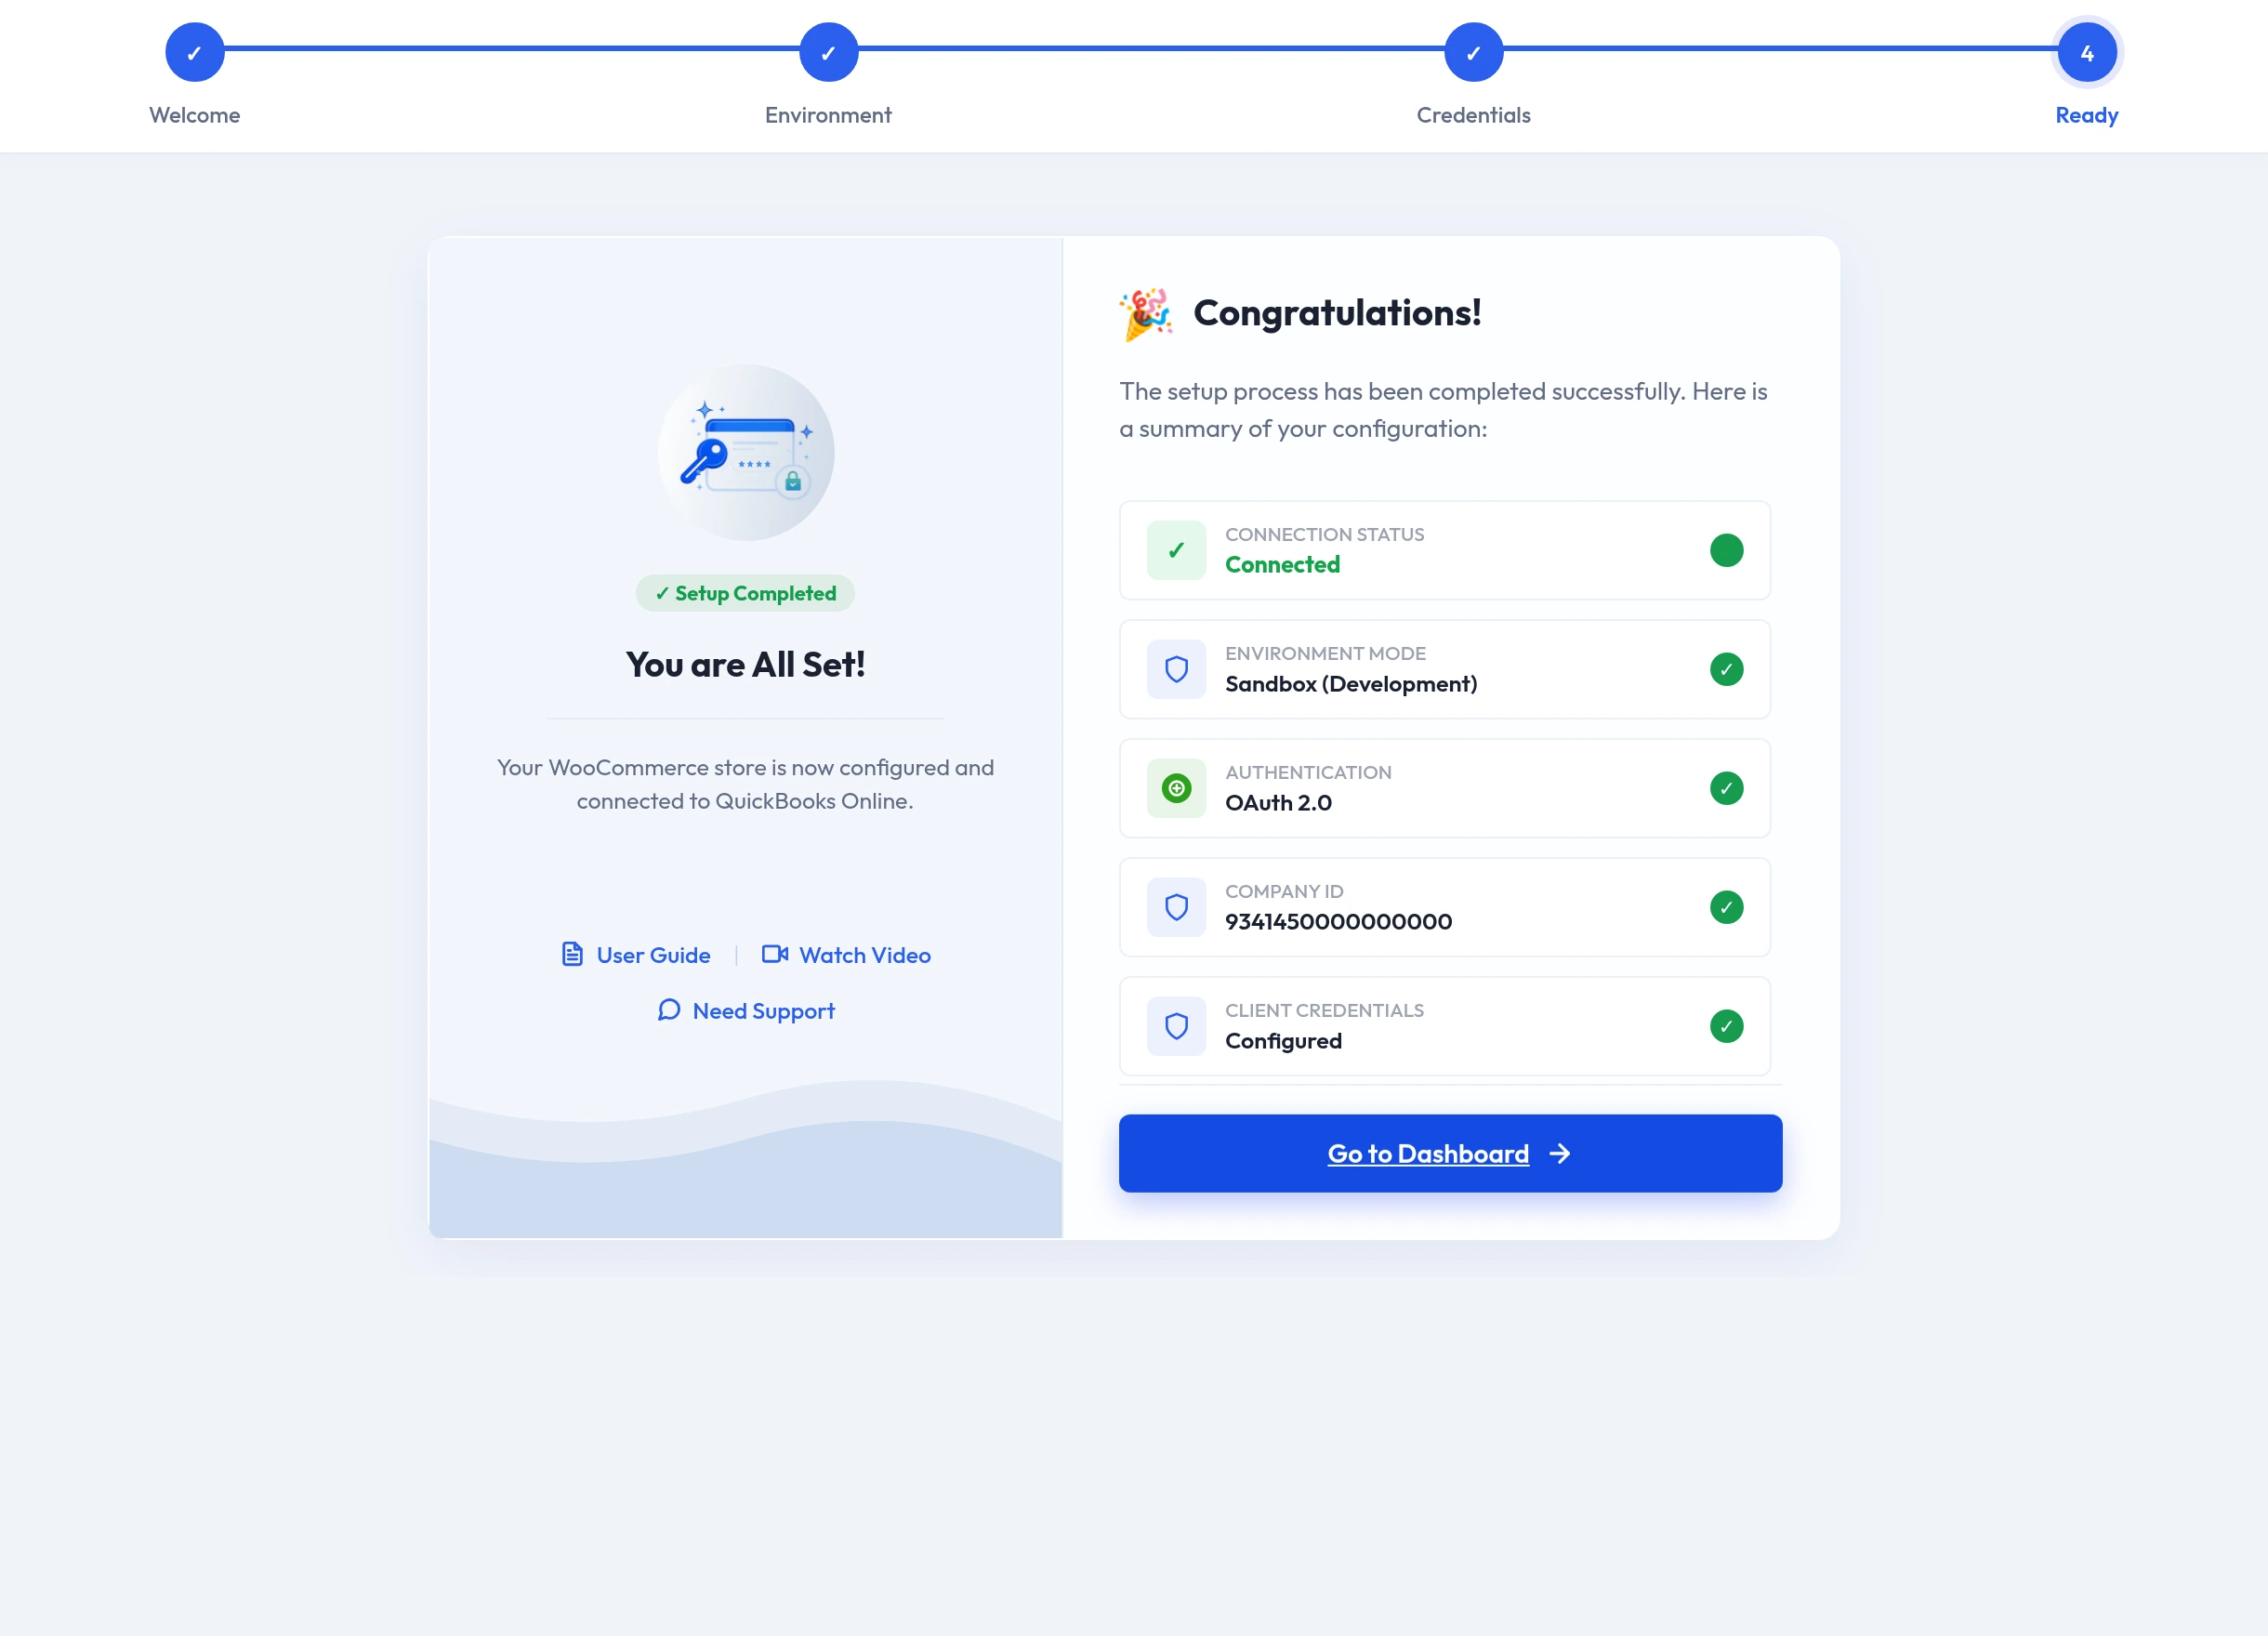
Click Go to Dashboard to open the connector, where the Connection Settings page now shows your live status card.
Related Features
- Get Your Intuit Credentials — where the Client ID, Client Secret, and Redirect URIs come from
- Connection Settings — manage, edit, or delete the connection the wizard created
- General Settings — the recommended next stop: map your QuickBooks accounts