
Get Your Intuit Credentials
The connector talks to QuickBooks Online through an Intuit Developer app that belongs to you. The app gives you the two keys the Setup Wizard asks for — the Client ID and the Client Secret — and it's where you register the connector's Redirect URIs so the one-click authorization is allowed to return to your store.
Creating the app is free and takes about five minutes. The screenshots below show the real Intuit Developer portal, step by step.
Step 1: Create an Intuit Developer account
- Go to developer.intuit.com.
- Click Sign In (top right) and log in with your Intuit account — the same account type used for QuickBooks/TurboTax. If you don't have one, create it for free from the same screen.
One account, two worlds
Your Intuit Developer account is separate from your QuickBooks Online company. The developer account owns the app and its keys; during authorization you'll pick which QuickBooks company the store connects to.
Step 2: Create an app
Apps live inside a workspace on the Intuit Developer portal.
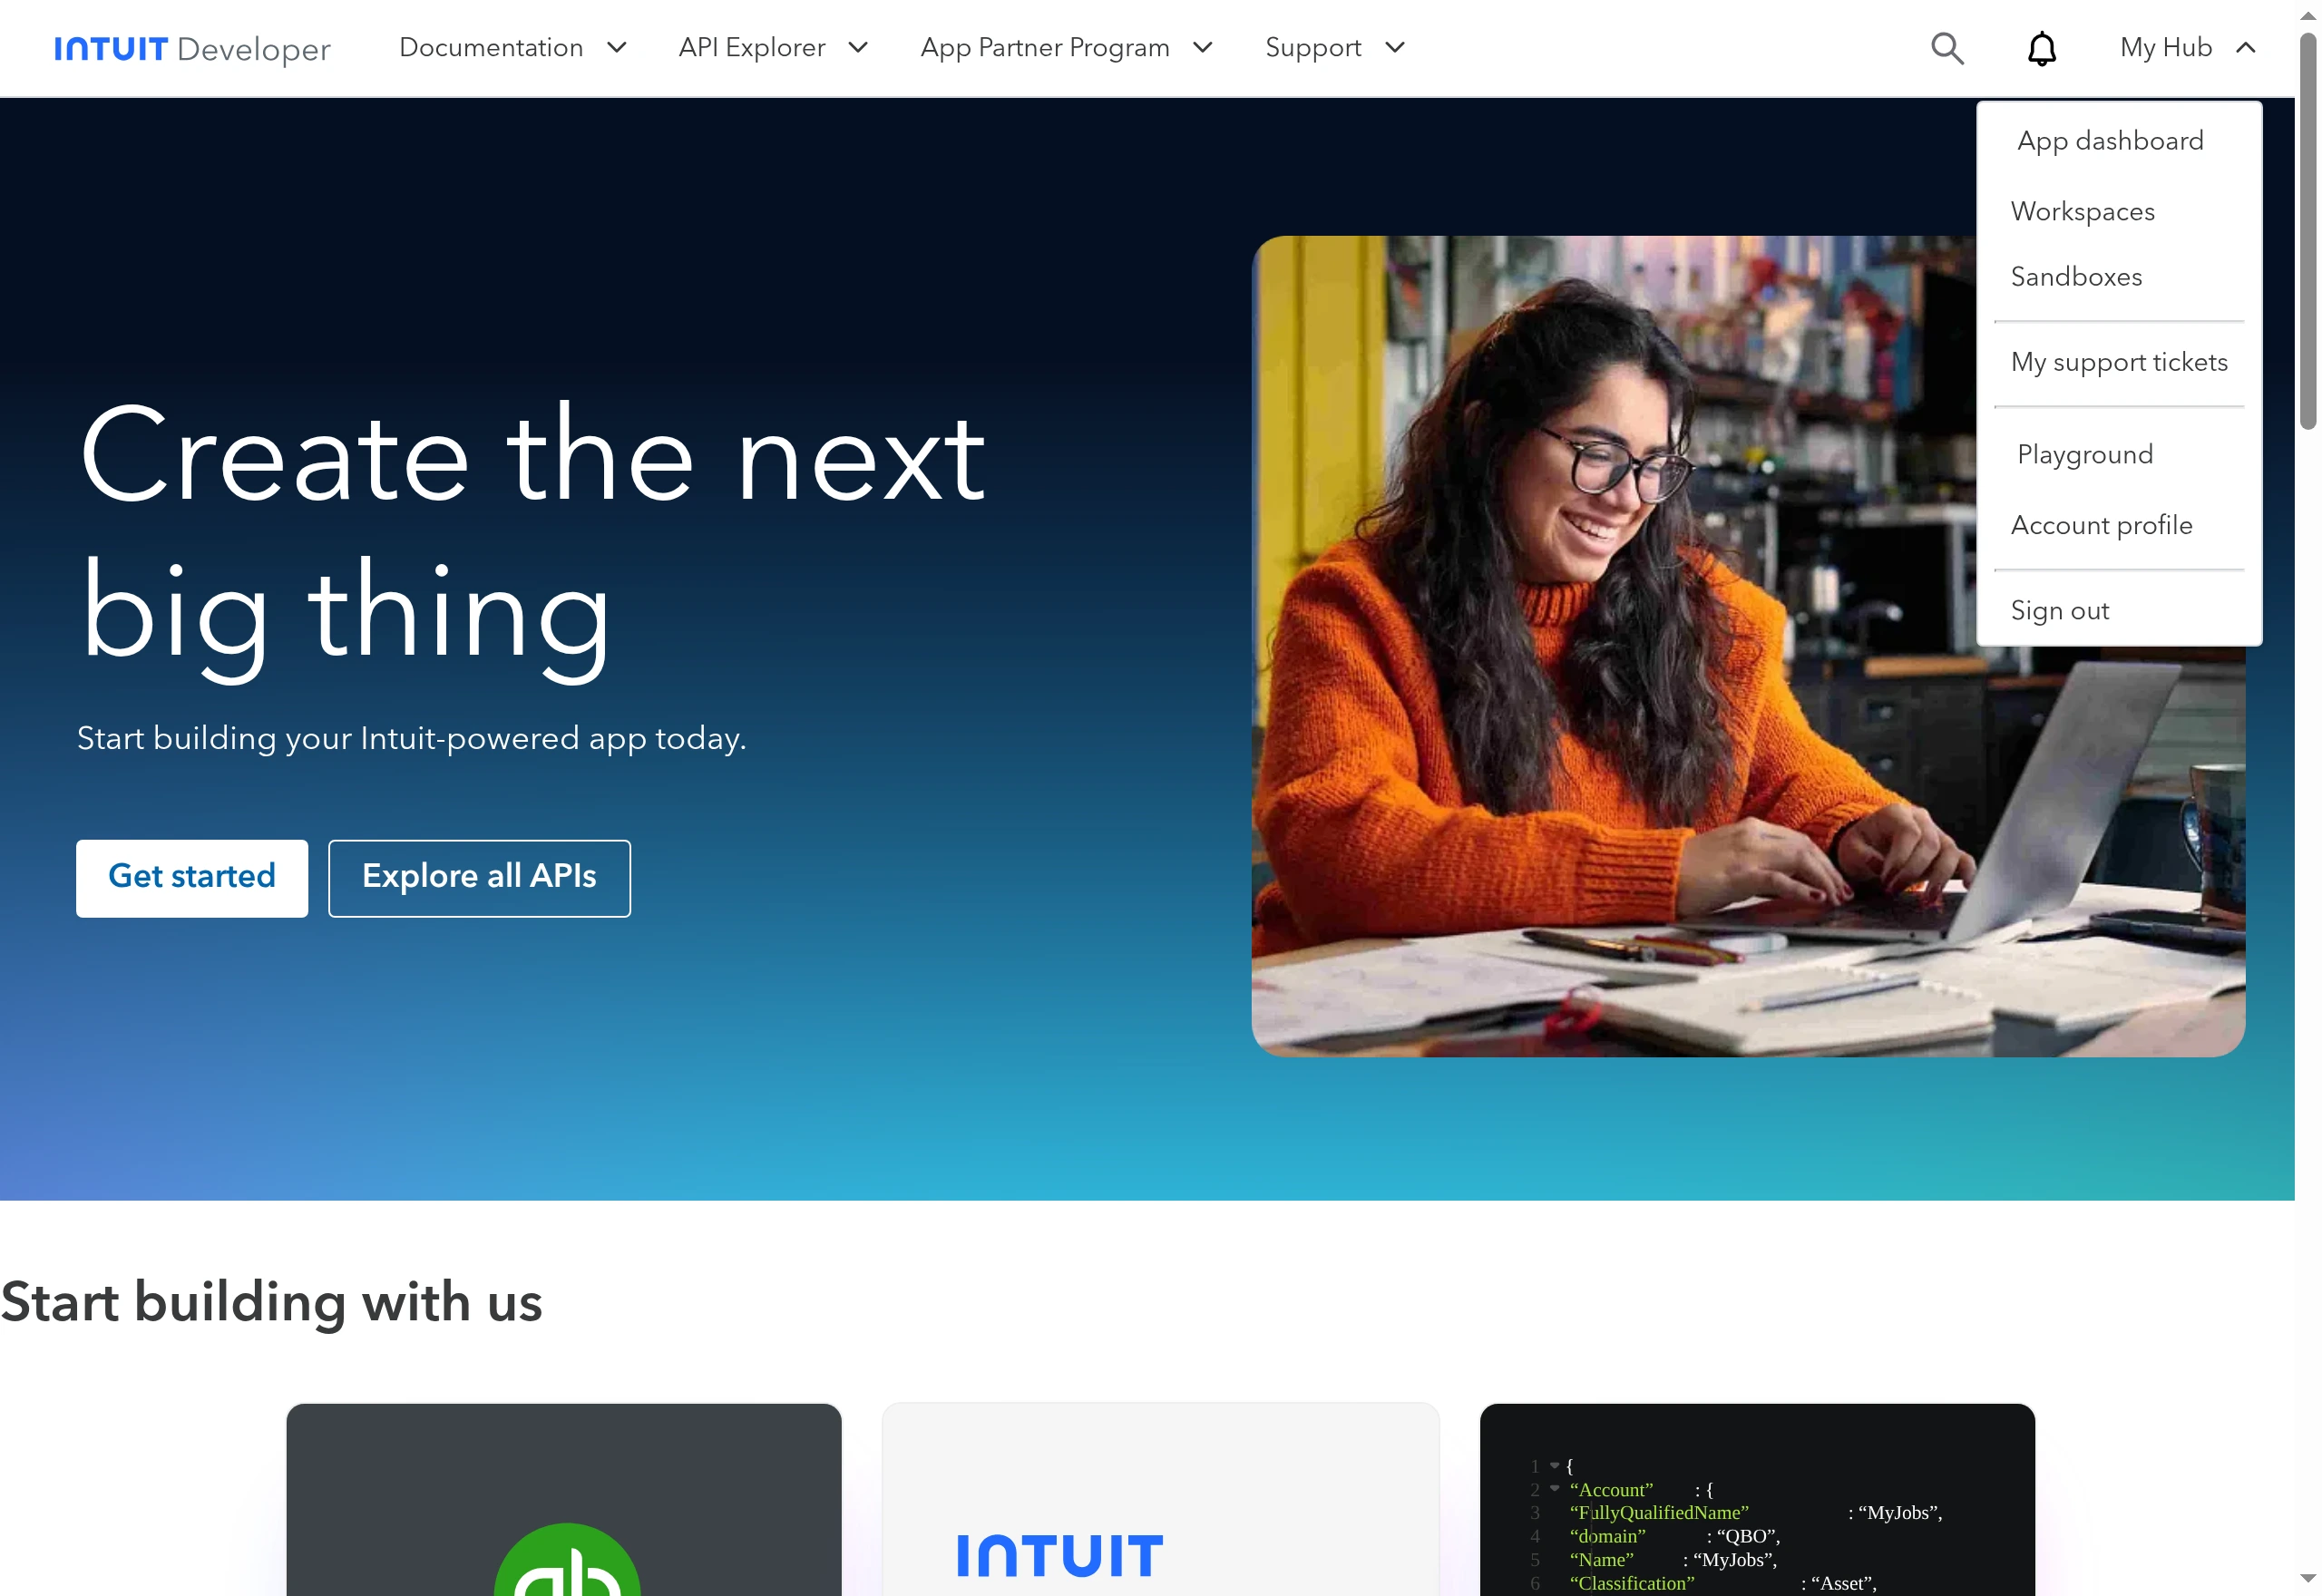
- Open the My Hub menu (top right) and choose Workspaces.
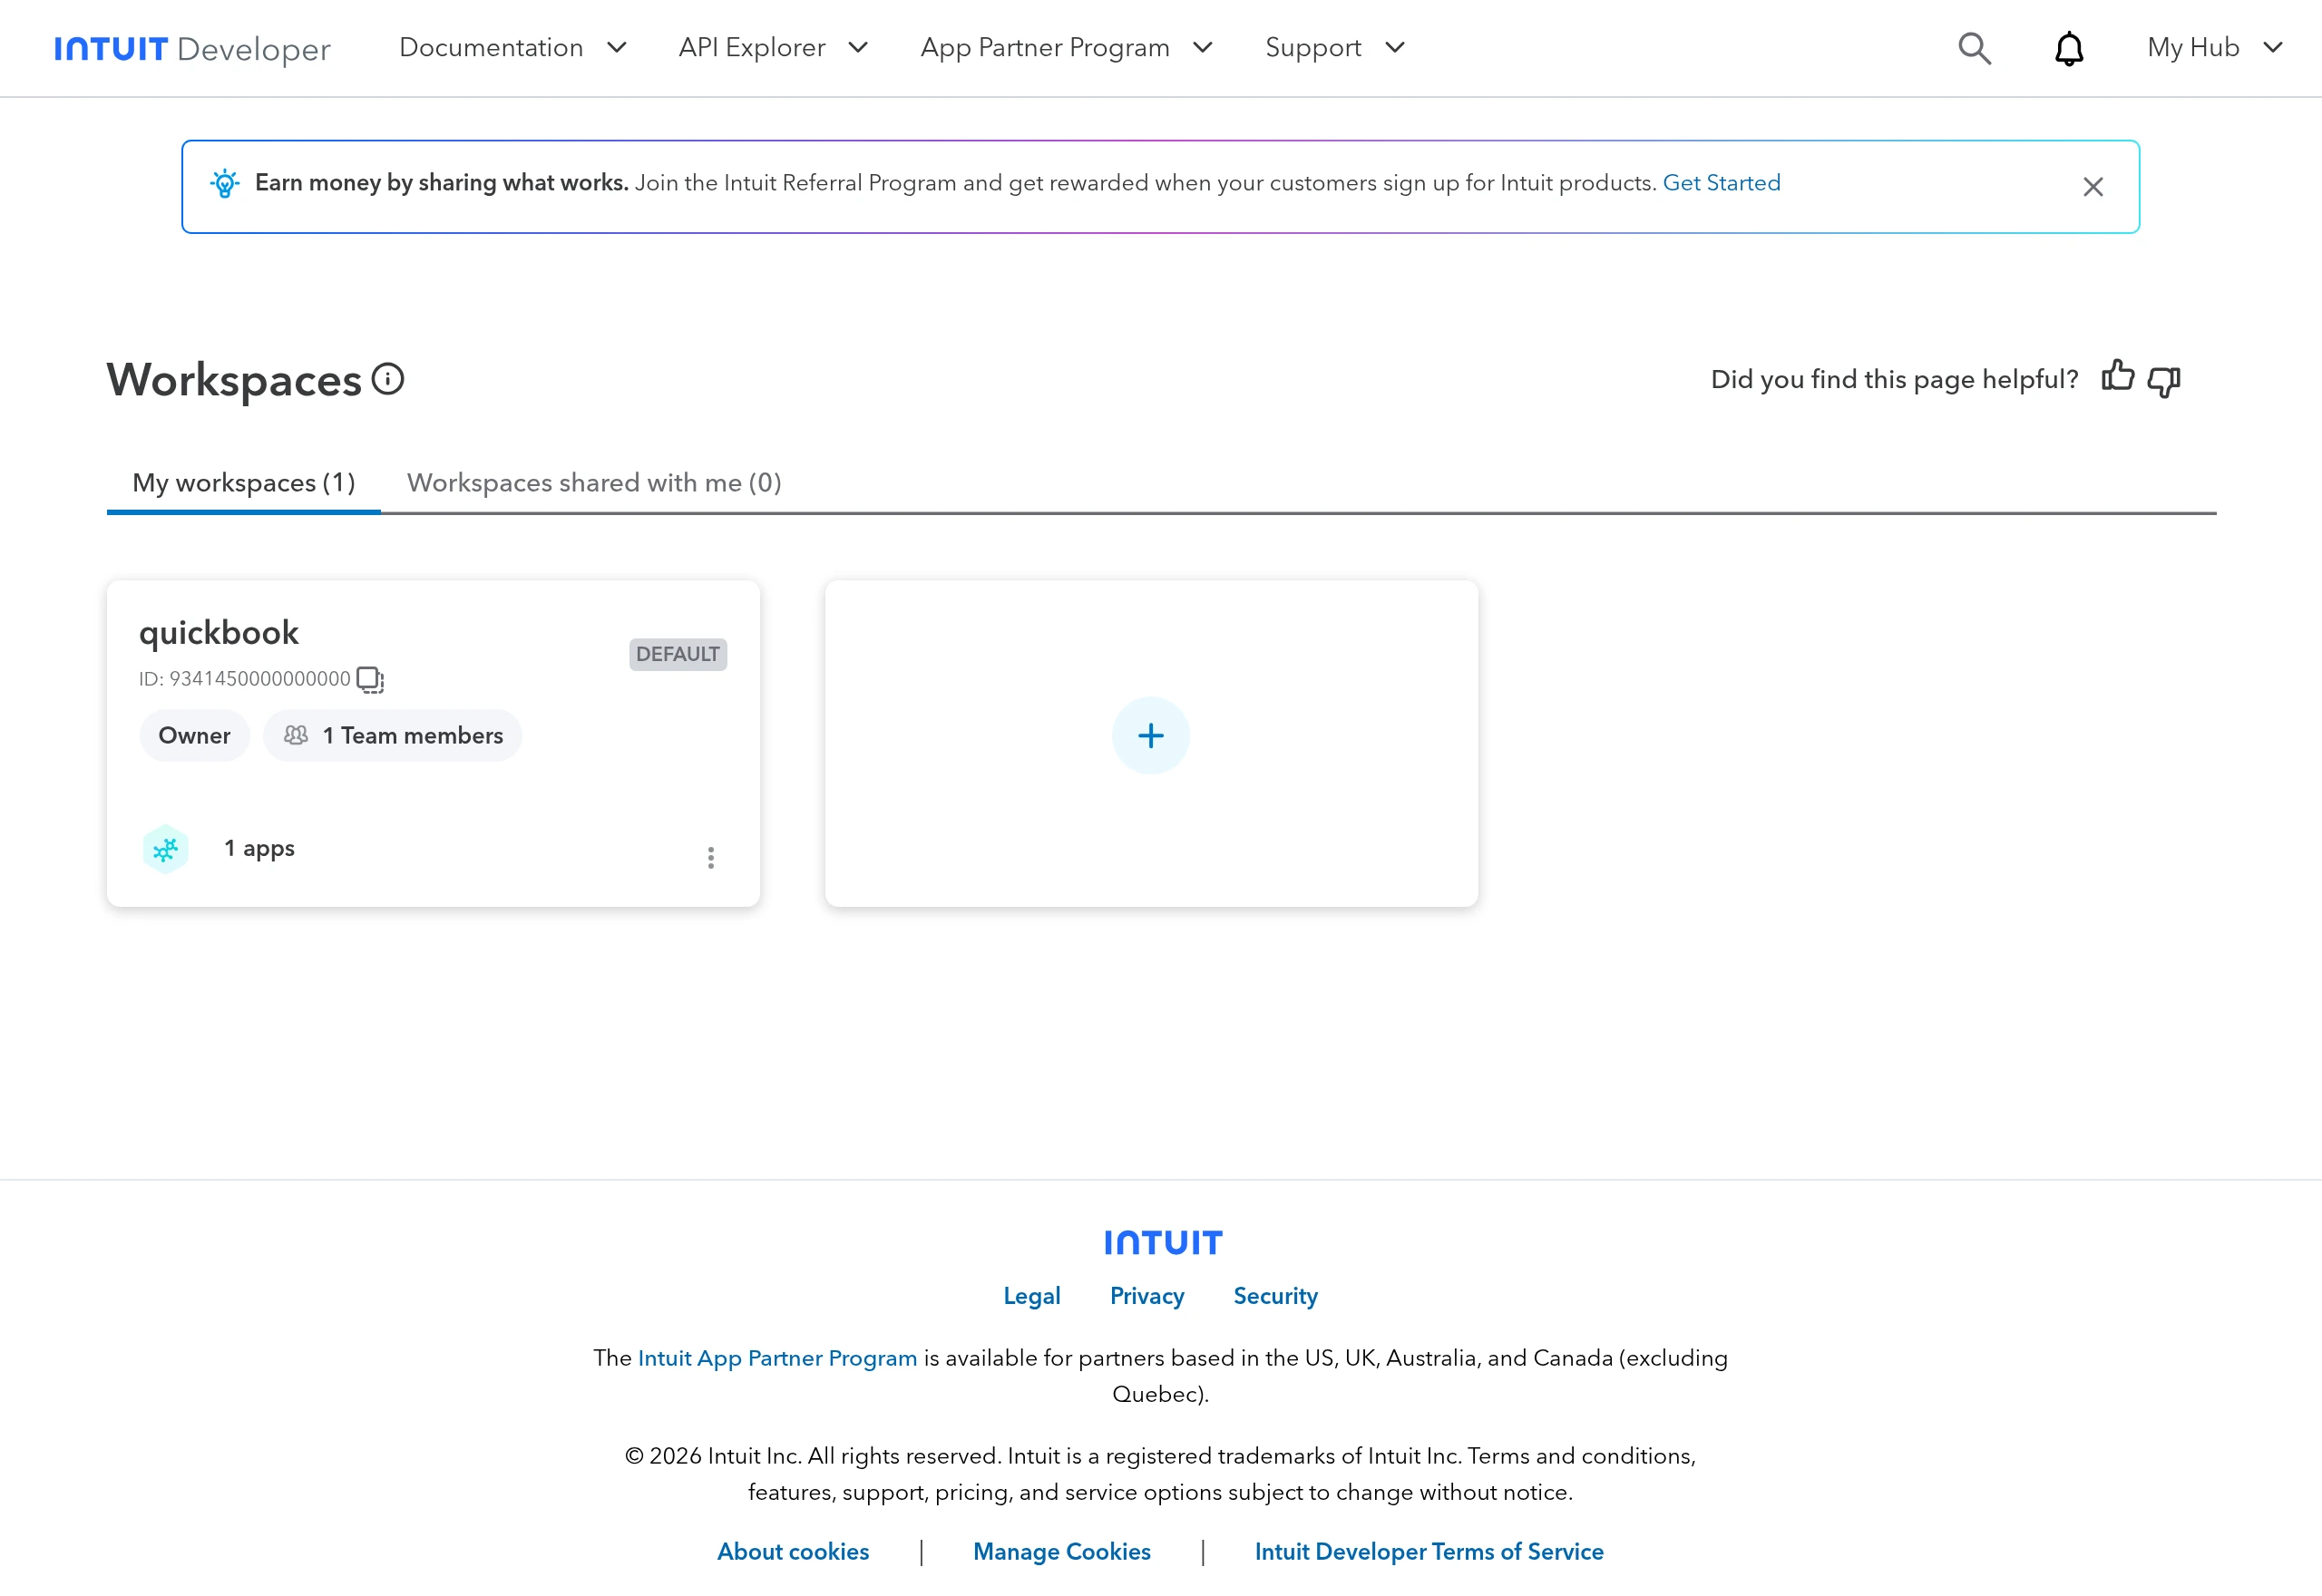
- Open your workspace (Intuit creates a default one), or click + to create a new workspace.
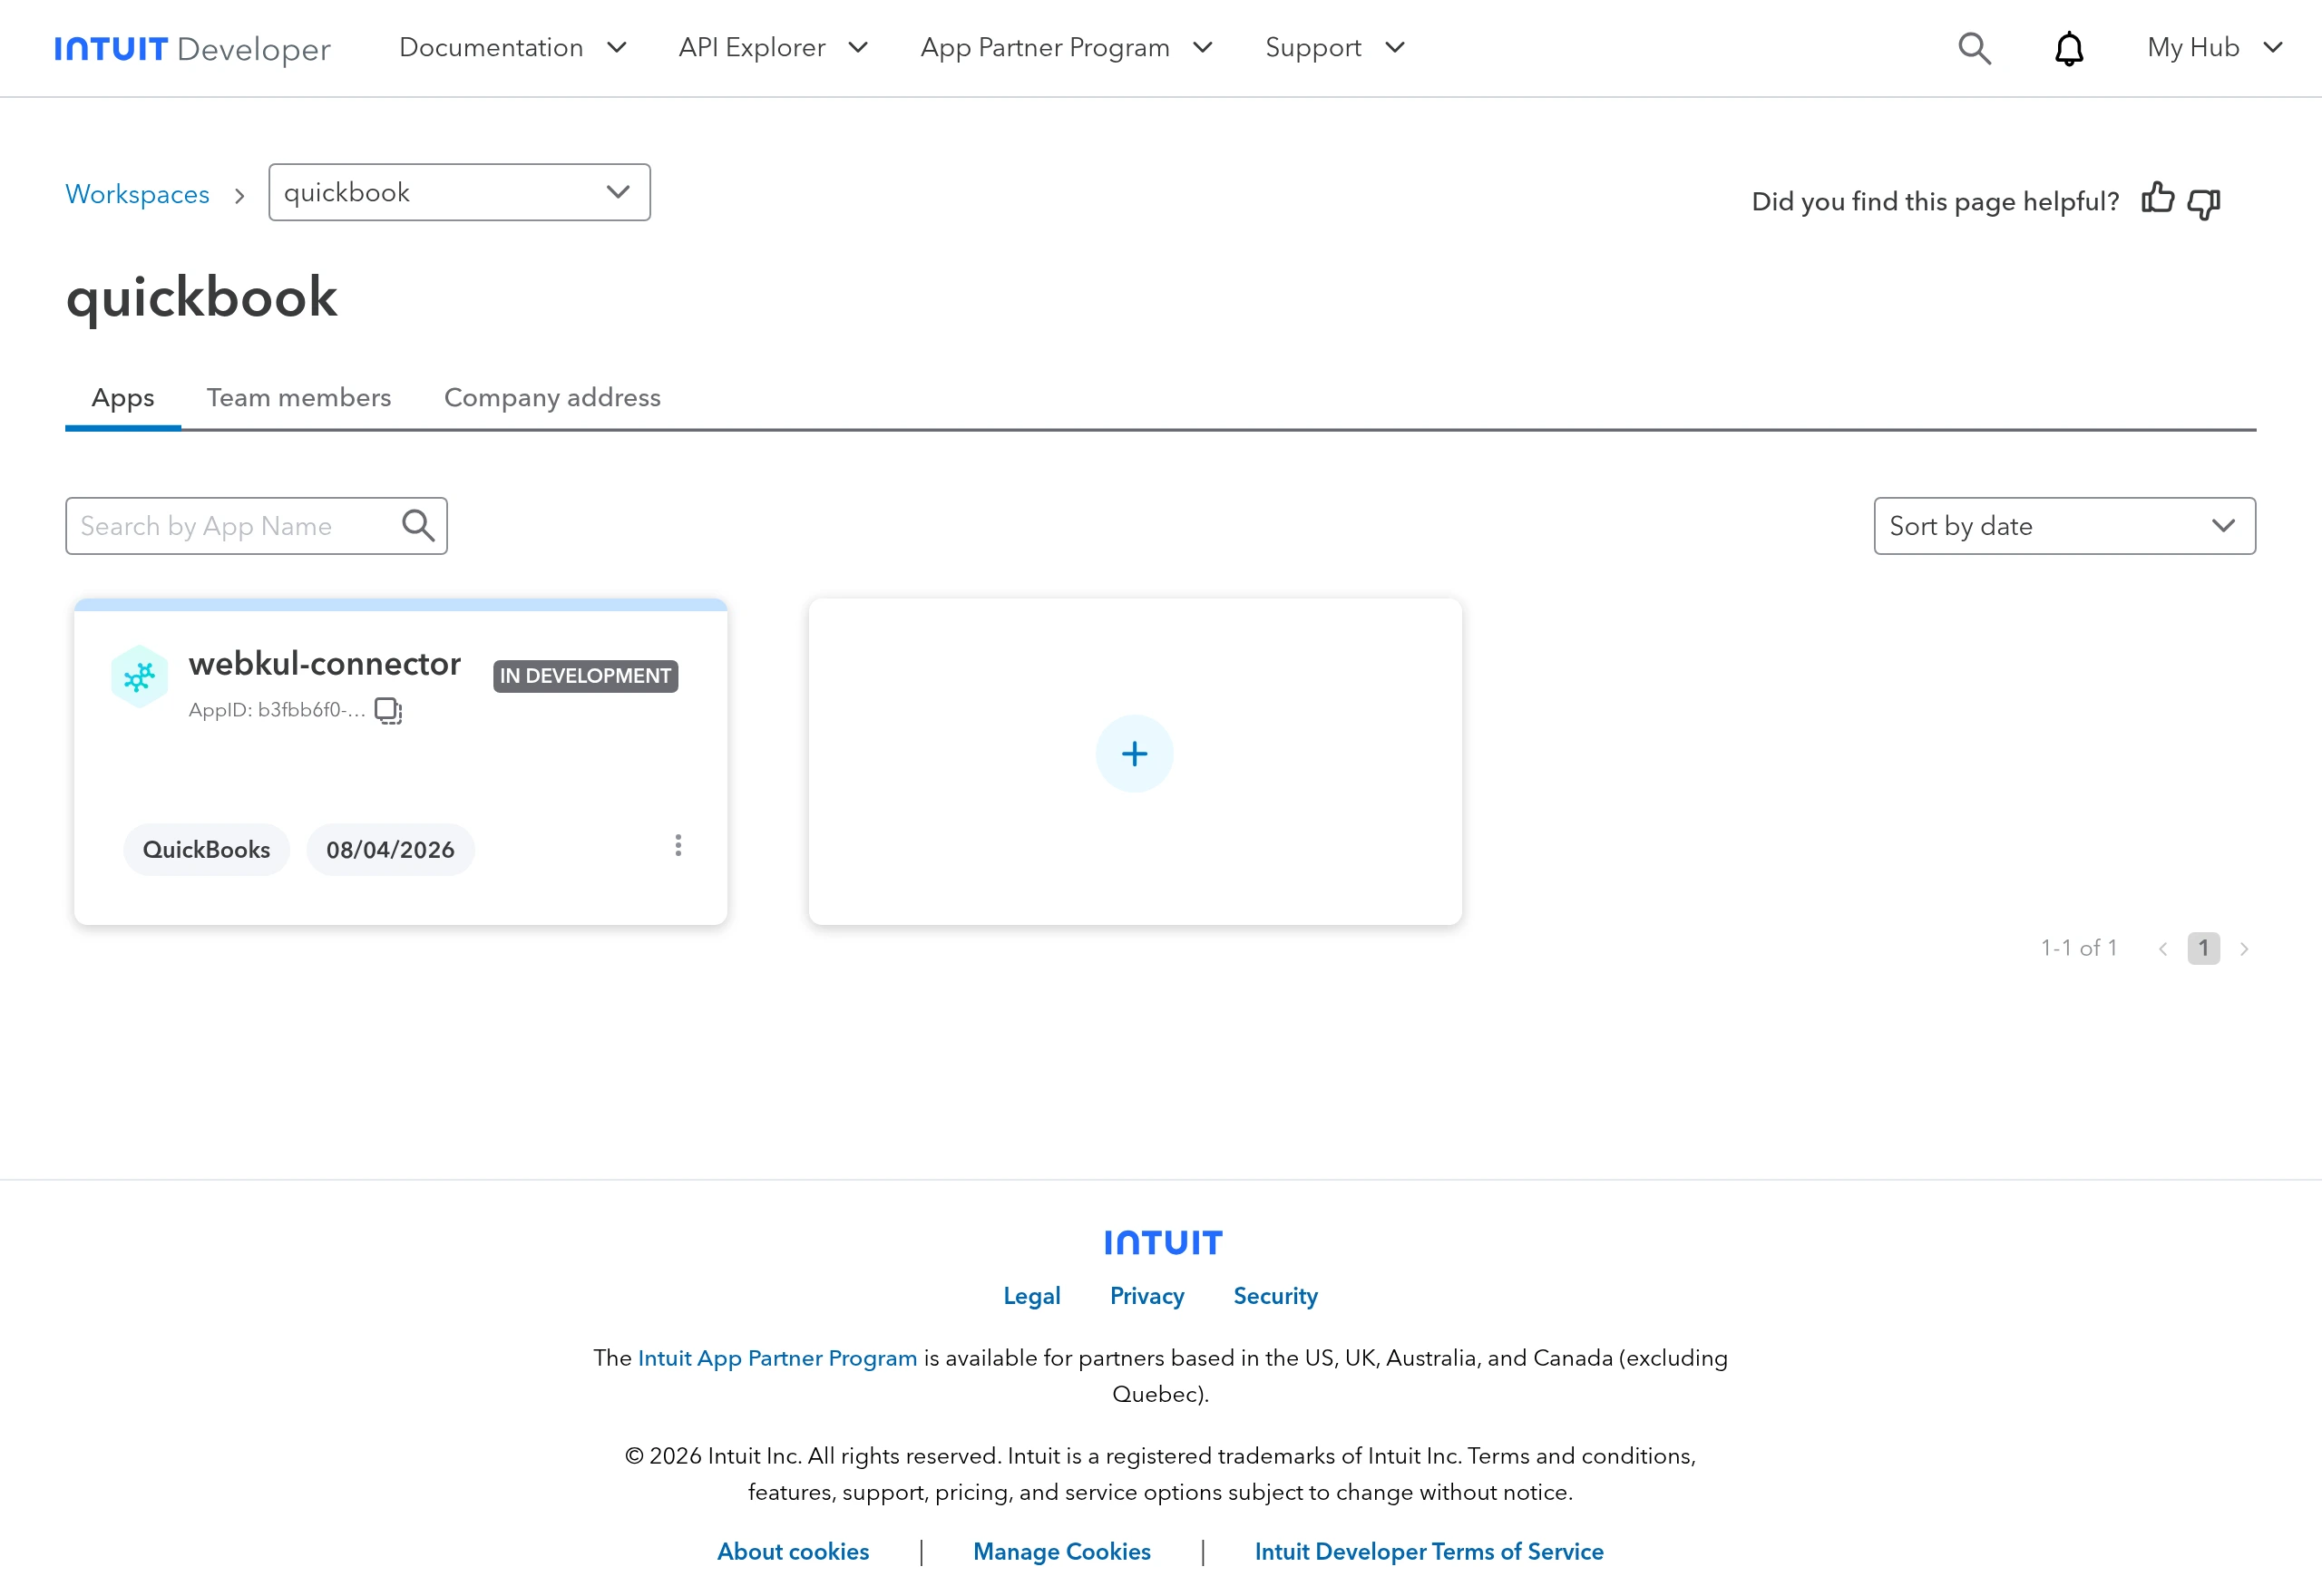
- On the workspace's Apps tab, click the + card to create an app: select QuickBooks Online and Payments as the platform, give the app a recognizable name, and select the Accounting scope (
com.intuit.quickbooks.accounting) — that's what the connector uses to read and write customers, items, invoices, payments, and taxes.
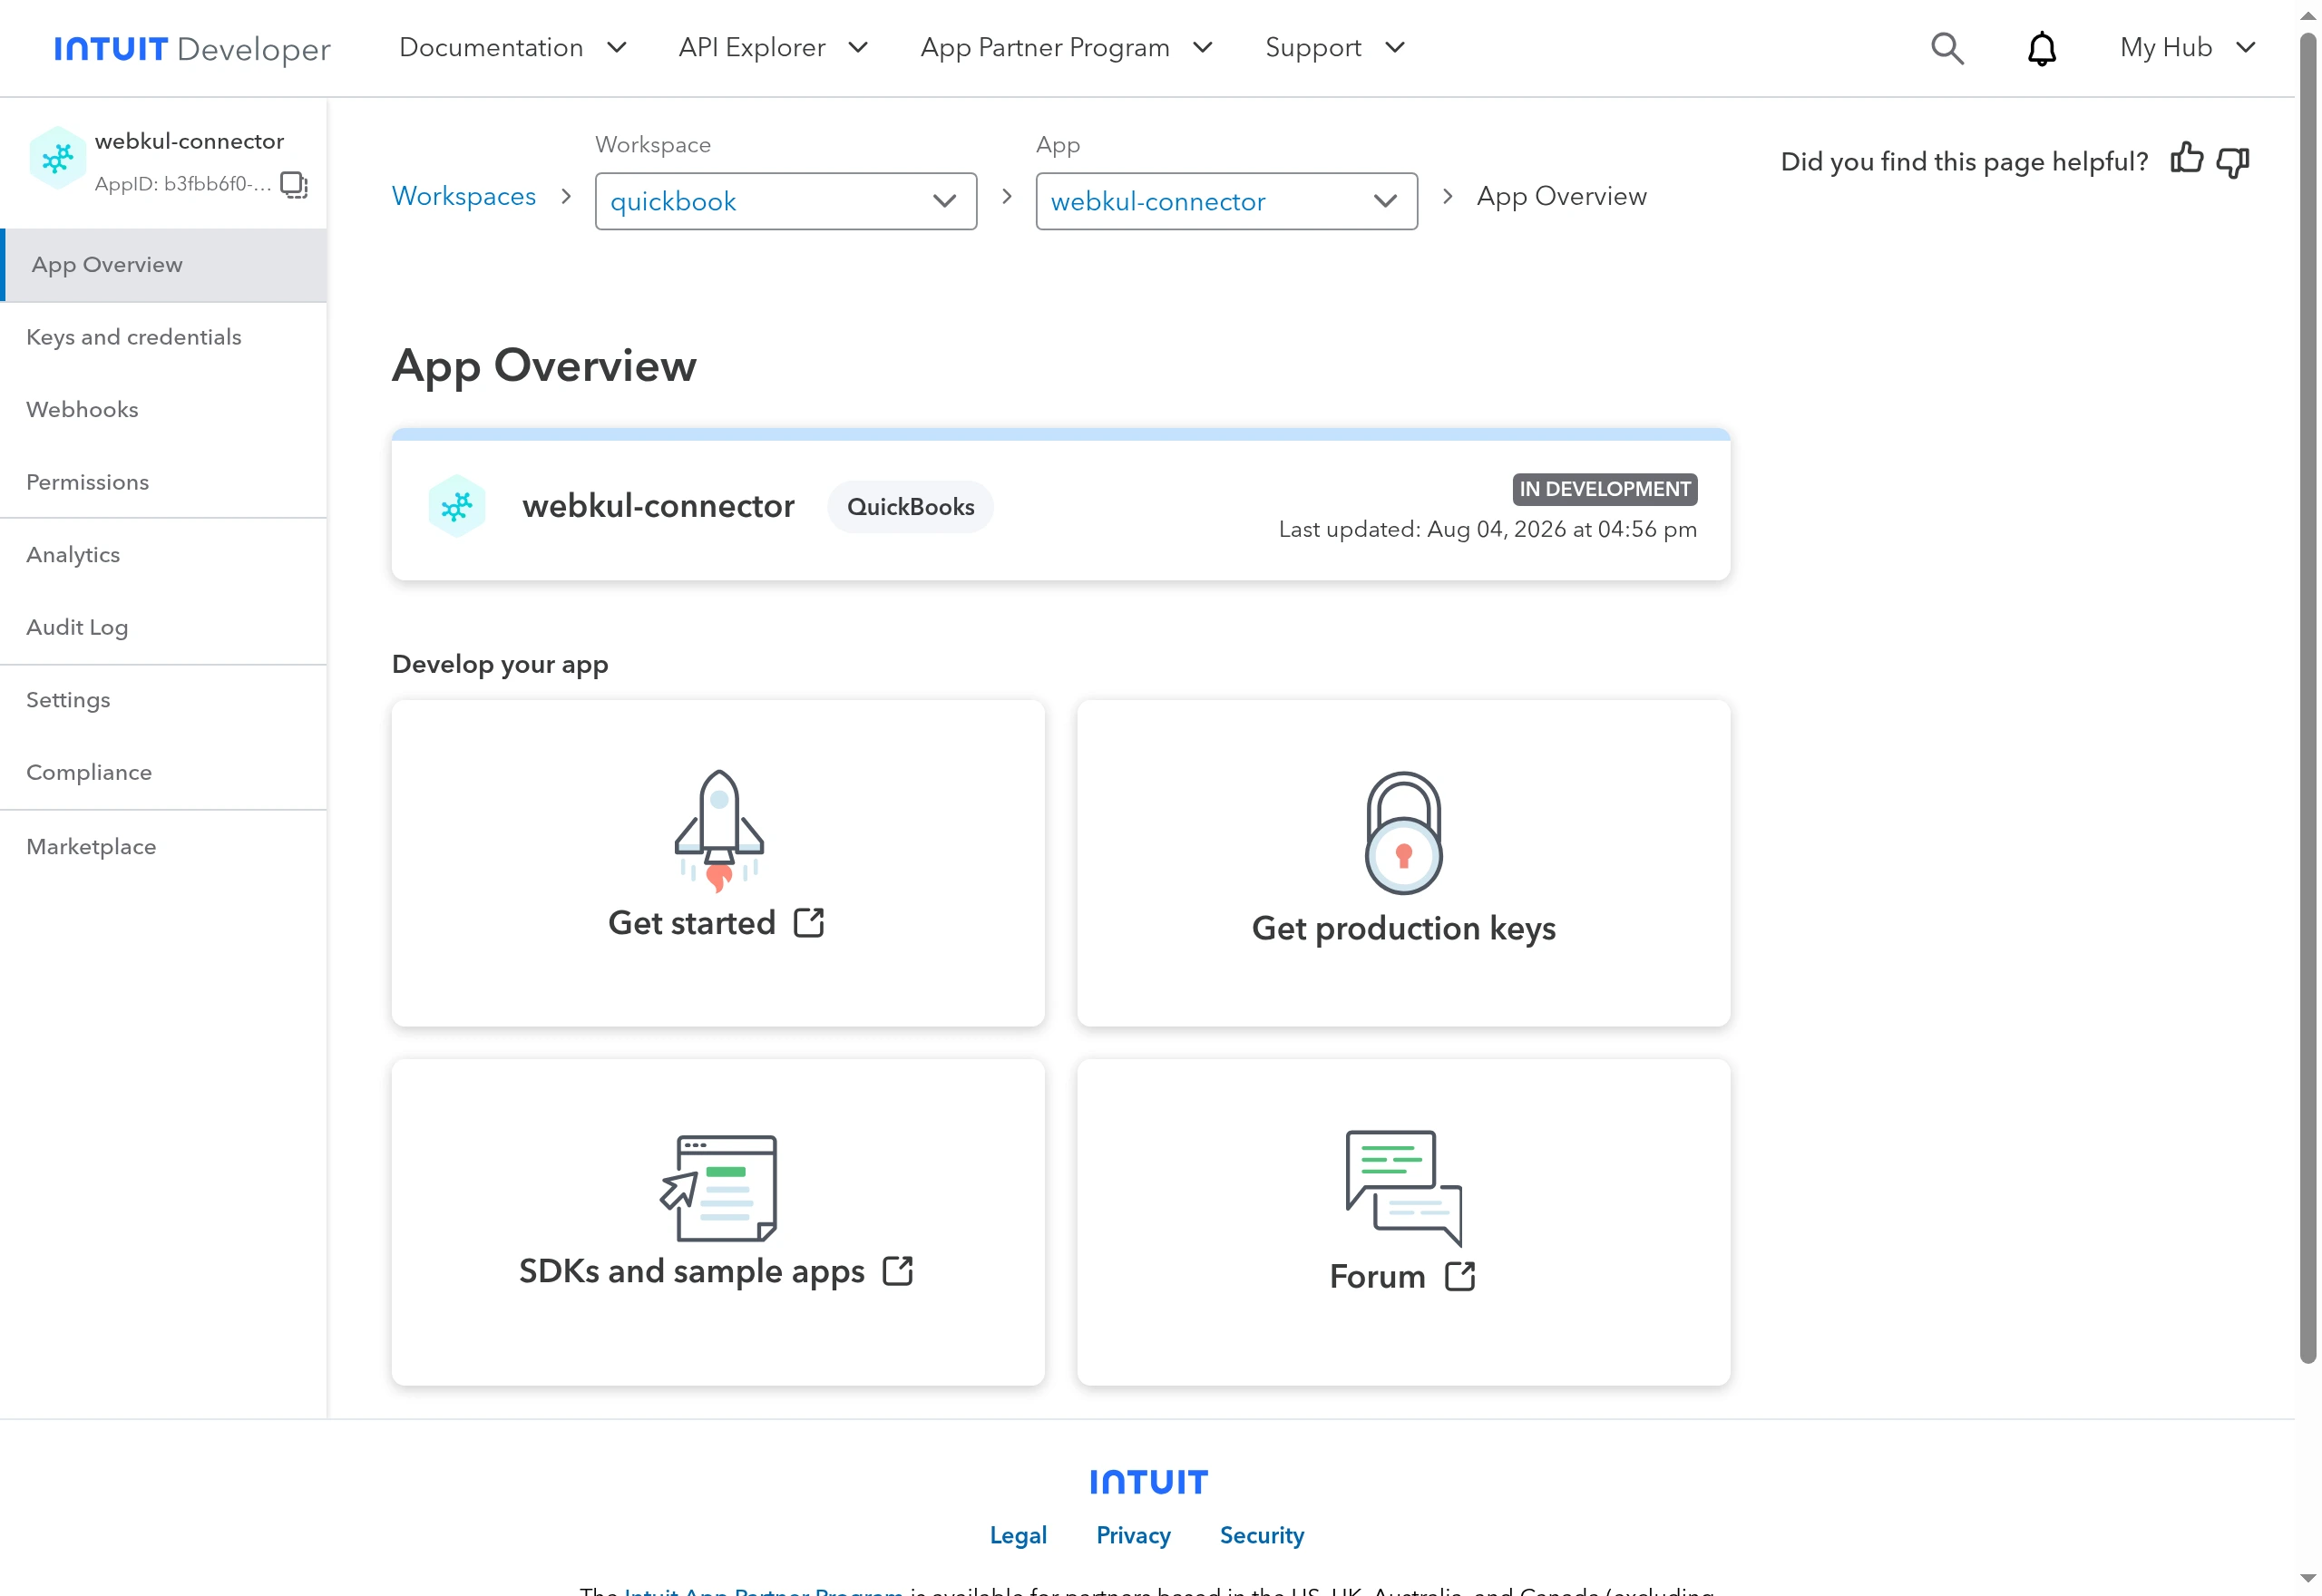
- Click the app card to open its App Overview. The left sidebar is where everything else on this page happens: Keys and credentials and Settings.
Step 3: Copy the Client ID and Client Secret
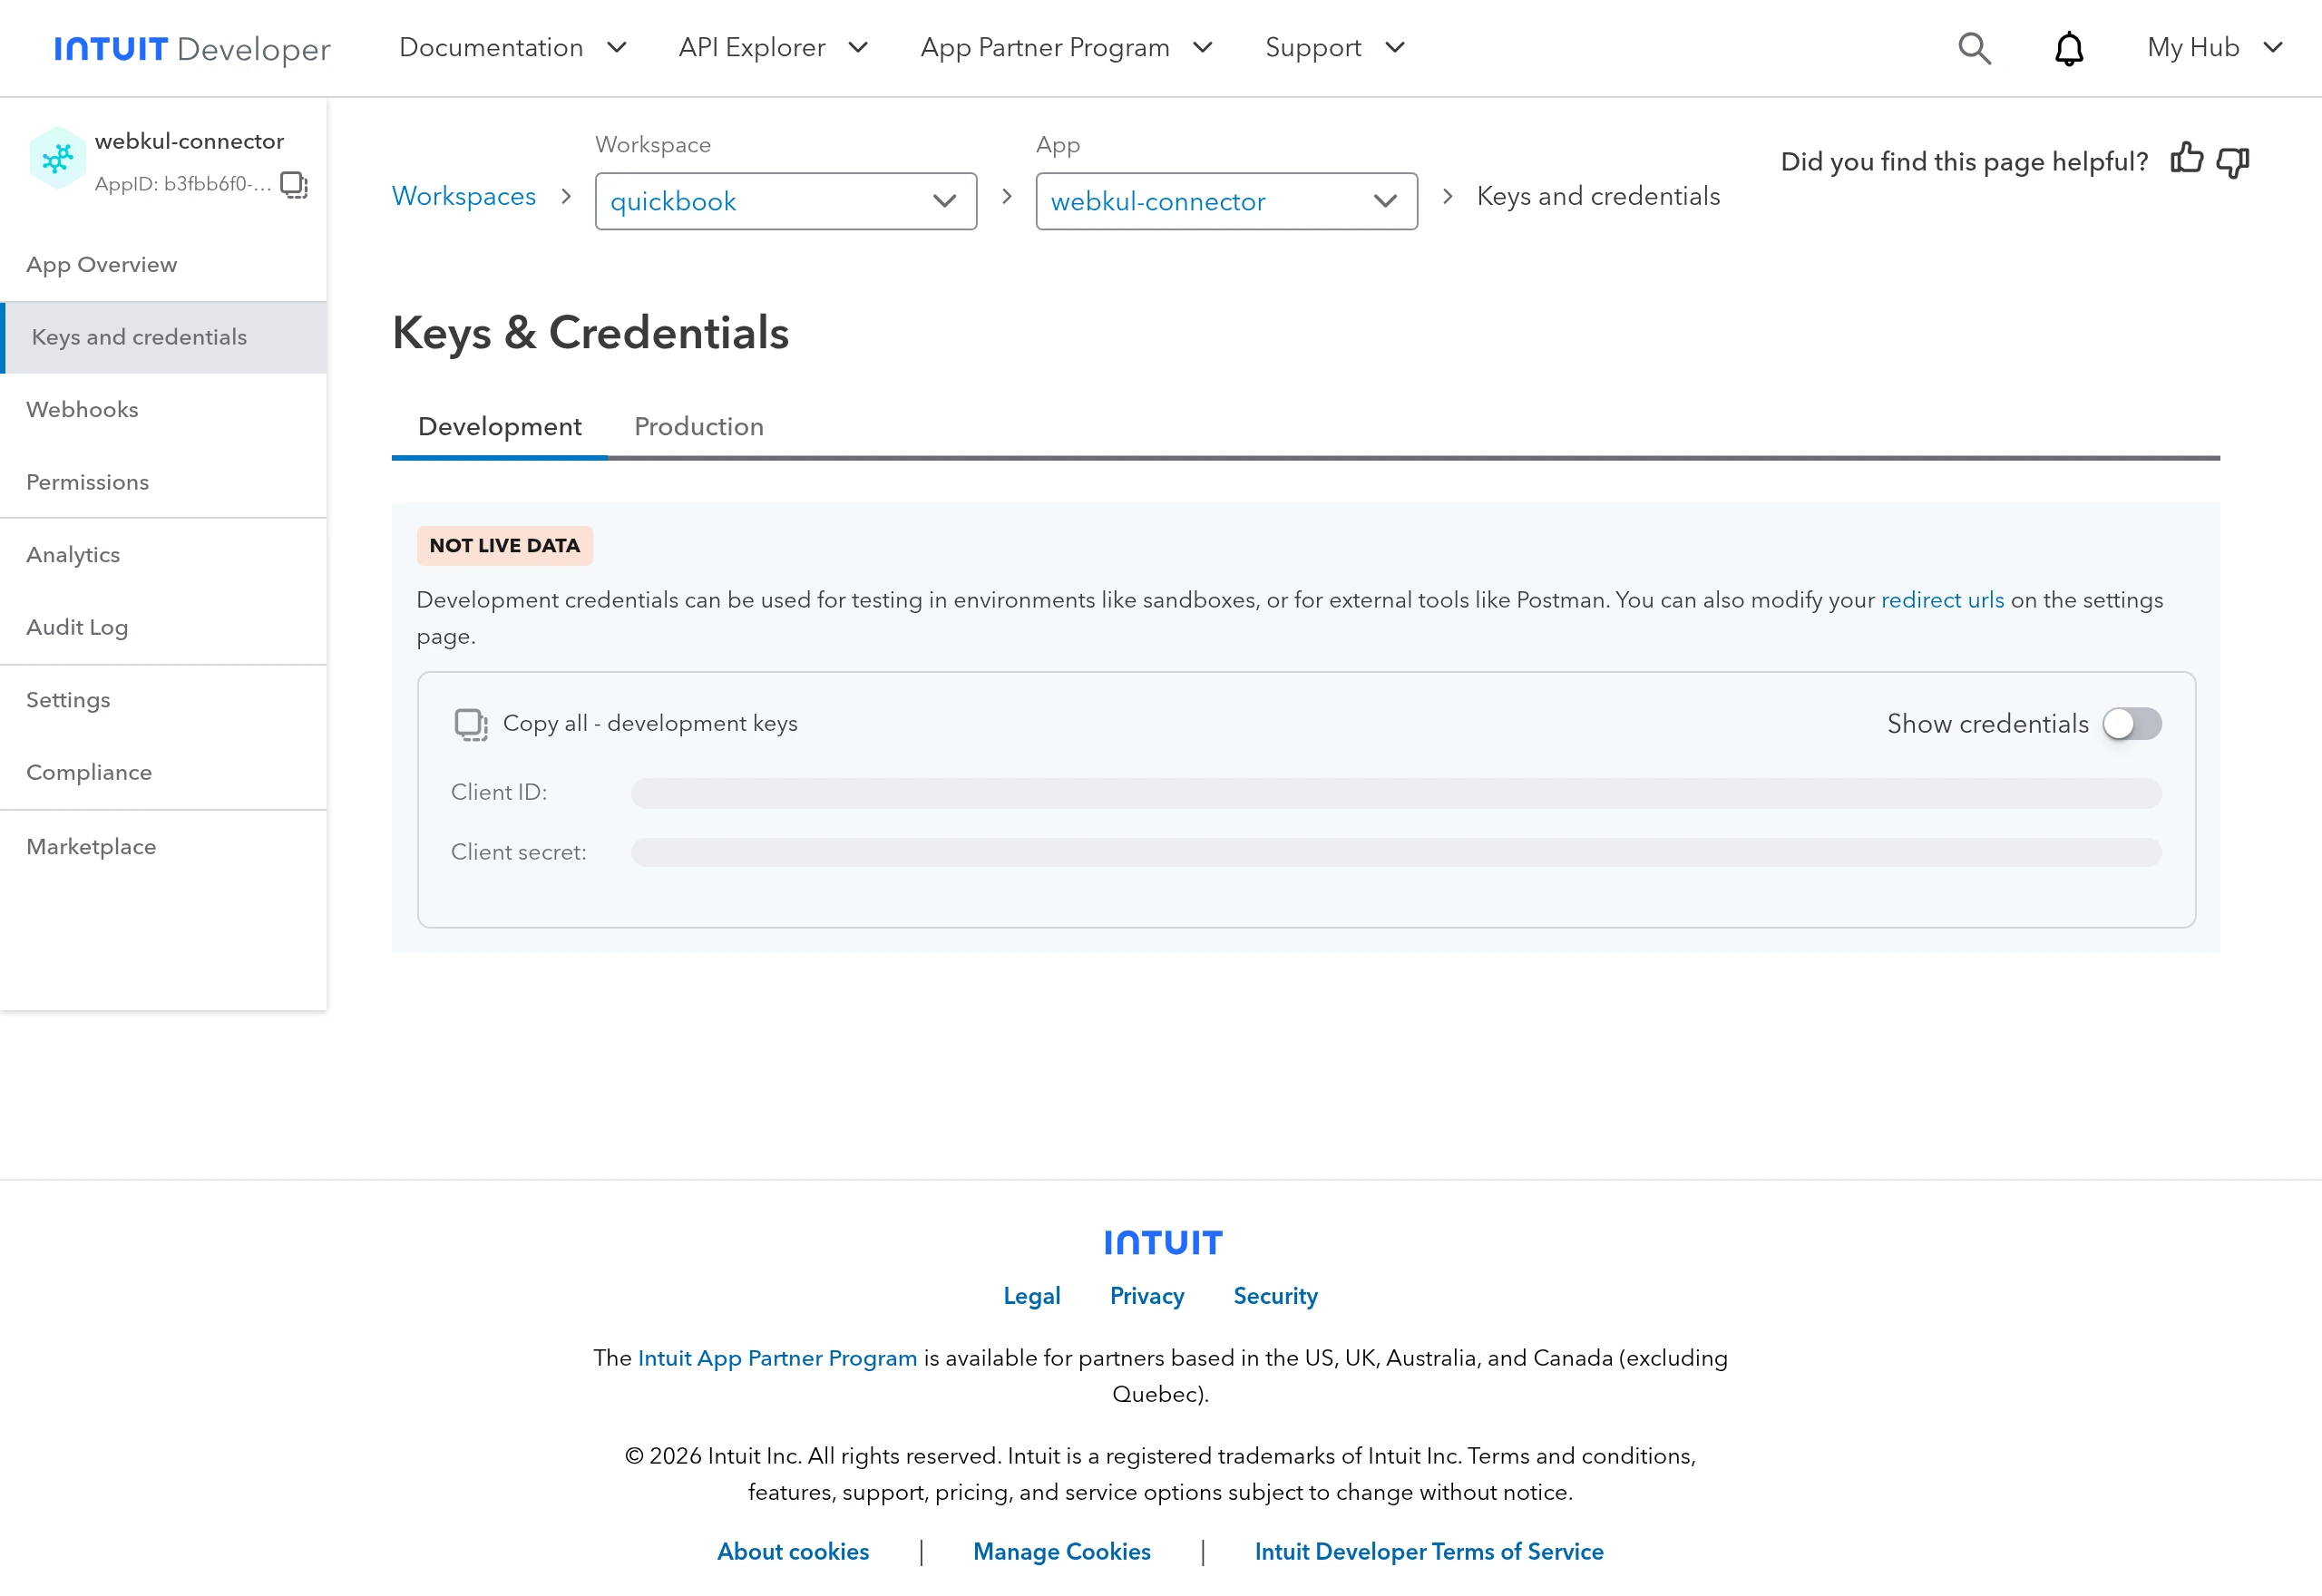
- In the app's left sidebar, open Keys and credentials.
- Pick the environment tab that matches the mode you'll choose in the wizard — Development or Production:
| Key pair on developer.intuit.com | Use with wizard mode | Connects to |
|---|---|---|
| Development tab | Sandbox / Development | Intuit's free sandbox company — safe for testing |
| Production tab | Live / Production | Your real QuickBooks Online company |
- Turn on the Show credentials toggle to reveal the values, then copy the Client ID and Client secret (the Copy all button grabs both at once). These are exactly the two values the wizard's Credentials step asks for.
Keys are mode-specific
Development keys can never authorize a Production connection, and vice versa. If the wizard's connection test fails with correct-looking keys, first check that the key pair matches the selected QuickBooks Mode.
Production keys
Production keys appear on the Production tab only after you complete the app's required details — use the Get production keys card on the App Overview and fill in the questionnaire. Do this once your Sandbox testing is finished.
Step 4: Register the Redirect URIs
After authorization, Intuit sends your browser back to the store — but only to URLs you have pre-approved in the app:
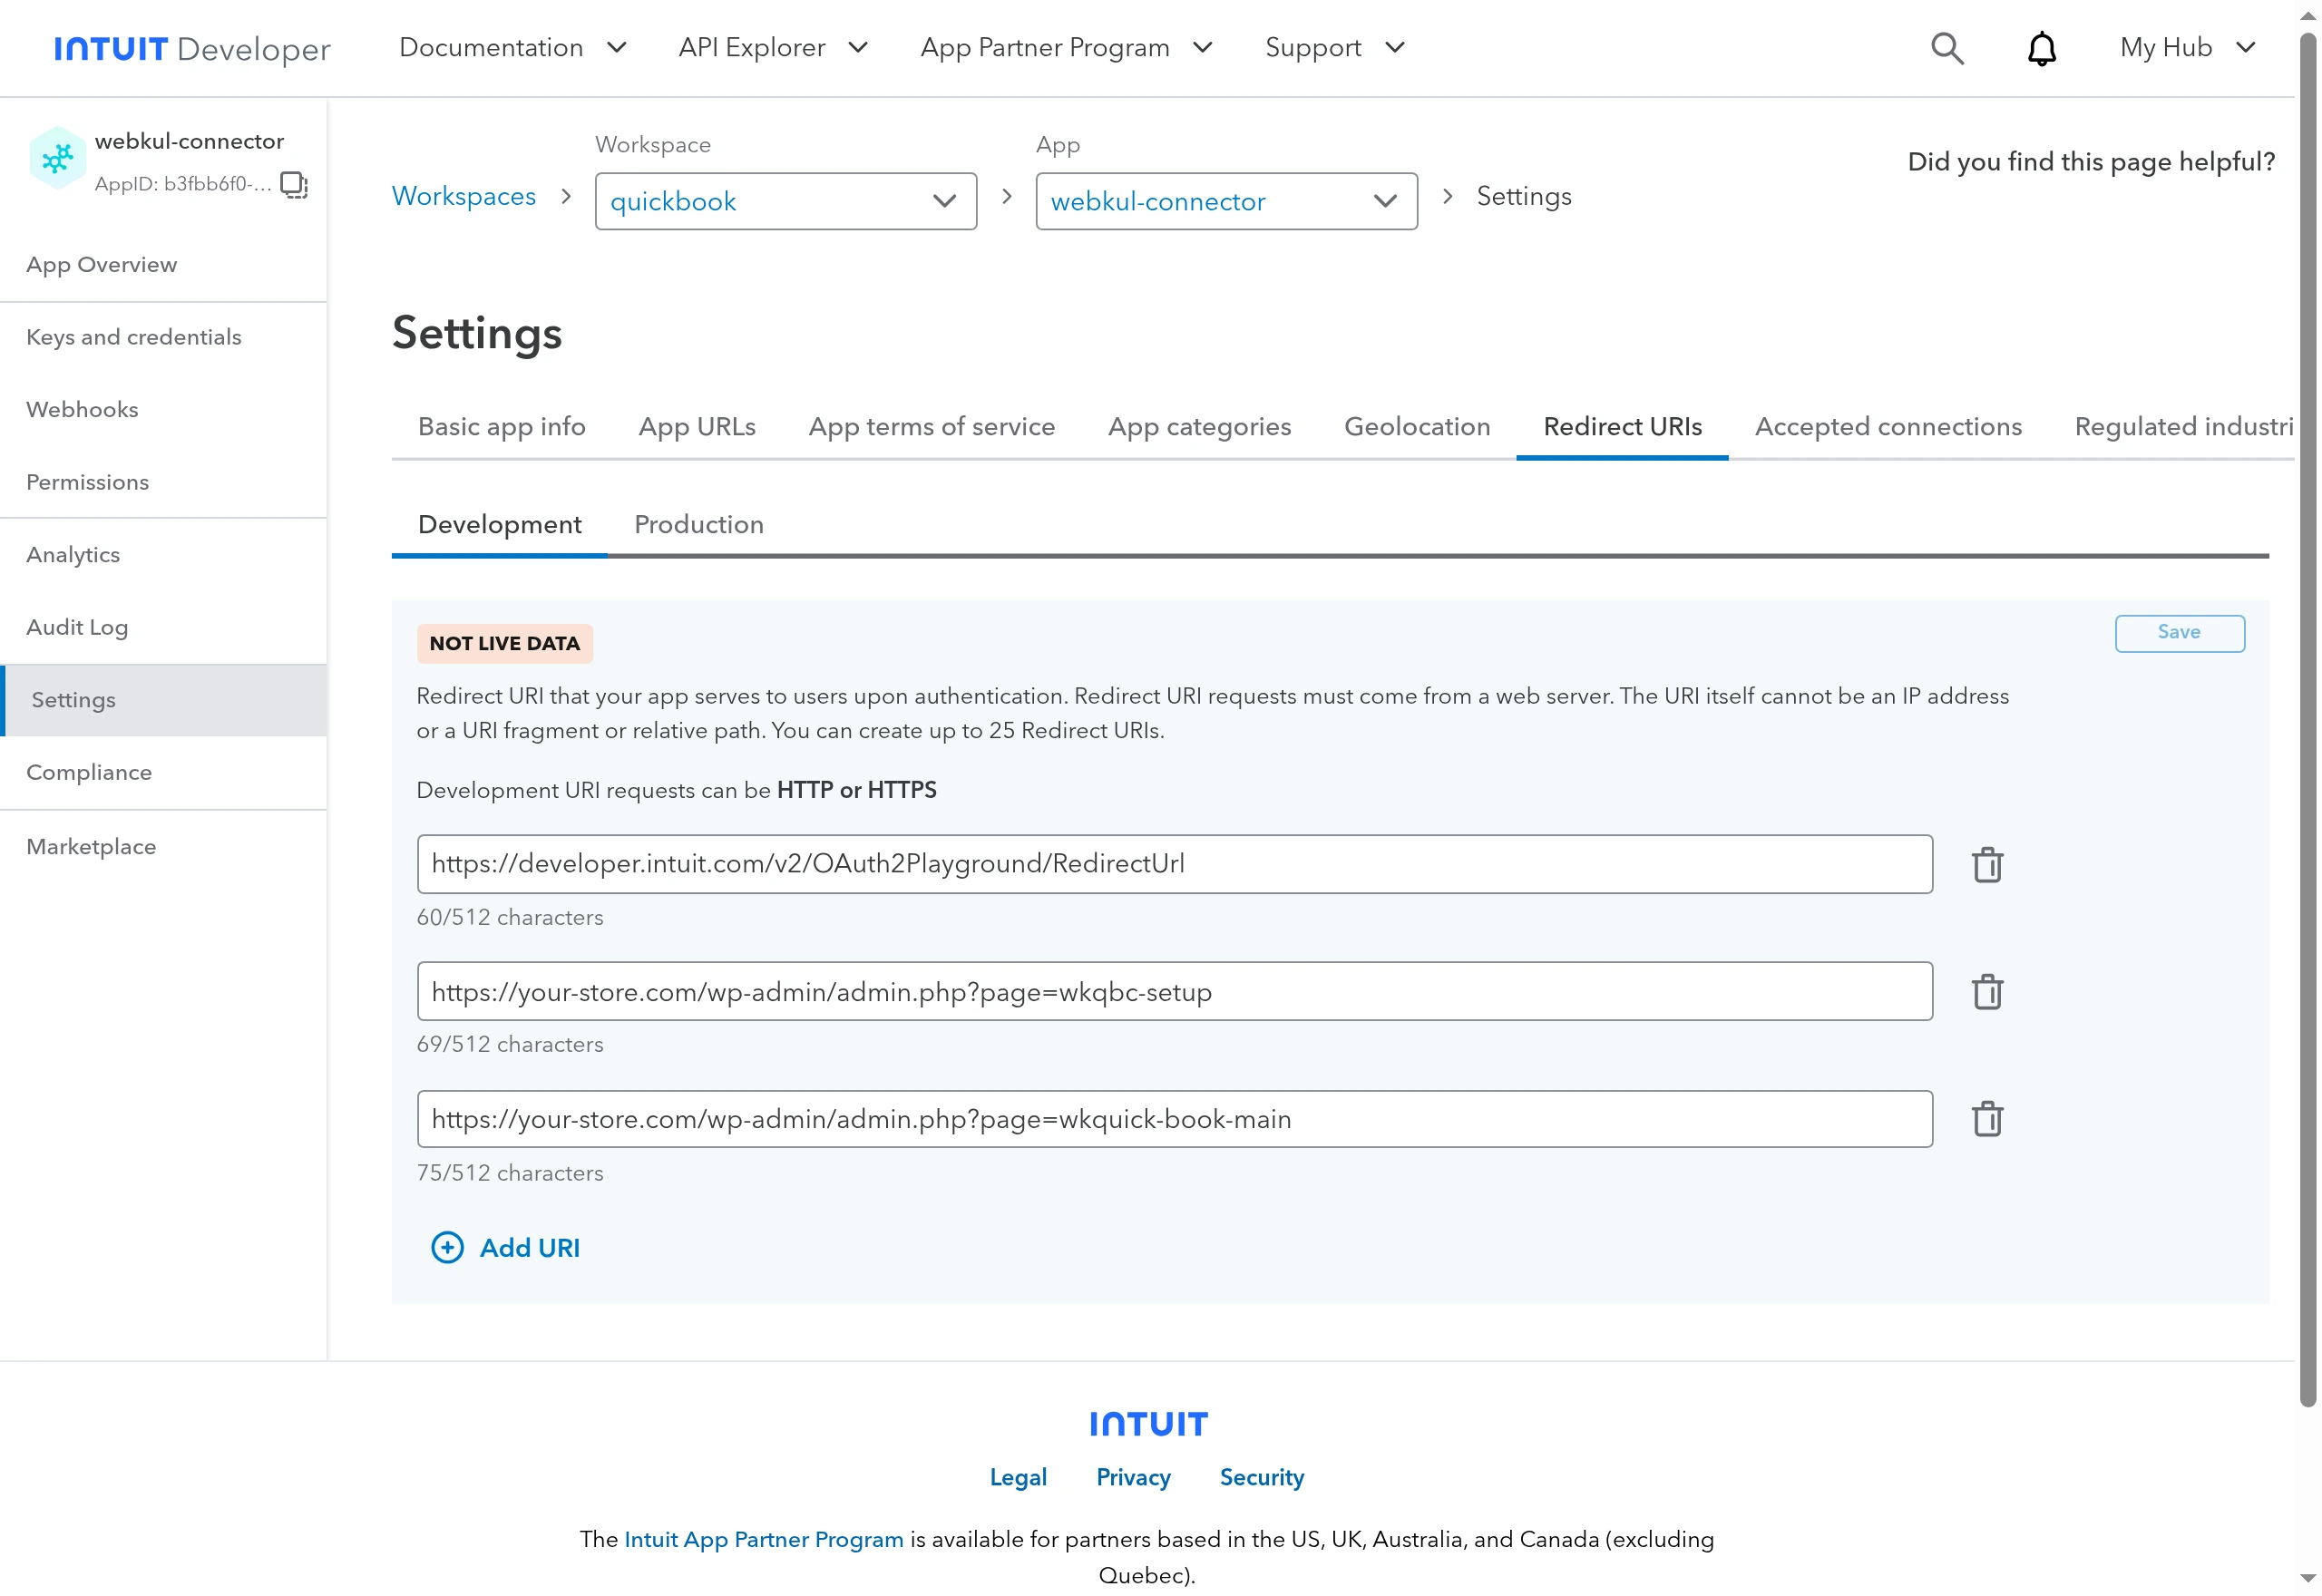
- In the app's left sidebar, open Settings and switch to the Redirect URIs tab.
- Stay on the environment tab you're configuring (Development or Production).
- Click Add URI and add both URIs used by the connector, then click Save:
https://your-store.com/wp-admin/admin.php?page=wkqbc-setuphttps://your-store.com/wp-admin/admin.php?page=wkquick-book-main
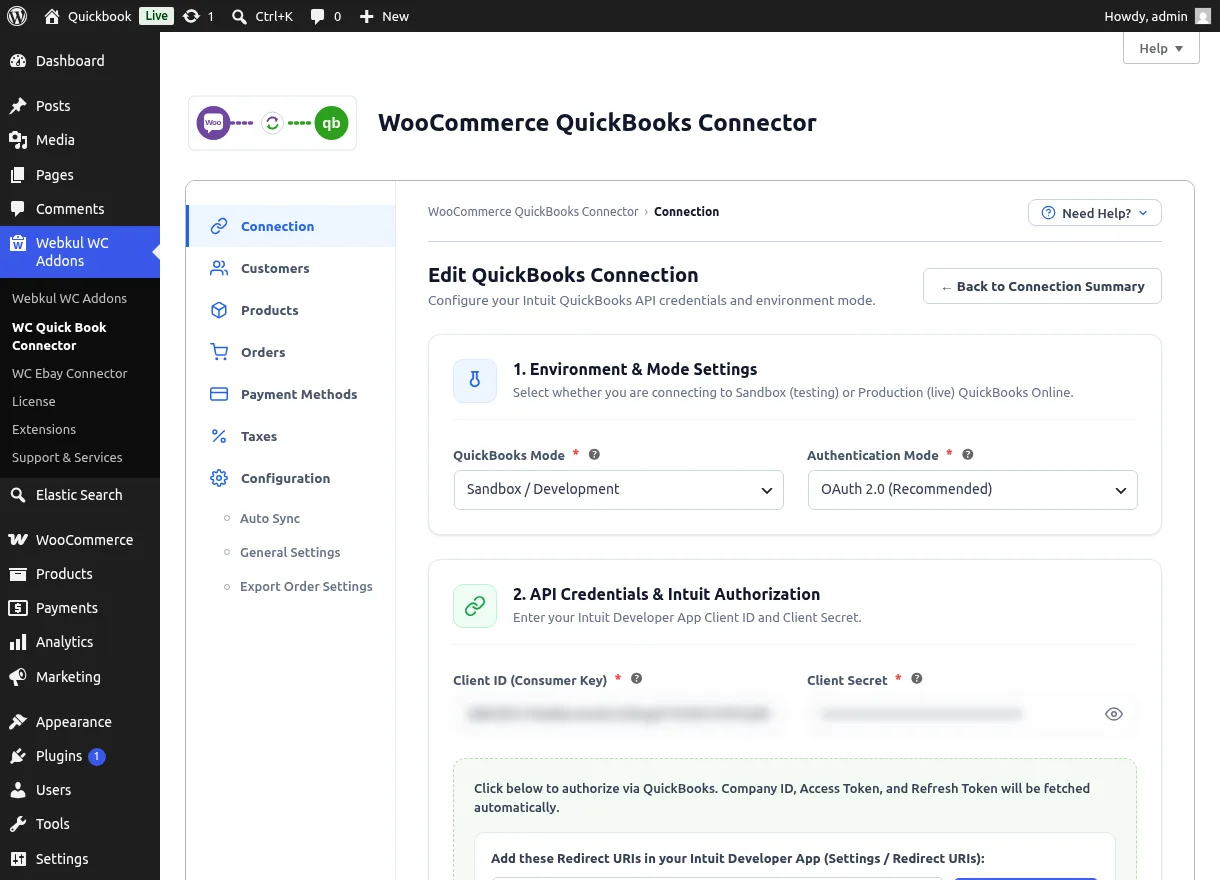
You don't need to type the URIs — the connector's Connection Settings form shows both with one-click Copy buttons:
Exact match required
Intuit compares redirect URIs character by character. Copy them from the connector rather than retyping, and re-add them if your store's domain or protocol ever changes — otherwise authorization fails with a redirect error. Development URIs may use HTTP or HTTPS; Production URIs must be HTTPS.
Step 5: Set up the webhook (for real-time sync)
If you plan to use real-time QuickBooks → WooCommerce sync, tell Intuit where to send change notifications:
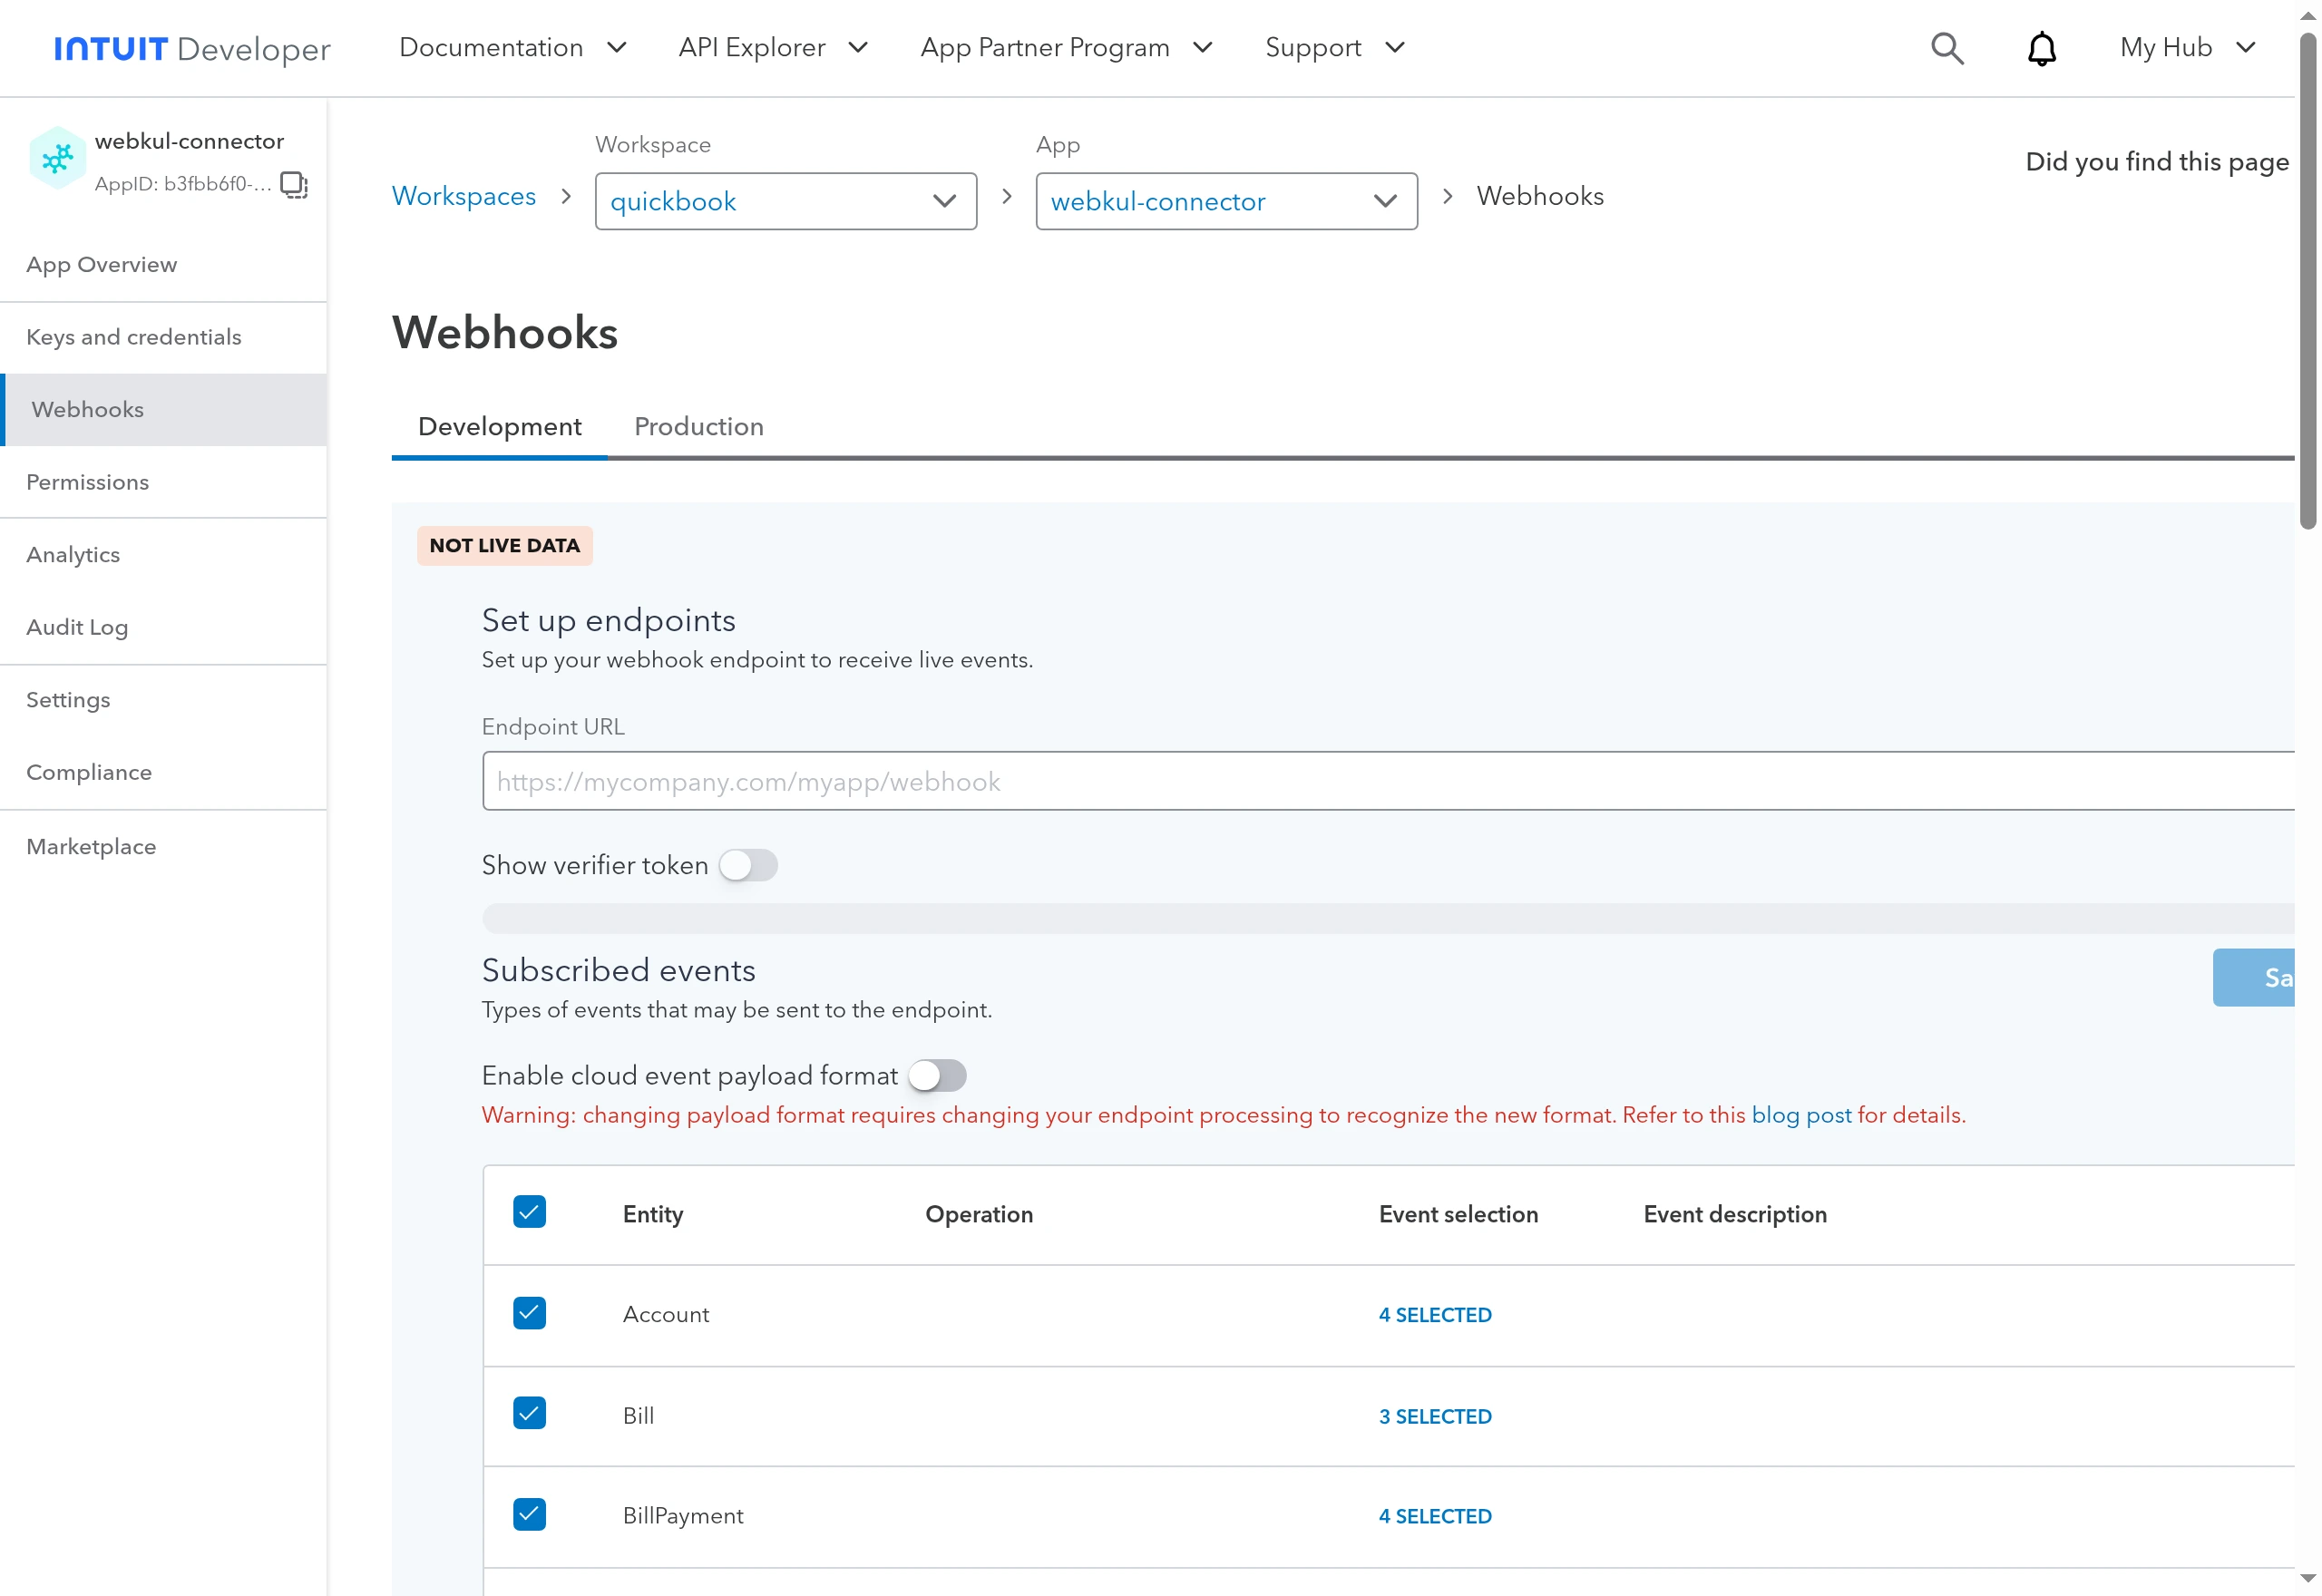
- In the app's left sidebar, open Webhooks and stay on the matching environment tab.
- Under Set up endpoints, enter your store's webhook listener as the Endpoint URL:
https://your-store.com/?wk_woo_quickbook=update
- Under Subscribed events, subscribe to the entities the connector processes — Item, Invoice, Payment, and Bill (create/update/delete events).
- Click Save.
Both payload formats work
The connector understands Intuit's classic webhook JSON and the newer CloudEvents payload format (the Enable cloud event payload format toggle) — you can leave the toggle either way.
Step 6: Get a sandbox company (for testing)
Every Intuit developer account includes free sandbox QuickBooks companies:
- Open My Hub → Sandboxes (the same menu as Step 2).
- Intuit creates a sandbox company automatically — the list shows its name, ID, region, and enabled features, and the Add button creates more (up to your account limit).
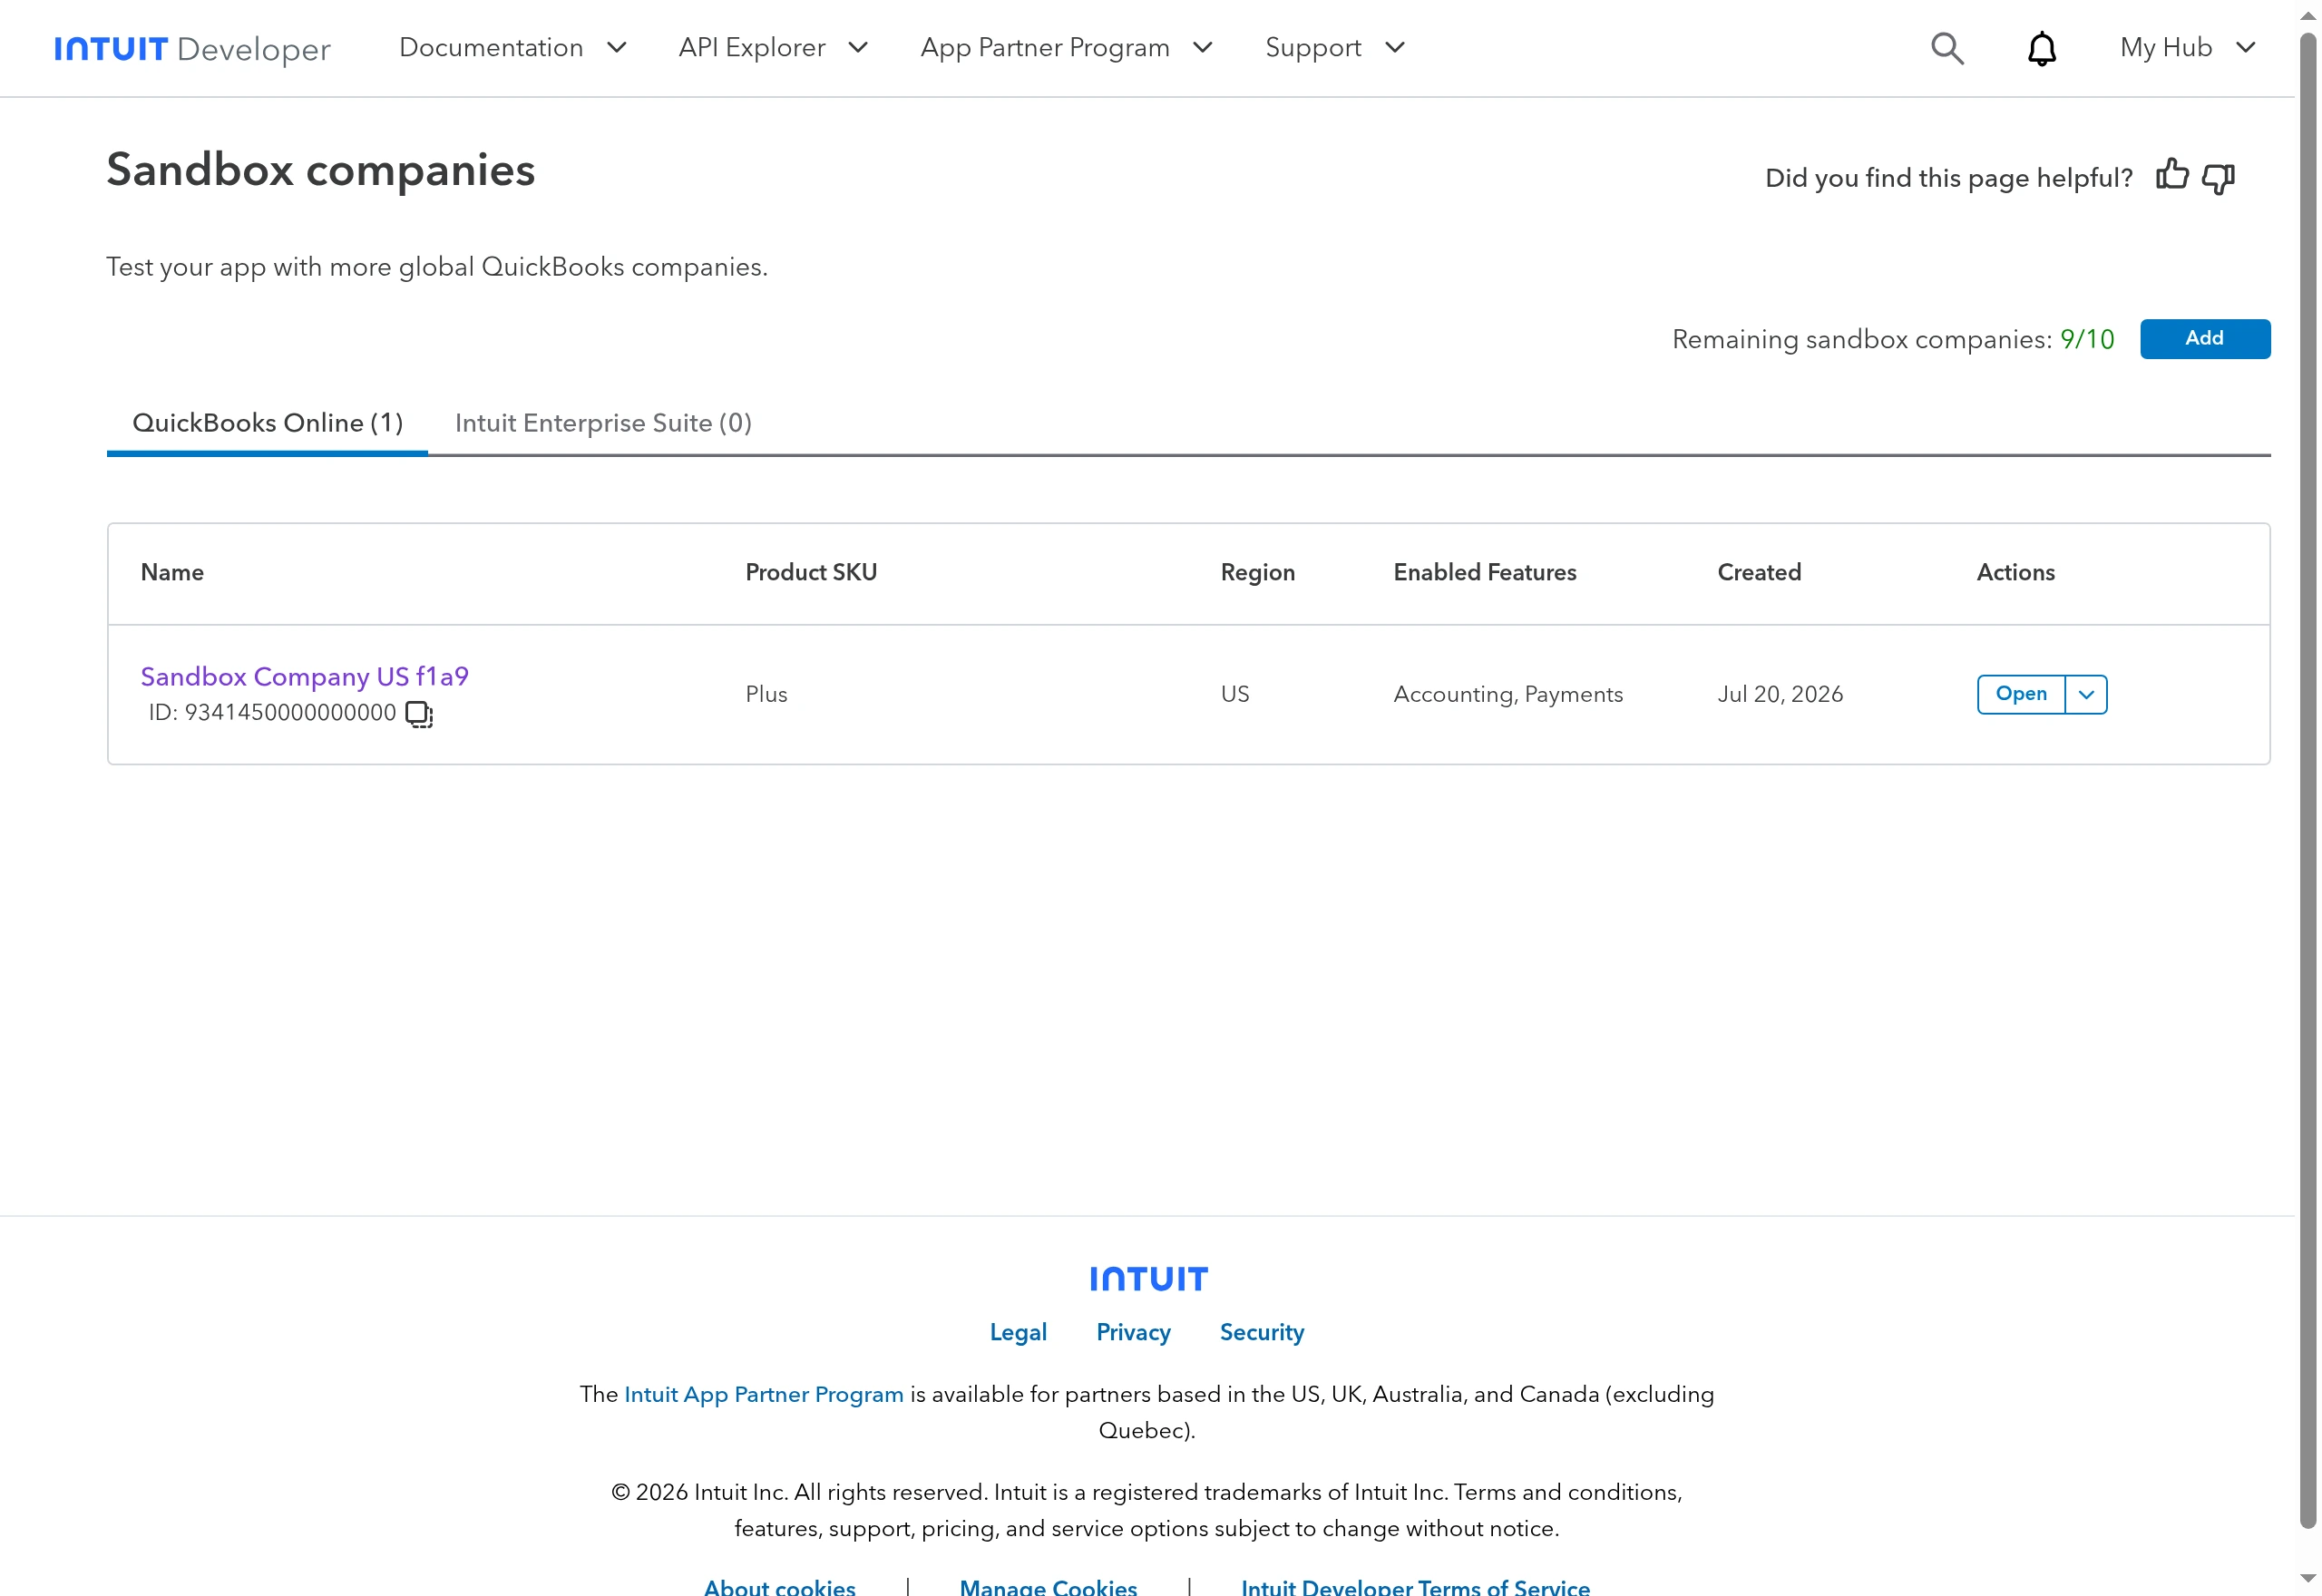
This is the company you'll pick when authorizing in Sandbox / Development mode. Test your product, customer, and order sync against it first — nothing you do there touches real books.
Checklist before running the wizard
- ✅ Intuit Developer account created
- ✅ Workspace opened and app created with the Accounting scope
- ✅ Client ID and Client secret copied (from the environment tab matching your mode)
- ✅ Both Redirect URIs added under Settings → Redirect URIs and saved
- ✅ Webhook endpoint saved under Webhooks (if you'll use real-time sync)
- ✅ Sandbox company available (if testing first)
Next step: Run the Setup Wizard →