
Products
The Products tab keeps your catalog aligned in both systems: export WooCommerce products (variations included) to QuickBooks, or pull QuickBooks items into WooCommerce through a two-step staged import.
Open Webkul WC Addons → WC Quick Book Connector → Products.
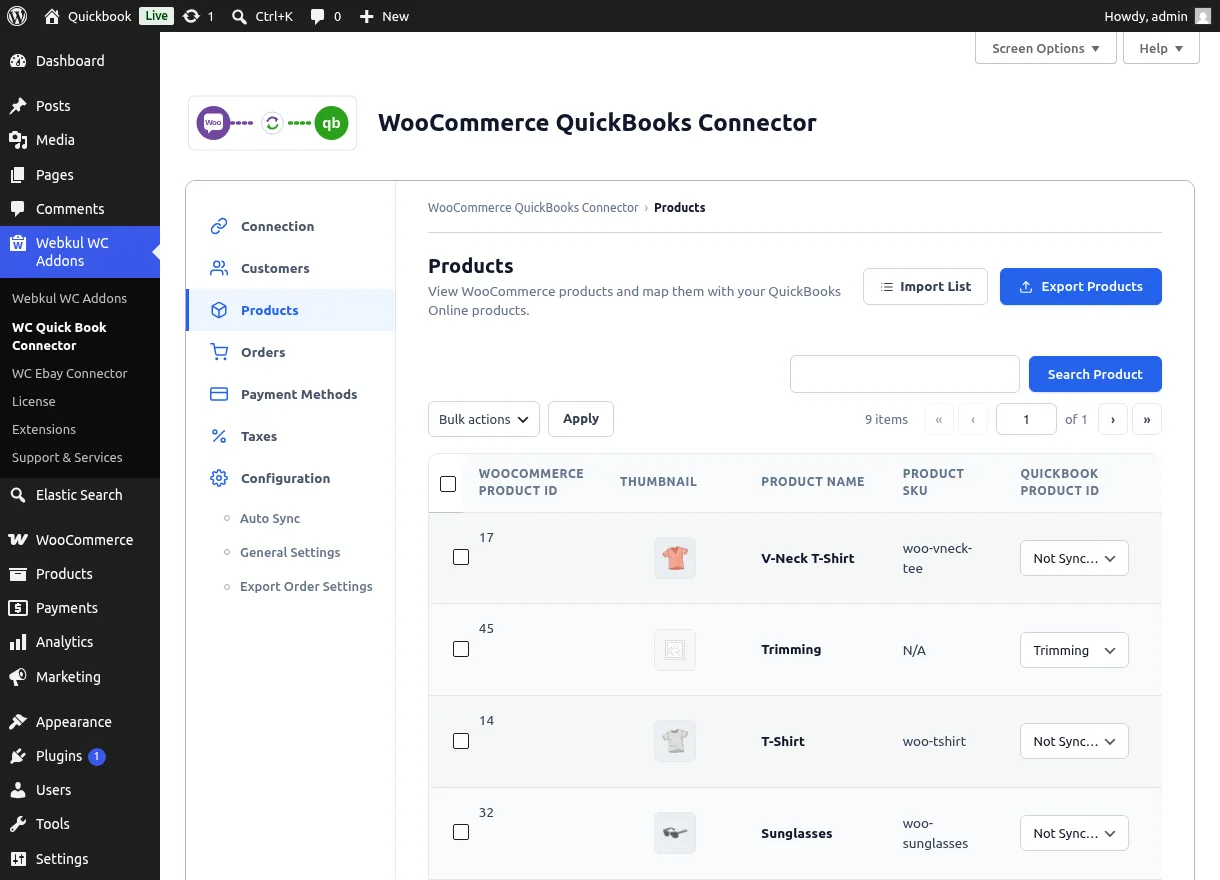
Reading the List
| Column | Meaning |
|---|---|
| WooCommerce Product ID | Product (or variation) ID |
| Thumbnail | Product image |
| Product Name / Product Sku | Catalog identity |
| Quickbook Product Id | The mapped QuickBooks item, or Not Synced |
| Sync Source | Badge showing where the mapping came from |
Search products by name, and use Screen Options to adjust rows per page.
Exporting Products to QuickBooks
- Tick the products to export.
- Click Export Products.
- A progress panel tracks the batches — keep the page open until it finishes.
Good to know
- Variable products export every variation as its own QuickBooks item.
- Zero-price products are skipped unless Export Products on QuickBooks With Price Zero is set to Yes in General Settings.
- Products can also export automatically on save when real-time export is enabled in Auto Sync Settings.
Importing Products from QuickBooks (Import List)
Importing is a deliberate two-step flow so nothing lands in your catalog unreviewed. Click Import List to open the staging screen:
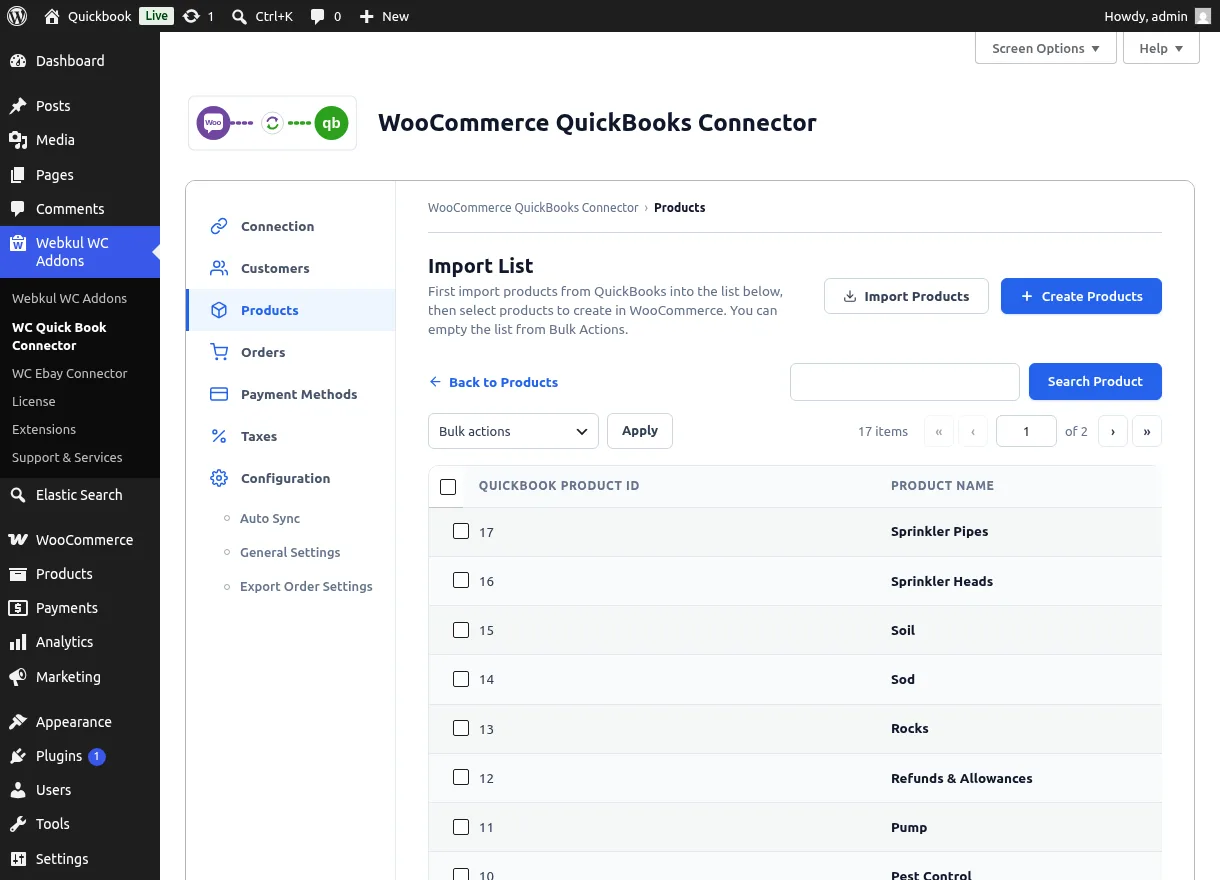
Step 1: Import Products
- Click Import Products.
- QuickBooks items stream into the staging list in batches (the batch size and resume position come from General Settings). A counter shows "Products Imported Out Of …".
Step 2: Create Products
- Tick the staged items you want in WooCommerce.
- Click Create Products.
- Each item becomes a WooCommerce product with the default status from General Settings. A counter tracks progress, and items whose SKU already exists are skipped — the "Products skipped due to duplicate SKU" counter tells you how many.
Use Bulk Actions → Empty The Import List to clear the staging list and start fresh, and Back to Products to return to the main list.
Mapping and Row Actions
- Map by hand — open the Quickbook Product Id dropdown on any row, search the live QuickBooks item list, and pick the match.
- Edit — opens the WooCommerce product editor.
- Clear Mapping — removes only the QuickBooks link (confirmation dialog shown).
- Delete — permanently deletes the product from WooCommerce along with its mapping (confirmation dialog shown); also available as a bulk action.
Related Features
- Auto Sync Settings — real-time product sync in both directions, plus image sync
- General Settings — batch size, import status, and zero-price behavior used here