
RFQ Management
A Request for Quotation (RFQ) is how you buy stock: describe what you need, email it to a supplier as a branded PDF, record their answer, approve it — and turn it into a Purchase Order with one click.
Draft → Sent to Vendor → Vendor Response Received → Approved → Purchase Order Created
                                     ↘ Rejected
Prerequisites
- At least one Supplier account — see Users & Suppliers.
- RFQs access in the matrix (and Purchase Orders → Write to convert later).
The RFQ list
Open Purchasing → RFQs.
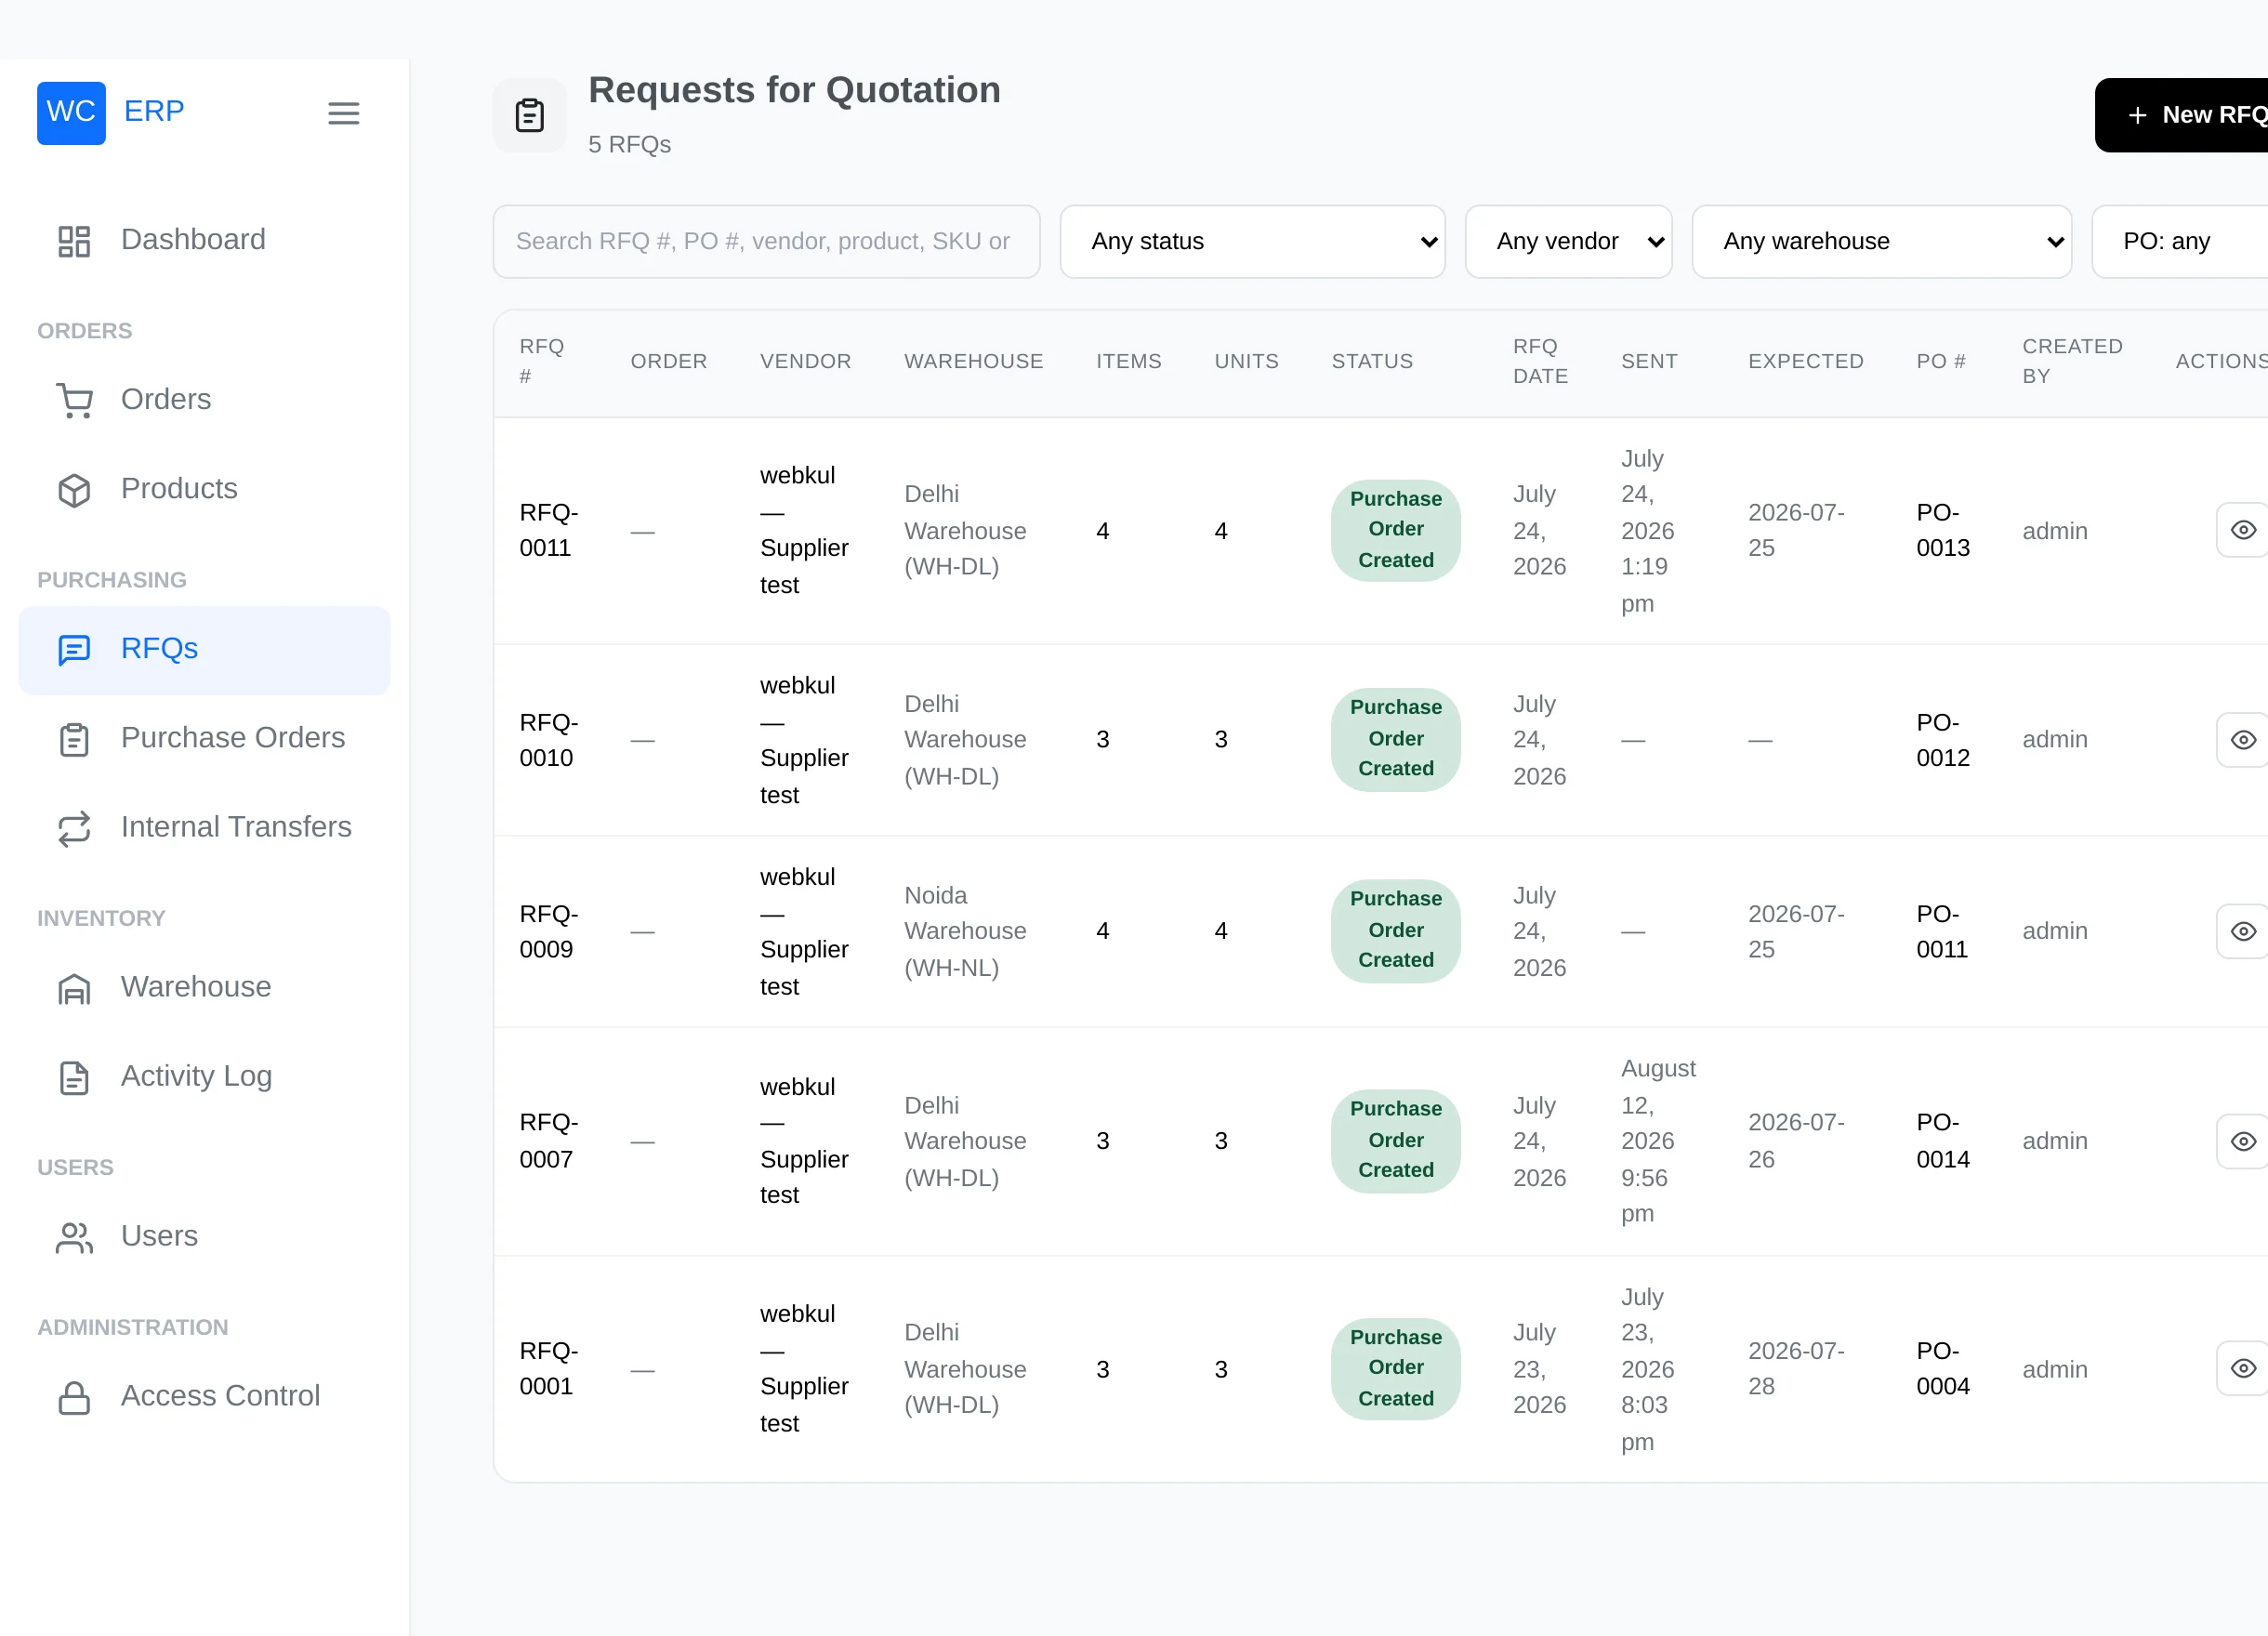
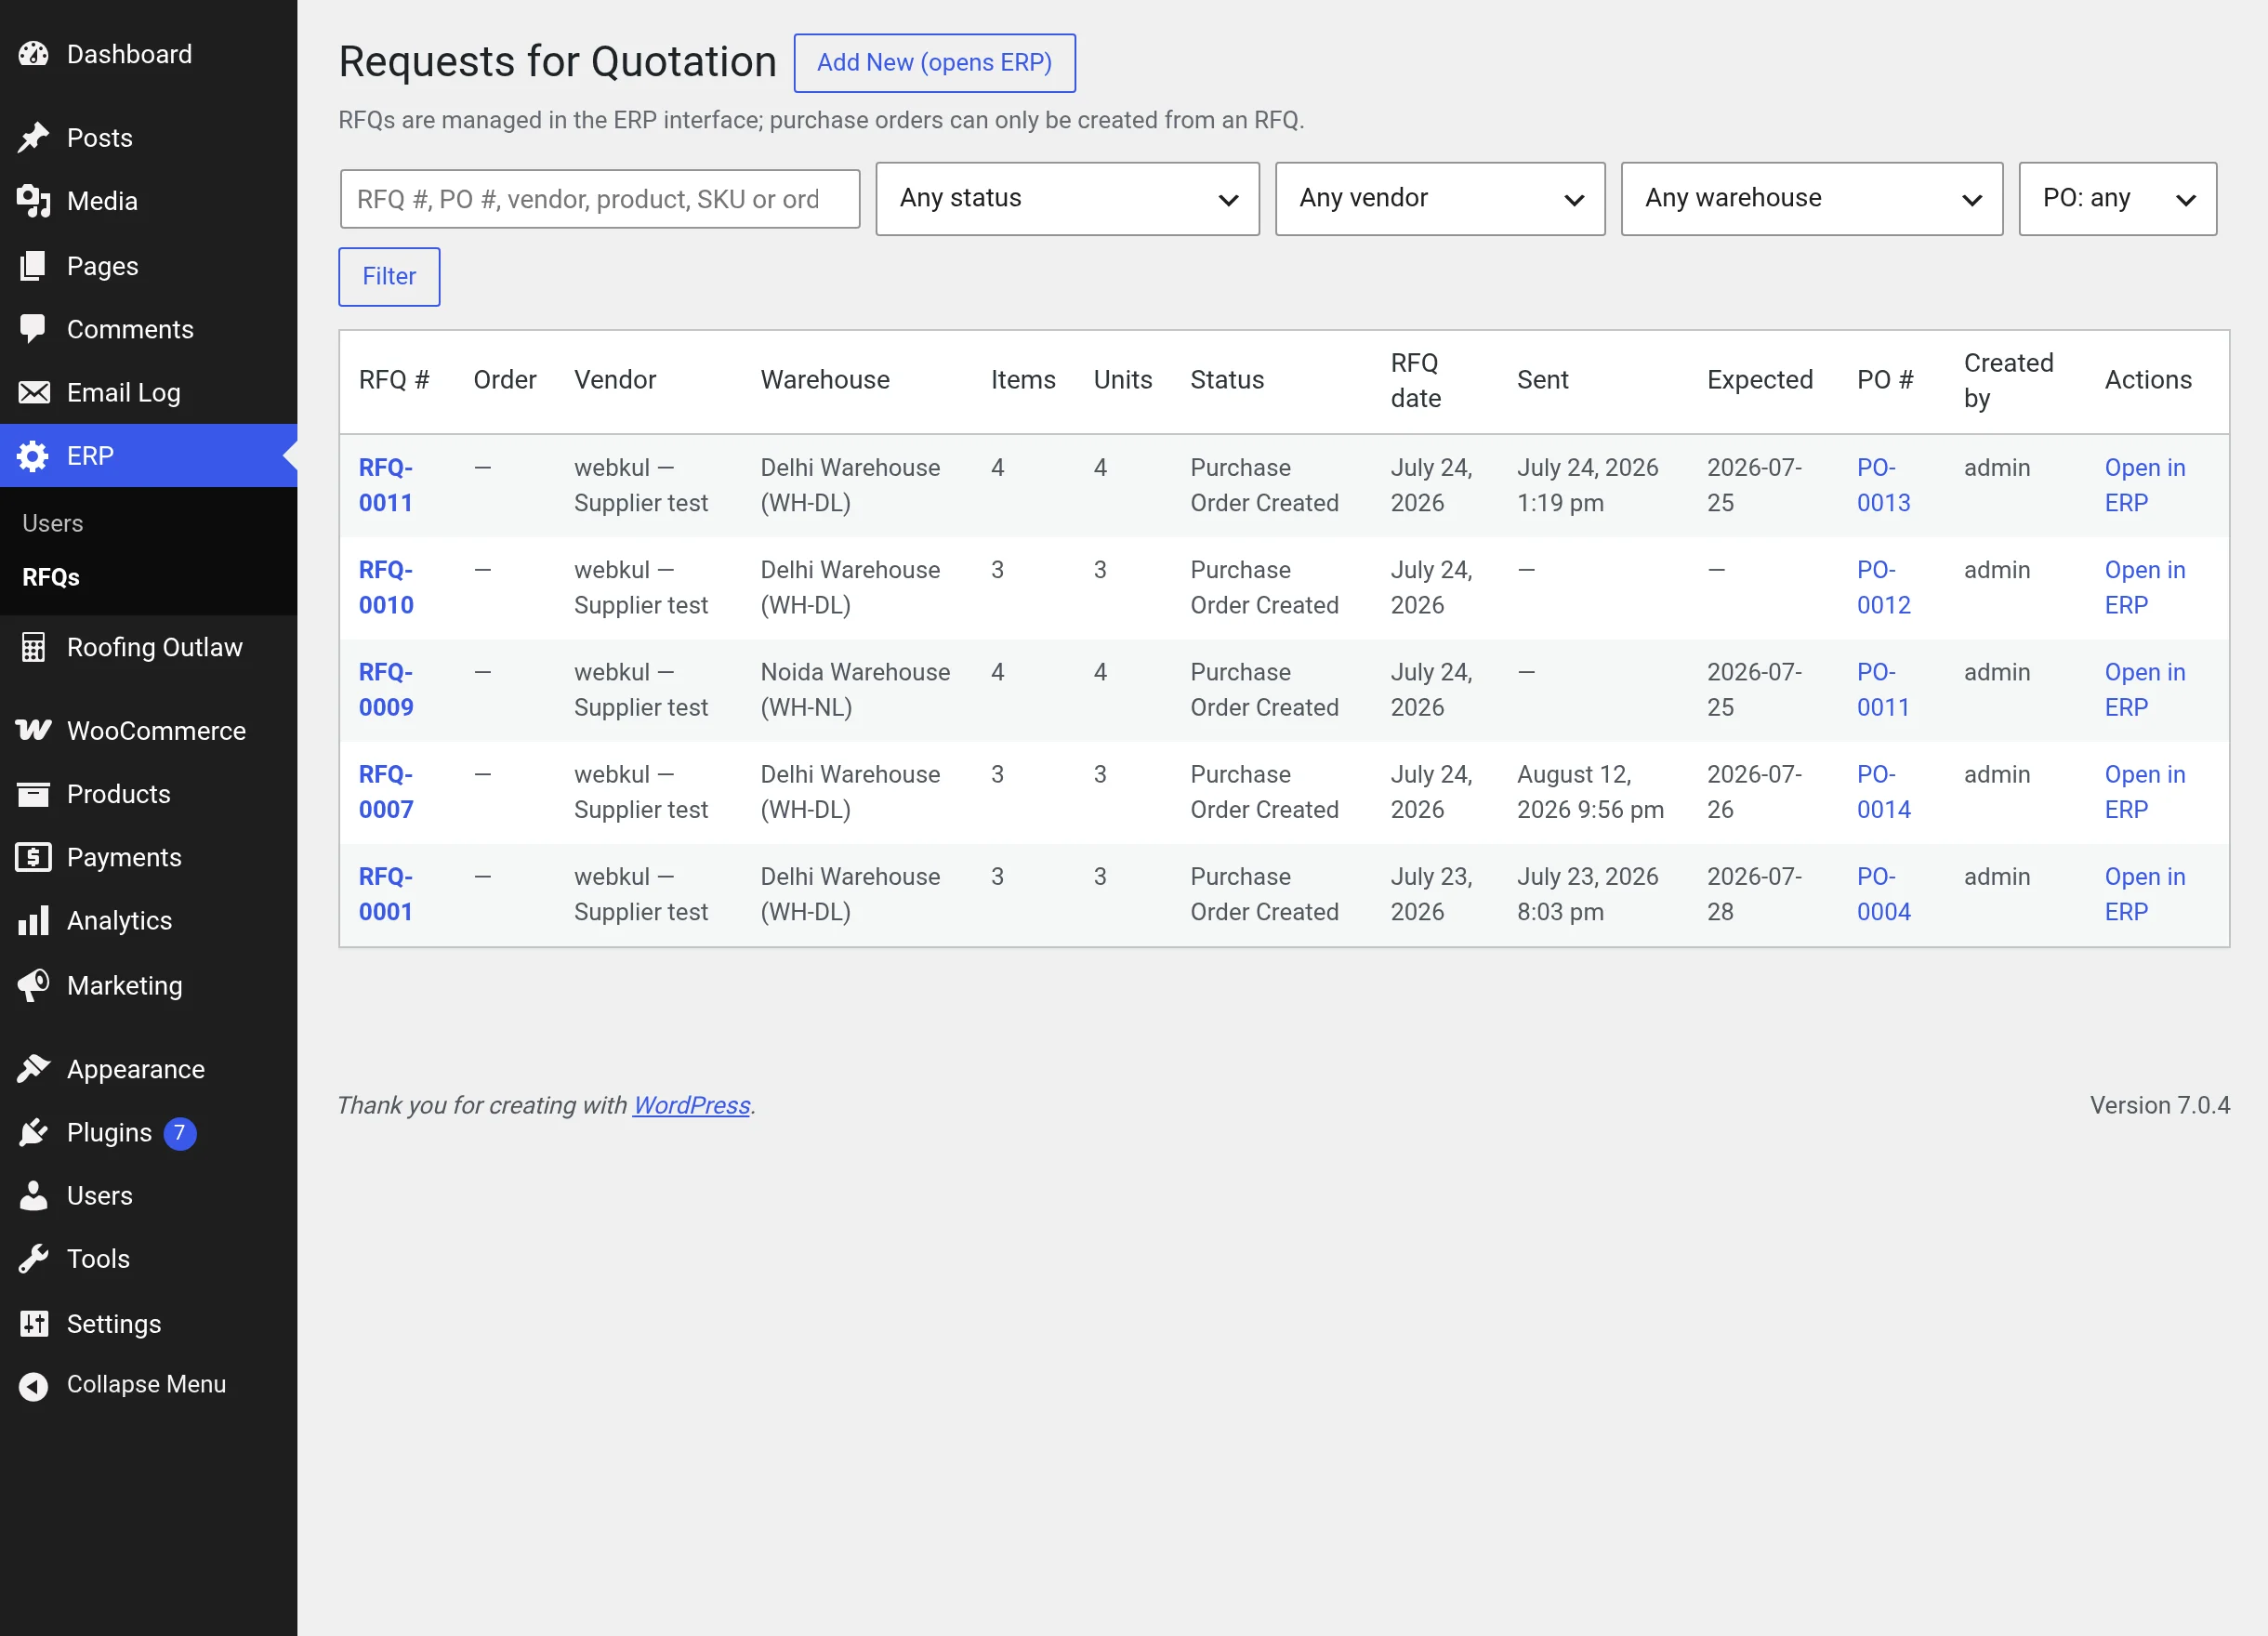
Search across RFQ numbers, orders, PO numbers, products, SKUs and vendors; filter by status, vendor, warehouse and whether a PO exists. Drafts can be deleted from here; everything else is managed from the RFQ's own page. Administrators also get a read-only mirror in wp-admin under ERP → RFQs:
Create an RFQ
Click New RFQ.
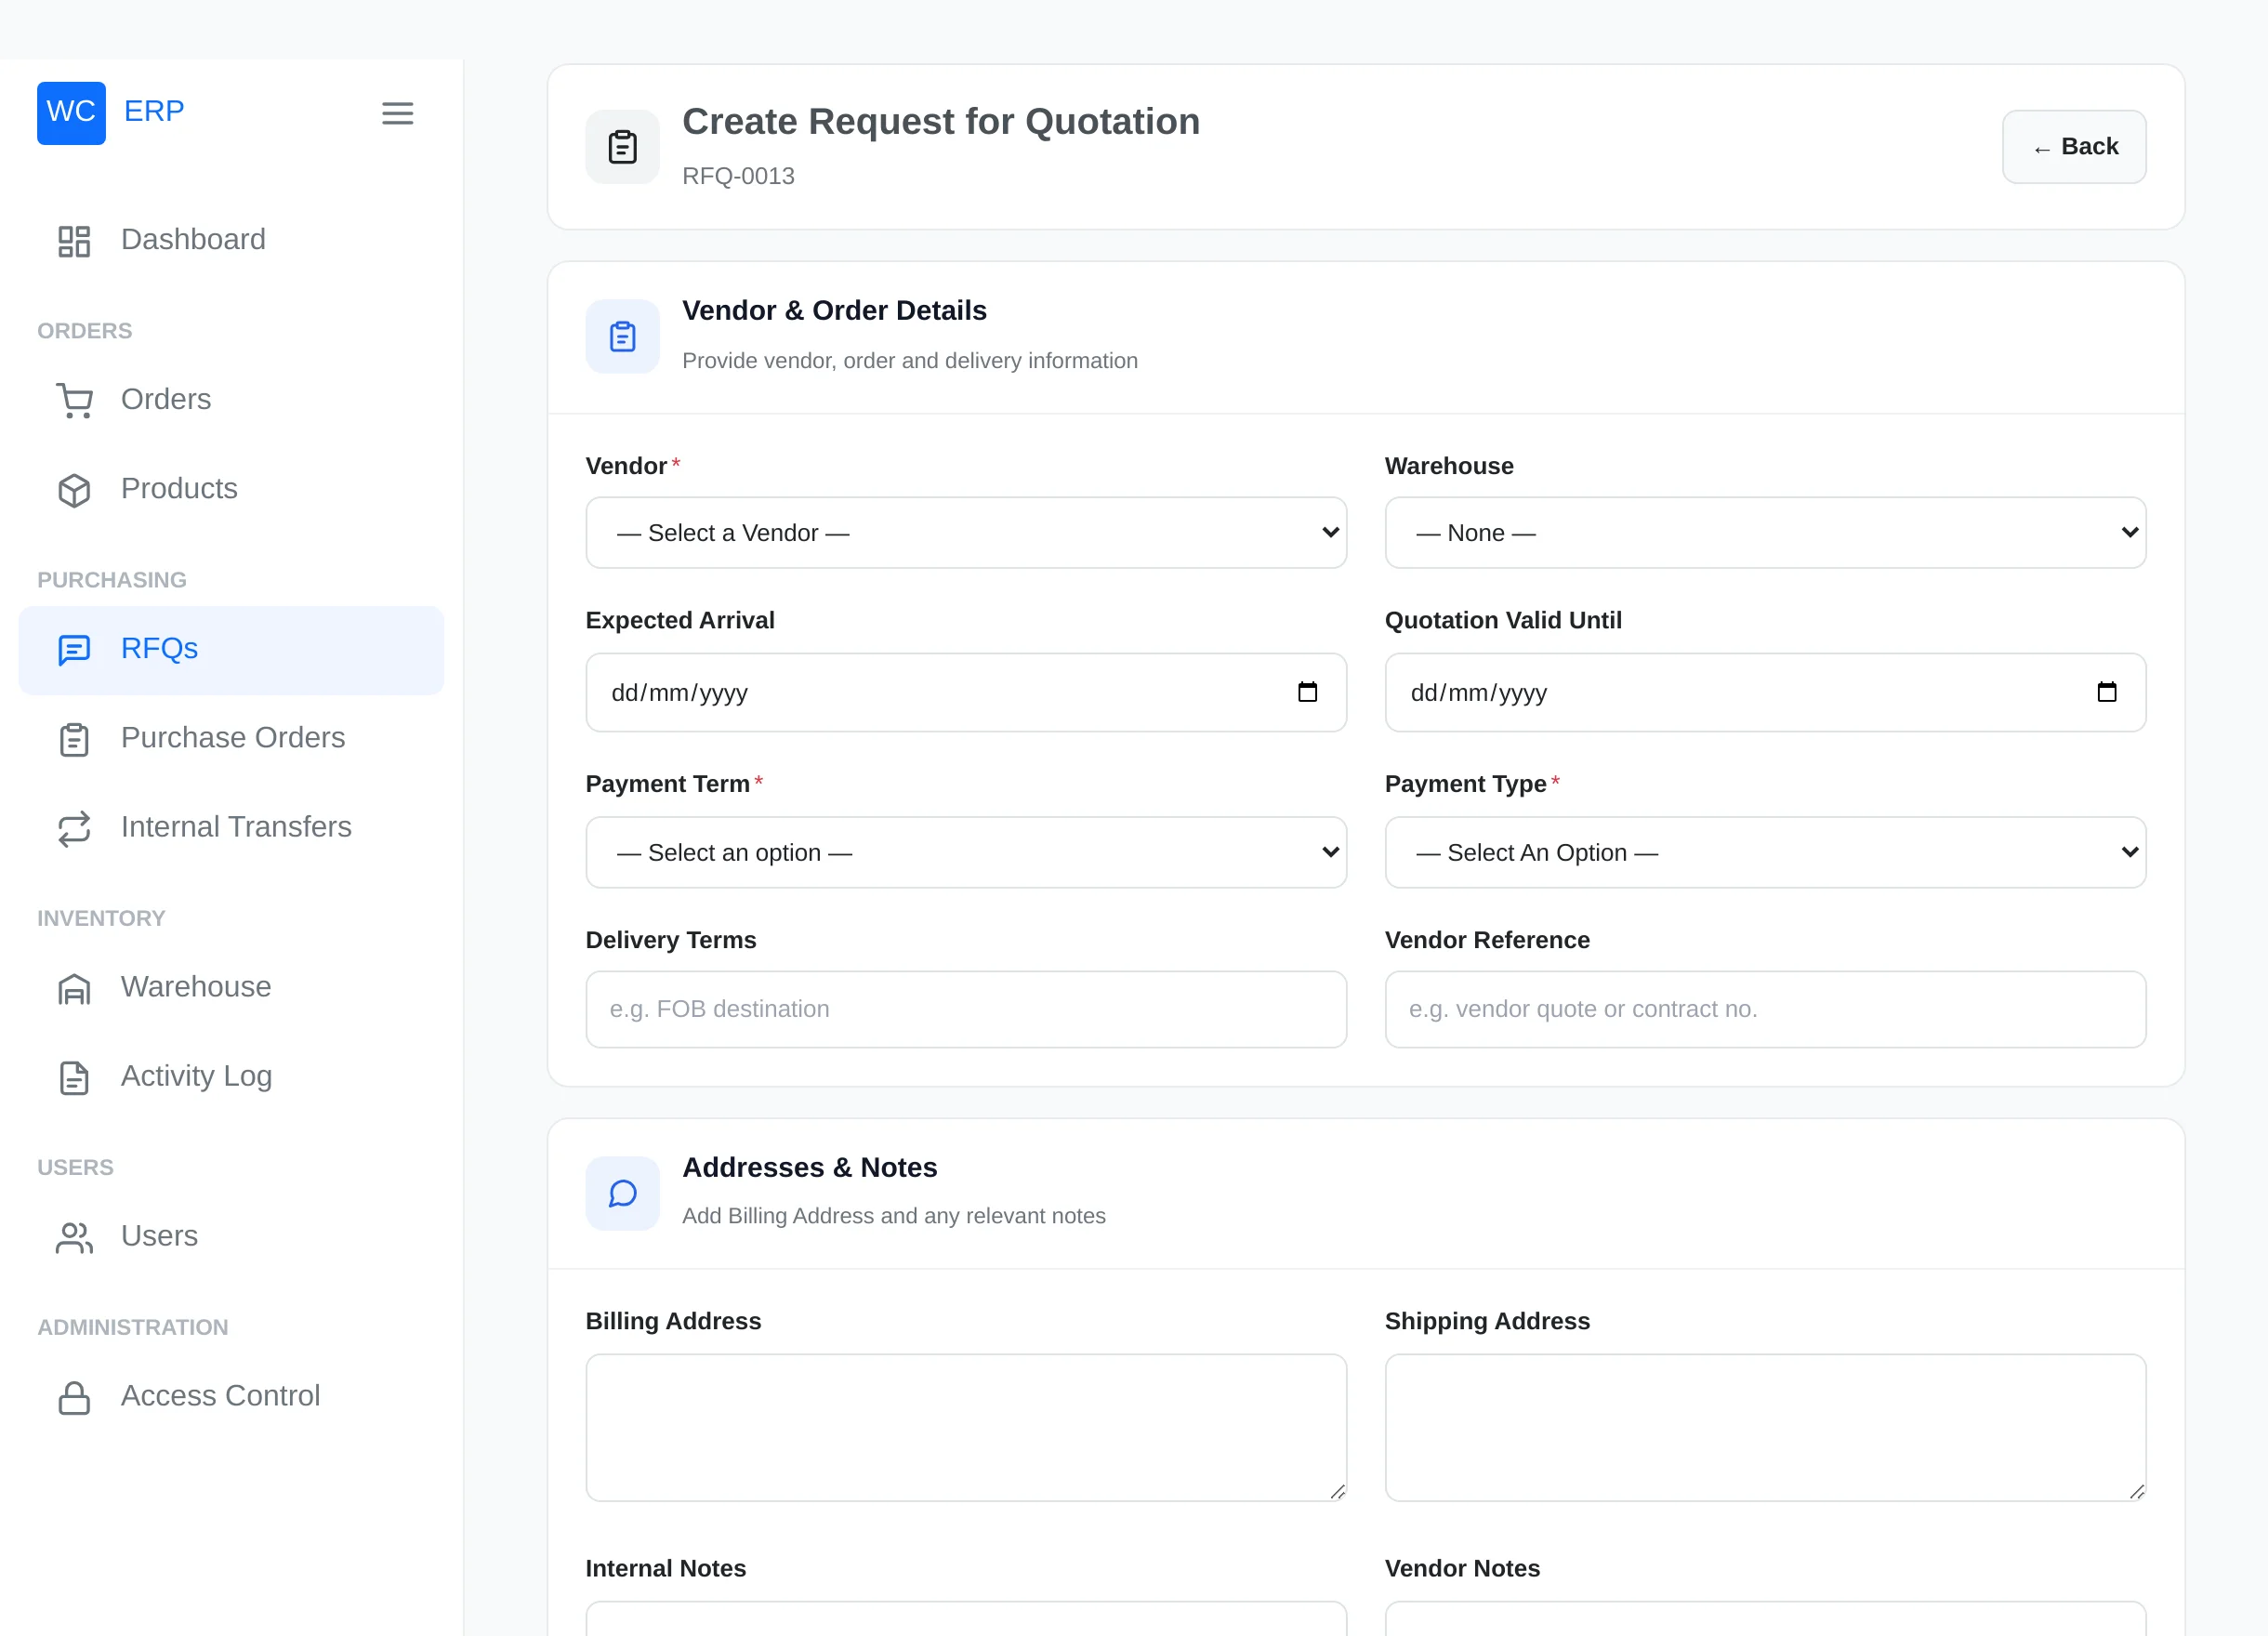
Vendor & Order Details
| Field | Notes |
|---|---|
| Vendor* | Your supplier accounts; picking one shows their contact details and pre-fills the billing address |
| Warehouse | Where the goods should arrive; pre-fills the shipping address and later locks the PO's receiving warehouse |
| Expected Arrival / Quotation Valid Until | Dates for the supplier |
| Payment Term* | Ten standard options (Immediate Payment, 15 Days, 30 Days, 2/7 Net 30, …) |
| Payment Type* | Bank Transfer, Cash on Delivery, or Other (with a text box) |
| Delivery Terms / Vendor Reference | Free text, e.g. "FOB destination" or the supplier's quote number |
Addresses & Notes — billing address, shipping address, Internal Notes (never leave the ERP) and Vendor Notes (included in the email and PDF).
Attachments — any number of files (images, PDF, Office documents, CSV or text).
Products — search by name or SKU and click to add lines. Each line has a quantity, unit, target price (pre-filled from the product's cost price), automatic WooCommerce tax and a note; the footer totals everything.
Click Create RFQ — it is saved as a Draft you can keep editing.
RFQs that start themselves
From an order with shortages, Create RFQ arrives here with the products and missing quantities already filled in. The same works from an internal transfer's unfulfilled remainder — and links the two records together.
Send it to the supplier
Open the RFQ and click Send RFQ to Vendor.
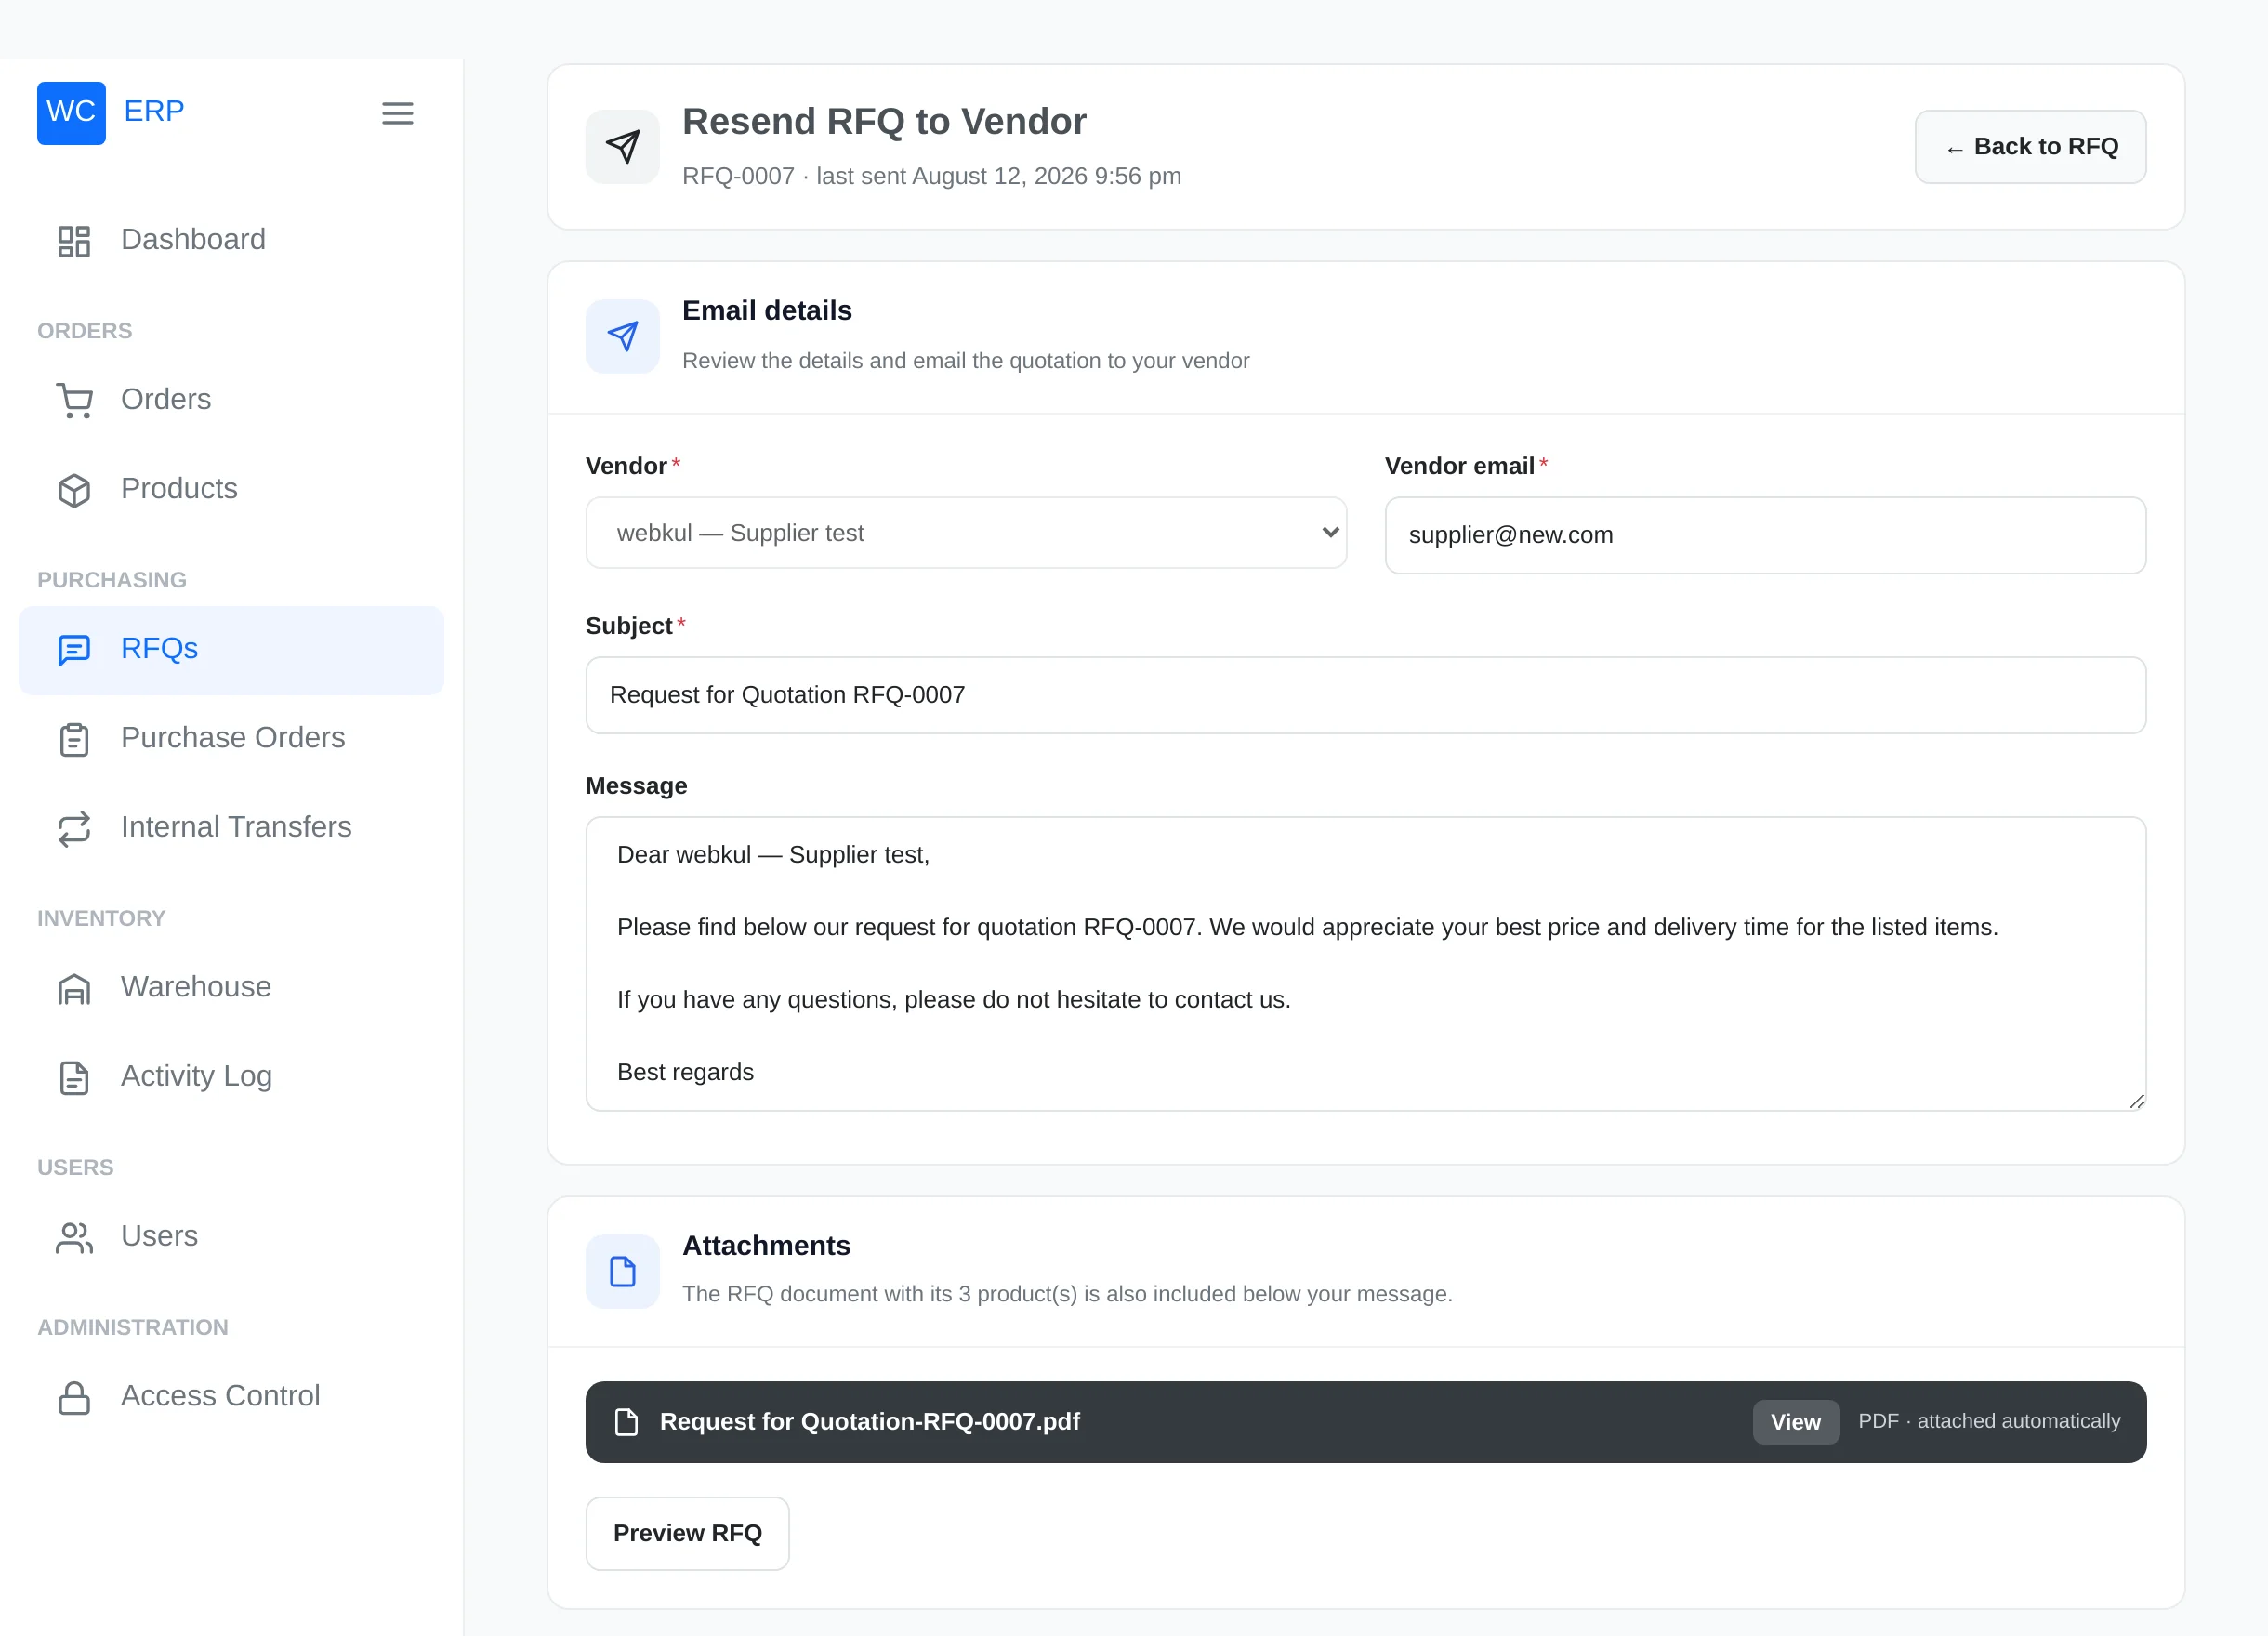
- Vendor email is pre-filled from the supplier's business email (editable).
- Subject and Message are pre-written and editable; a preview shows the full email.
- The generated PDF quotation — a branded document with your store name, the terms and the product table — is attached automatically, together with the RFQ's stored attachments.
Click Send. The RFQ becomes Sent to Vendor and the send is logged. You can Resend any time — each resend is recorded.
If the email cannot be delivered
The RFQ is still marked Sent, and the activity log records that delivery failed so you can check your mail configuration and resend. See Installation → Requirements about SMTP.
Record the response and approve
Suppliers reply by email or phone — you record the outcome on the RFQ view:
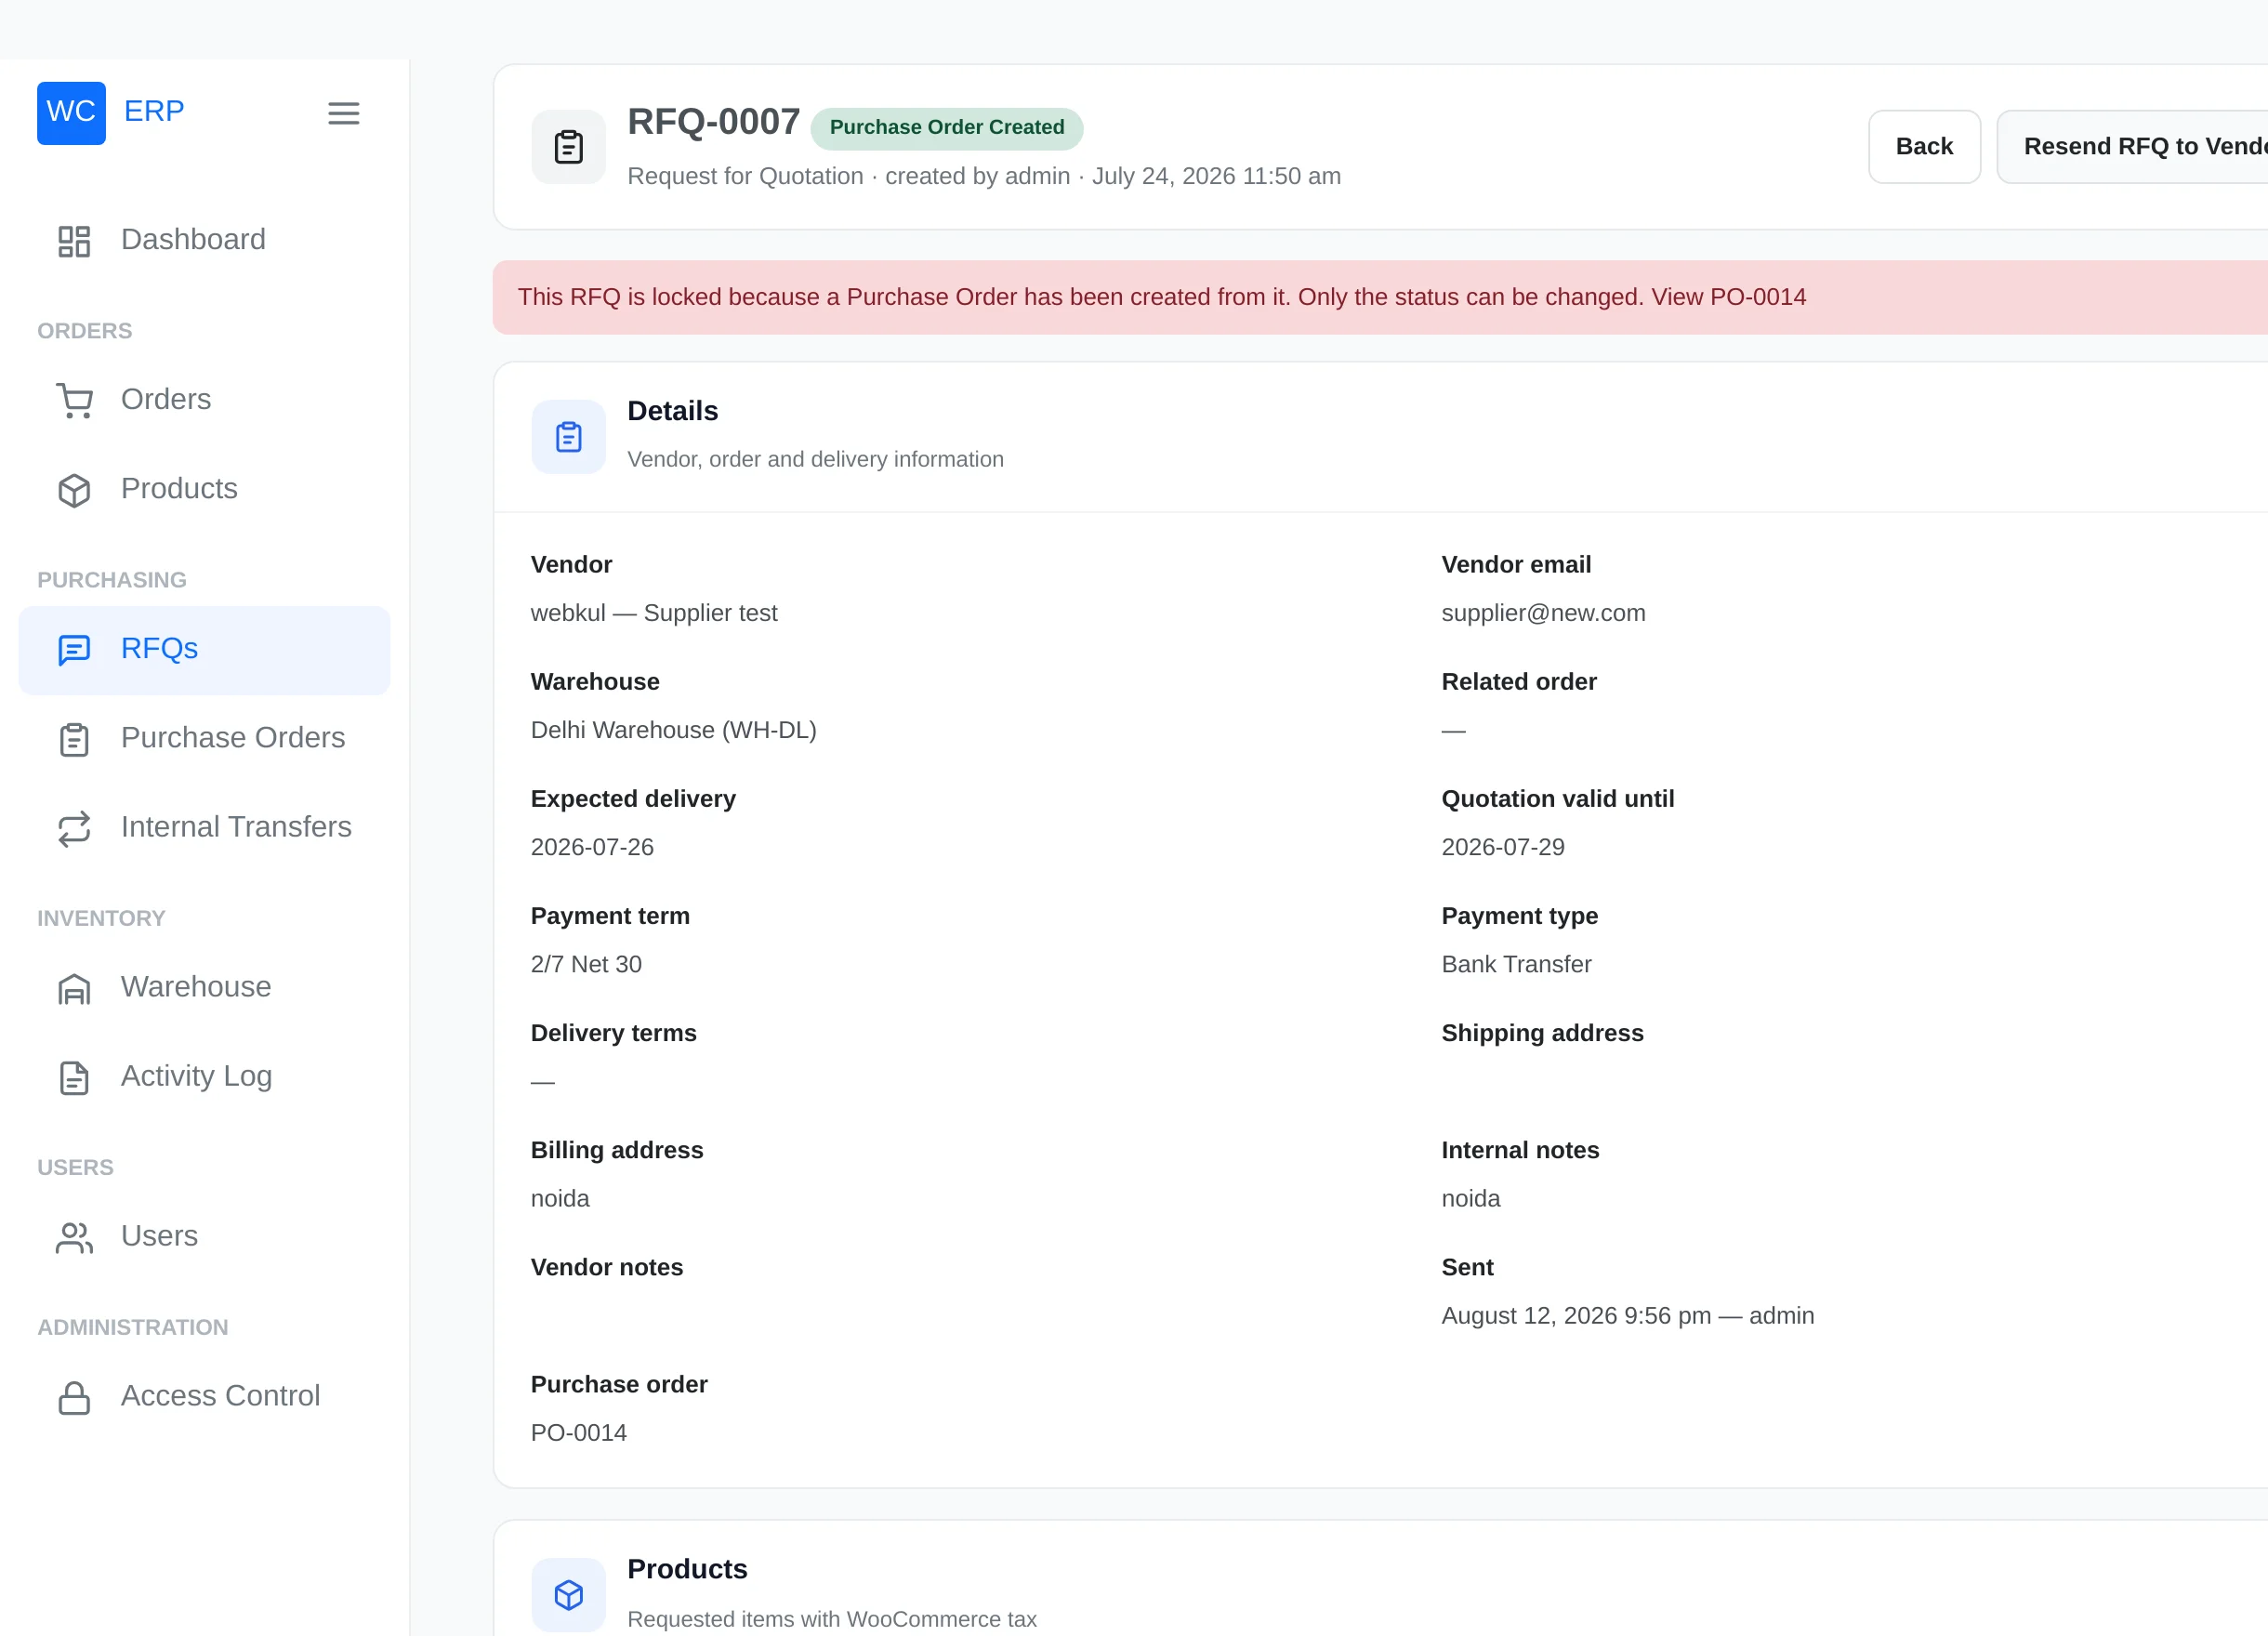
Use the Change status card to set Vendor Response Received (optionally attaching their quote document and a comment), then Approved — or Rejected if the offer doesn't work. Every change lands in the Activity table with who, when and why.
Convert to a Purchase Order
On an Approved RFQ click Confirm Purchase Order. The ERP creates a PO with all the line items and terms, links the two records — and locks the RFQ: a banner explains that only its status can still change, with a link to the PO. Continue in Purchase Orders.
Deleting
Only Draft RFQs can be deleted (with the RFQ delete permission). Sent or processed RFQs stay as history; use Rejected to close one that won't proceed.