
Stock Assignment
Assigning stock tells the ERP which bin your WooCommerce stock physically sits in. Until units are placed in a bin they cannot be reserved, picked or transferred — the dashboard flags such products with "products hold stock but are assigned to no warehouse bin."
There are two ways to assign, ending in the same result.
Assign from the product side
Best when you're putting away one product across locations. From the Products list (or a product's locations page) click the Assign to Warehouse action.
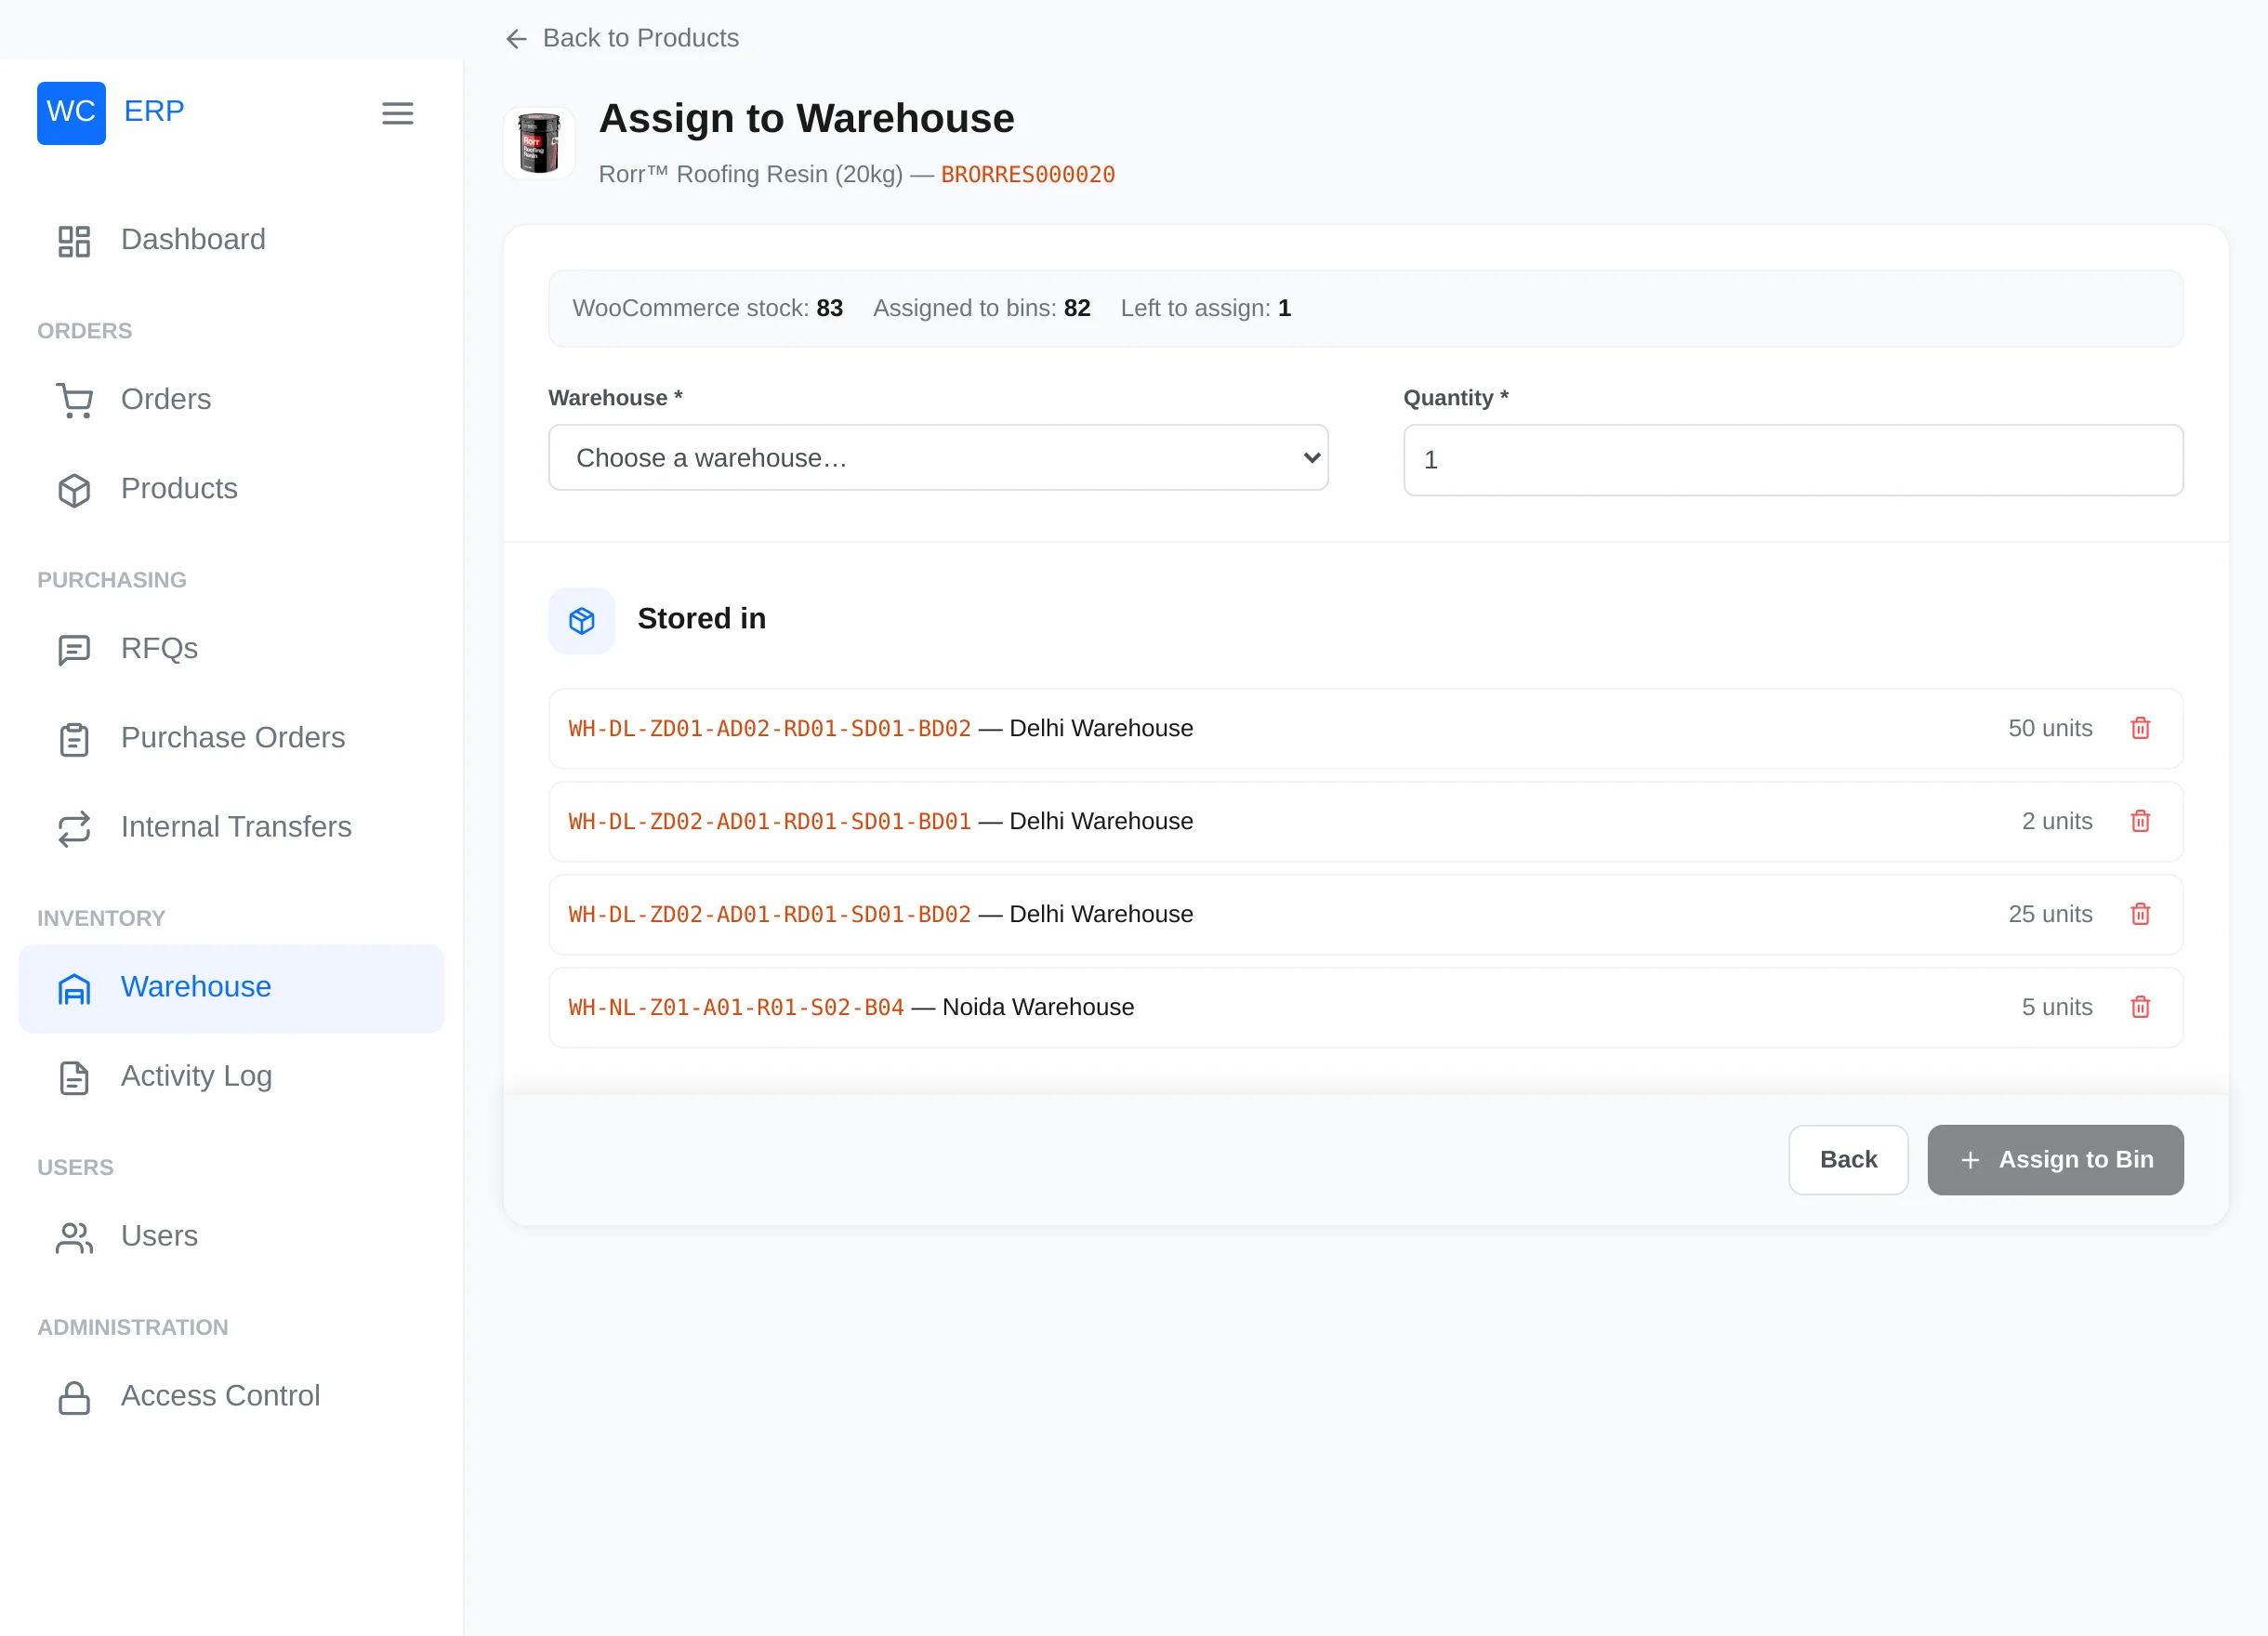
- The header shows the three numbers that matter: WooCommerce stock, Assigned to bins and Left to assign.
- Pick the Warehouse — then a Zone, Aisle, Rack, Shelf and Bin dropdown appear one after another. Levels with a single option select themselves; every option shows its fill (
stored/capacity) and full bins are disabled. - Enter the Quantity and click Assign to Bin.
The Stored in panel lists every bin already holding this product, with a remove button per bin.
Assign from the bin side
Best when you're standing at a bin. Open the bin from the Explorer (or via Codes) and click Assign.
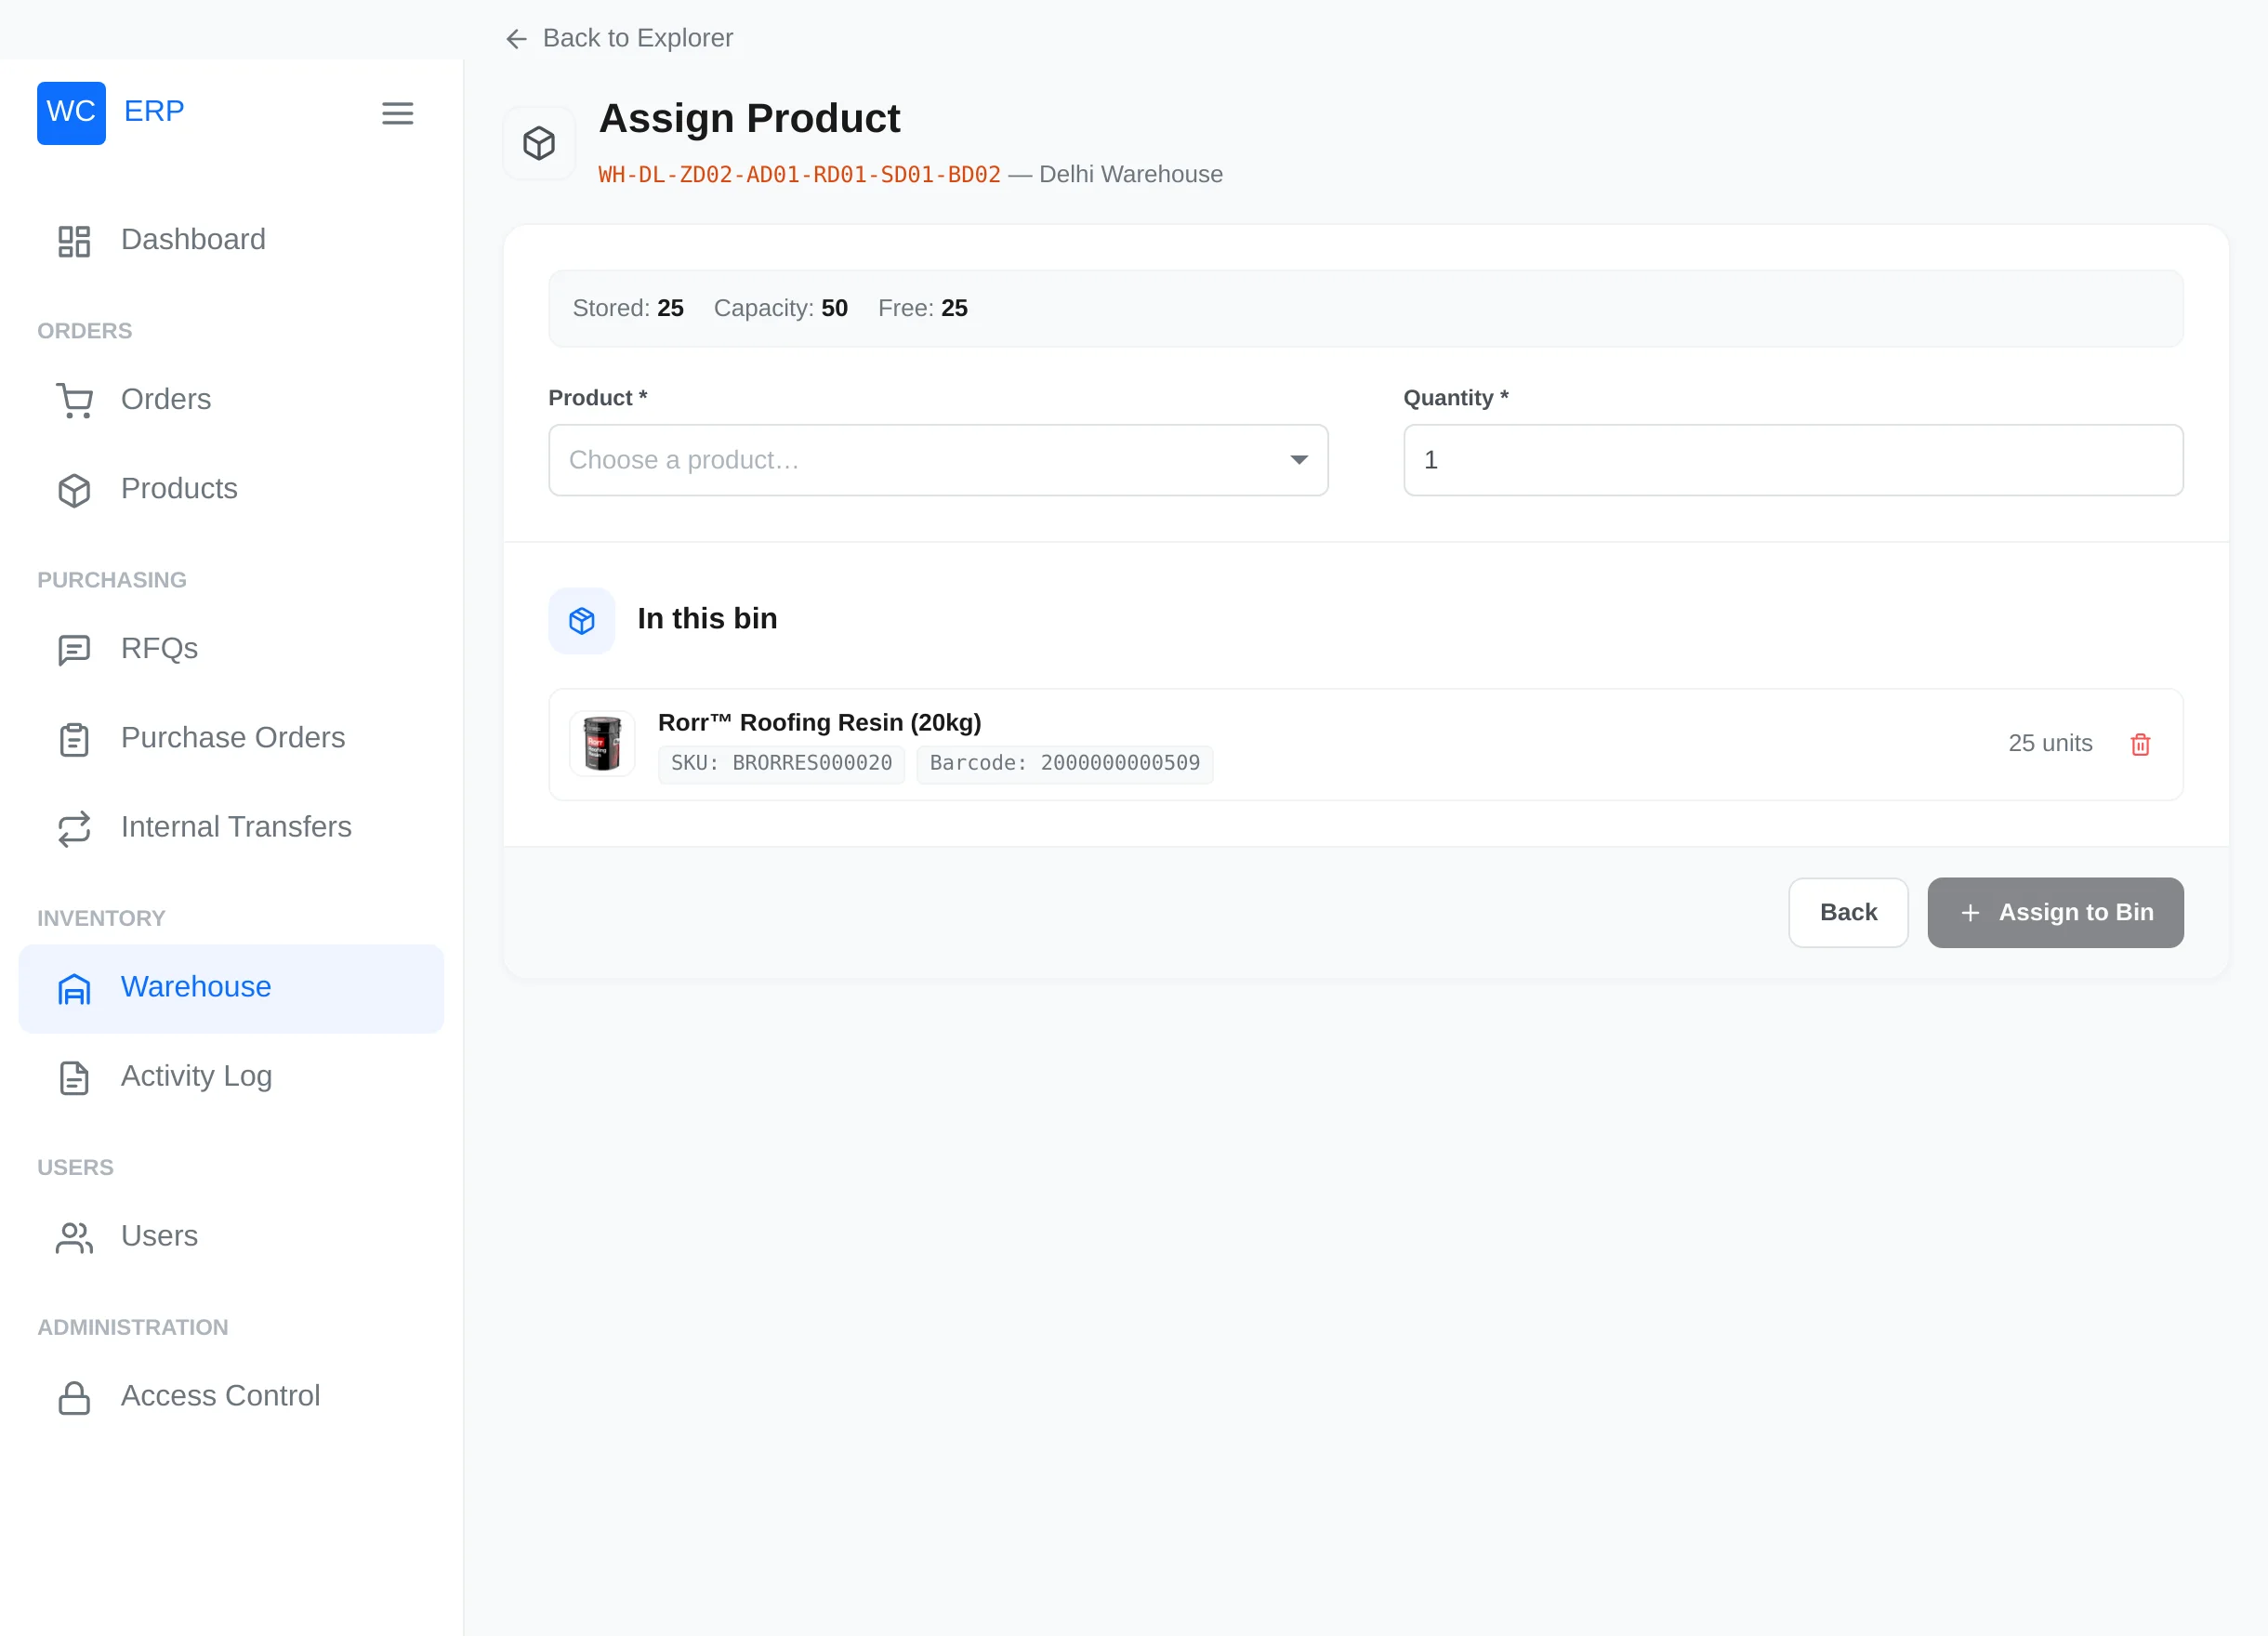
- The summary shows Stored / Capacity / Free for the bin.
- Search a Product by name or SKU, set the Quantity, click Assign to Bin.
- In this bin lists the current contents (with SKU and barcode) and lets you remove an assignment.
If the bin is full, the form is replaced by a notice — "This bin is at full capacity (N units) — remove products below to free up space."
The rules the ERP enforces
Every assignment is checked server-side, in this order:
- Never more than WooCommerce stock. You can only assign what isn't already assigned elsewhere; the error tells you the exact remaining number. (Products that don't track stock in WooCommerce have no stock cap.)
- Bin capacity — the bin must have room.
- Every parent's capacity — if a shelf, rack, aisle, zone or the warehouse itself has a capacity, it must have room too. Errors are specific: "Cannot assign N units — Rack 'X' has only F of C units free."
Removing an assignment
The remove (trash) button on either page releases the entire bin assignment for that product and logs a negative movement. To reduce a quantity, remove the assignment and re-assign the smaller amount.
Everything is logged
Each assign and remove writes a row to the movement ledger — bin, product, signed change, resulting quantity, reason and user. See the Activity Log.
Other ways stock enters bins
Manual assignment is one of three inflows. Receiving a purchase order credits bins (and increases WooCommerce stock), and receiving an internal transfer moves units into the destination warehouse's bins — both use the same capacity rules described above.