
Connecting Your Store
My Account → Shopify Connector is the seller's home for every Shopify store they have connected. Everything else in the connector is reached from here.
The Shopify Account List
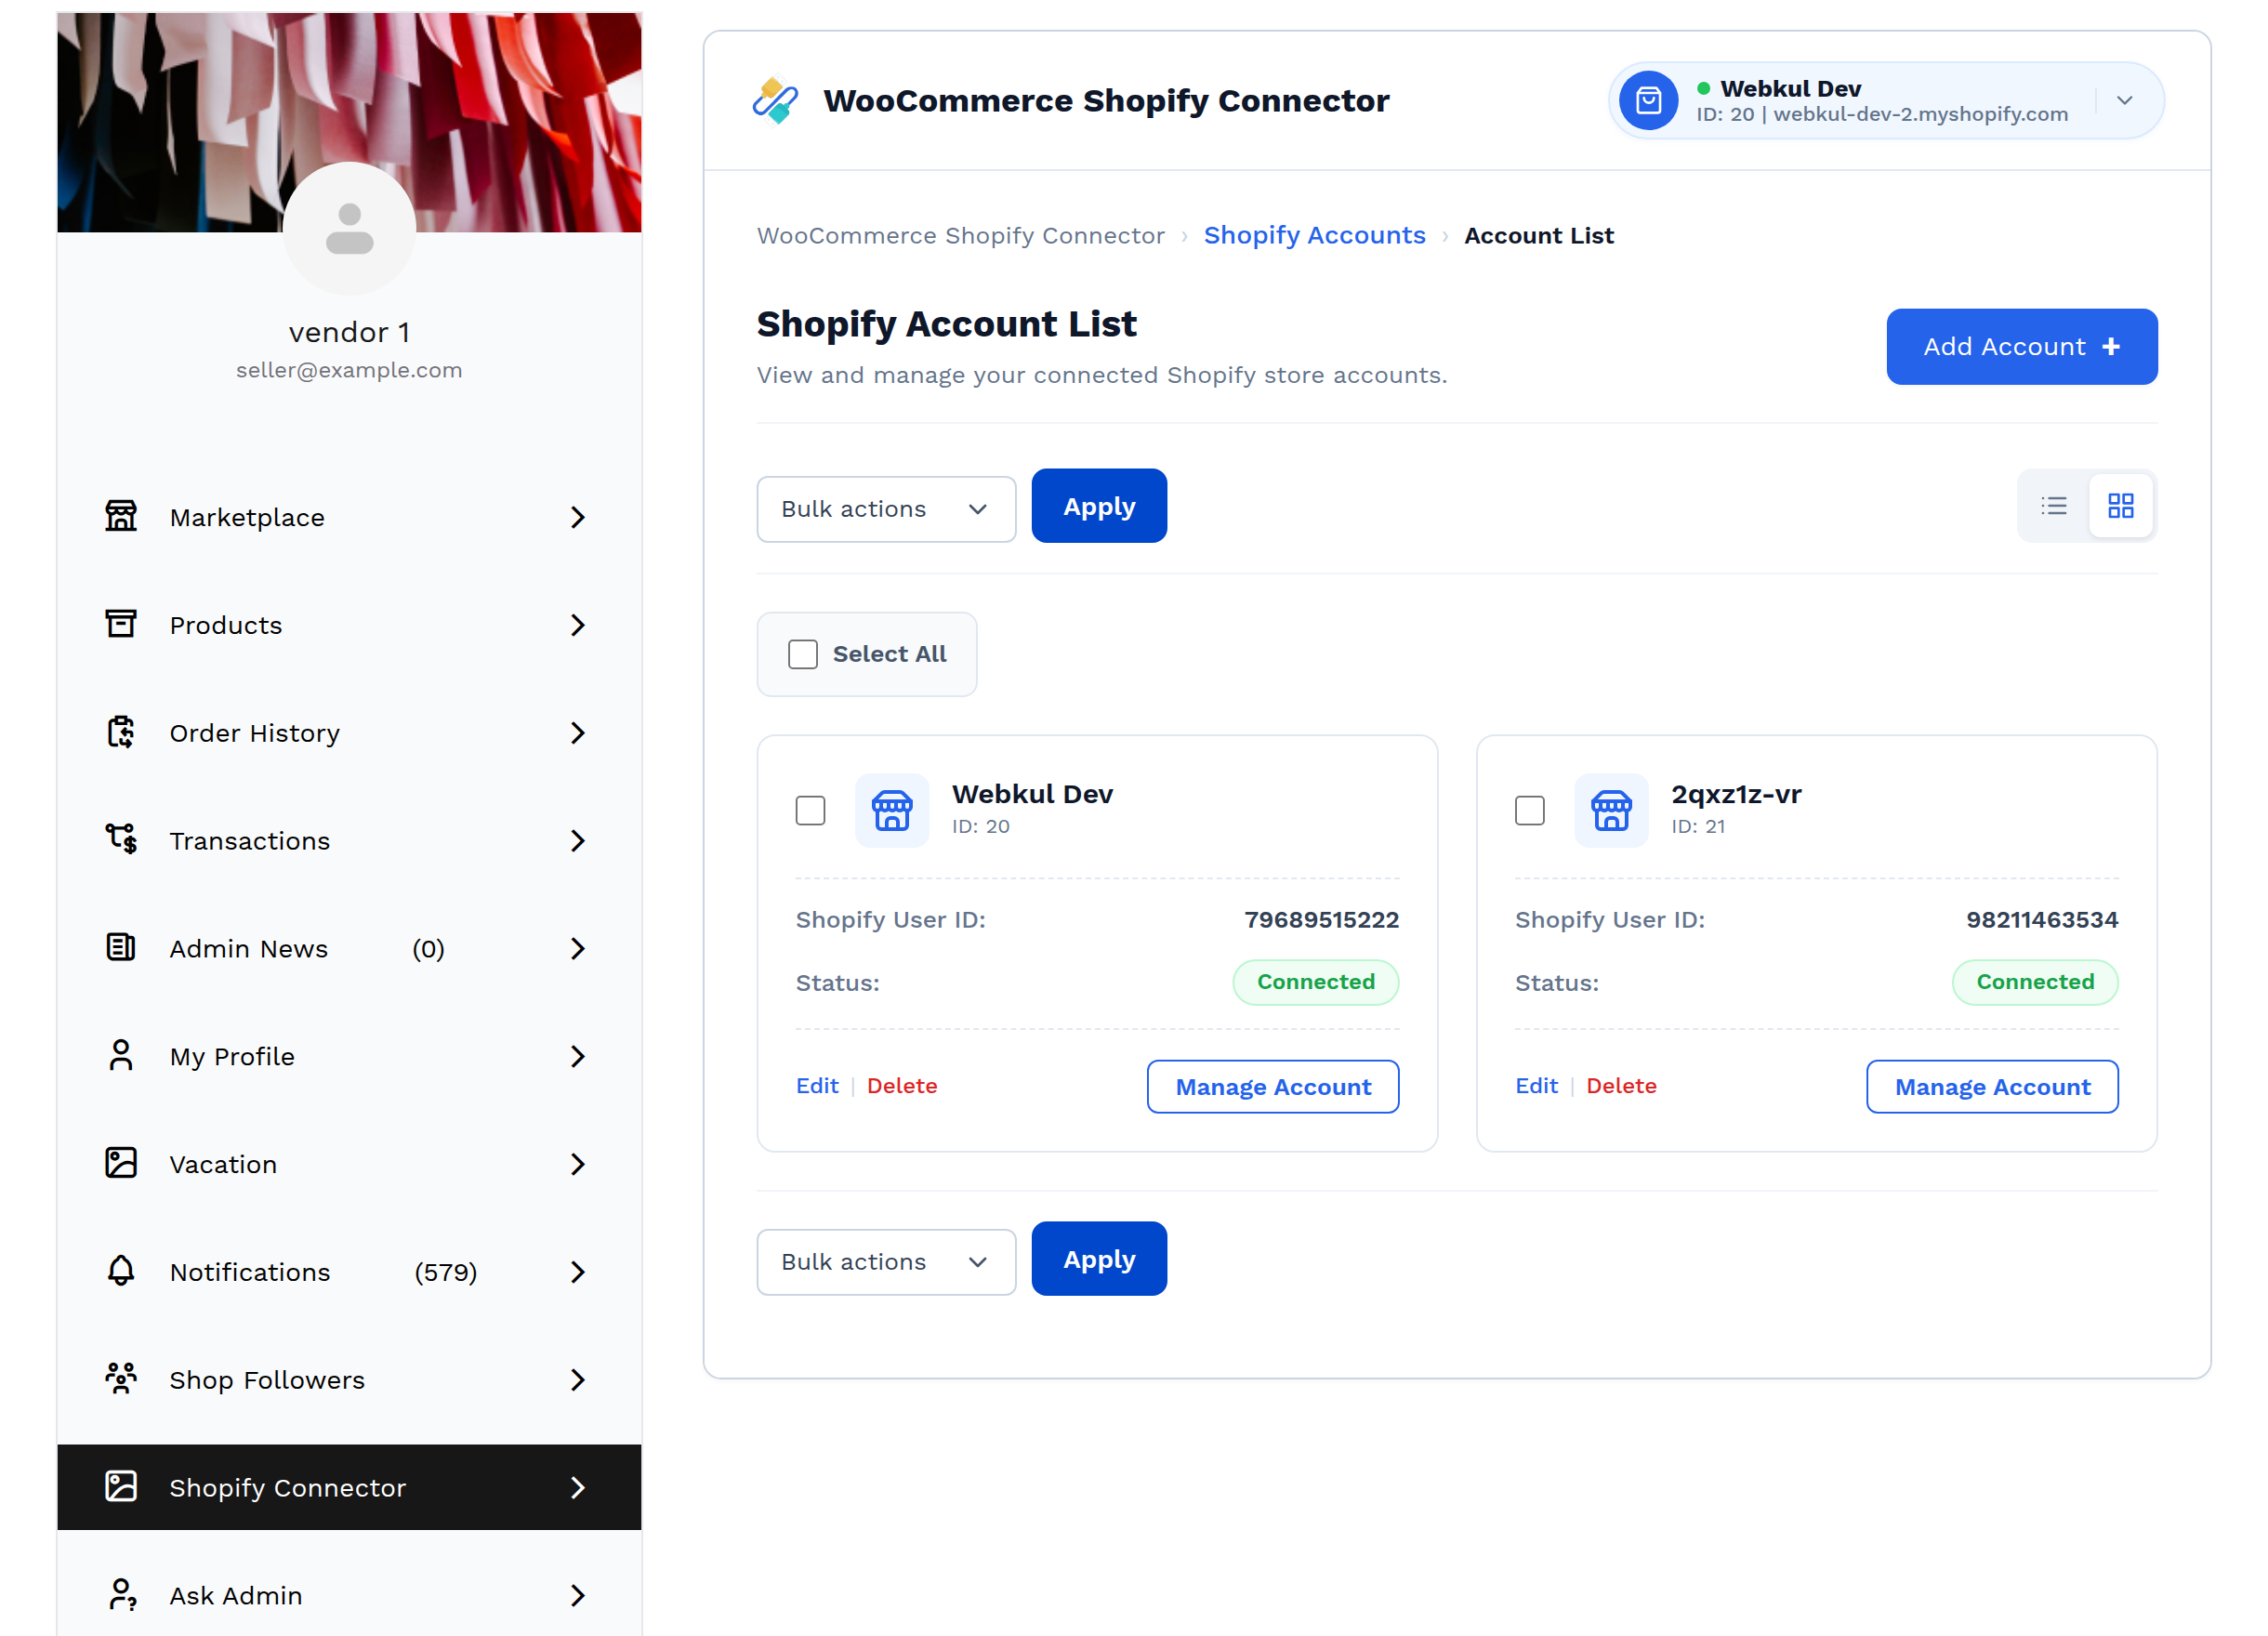
Each row shows:
| Column | What it tells you |
|---|---|
| Store Name | The store's name, its connector account ID, and the row actions Edit and Delete |
| Shopify User ID | The store's numeric ID in Shopify |
| Action | Manage Account — opens the nine configuration tabs |
| Status | Connected or Disconnected, checked live |
The Status badge is not stored. Each time the list loads, the connector asks Shopify for the store's name and compares it with the name saved here. A Disconnected badge means the store did not answer, the token has been revoked, or the store was renamed in Shopify.
Ten accounts are listed per page; a pager appears below the table when there are more.
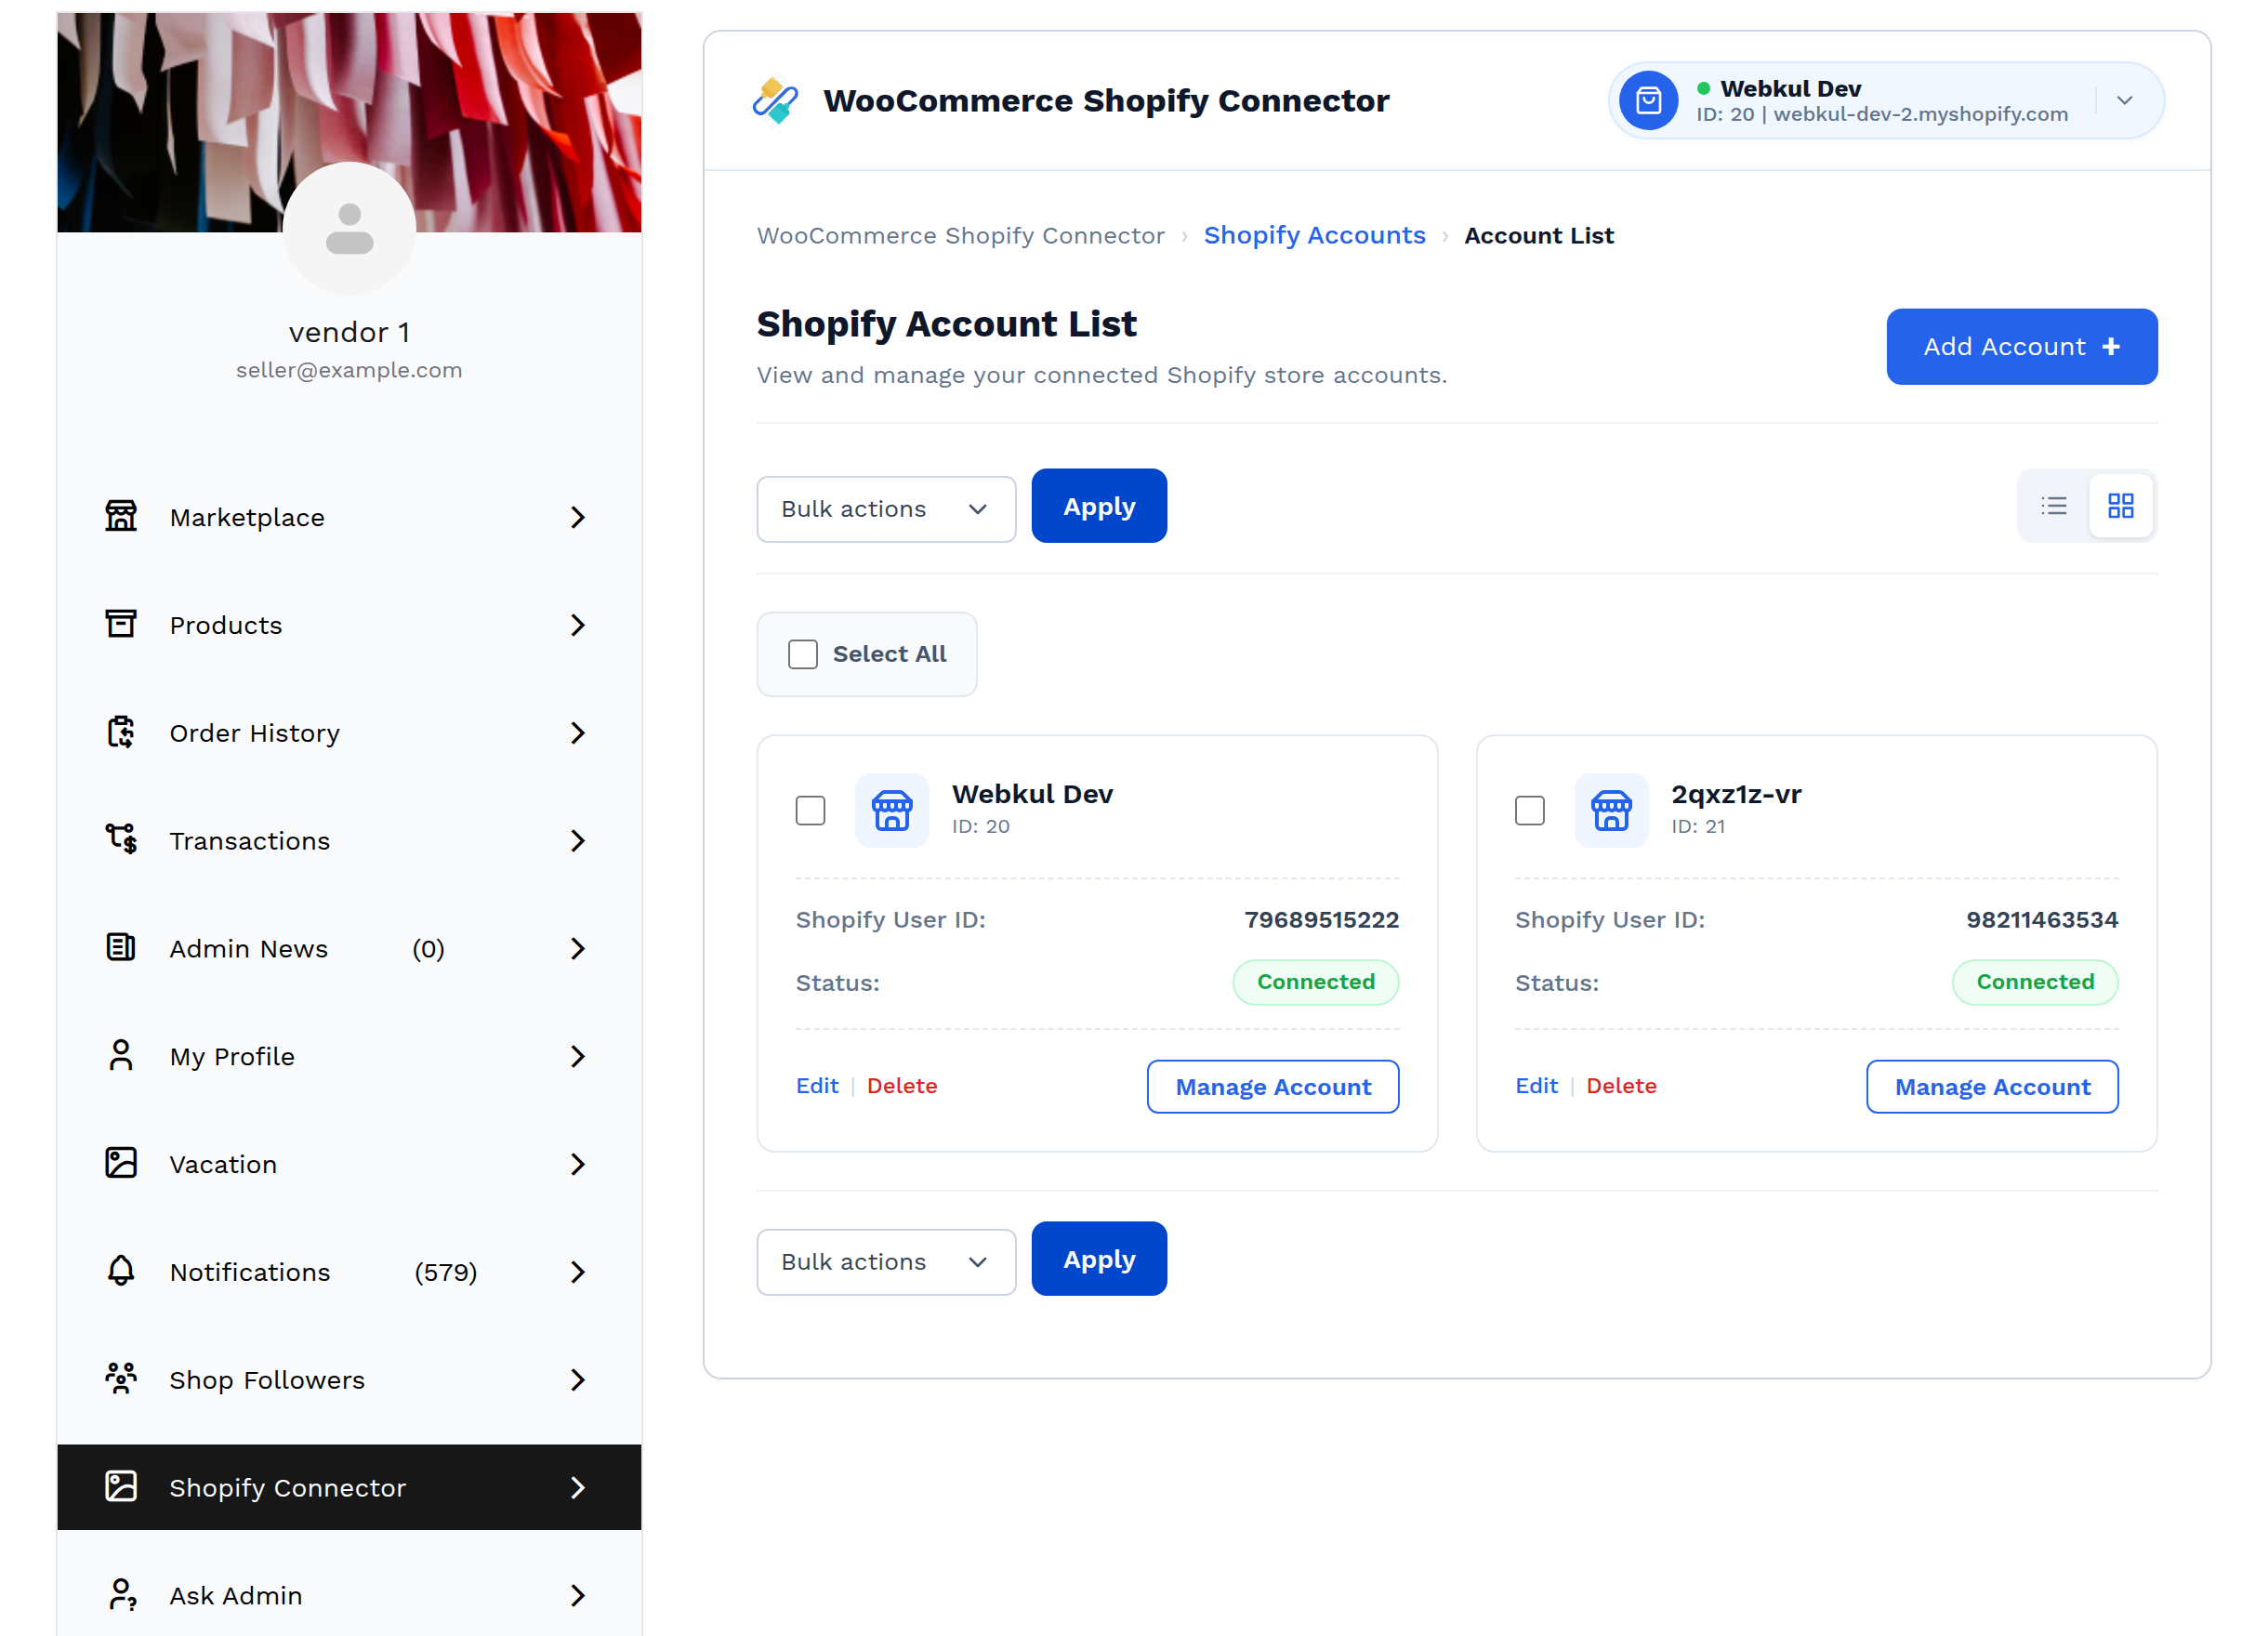
List and grid views
The two small buttons above the table on the right switch between the table and a card layout. Both show the same information and support the same bulk actions.
Switching between stores
When a seller has more than one Shopify store, the pill at the top right of the connector header shows the active one — its name, account ID and domain, with a green dot for a live connection.
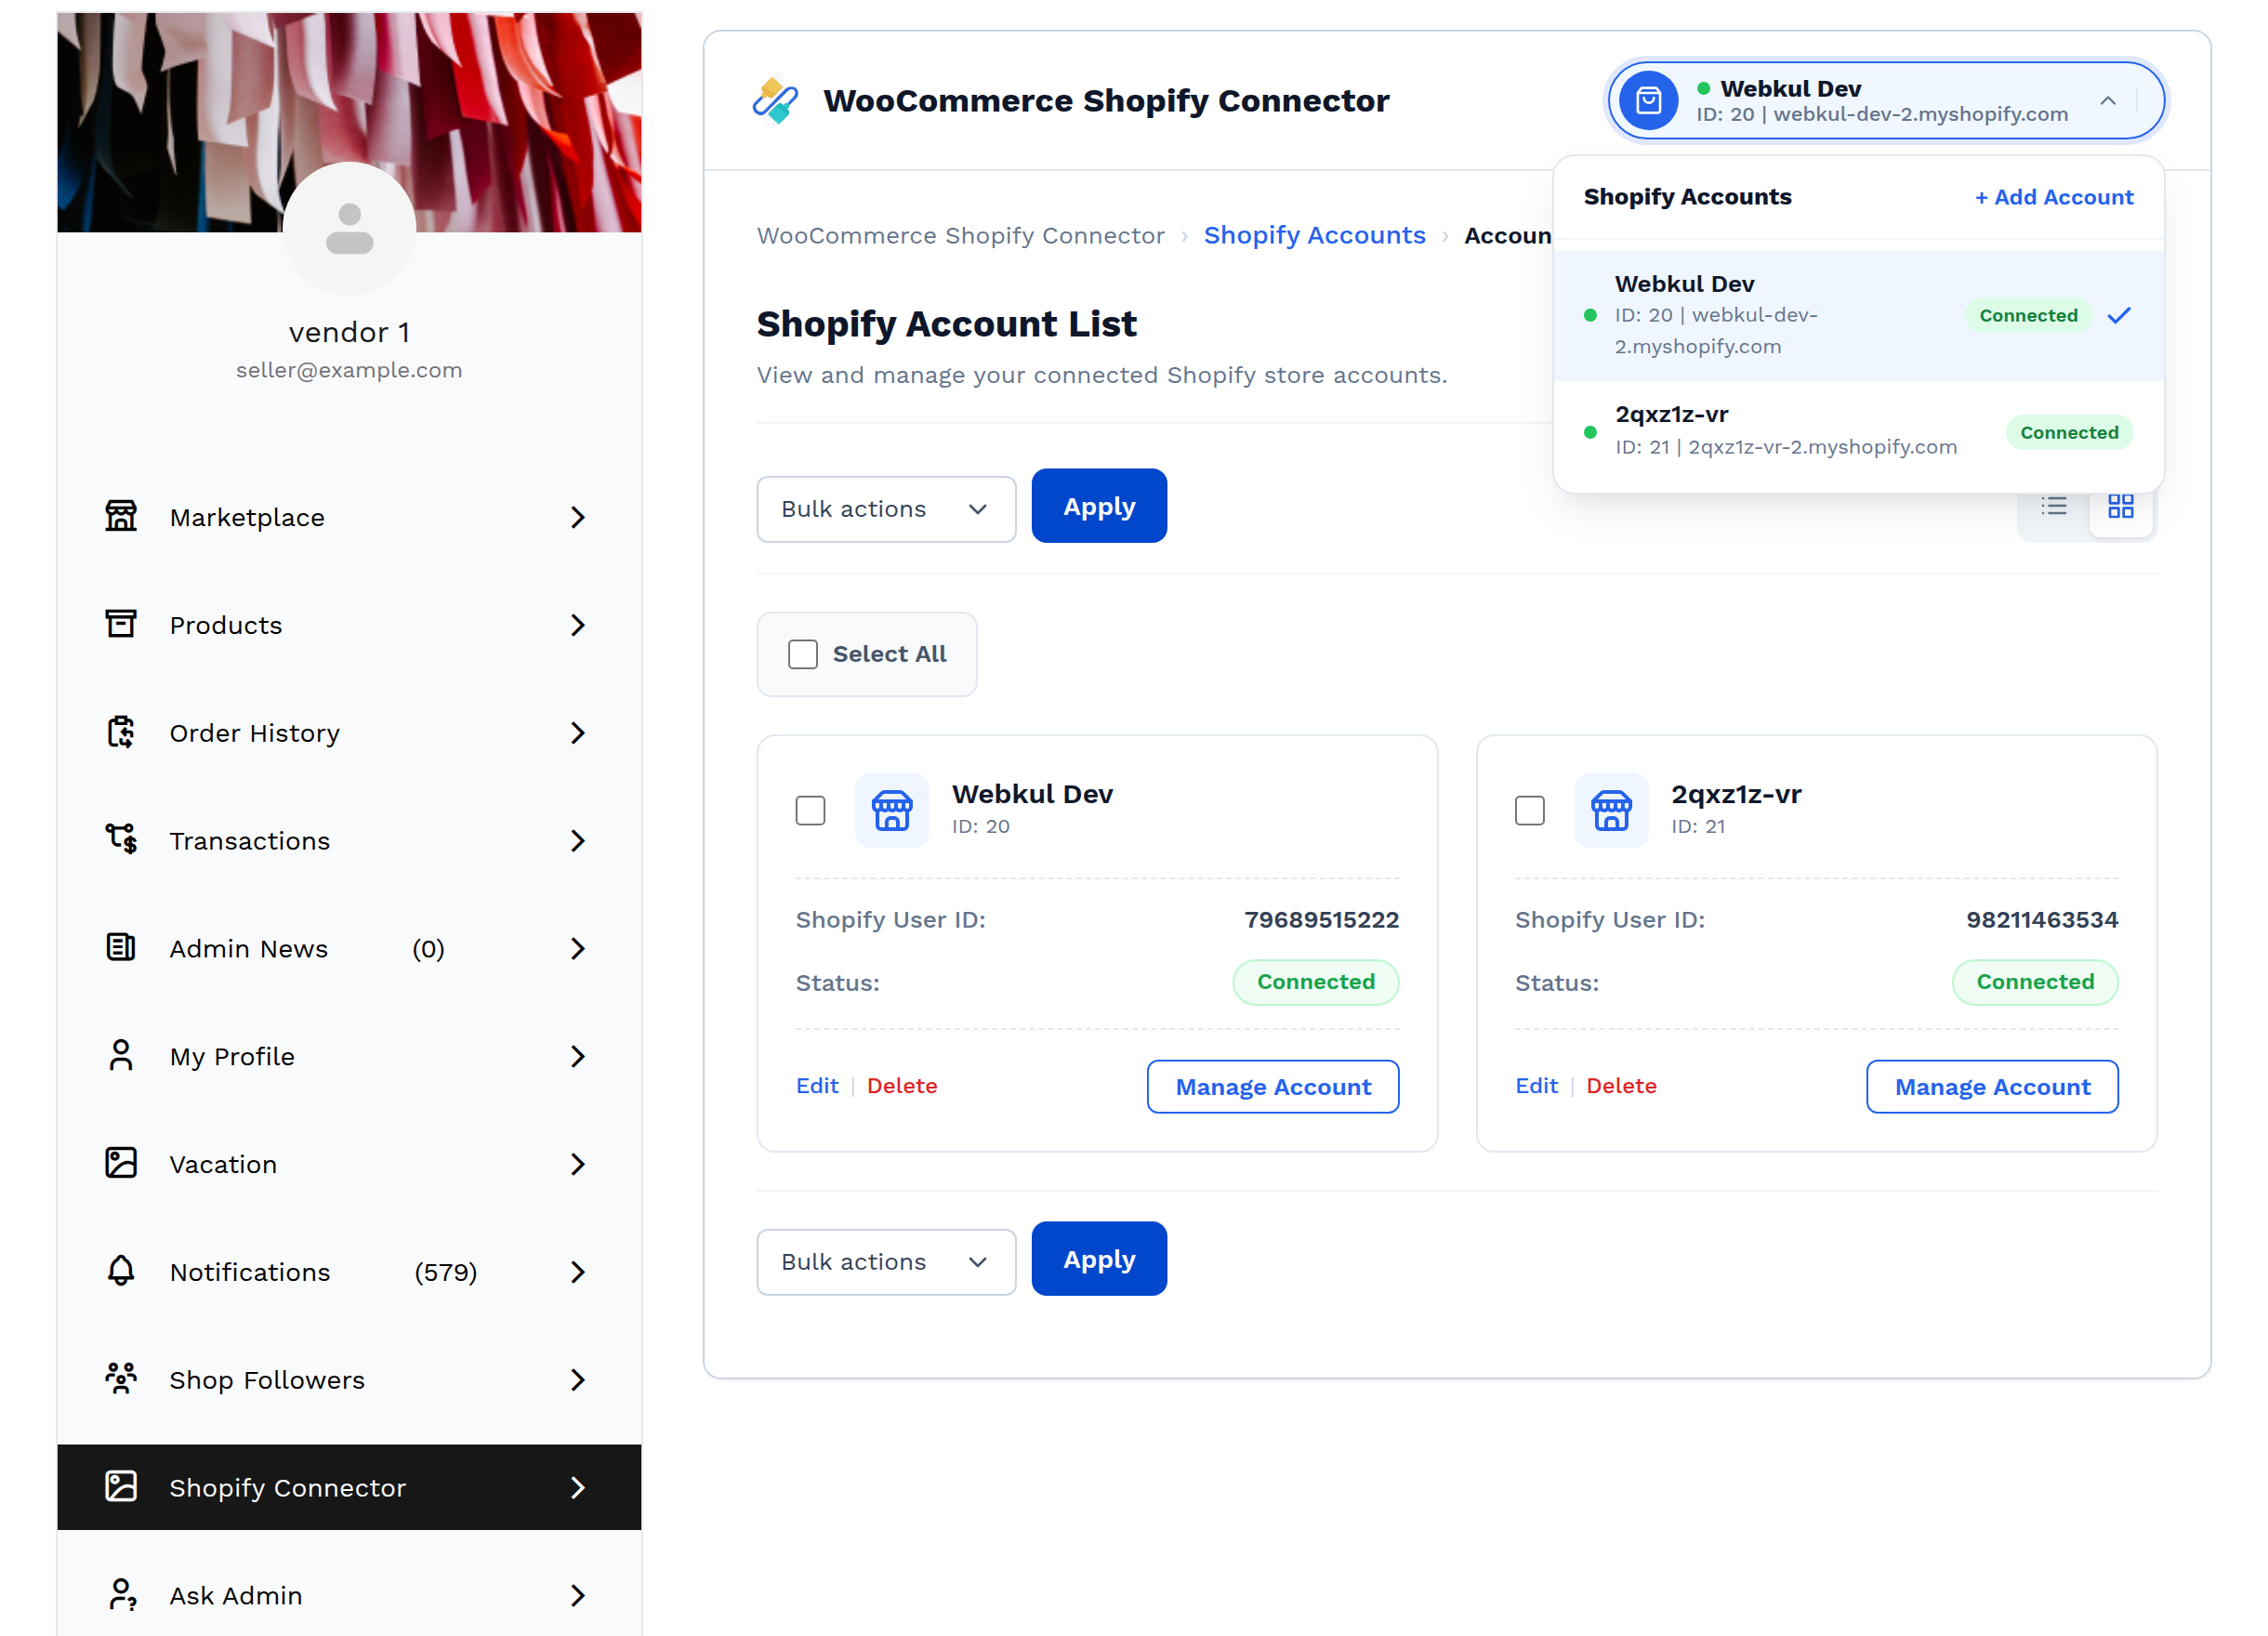
Selecting the pill drops down the full list. Choose a store to jump straight into its Manage Account screen, or select + Add Account to connect another one.
The navigation panel
The ☰ button beside the connector title opens a side panel with the same navigation in a taller form: Account List, Add Account, a Connected Accounts section with one card per store, and a Manage Settings shortcut to the active store's Settings tab.
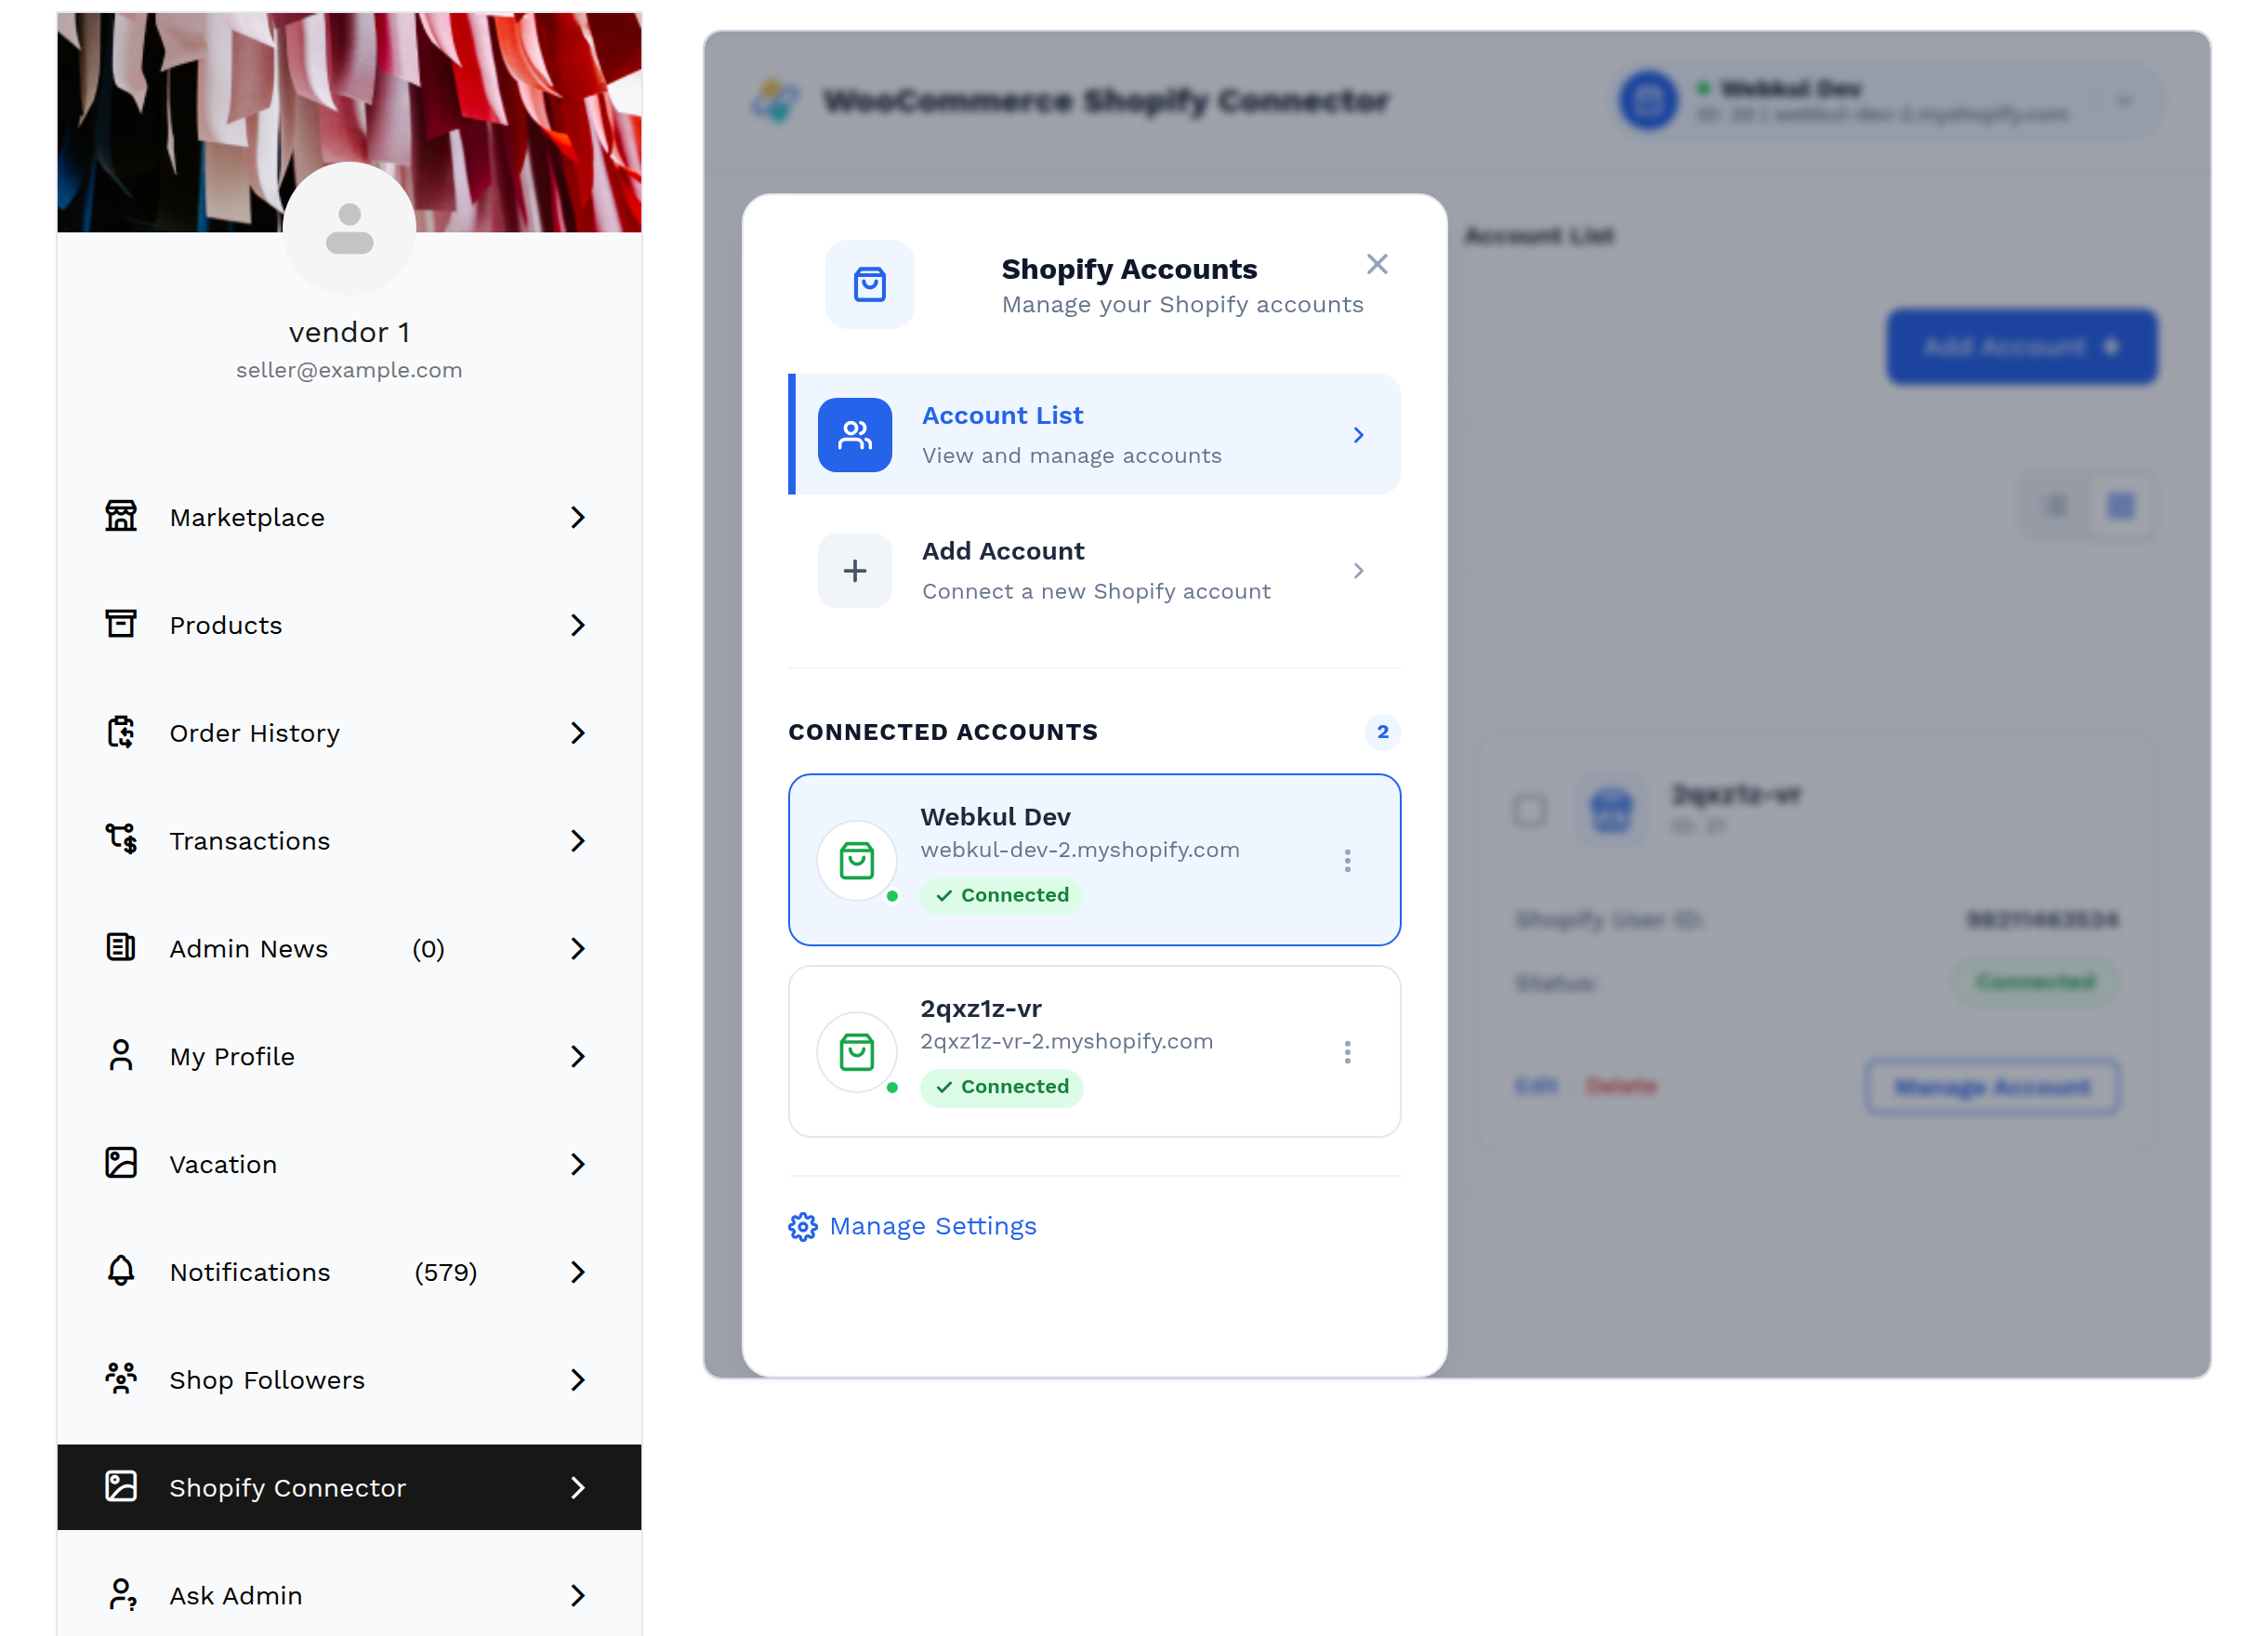
This is the panel sellers use on narrow screens, where the header pill collapses.
Adding a Shopify account
Select Add Account — from the button at the top right of the list, from the store switcher, or from the navigation panel. The form offers the same two authentication methods as the wizard.
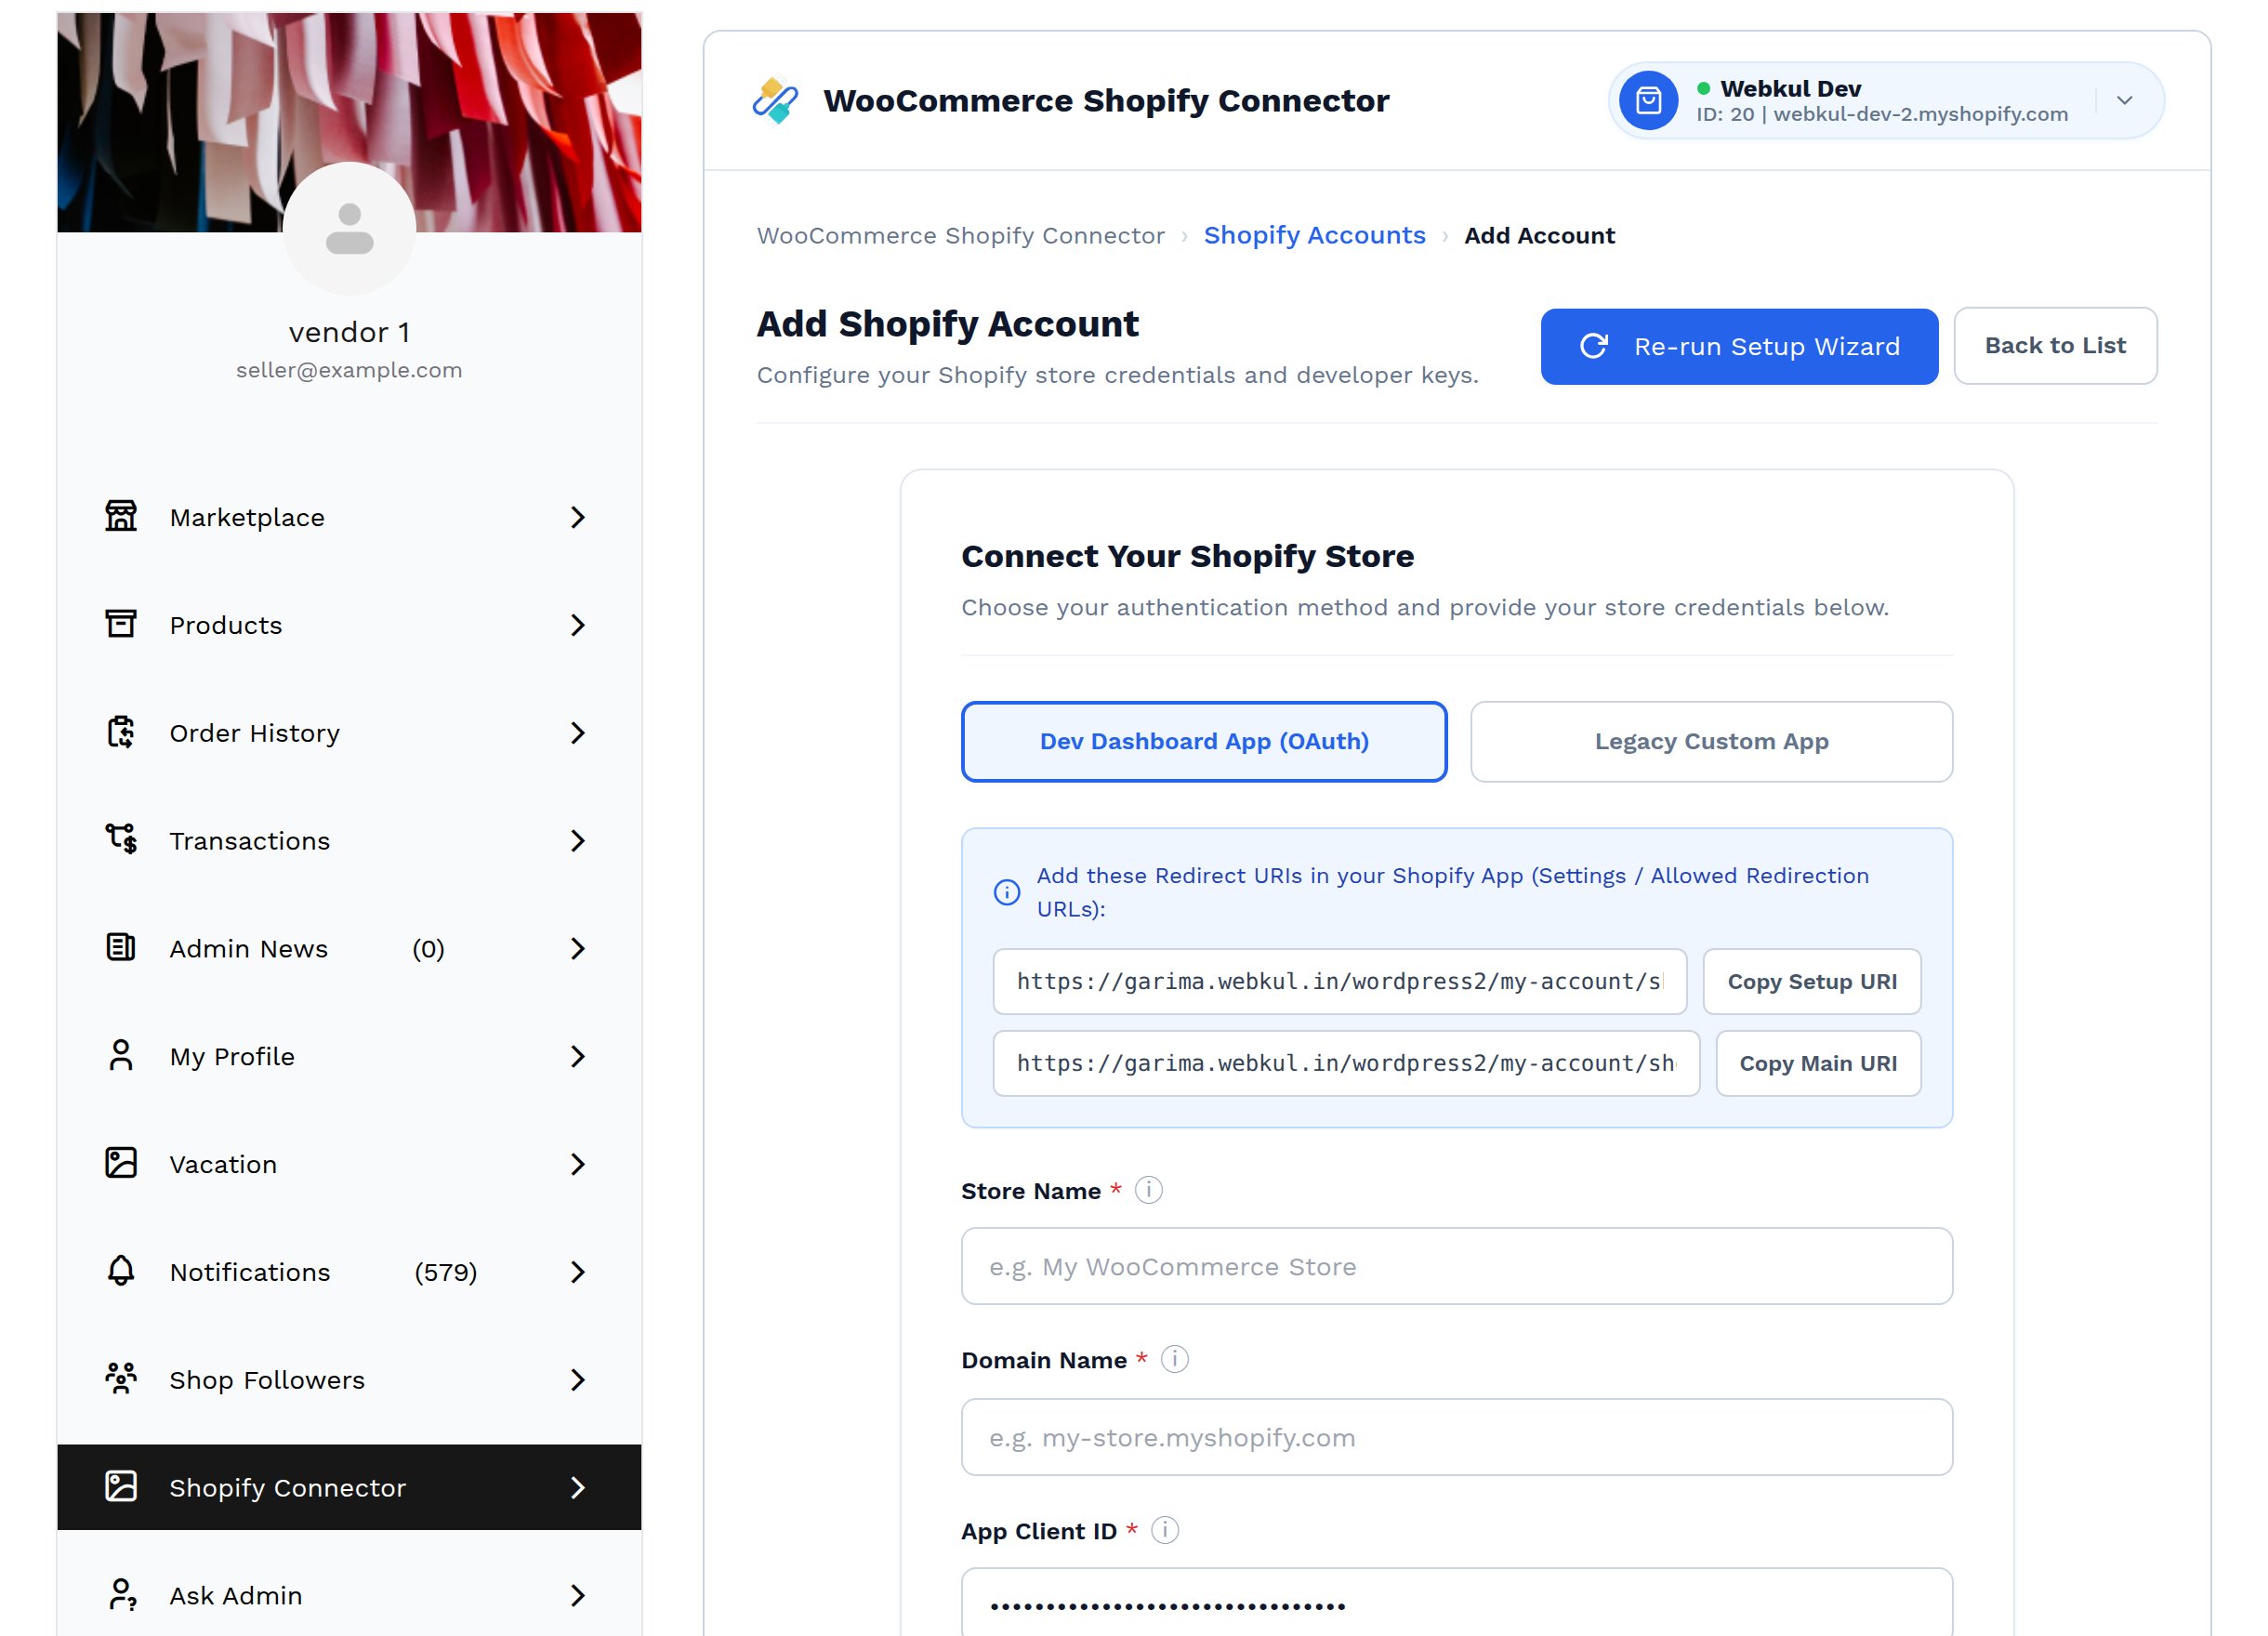
Dev Dashboard App (OAuth)
Copy the two redirect URIs from the blue callout into the Shopify app's Allowed redirection URLs.
Fill in:
Field Value Store Name Must match the Shopify store name exactly Domain Name The myshopify.comdomain, withouthttps://App Client ID From the Shopify Developer Dashboard app App Secret Key From the same app Select Connect Your Account. Shopify's authorisation screen opens; approve the app.
On success the connector returns to the account list with a green ✔ Shopify Account connected successfully! banner, and the store's three webhooks have already been registered.
Legacy Custom App
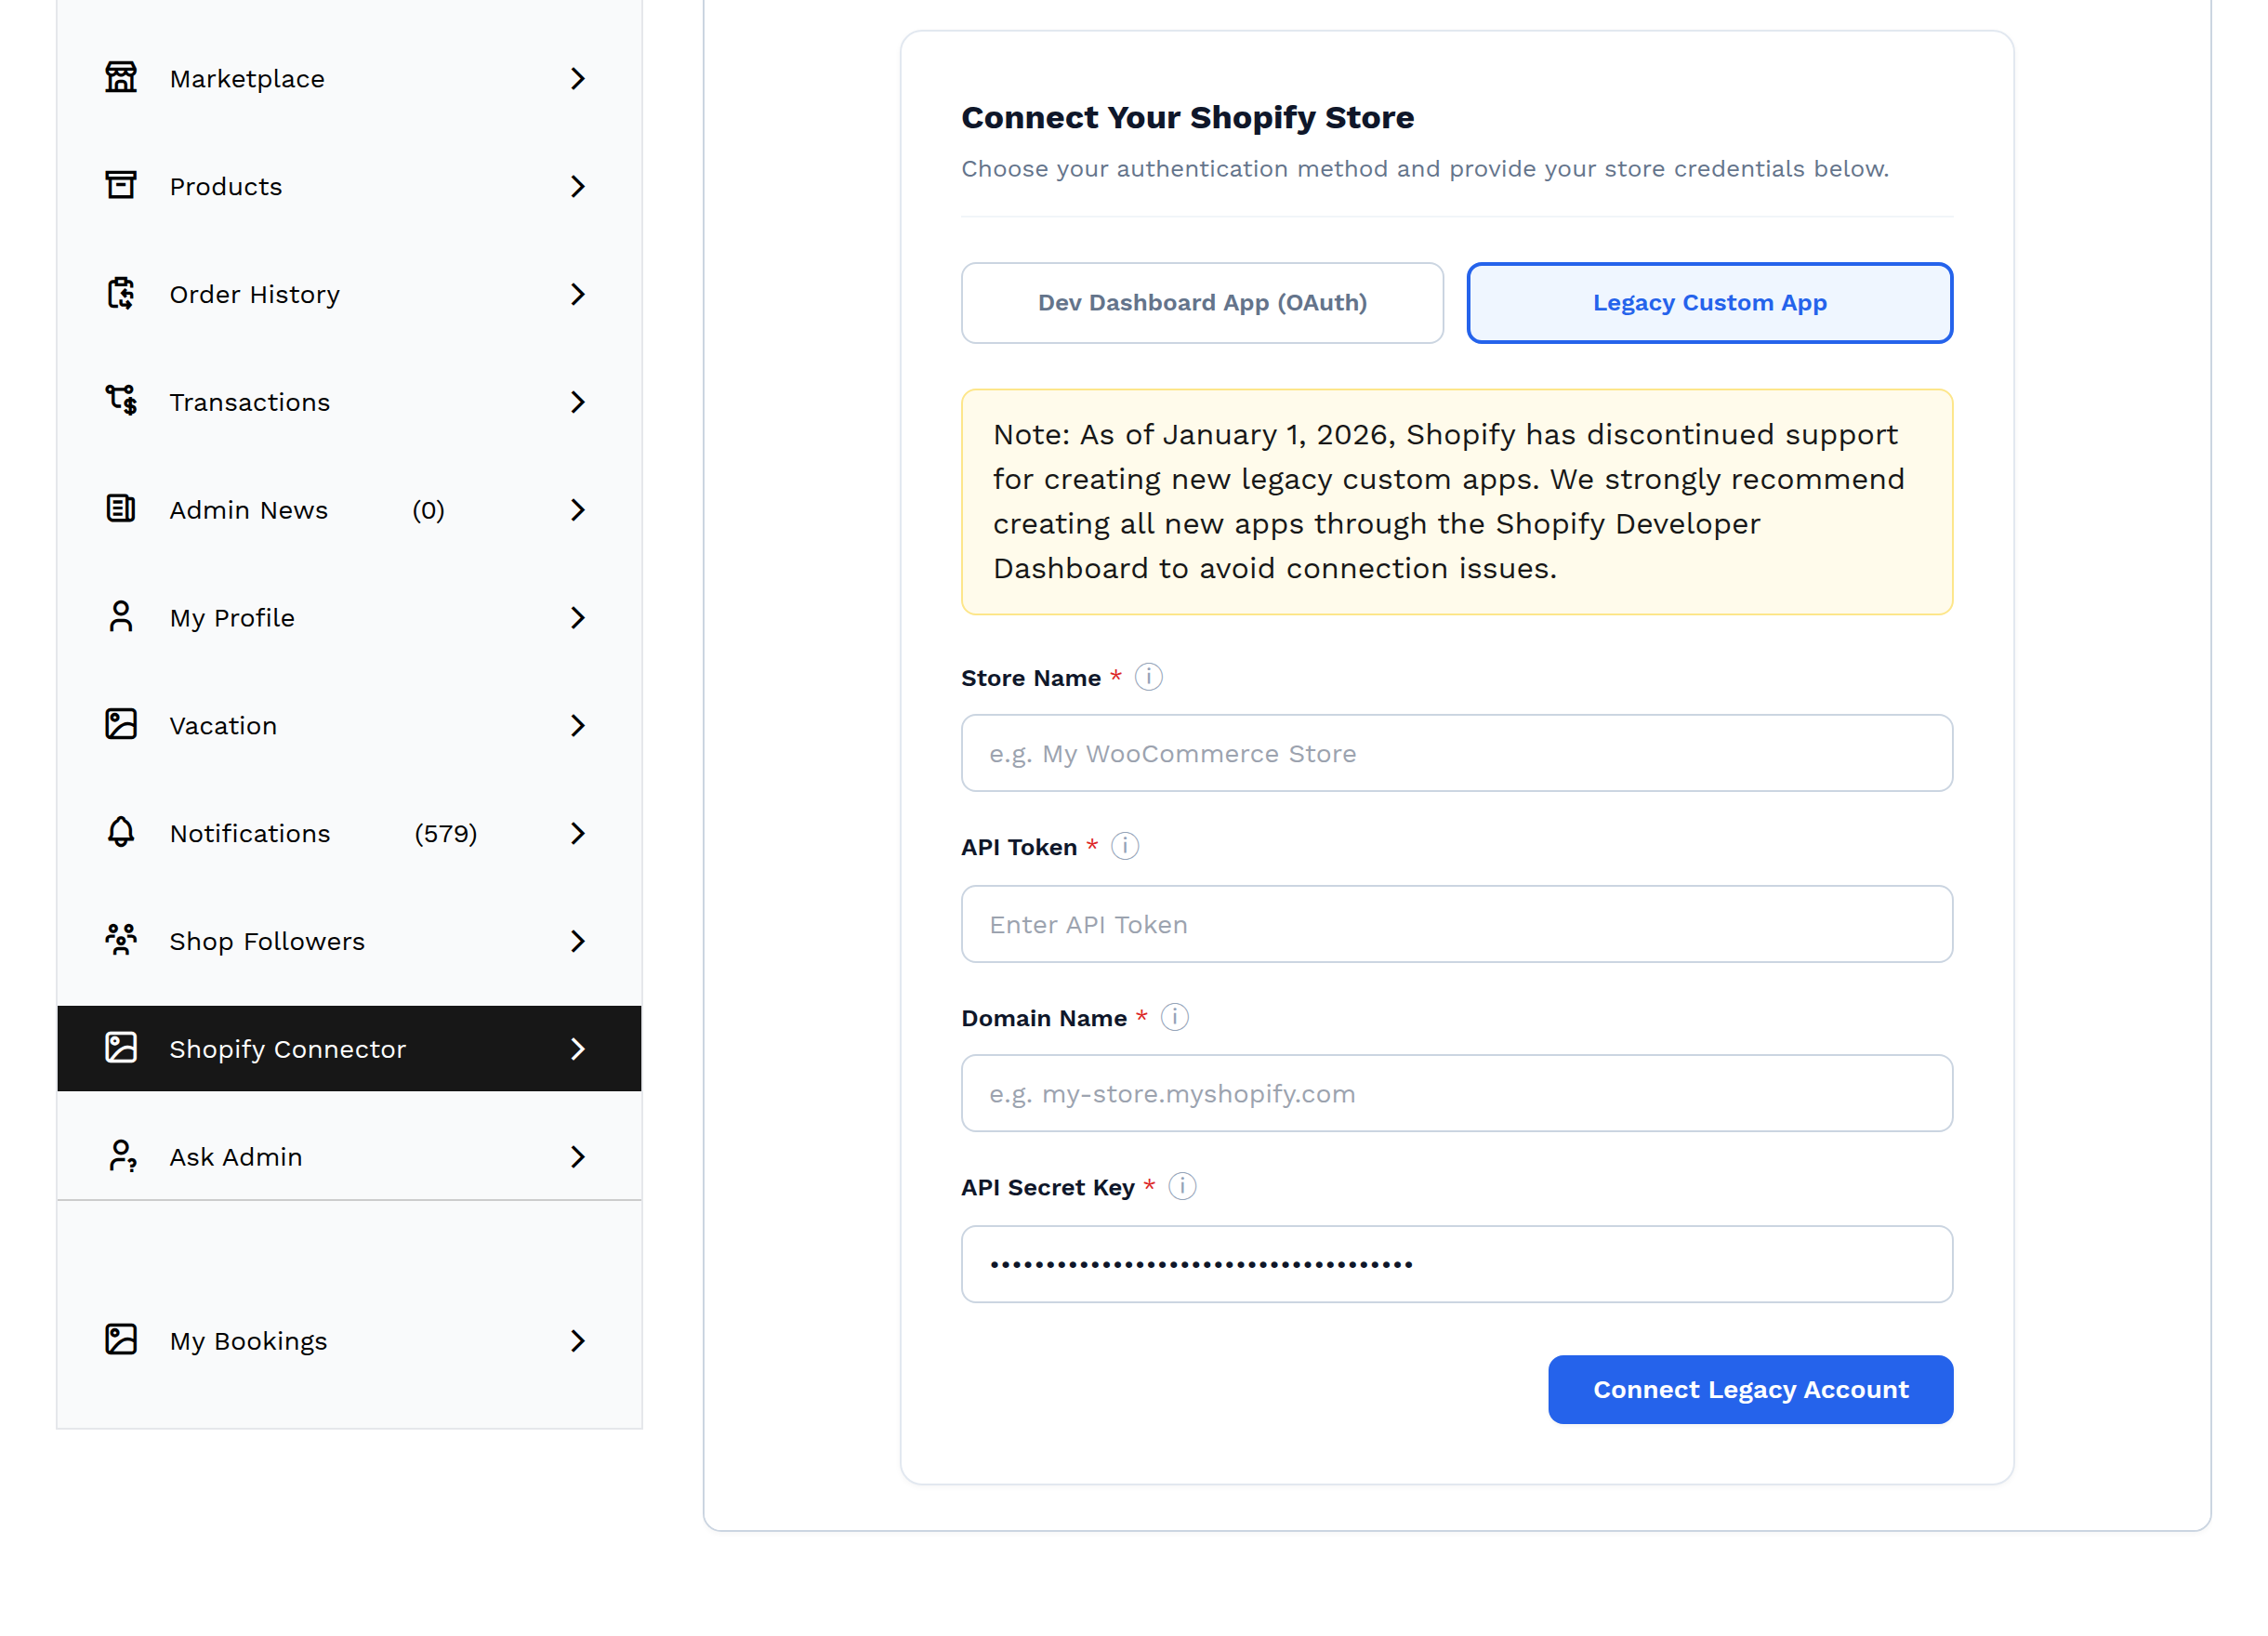
Select the Legacy Custom App tab and fill in Store Name, API Token, Domain Name and API Secret Key, then select Connect Legacy Account. There is no redirect — the connector verifies the token with Shopify and saves the account immediately.
Important
The API Secret Key is what the connector uses to verify incoming Shopify webhooks. If it is wrong, the store connects but real-time updates are silently rejected.
Errors on this form
| Message | Cause | Fix |
|---|---|---|
| "Please Enter All Required Details." | A required field is blank | Complete every field |
| "Added store name does not match with the shopify store name. Please add valid store name." | Store Name differs from the name in Shopify | Copy the name from Shopify exactly |
| "Please Enter Your Correct Shopify Account Details." | Shopify rejected the credentials | Re-copy the Client ID, secret or token |
| "Account already exists." | This Shopify store is already connected | Manage the existing account instead |
Invalid OAuth state | The authorisation round trip was interrupted or tampered with | Start again from Add Account |
Editing a connection
Select Manage Account on a row (or Edit in the row actions) and open the Account tab.
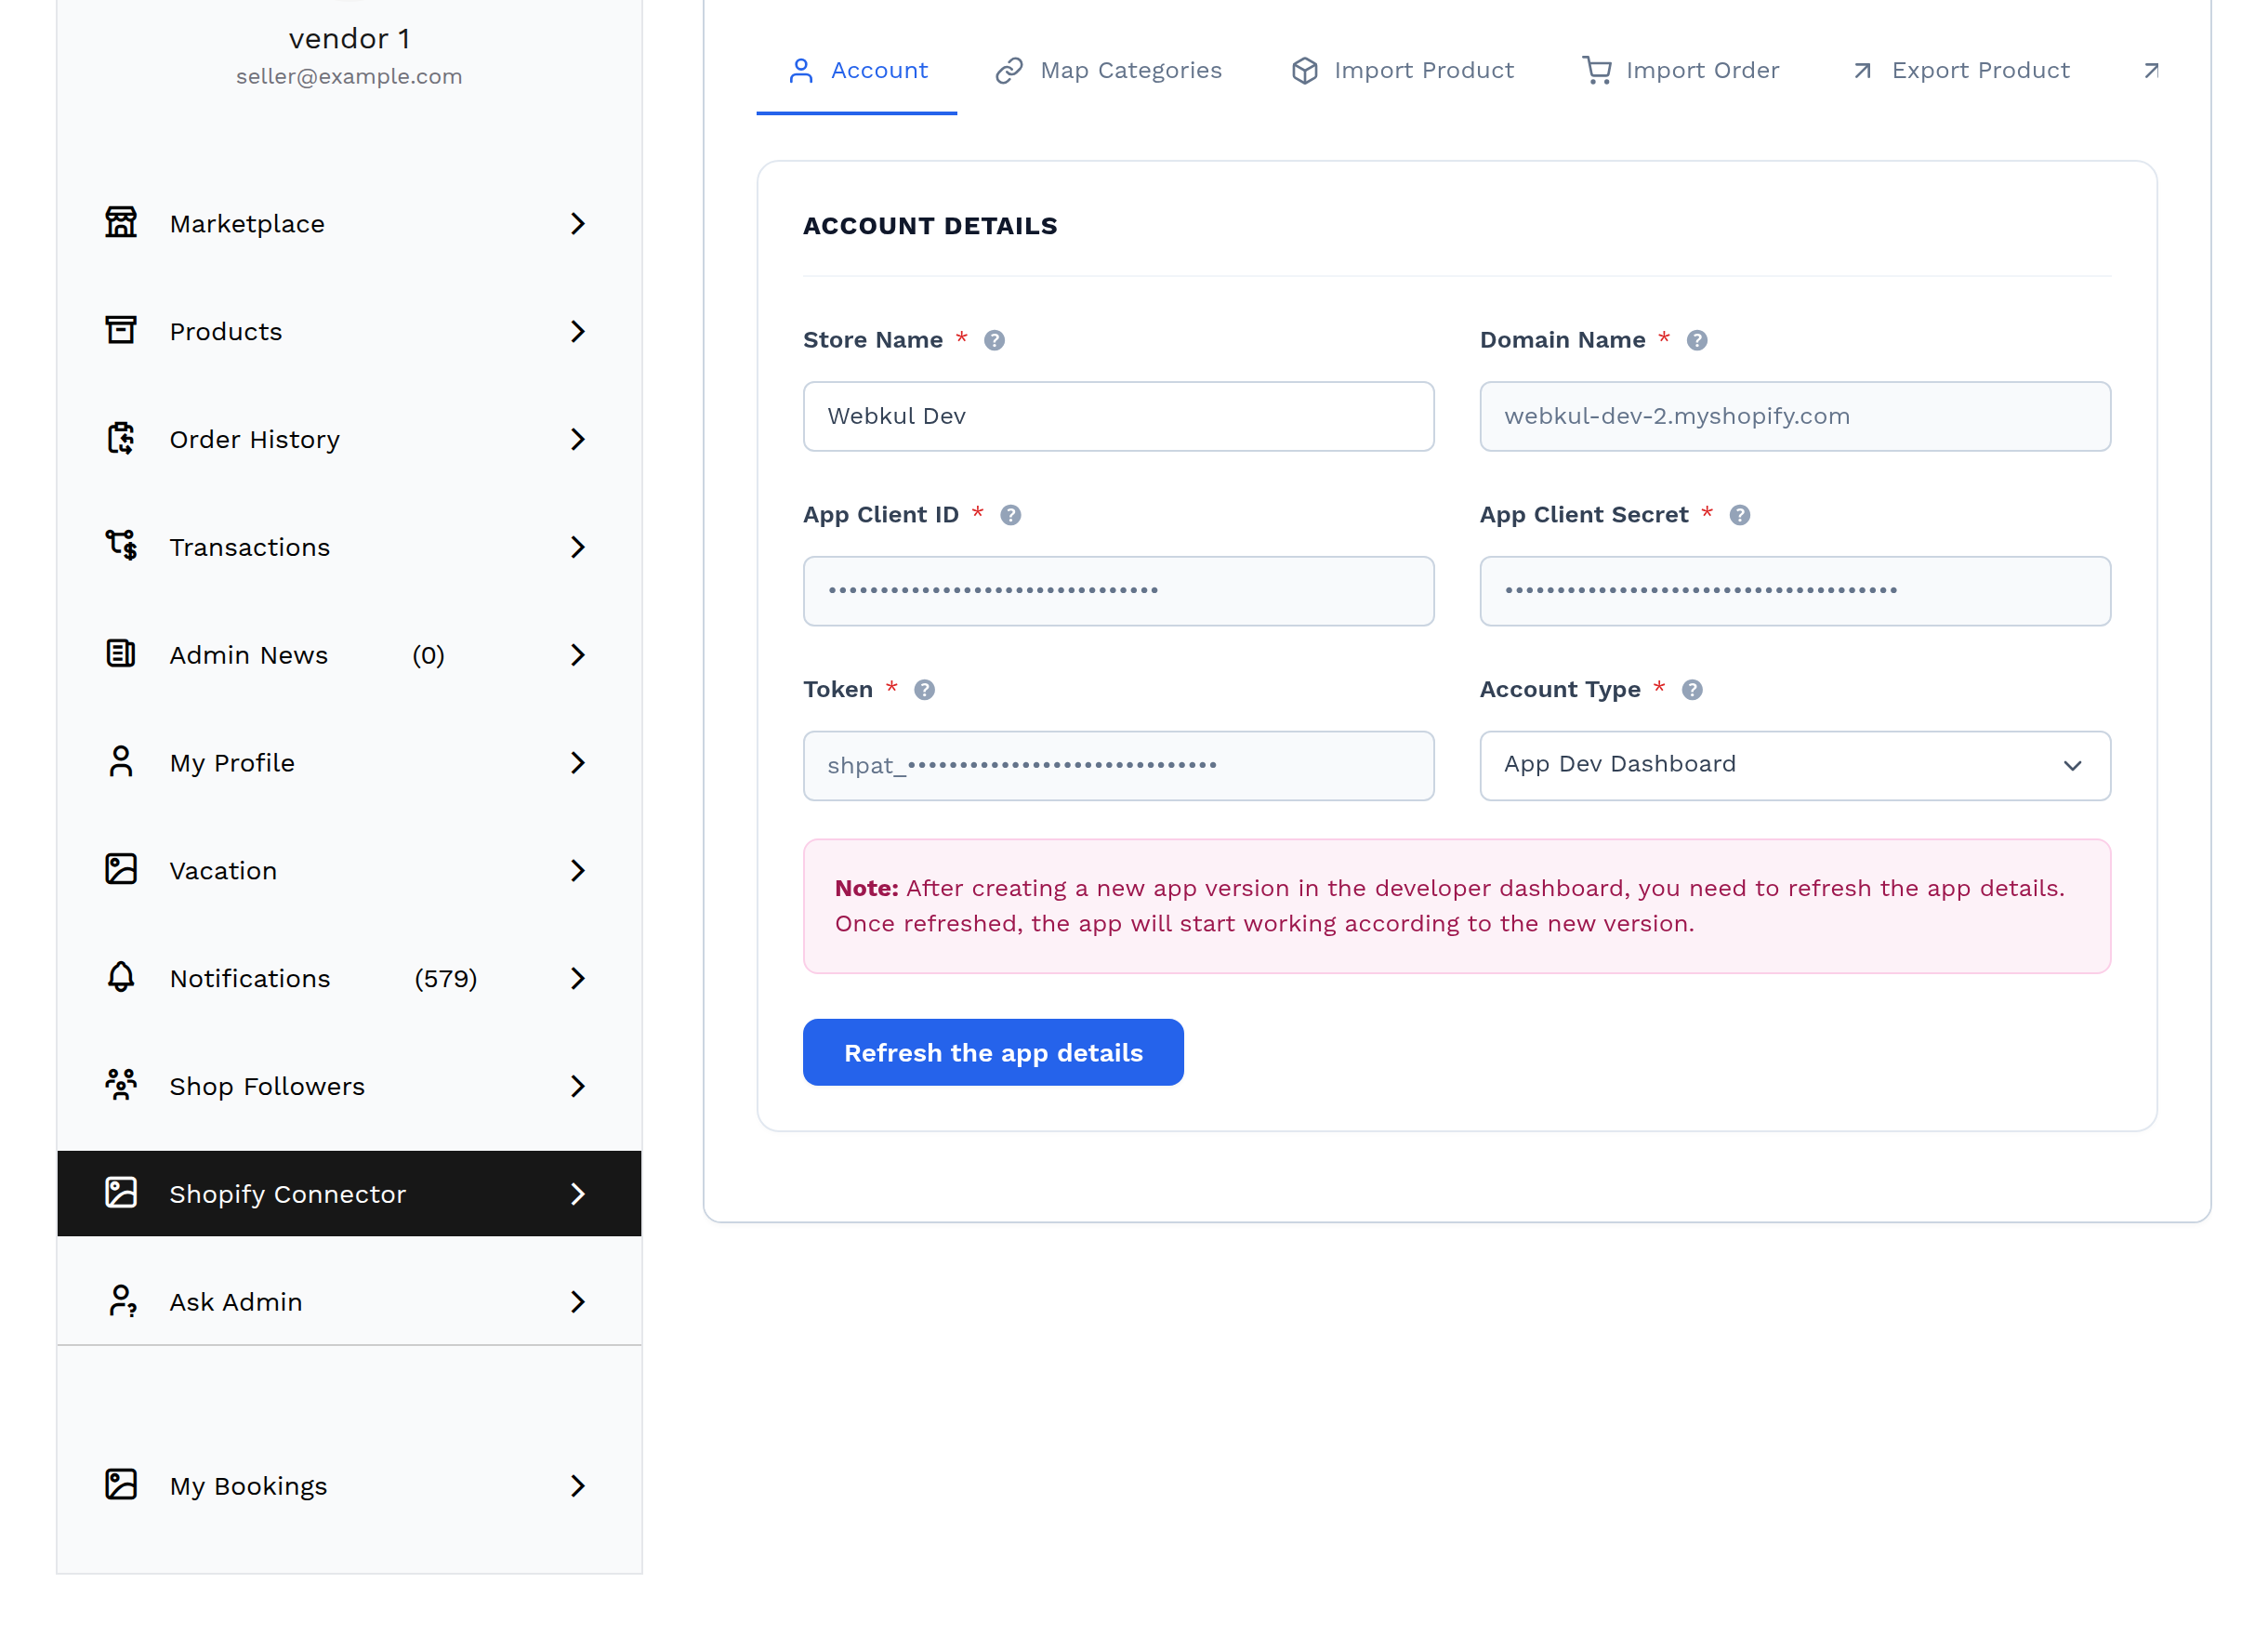
| Field | Editable | Notes |
|---|---|---|
| Store Name | Yes | Must still match Shopify |
| Domain Name | No | Fixed for the life of the connection |
| App Client ID | Depends | Read-only once an OAuth connection is established |
| App Client Secret | Yes | Needed for webhook verification |
| Token | No | Generated and saved automatically; shown masked |
| Account Type | Yes | App Dev Dashboard or Legacy Custom App |
The button at the bottom changes with the account type:
- App Dev Dashboard → Refresh the app details. This re-runs the Shopify authorisation. Use it after publishing a new version of the app in the Developer Dashboard; as the on-screen note says, the app only starts working to the new version once the details are refreshed.
- Legacy Custom App → Update Details. This re-validates the store name against Shopify and saves.
Removing a connection
Select Delete in a row's actions, or tick one or more rows and use the Bulk actions → Delete control. A confirmation appears first.
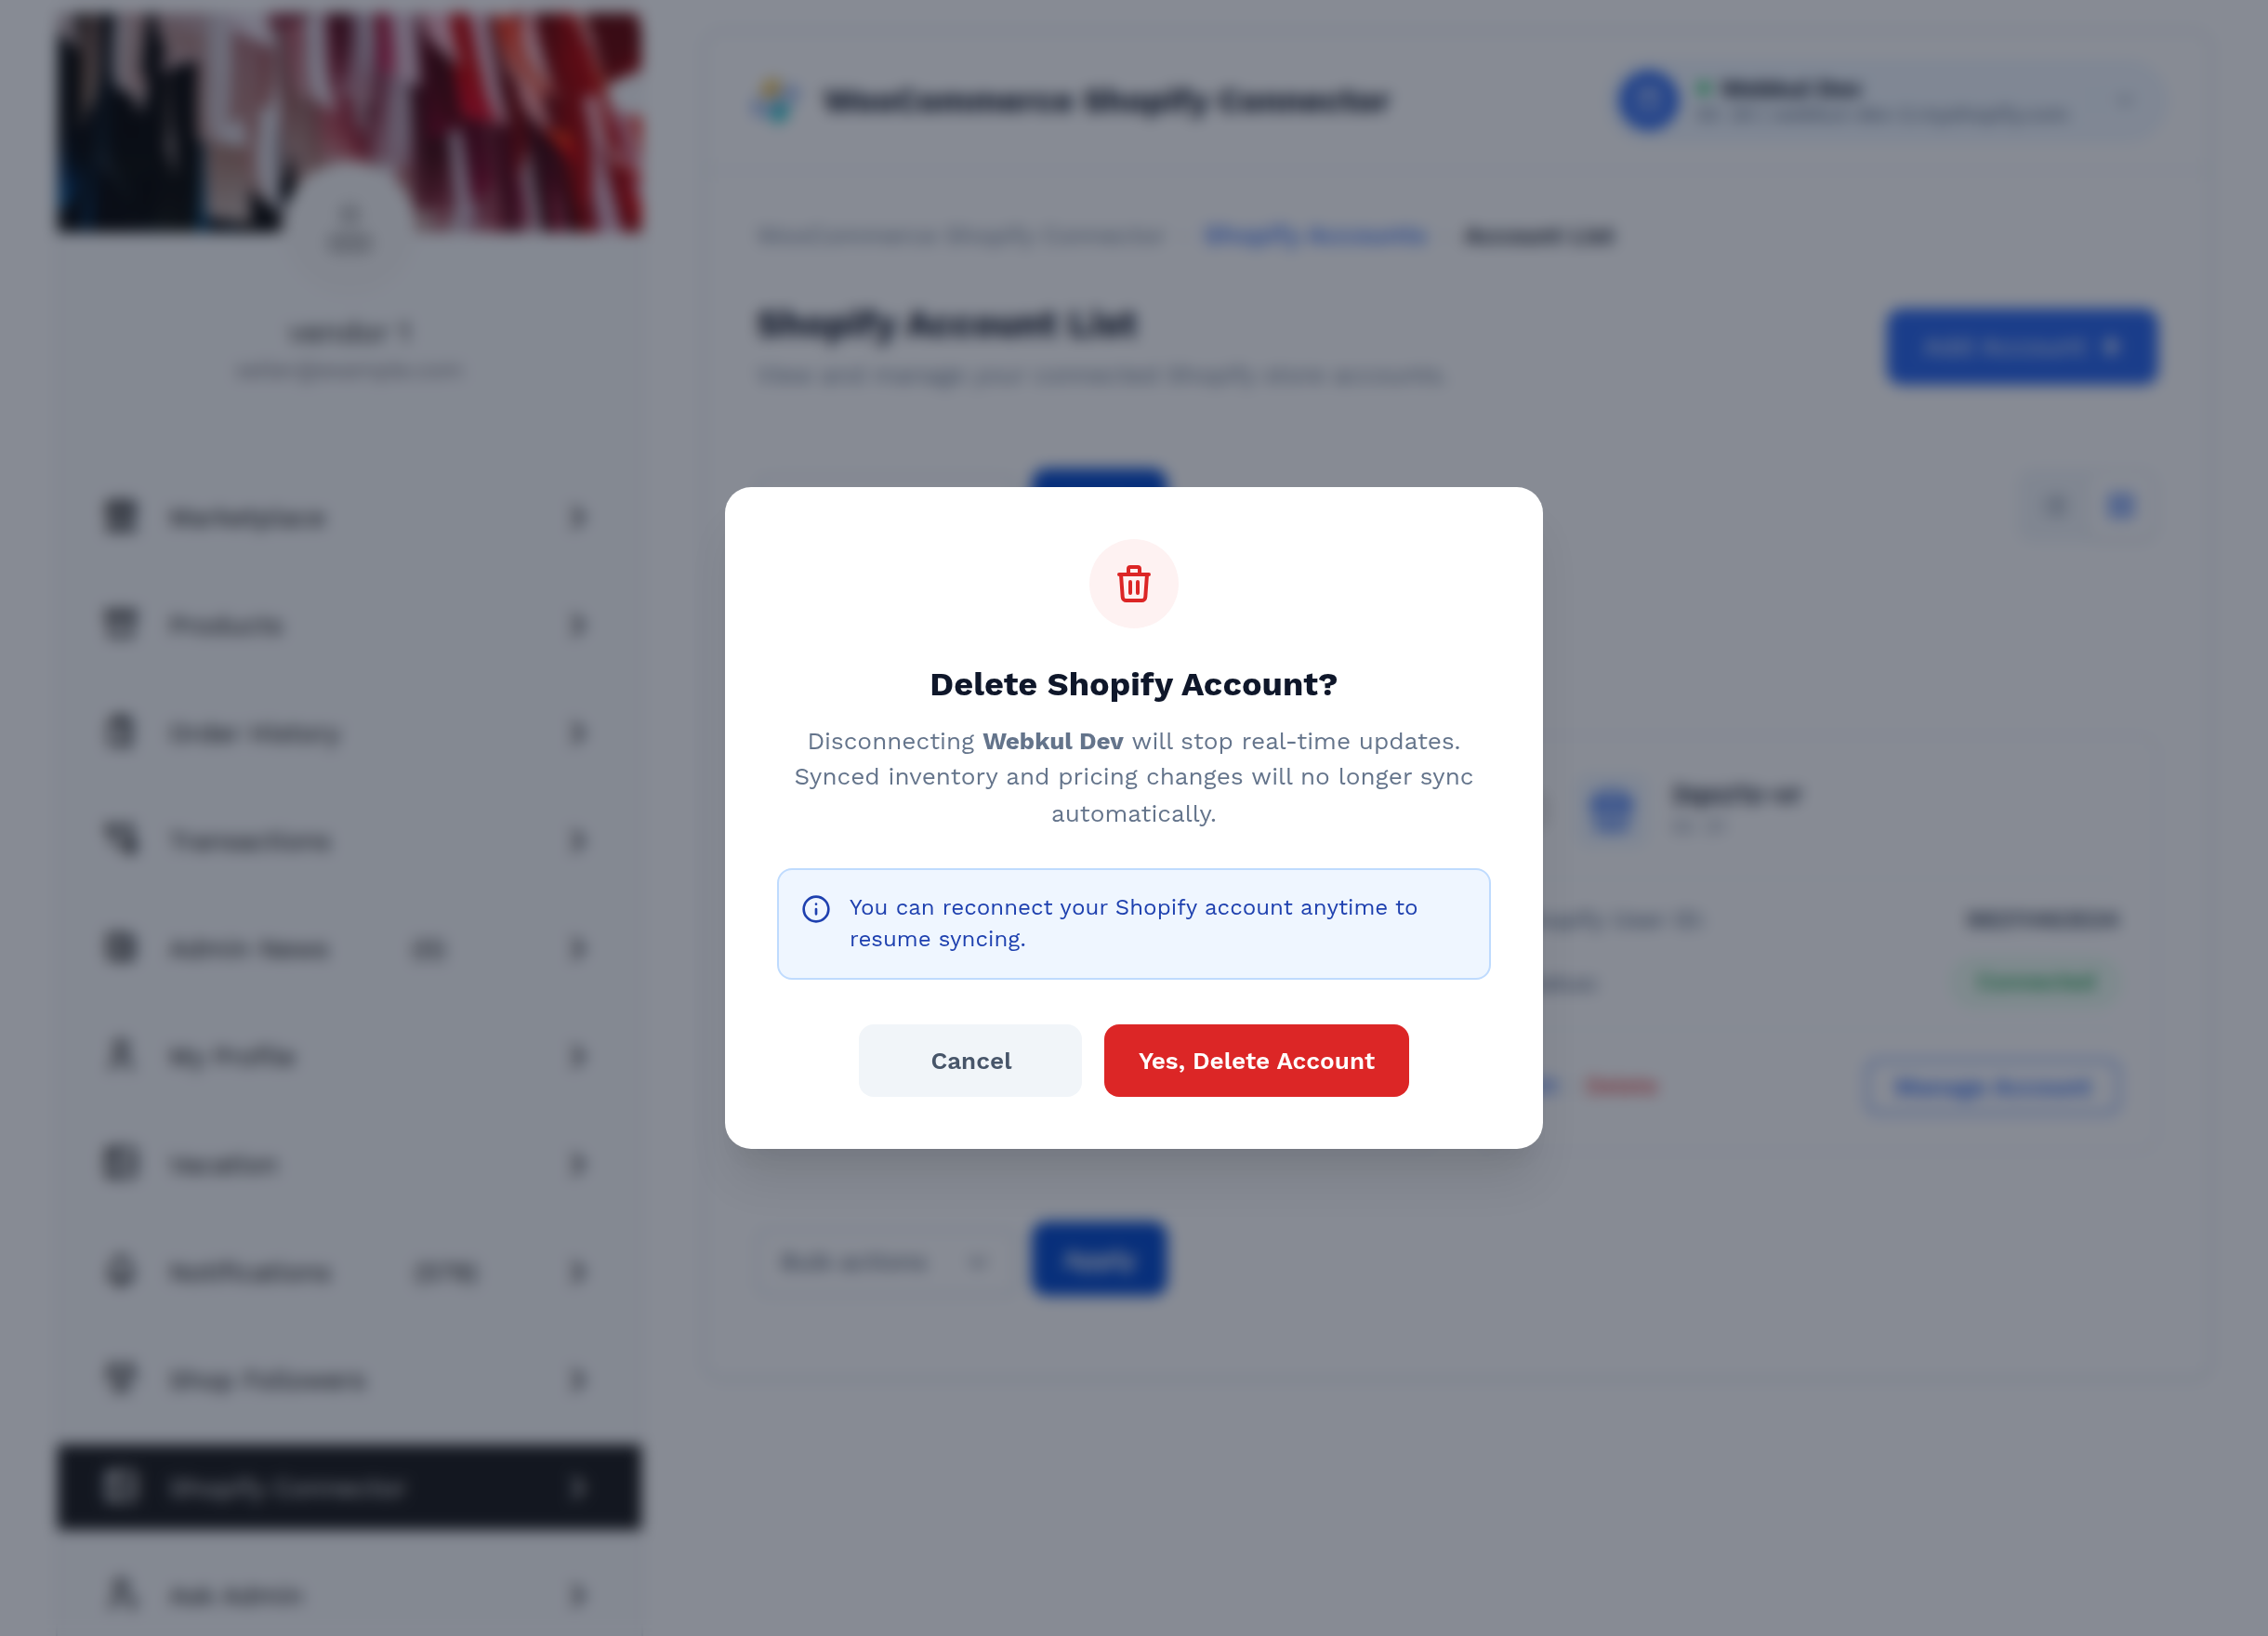
Deleting an account removes the connection and everything the connector stored for it: the product and order mappings, the category mappings, the price rules and the account's settings. The account's webhook subscriptions are deleted from Shopify as well, so the disconnected store stops sending updates instead of leaving orphaned webhooks behind.
Warning
Deleting a Shopify account does not delete the WooCommerce products and orders that were imported through it. Those stay in your store, but they are no longer linked to Shopify, so reconnecting the same store later will import them again as new items.
The modal notes that a store can be reconnected at any time to resume syncing.
Next step
With a store connected, line up the catalogue structure first — see Category Mapping.