
Settings
The Settings tab is where a Shopify account is configured. Sixteen options sit in three cards, and between them they decide what is imported, what an imported product looks like, what an exported order carries, and what happens automatically.
Settings are stored per Shopify account. A seller with two connected stores configures each one separately — nothing here is global.
Open My Account → Shopify Connector → Manage Account → Settings.
Changes take effect when you select Save Settings at the bottom.
| Message after saving | Meaning |
|---|---|
| Settings updated successfully | Saved |
| Unable to update the settings. So, please check the details | The save did not go through — reload and try again |
Tips
Every option has a ? beside its label. Hovering it shows the plugin's own explanation of that field — handy when configuring a second store from memory.
General Settings
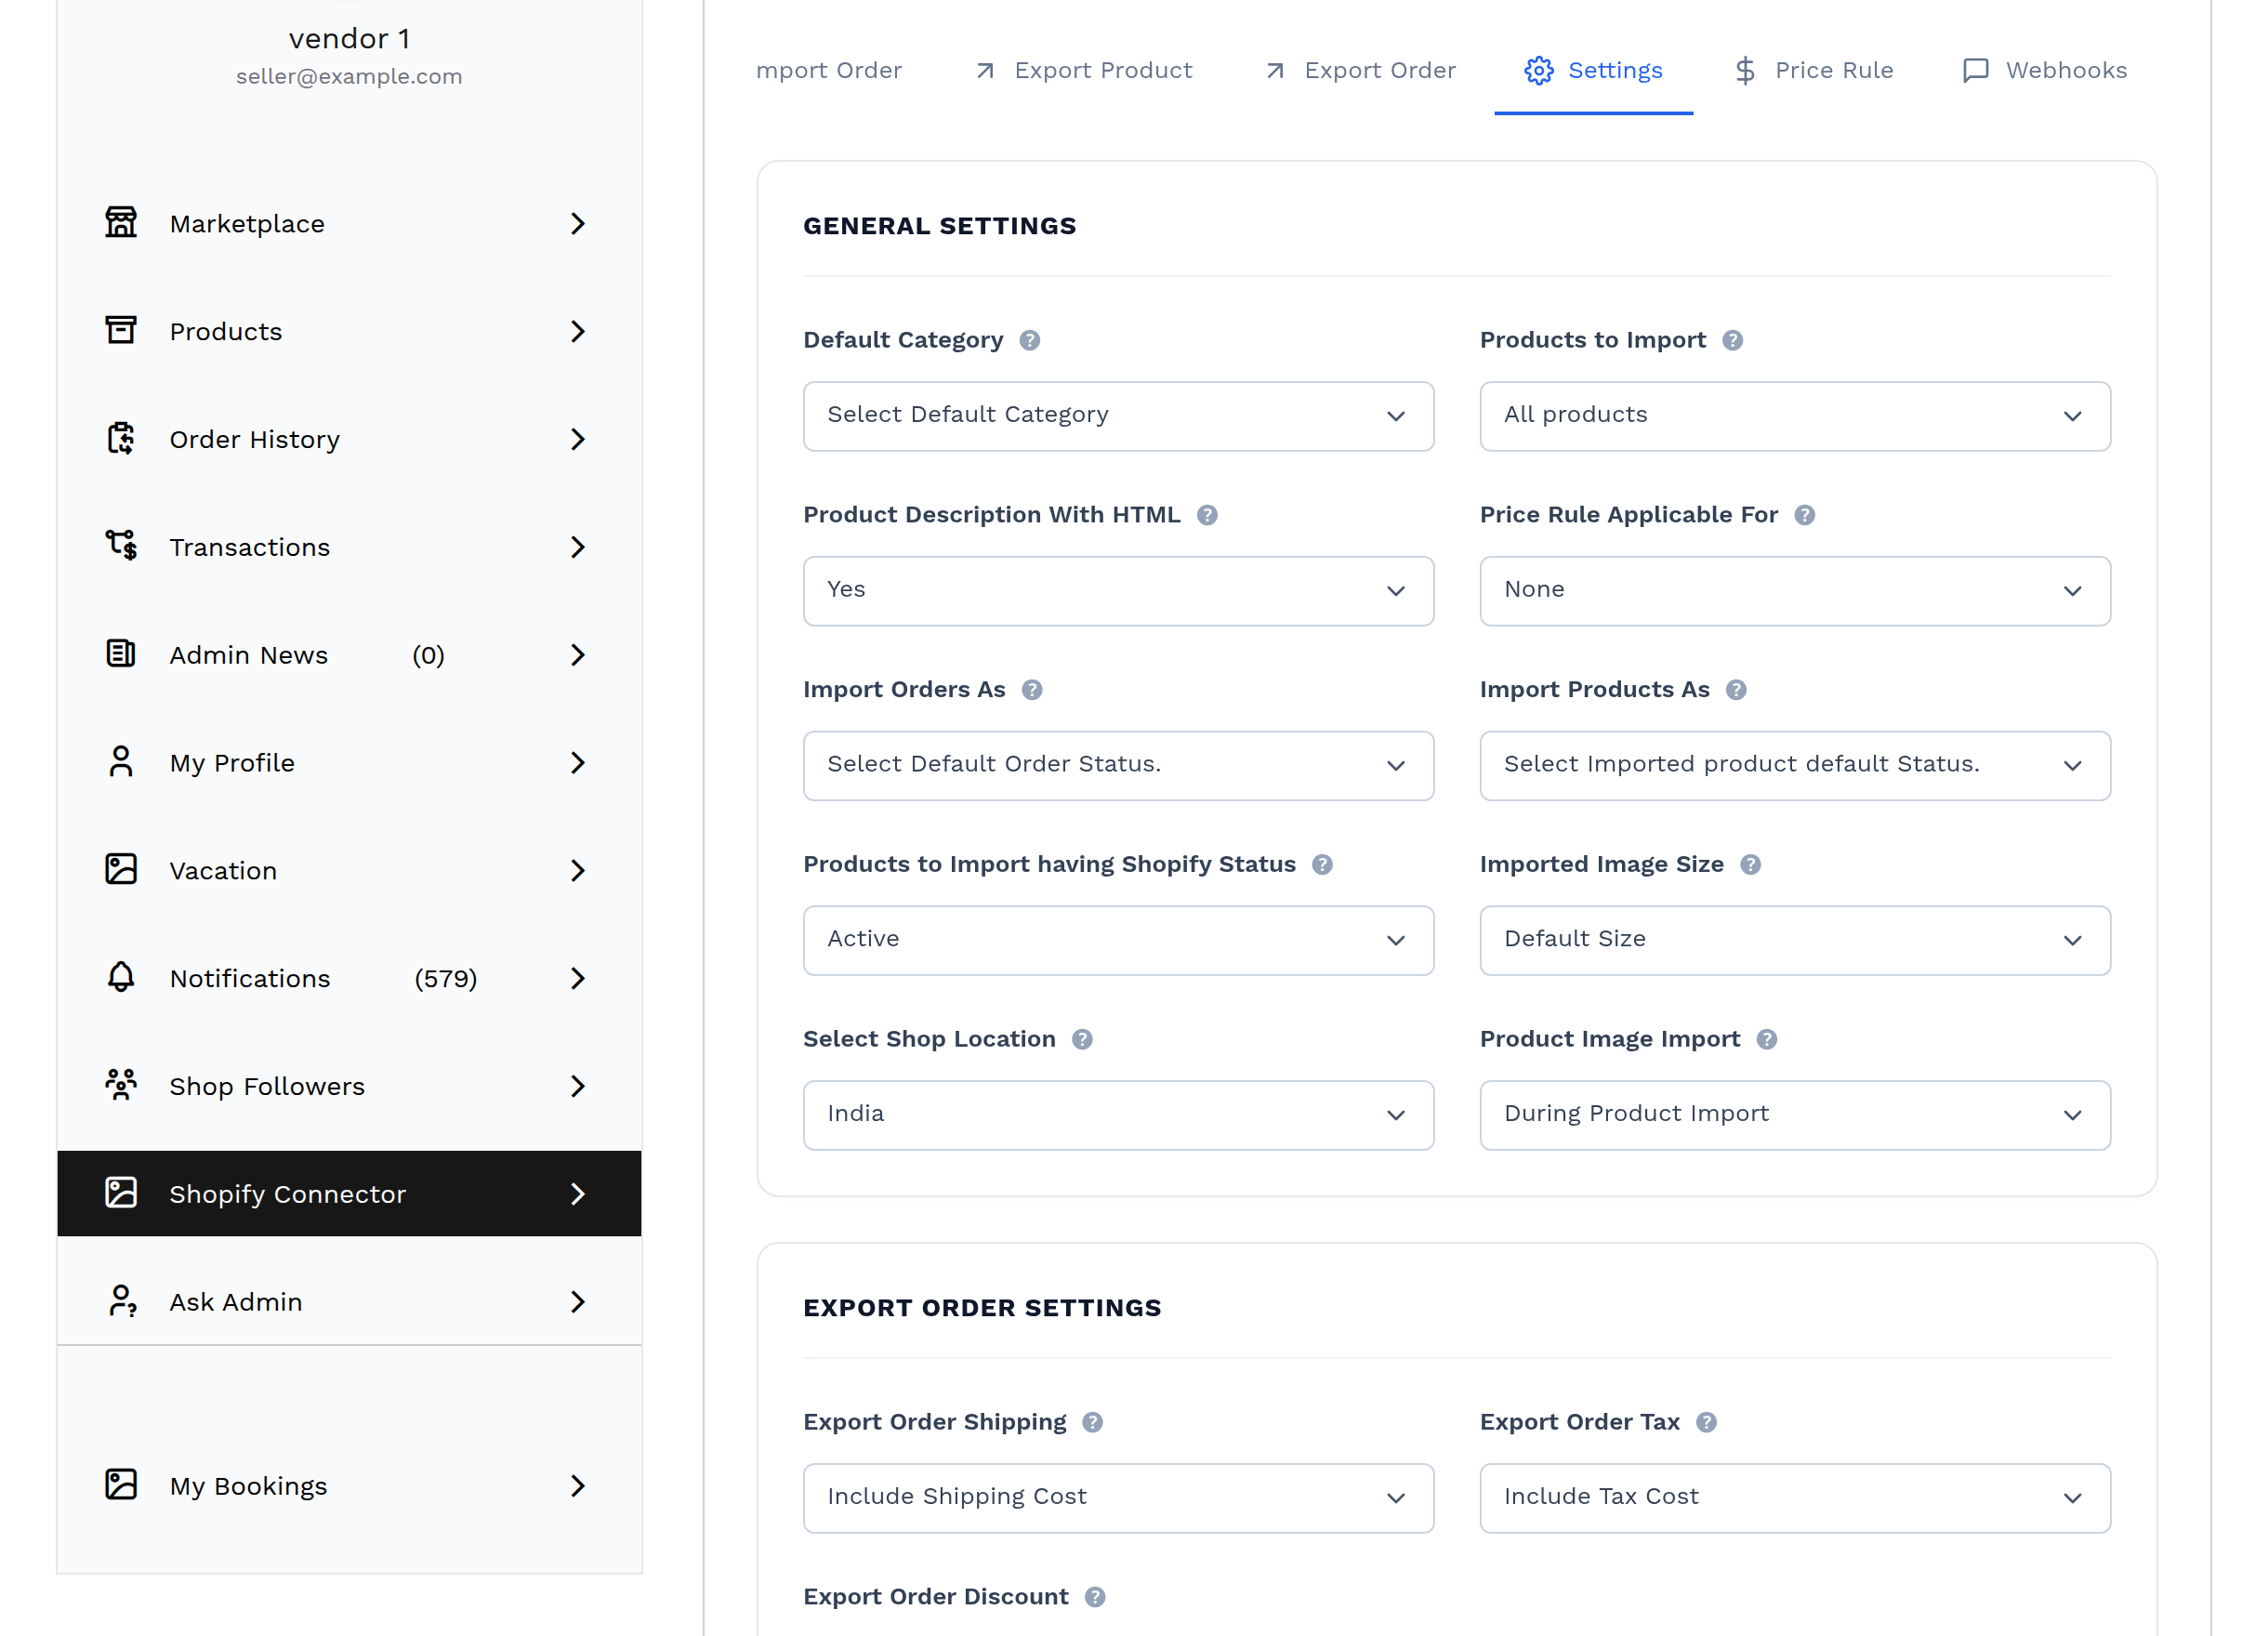
Default Category
Options: Select Default Category, plus every WooCommerce product category.
Where an imported product is filed when its Shopify collection is not mapped to a category. It is the safety net behind Category Mapping.
If the marketplace restricts which categories a seller may sell in, only those categories are listed here.
When to change it: set it before your first import. Without it, and without a mapping, imported products arrive with no category at all.
Products to Import
Options: All products · Only mapped categories product
| Option | Behaviour |
|---|---|
| All products | The import covers the whole Shopify catalogue. Unmapped products go to Default Category. |
| Only mapped categories product | Products whose collection is not mapped are skipped entirely, and reported as Product(s) skipped due to category not mapped. |
Use the second option when the Shopify store carries lines that have no place on your marketplace.
Product Description With HTML
Options: Yes · No
Yes keeps Shopify's formatting — headings, lists, bold — in the WooCommerce description. No strips every tag and imports plain text.
Choose No when the Shopify descriptions carry styling that clashes with your marketplace theme.
Price Rule Applicable For
Options: None · Import Product · Export Product
Which direction your price rules act on. Only one direction can be active.
None switches every rule off without deleting any of them — the fastest way to test whether a pricing oddity is coming from a rule.
Import Orders As
Options: Select Default Order Status, plus every WooCommerce order status — Pending payment, Processing, On hold, Completed, Cancelled, Refunded, Failed, Draft.
The status every imported Shopify order is created with. Imported orders do not inherit the Shopify status; see the Order Data Reference.
| Choose | When |
|---|---|
| Processing | The order is paid on Shopify and you want it in the normal fulfilment queue |
| Completed | Shopify has already shipped it and you are importing for the record |
| Pending payment | You want to review each order before it counts |
Import Products As
Options: Select Imported product default Status · Draft · Pending Review · Published
WordPress's Private status is deliberately not offered.
Leave it blank and the Shopify status decides instead:
| Shopify status | WooCommerce status when this is blank |
|---|---|
| active | Published |
| draft | Draft |
| archived | Pending Review |
Tips
Draft is the safe choice for a first import. Nothing goes live until you have reviewed the catalogue, and you can publish in bulk afterwards from Products.
Products to Import having Shopify Status
Options: Active · Archived · Draft
Filters what is fetched from Shopify. Only products with the selected status are pulled.
If this has never been saved, the connector fetches active, draft and archived — everything. Set it explicitly if you only want live products.
Imported Image Size
Options: Default Size · Thumbnail (150px) · Medium (300px) · Full (768px)
The size requested from Shopify's image CDN. Default Size takes the original.
Smaller sizes import faster and use less disk, at the cost of image quality on product pages. This setting also applies in reverse — it sizes the images sent to Shopify on export.
Select Shop Location
Options: the live list of locations on the connected Shopify store.
Which Shopify location stock is read from on import and written to on export. A store with a single location can leave this alone; a store with a warehouse and a retail counter must pick the one that should back the marketplace listing.
Important
Get this wrong and stock numbers will look inexplicable — you will be syncing the shop floor's count instead of the warehouse's, or writing marketplace sales against the wrong location.
Product Image Import
Options: During Product Import · In The Background
| Option | Behaviour |
|---|---|
| During Product Import | Images are downloaded while each product is created. Slower, but nothing is left queued. |
| In The Background | Products are created immediately and images are fetched afterwards by a background queue. Much faster on a large catalogue; products briefly appear without pictures. |
In background mode the Import Product tab shows a Product images left for create counter while the queue has work in it. If that number never falls, WordPress's scheduler is not running — see Troubleshooting.
Export Order Settings
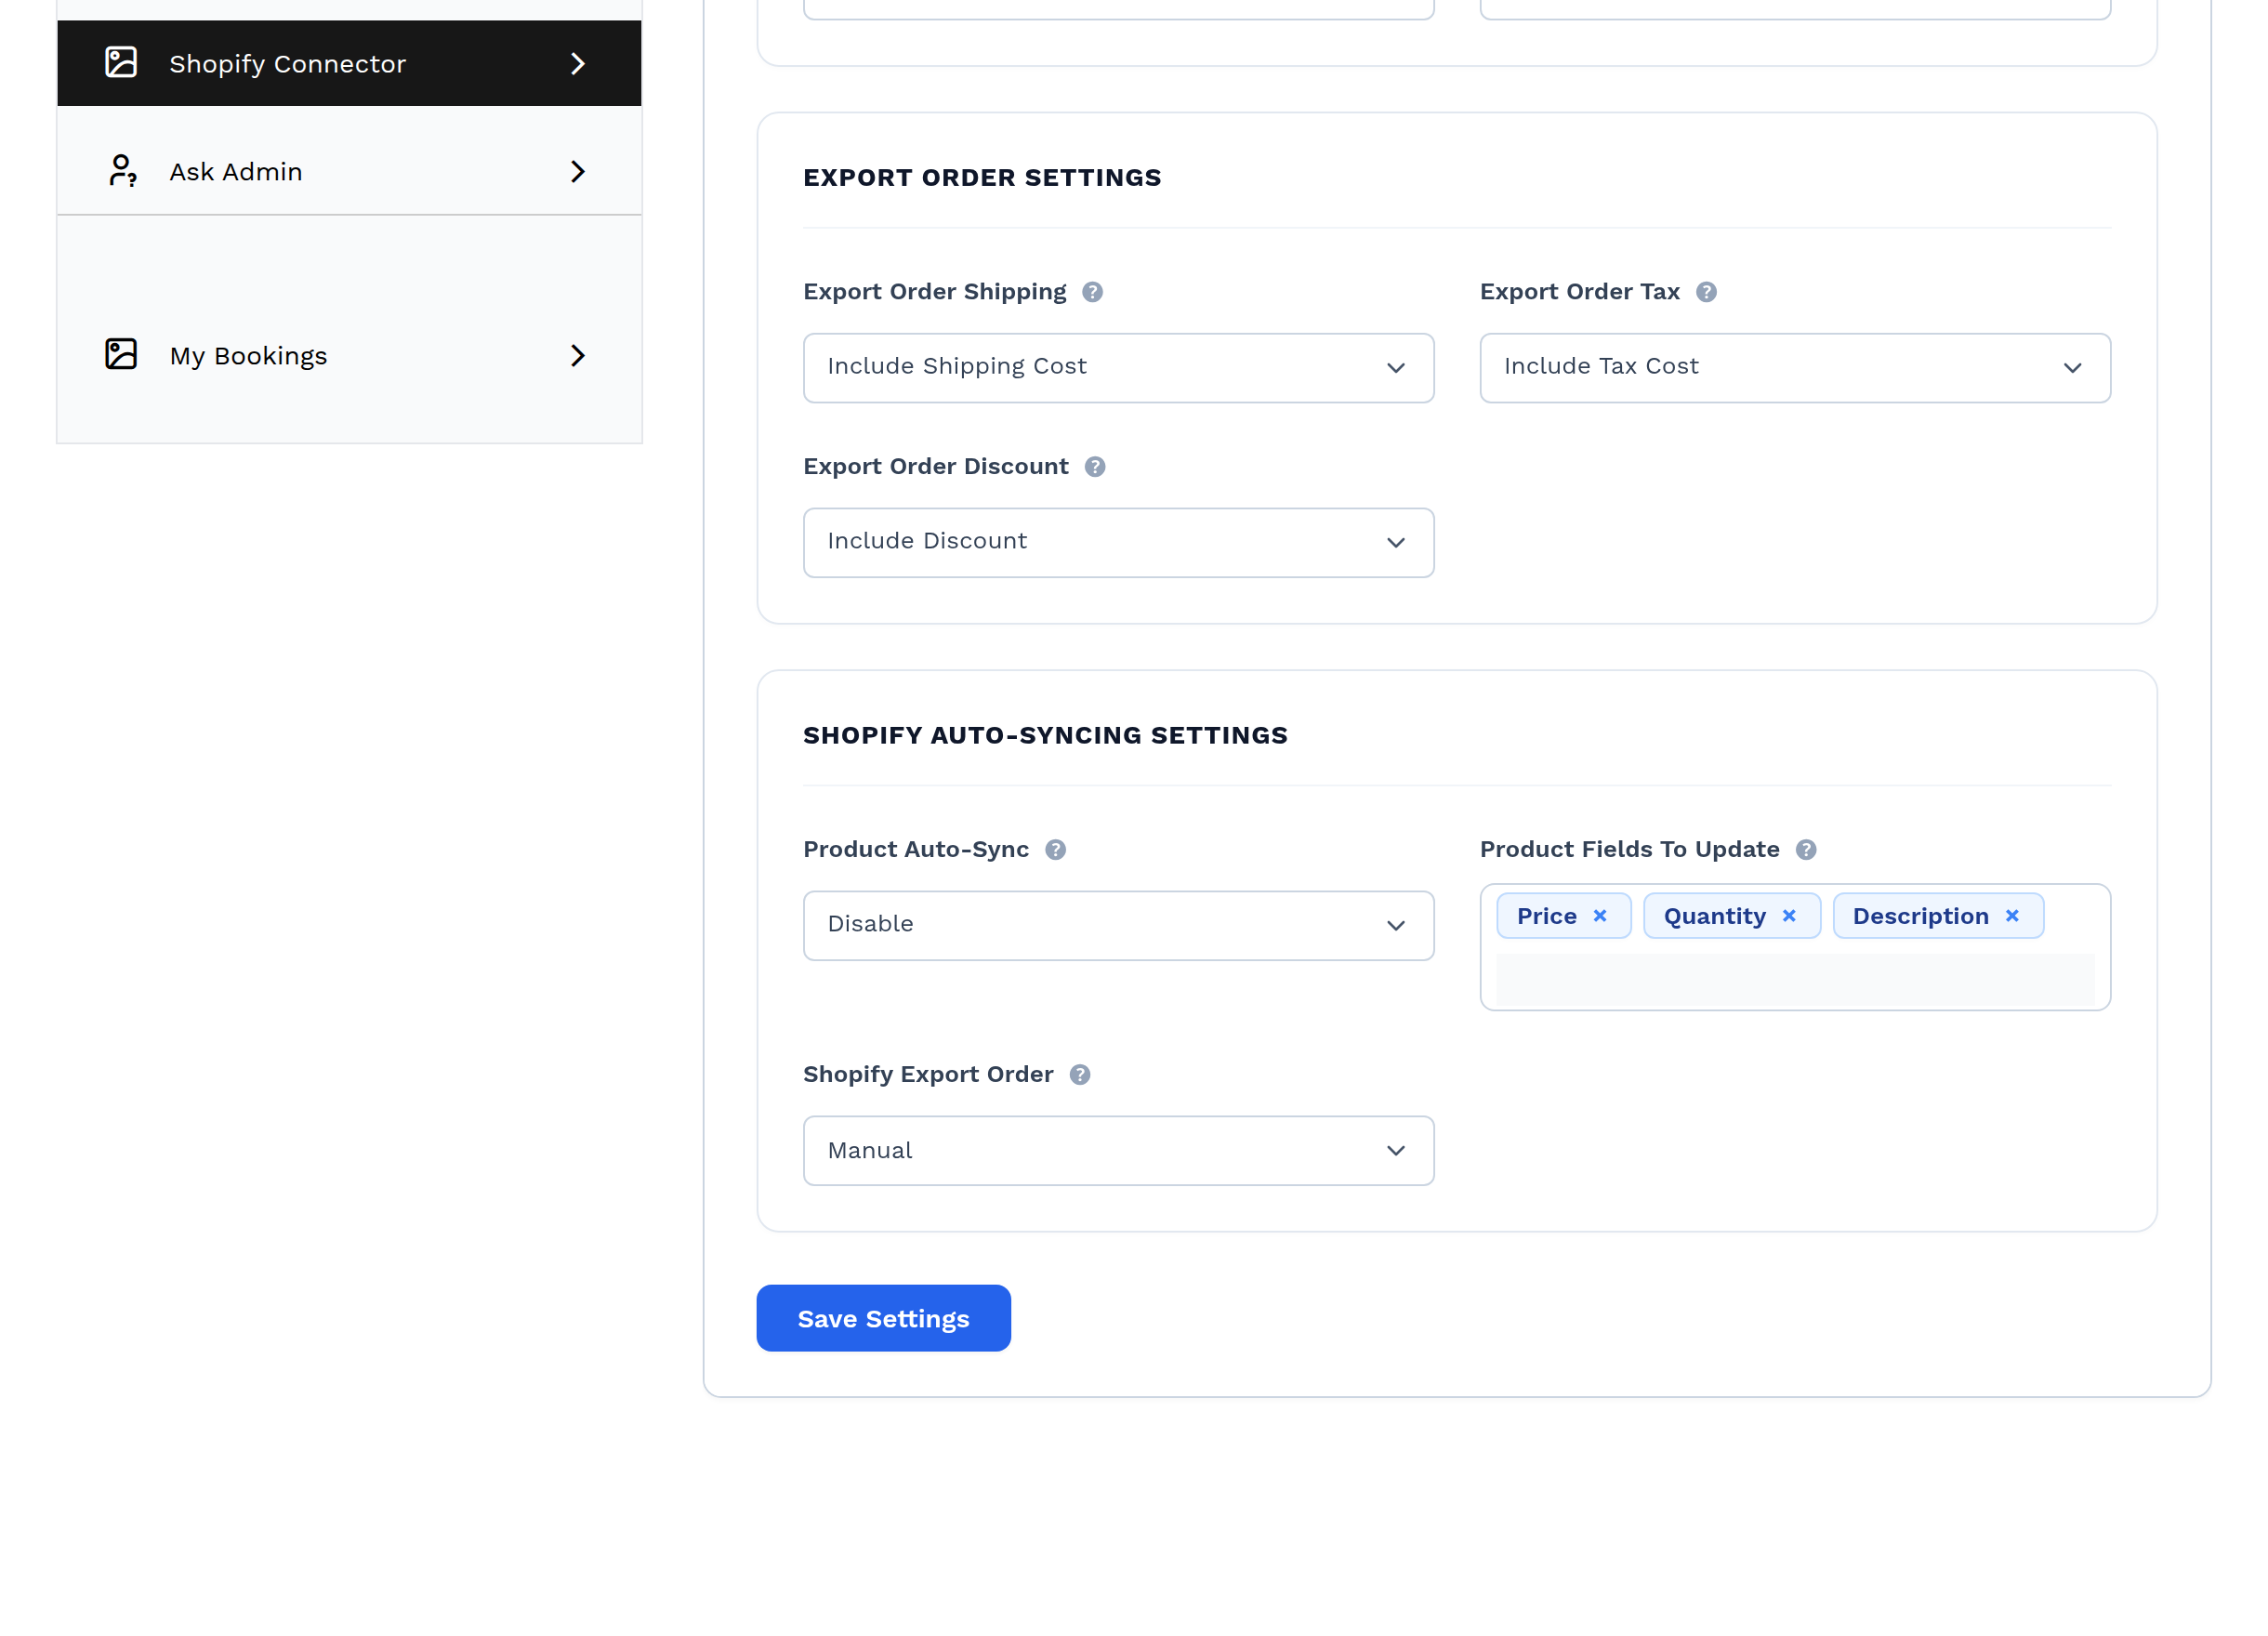
These three decide what is carried onto an order created on Shopify. Each is a simple include or exclude.
| Setting | Options | What Include sends |
|---|---|---|
| Export Order Shipping | Include / Exclude Shipping Cost | The shipping method title, its cost and its tax, as a Shopify shipping line |
| Export Order Tax | Include / Exclude Tax Cost | Each WooCommerce tax rate as a Shopify tax line, with its title, rate and amount |
| Export Order Discount | Include / Exclude Discount | The order's coupon as a Shopify discount code — percentage or fixed, matching the coupon type |
Exclude a component when your Shopify store already calculates it, or when including it would double-count in your reporting.
Shopify Auto-Syncing Settings
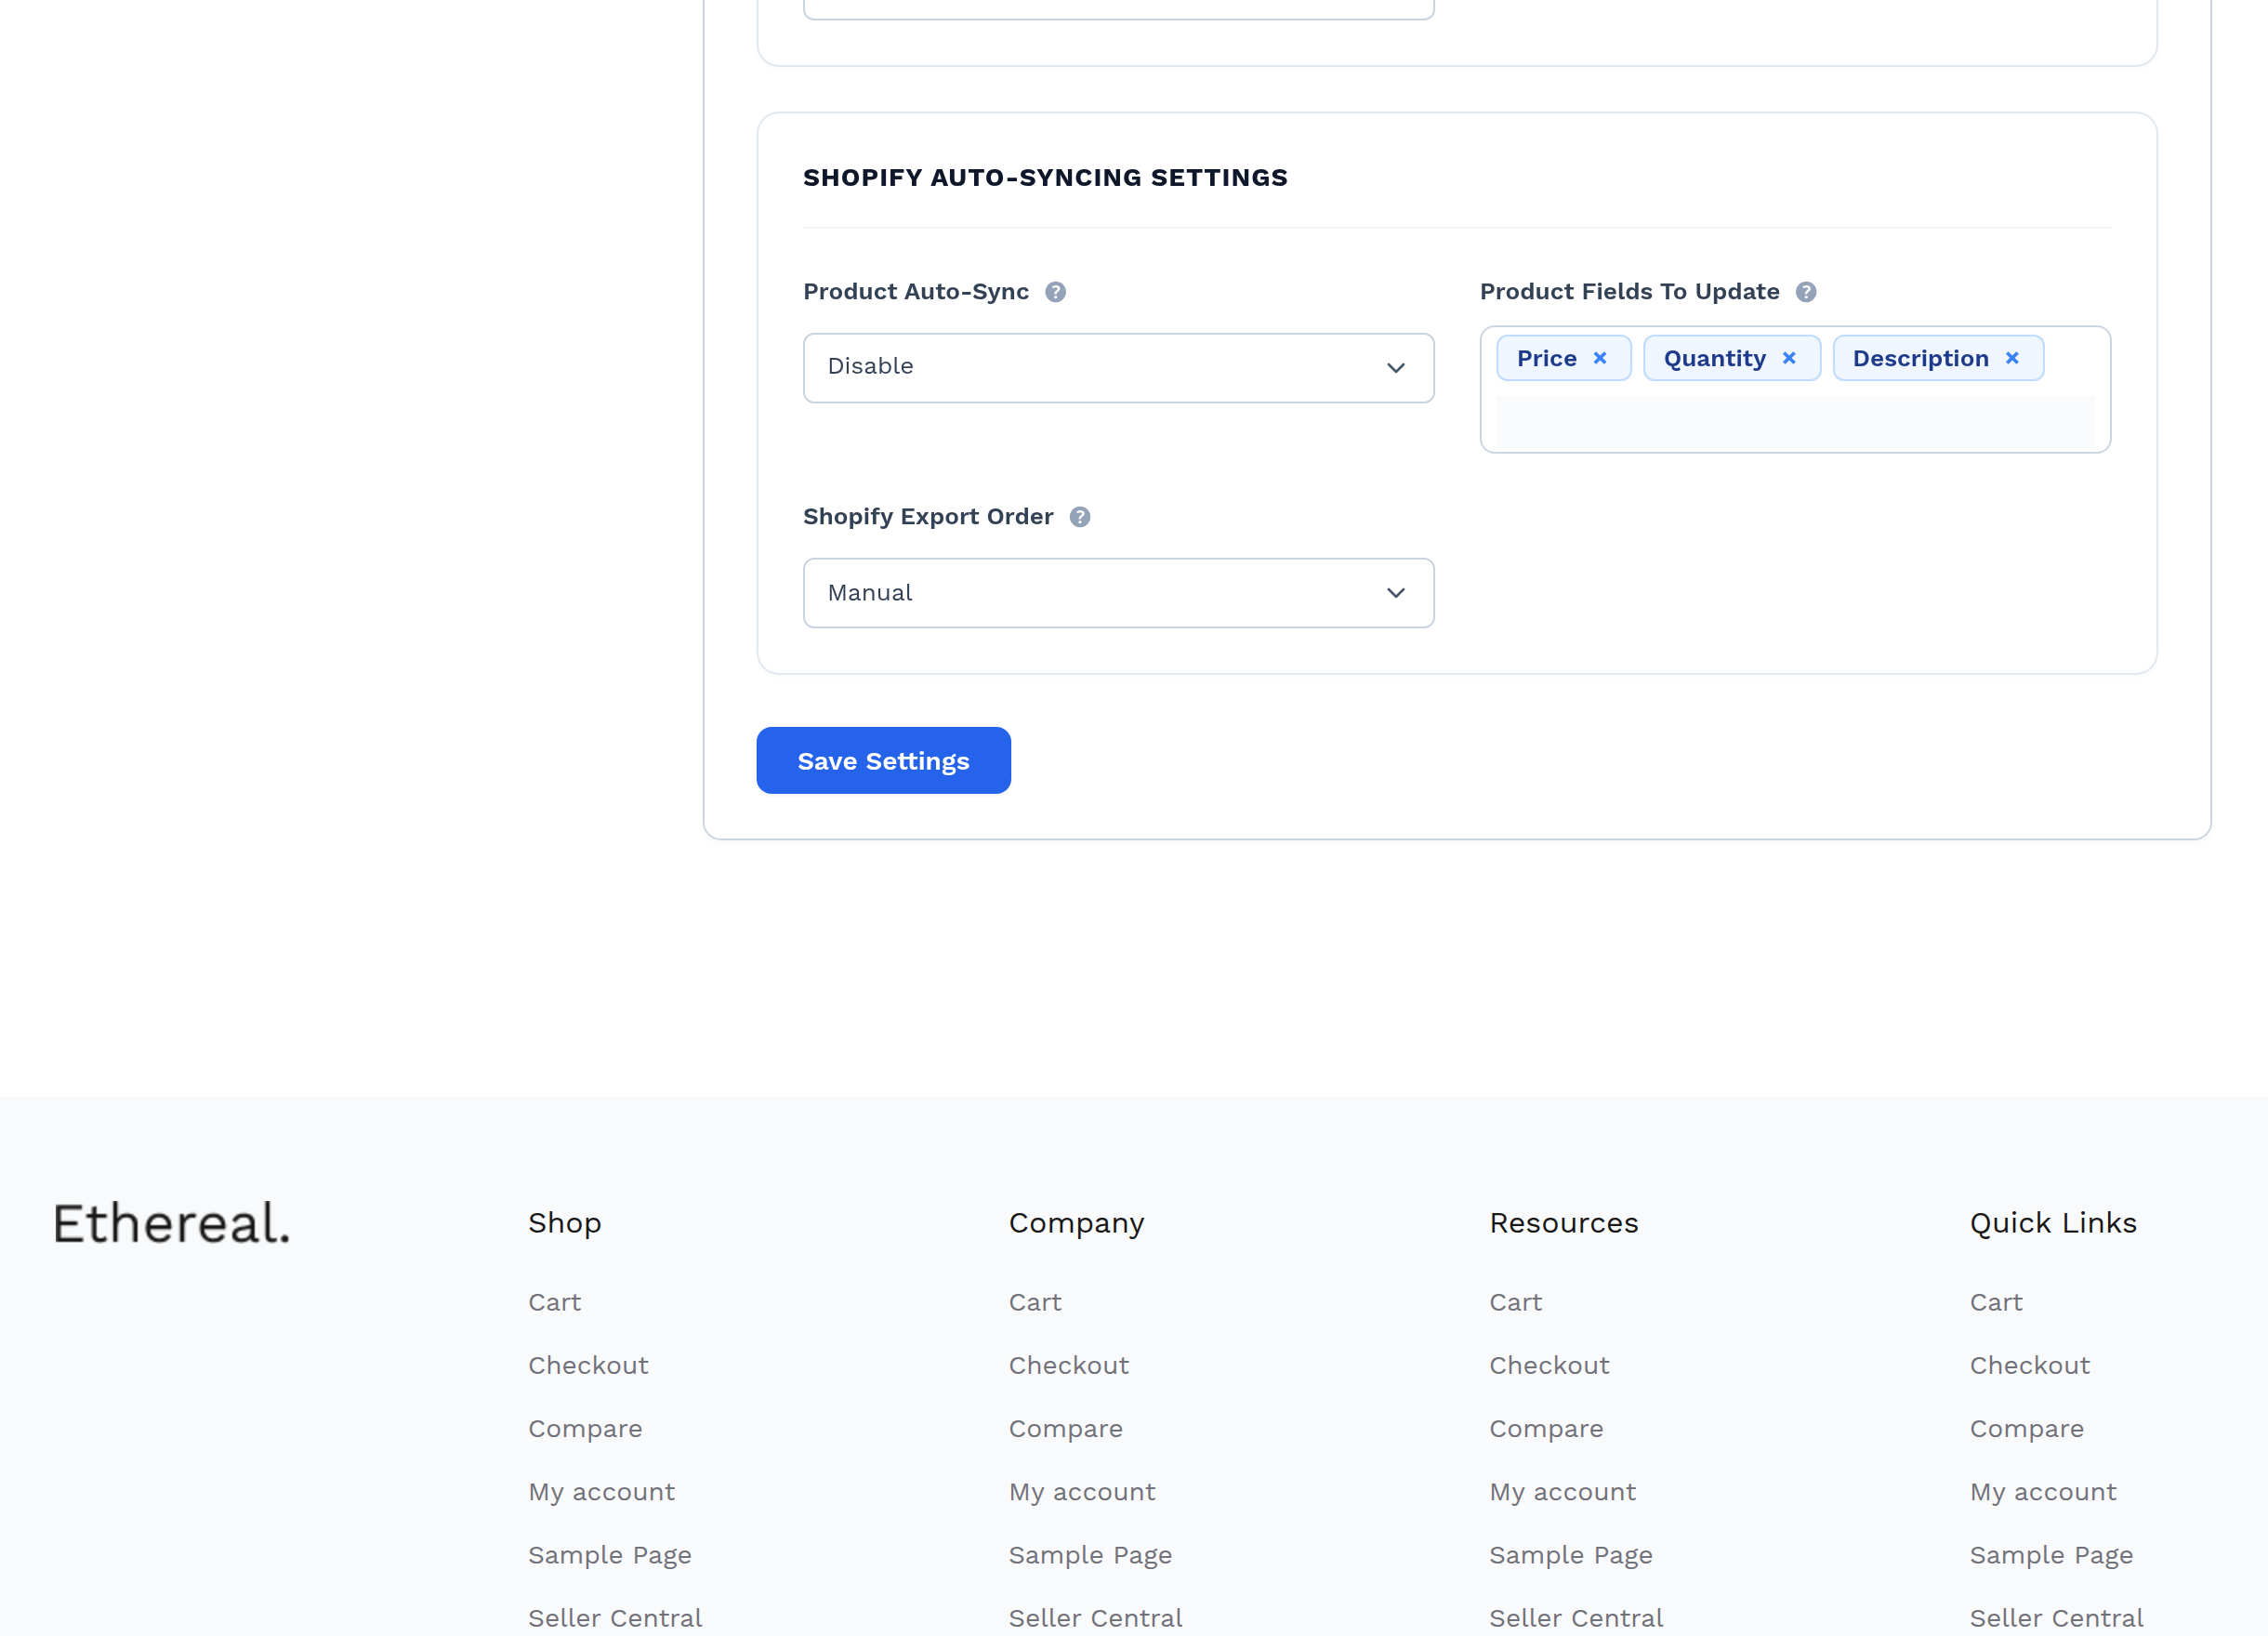
Product Auto-Sync
Options: Disable · Shopify To WooCommerce · Woocommerce To Shopify
The direction product details — SKU, price, quantity, description, images — travel automatically.
| Option | Behaviour |
|---|---|
| Disable | Nothing syncs on its own. Products change only when you run an import, an export or an update by hand. |
| Shopify To WooCommerce | Shopify is the master. The PRODUCTS_UPDATE and PRODUCTS_DELETE webhooks are acted on and WooCommerce follows. |
| Woocommerce To Shopify | WooCommerce is the master. Changes made in WooCommerce are pushed out to Shopify. |
Important
Shopify's product webhooks are only acted on when this is Shopify To WooCommerce. If live updates are not arriving, check this before anything else — the webhooks can be registered and perfectly healthy while the sync is switched off.
There is no "both directions" option, deliberately. Two systems each correcting the other is a loop nobody wins.
| Situation | Choose |
|---|---|
| Shopify is the seller's main store; the marketplace is an extra channel | Shopify To WooCommerce |
| The marketplace is the main store; Shopify is an extra channel | Woocommerce To Shopify |
| The seller edits both by hand and does not want surprises | Disable |
Product Fields To Update
Options (multi-select): Price · Quantity · Description · Images
Which fields a product update is allowed to write. Select as many as you need.
This is the setting that protects work you have done on one side from being overwritten by the other. Select only Price and Quantity, and an update refreshes stock and pricing while leaving your description and photography alone.
Three things worth knowing:
- It does not apply to a first export. When a product is created on Shopify for the first time, everything is sent regardless of what is selected here. The setting only governs updates to products that already exist.
- Some fields are always written by an update from Shopify, whatever you select: title, category, weight, SKU and tax status.
- If nothing is selected, an update writes almost nothing useful. Select at least one field if you rely on updates at all.
Full detail in the Product Data Reference.
Shopify Export Order
Options: Manual · All · Pending payment · Processing · On hold · Completed
When a marketplace order is created on Shopify automatically. Only those four WooCommerce statuses are offered — cancelled, refunded and failed orders are never auto-exported.
| Option | Behaviour |
|---|---|
| Manual | Nothing is exported automatically. Use the buttons on the Export Order tab. |
| All | Every eligible order is exported as soon as it is placed, whatever its status |
| A specific status | The order is exported when it reaches that status |
The check runs when a buyer completes checkout.
Tips
Processing is the usual choice: the order is paid, so it is worth reserving stock on Shopify, but it has not shipped yet. All exports even unpaid orders, which is rarely what a seller wants.
How the settings interact
A few combinations are worth spelling out, because they are where sellers get surprised.
Default Category vs. mapping vs. Products to Import
| Collection mapped? | Products to Import | Result |
|---|---|---|
| Yes | either | Product filed under the mapped category |
| No | All products | Product filed under Default Category |
| No | Only mapped categories product | Product skipped, reported as not mapped |
Import Products As vs. Products to Import having Shopify Status
These two are easy to confuse. The first controls the WooCommerce status a product is created with; the second controls which Shopify statuses are fetched in the first place. You can, for example, import only Shopify draft products and create them as WooCommerce Published ones.
Price Rule Applicable For vs. individual rules
A rule only fires when this setting names its direction and the rule is enabled and the price falls inside its band. All three must be true.
Select Shop Location vs. stock accuracy
Every quantity read on import and written on export goes through this location. It silently governs every stock number the connector touches.
Related pages
- Product Data Reference — what these settings actually change, field by field
- Order Data Reference — the same for orders
- Price Rules
- Webhooks and Auto-Sync