
Creating the Shopify App
The connector talks to Shopify through Shopify's Admin API, and Shopify only allows that through an app. Before connecting a store, the seller needs one of the following:
- a Dev Dashboard app, which gives a Client ID and a Client Secret — this is the recommended route, and the only one available for new stores; or
- a legacy custom app, which gives an Admin API access token starting with
shpat_.
Warning
As of 1 January 2026, Shopify no longer allows new legacy custom apps to be created. Stores that already have one can keep using it, but every new connection should be made with a Developer Dashboard app.
Option A — Dev Dashboard app (recommended)
- Sign in to the Shopify Developer Dashboard at
dev.shopify.comwith the account that owns the store. - Create a new app and give it a name.
- Open the app's Settings and find the Allowed redirection URLs (also shown as Redirect URIs) field.
- Leave that browser tab open — the two URLs you need are shown by the connector, in the next step.
- Copy the app's Client ID and Client Secret from the app's credentials screen. These are the two values the connector asks for.
Where to find the redirect URIs
Open My Account → Shopify Connector → Add Account in WooCommerce. The blue callout at the top of the form shows the exact two URLs to paste into Shopify, each with its own copy button.
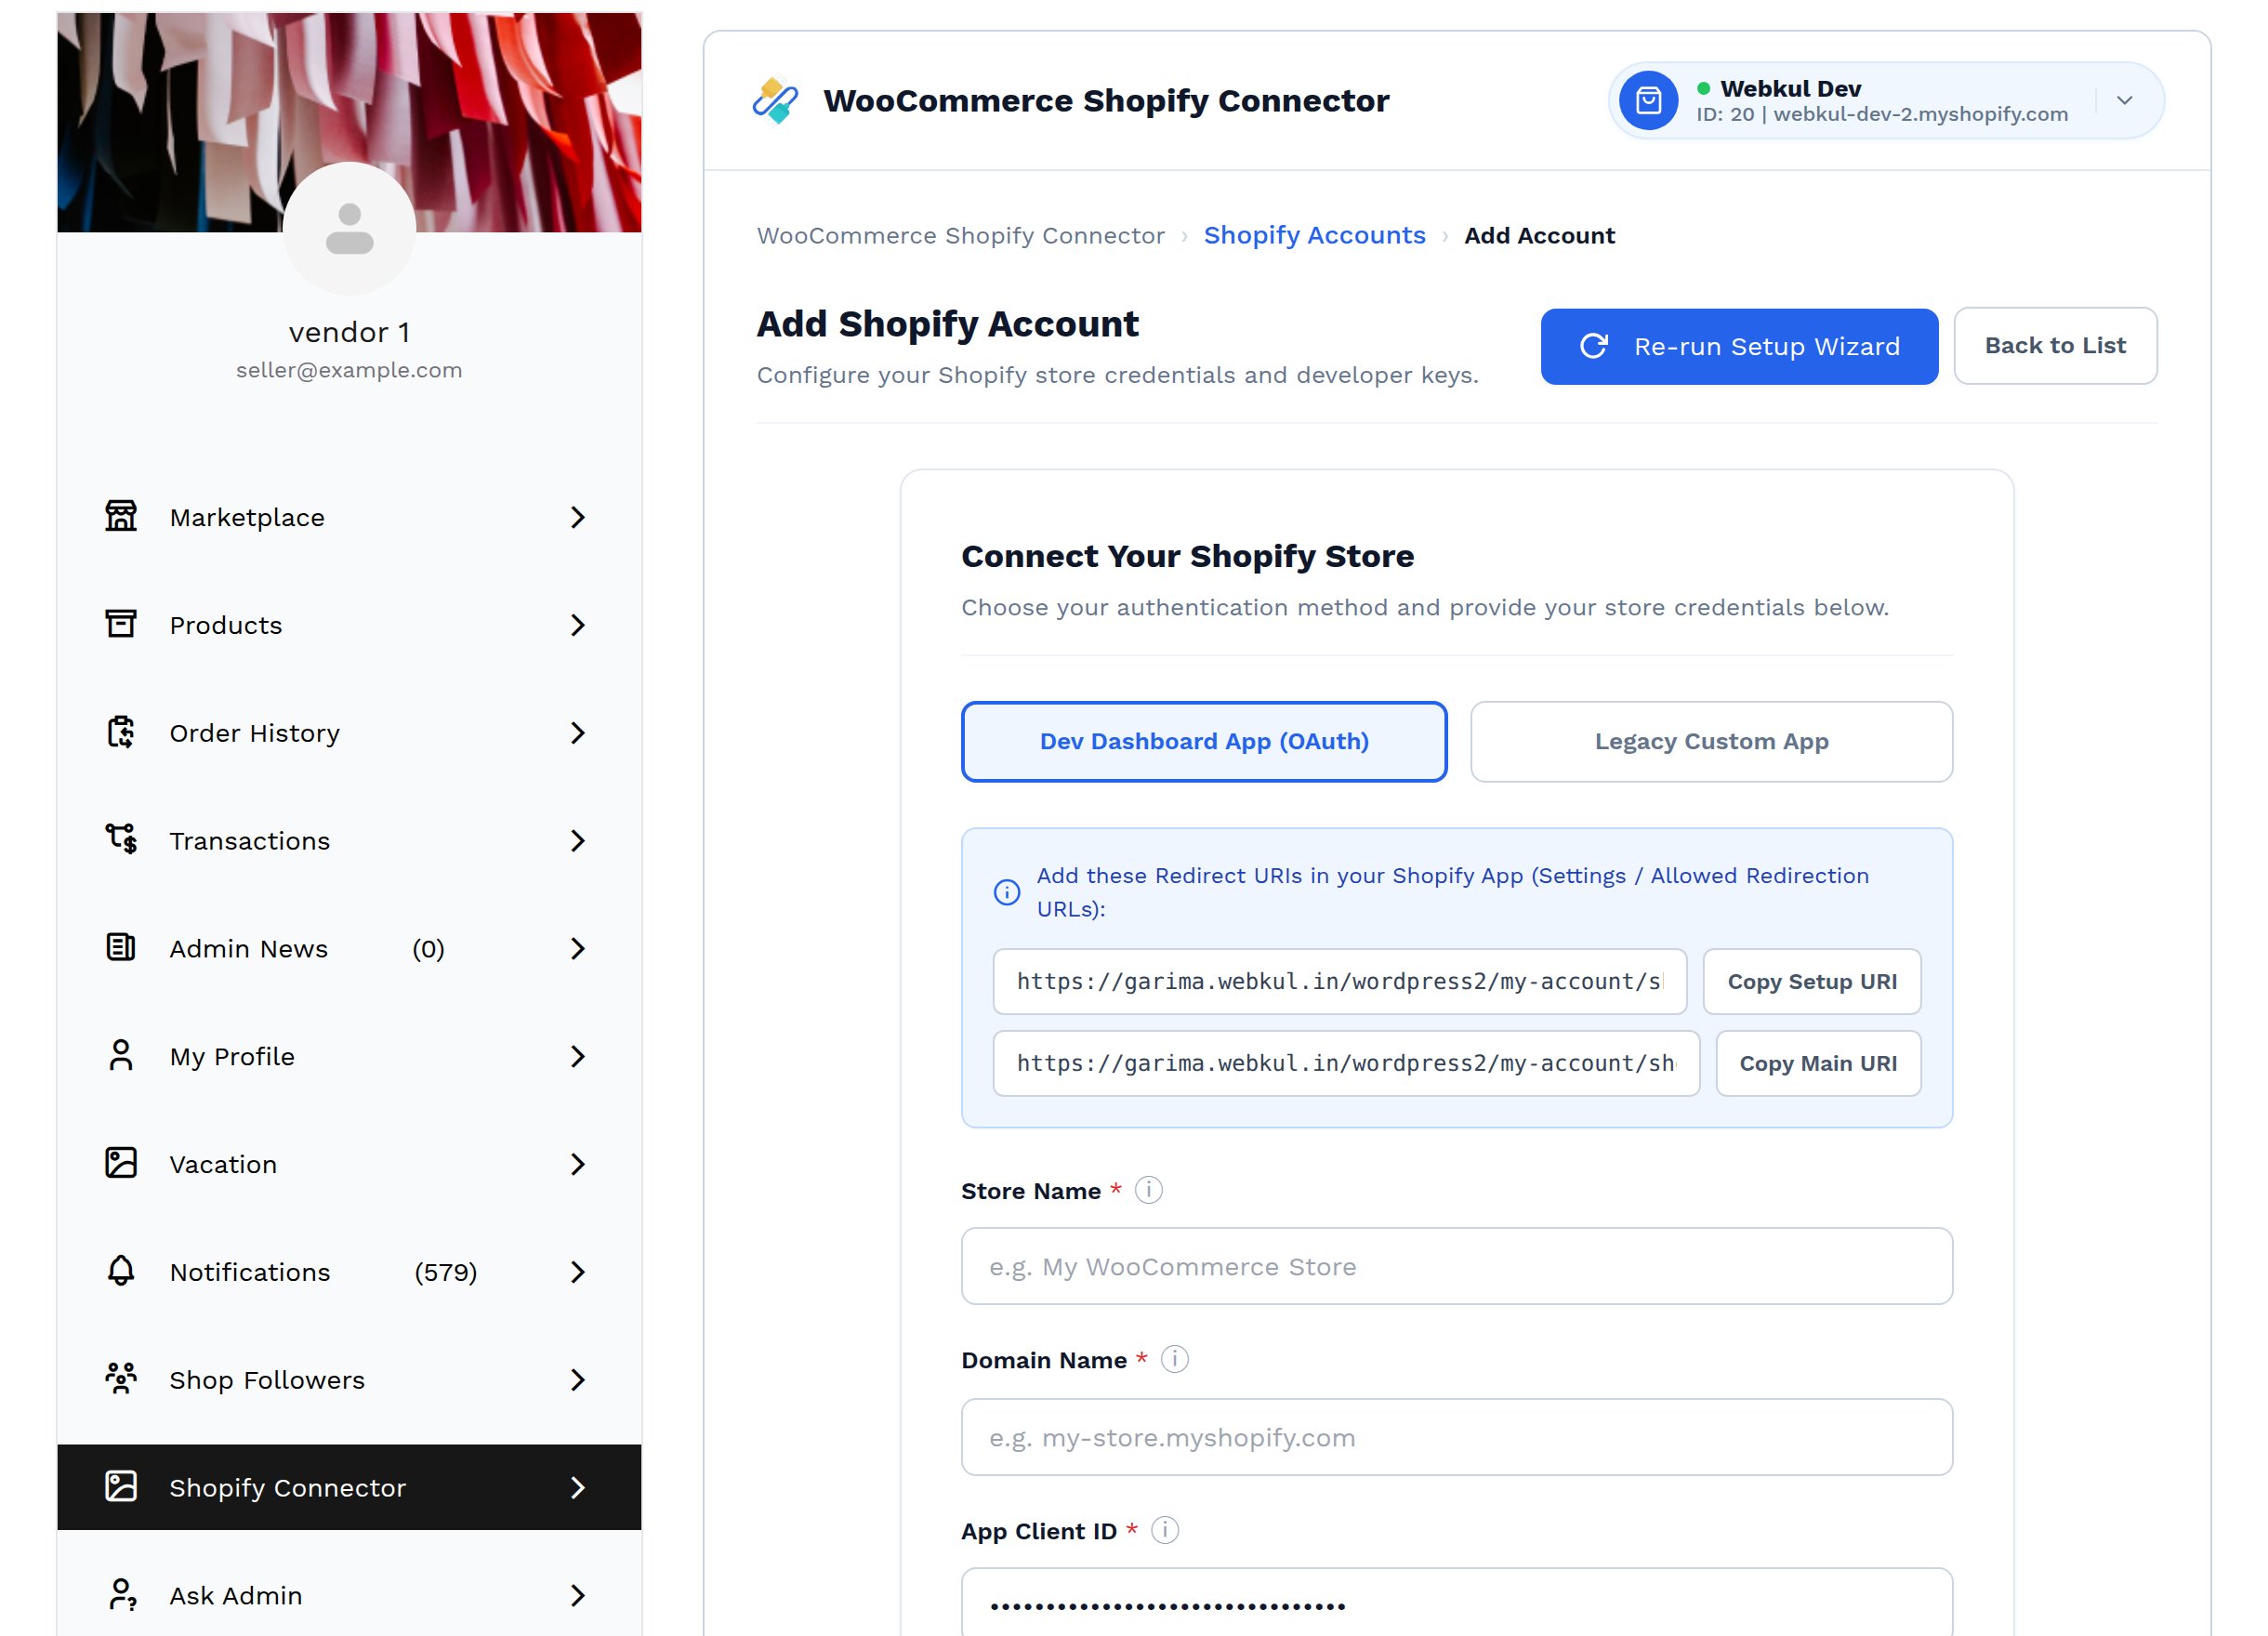
- Copy Setup URI — the address used when connecting through the setup wizard.
- Copy Main URI — the address used when connecting from the Add Account screen.
Add both to the Shopify app's allowed redirection URLs. If only one is registered, whichever route the seller happens to use may fail with a Shopify authorisation error.
The same callout appears on step 3 of the Setup Wizard, so the seller never has to leave the flow to find these values.
Scopes the app needs
Shopify's authorisation screen lists exactly what is being requested before the seller approves it. The same list stays visible afterwards in the app's Access panel in the Developer Dashboard, so you can check at any time what the app was granted.
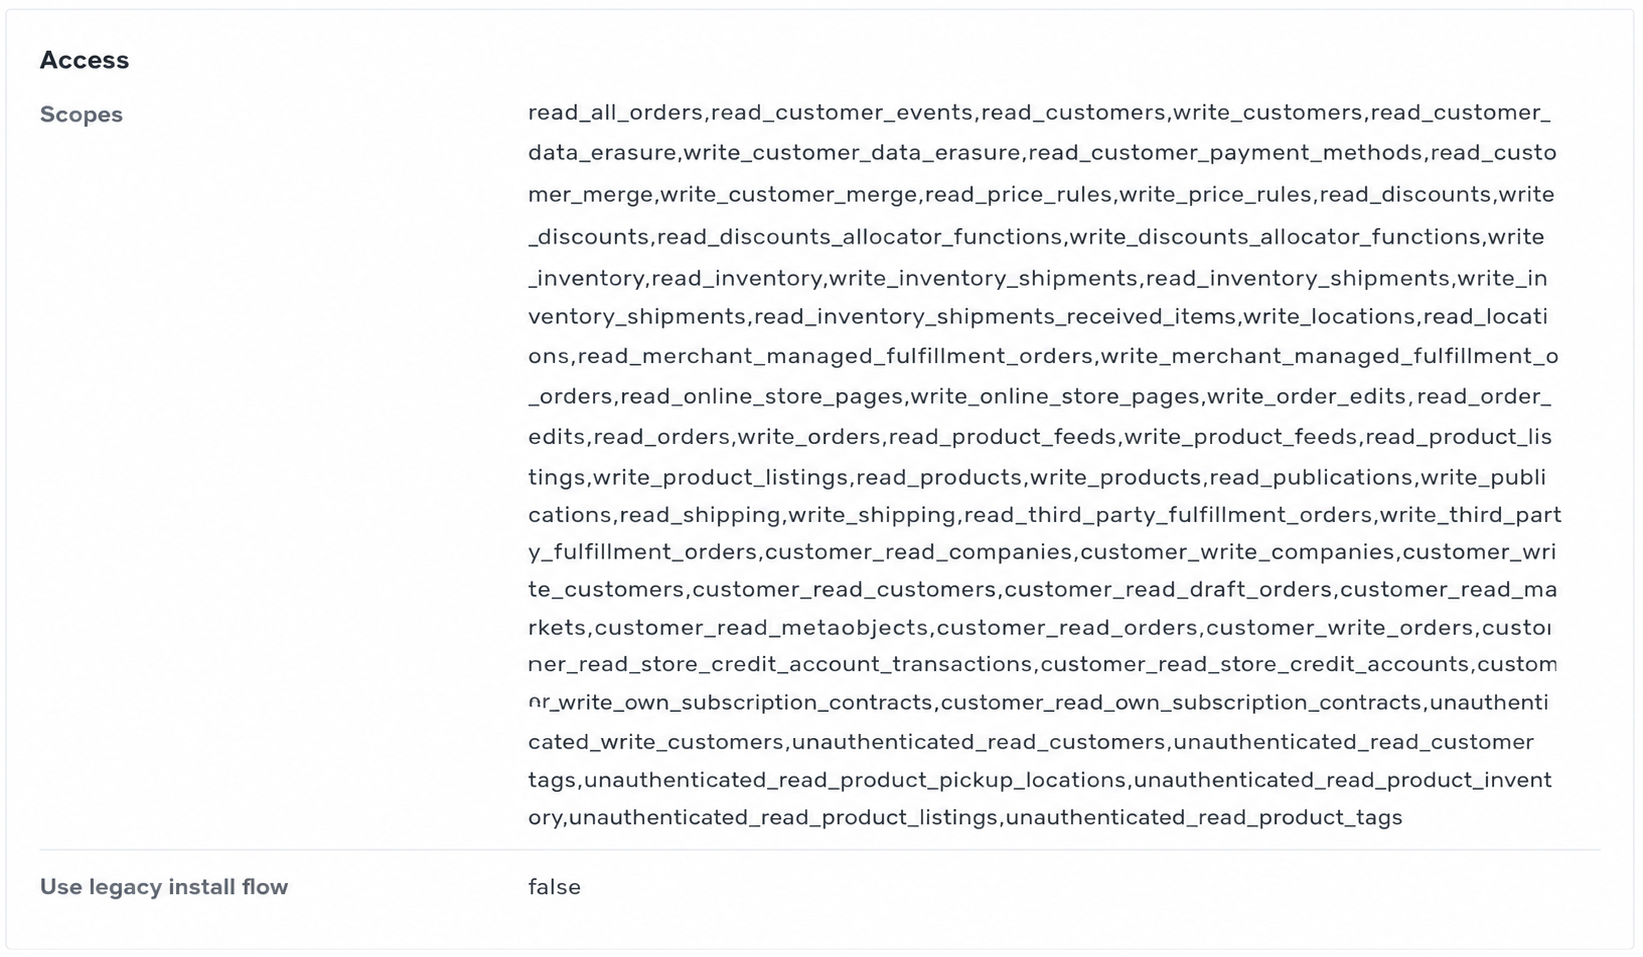
The connector needs the same set as the legacy route — see Permissions the app needs below.
Option B — Legacy custom app
How to get API credentials from your Shopify account
To get the API credential the seller first generates it inside the Shopify account. Open the Shopify store you want to connect and sync with the WooCommerce store, then follow these steps.
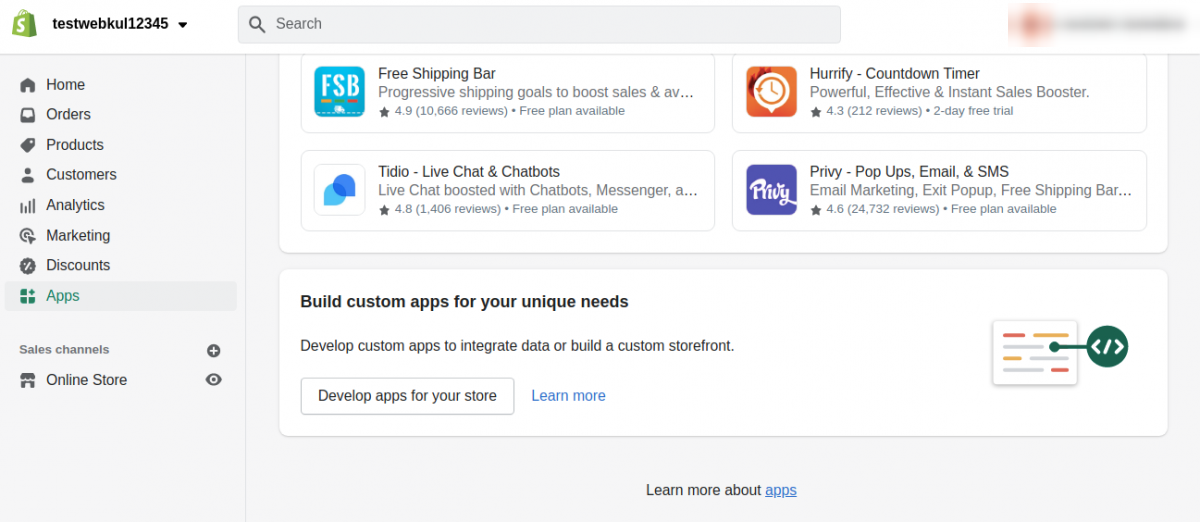
1. Open the Apps menu and select Develop apps for your store.
2. Select Create an app.
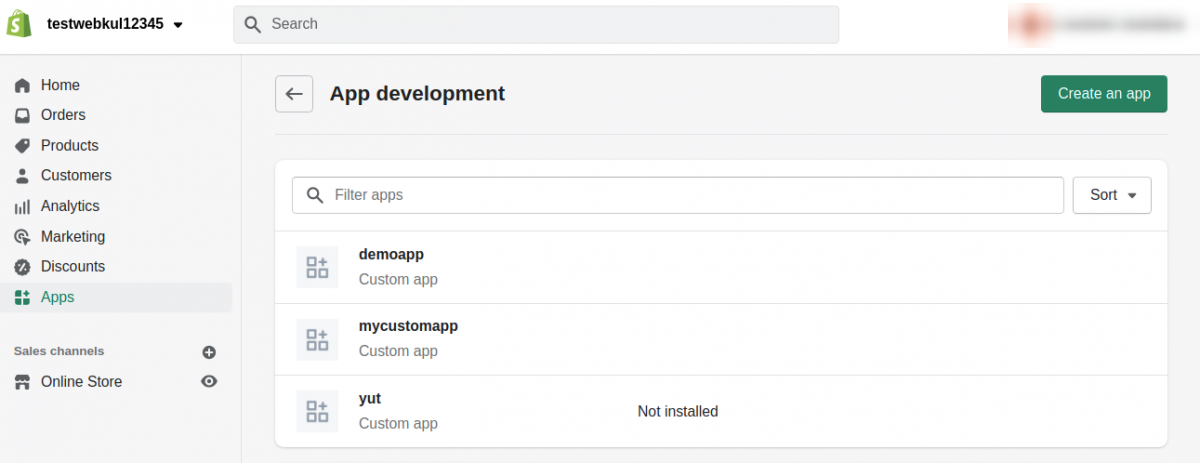
3. Fill in the required detail — the App name — and select Create app.
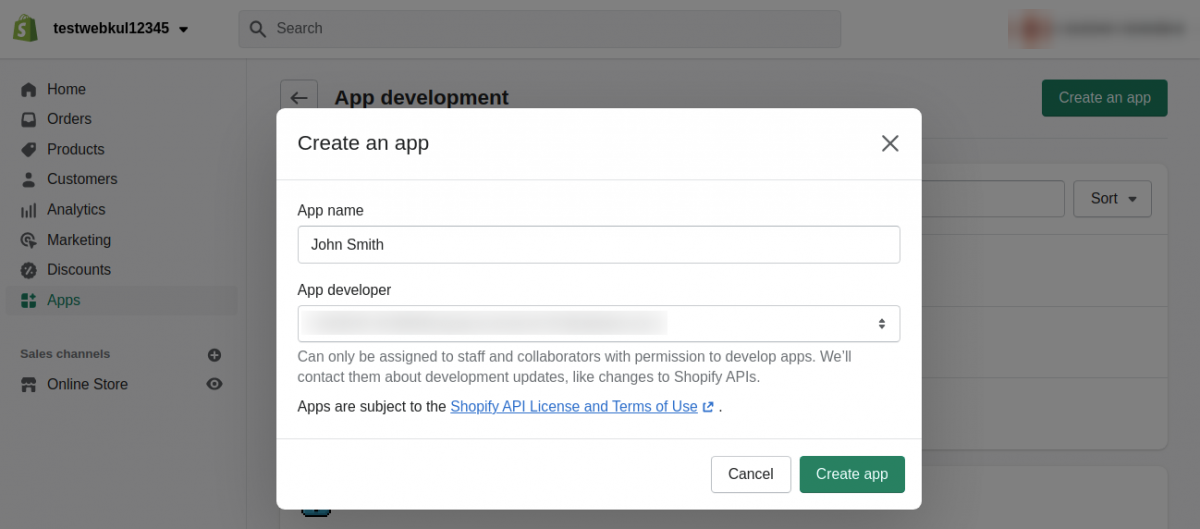
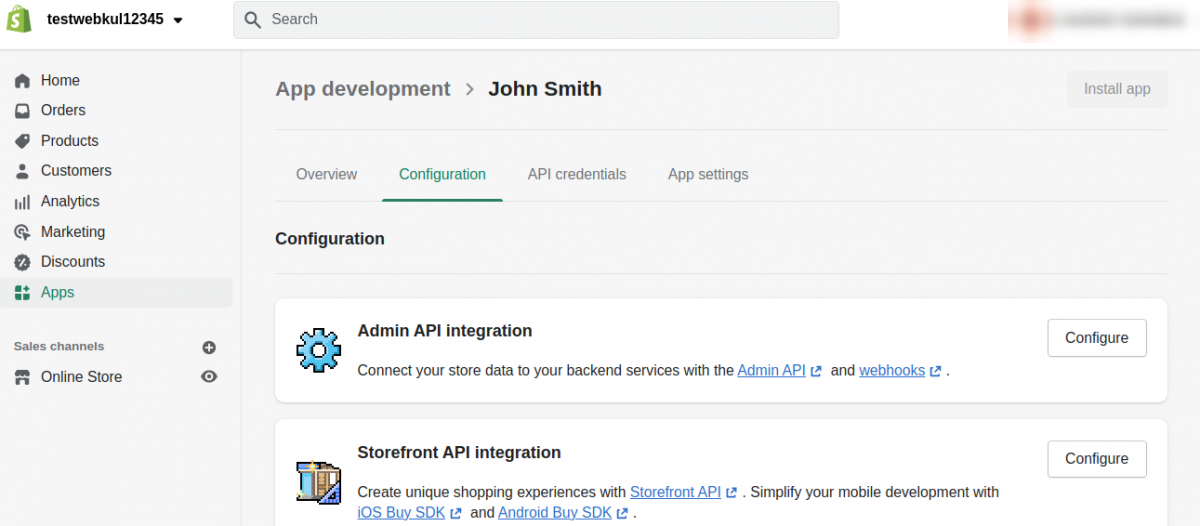
4. Once the app is created, open Configuration and select Configure for Admin API integration.
It should have Read and Write API permission for the following:
- Customer Details and Customer Group
- Inventory
- Order, transaction, and fulfillment
- Product Information
- Product, variant, and collection
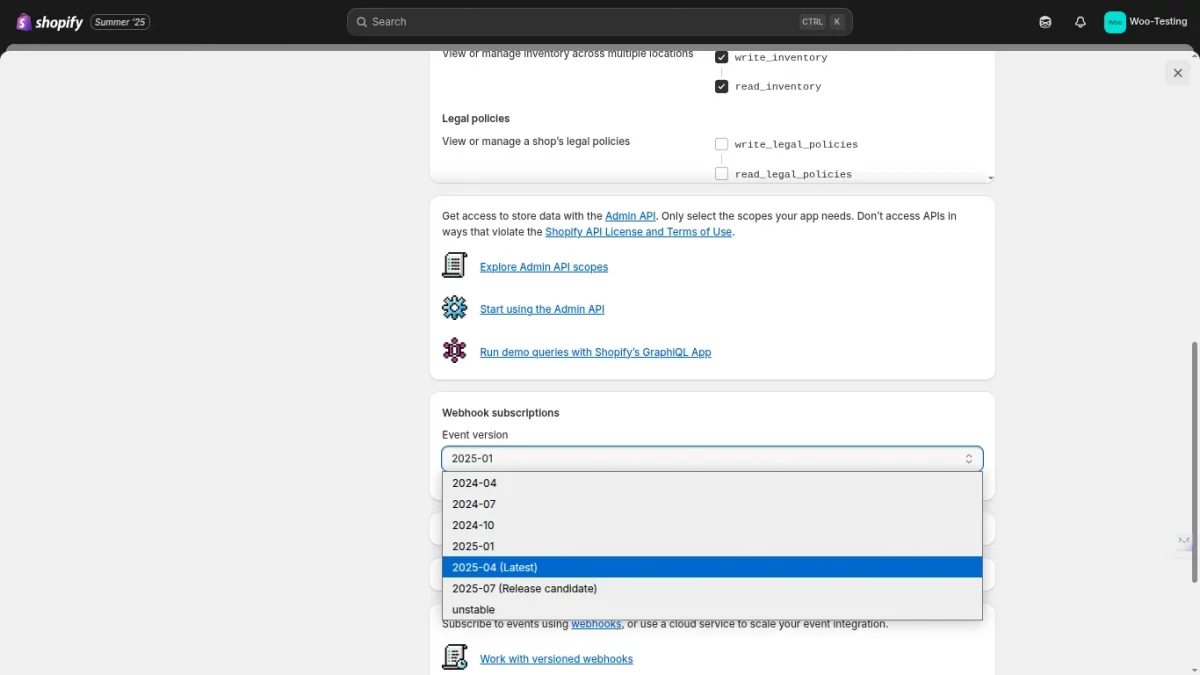
5. While making the Webhook Subscription, make sure to select the Event Version 2025-04 (Latest).
Note
You do not create the webhook subscriptions themselves here — the connector registers its own three webhooks when the store is connected, and you can re-create them at any time from the Webhooks tab. This setting controls the payload version Shopify sends them.
6. After filling in all the required permissions, select Save. Then go to API credentials and select Install app.
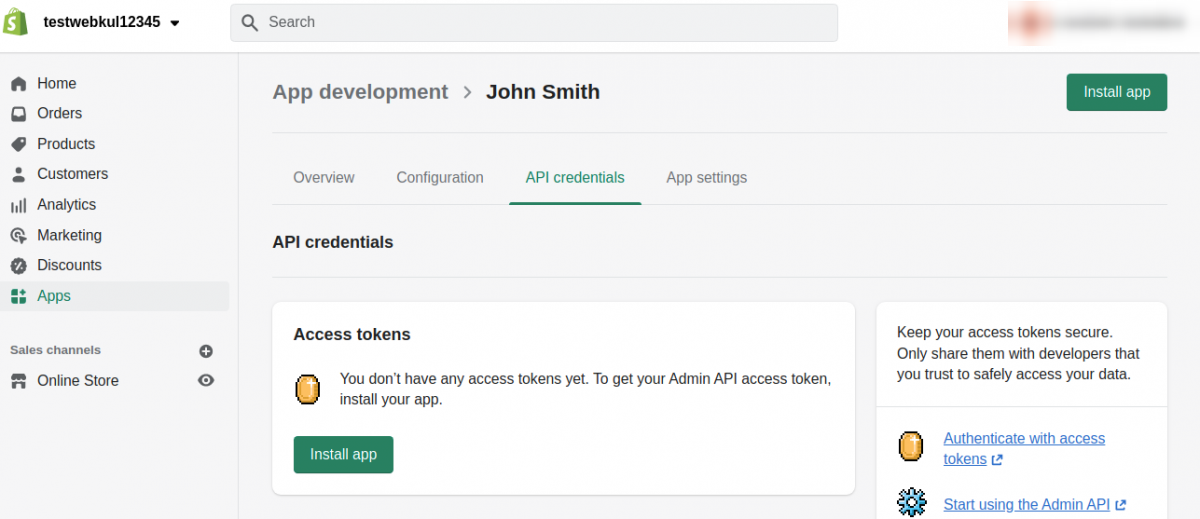
7. Select Reveal token once to get the token key.
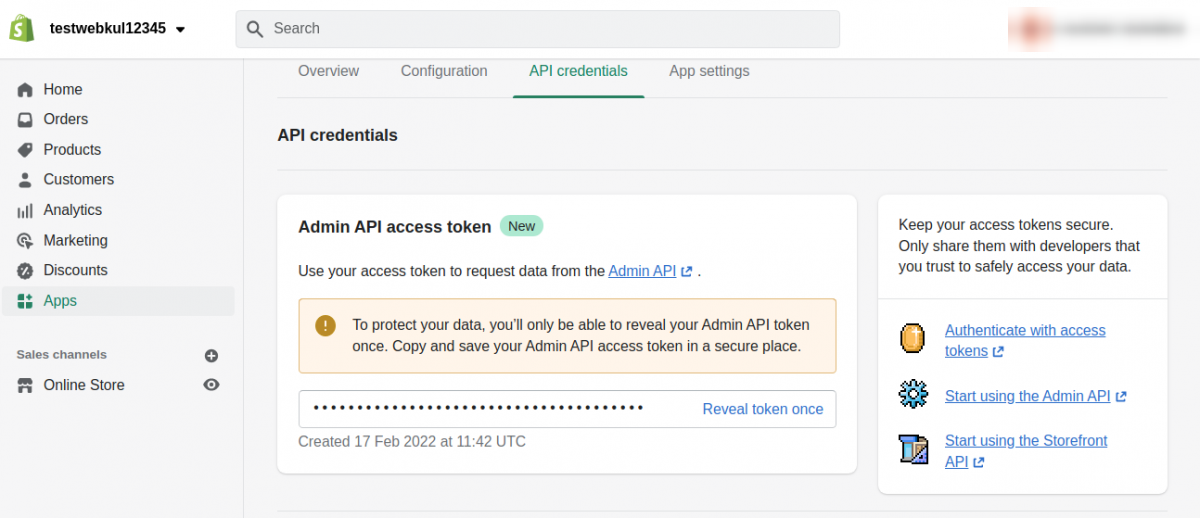
Warning
This token key is available only once. Copy and save your seller API token in a secure place. If you lose it you have to uninstall and reinstall the app to generate a new one.
8. On the same tab, copy the app's API secret key.
The API secret key matters as much as the token: it is what the connector uses to verify incoming Shopify webhooks. Without it the store connects and the webhooks look healthy, but every real-time update is silently rejected. See Webhooks and Auto-Sync.
There are no redirect URIs to register for this method — the connector authenticates directly with the token.
Permissions the app needs
Give the app Read and Write access to each of these. They map directly to what the connector does, so leaving one out breaks the matching feature rather than producing a clear error.
| Shopify permission | Why the connector needs it |
|---|---|
| Products | Reading the Shopify catalogue on import; creating and updating products on export |
| Product listings / variants and collections | Building variable products, and fetching the collections you pair with WooCommerce categories |
| Inventory | Reading stock on import and writing it back on export, against your chosen shop location |
| Orders, transactions and fulfilments | Importing Shopify orders, creating orders on export, and receiving fulfilment tracking |
| Customers | The order import reads the customer attached to each Shopify order |
The connector also reads your shop details (to confirm the store name matches), your locations (for the Select Shop Location setting), and manages its own webhook subscriptions — those come with the Admin API access above.
Note
You do not need to create webhook subscriptions by hand. The connector registers its own three webhooks when the store is connected, and you can re-create them at any time from the Webhooks tab.
Values the connector will ask for
| Connection type | Values needed | Where they come from |
|---|---|---|
| Dev Dashboard App (OAuth) | Store Name, Domain Name, App Client ID, App Secret Key | Shopify Developer Dashboard |
| Legacy Custom App | Store Name, API Token, Domain Name, API Secret Key | Shopify admin → Develop apps |
Store Name must match the store's name in Shopify exactly. The connector reads the name back from Shopify after authenticating and refuses the connection if the two differ — this is what stops a seller from accidentally attaching the wrong store.
Domain Name is the myshopify.com domain without https://, for example my-store.myshopify.com. In the setup wizard a bare handle such as my-store is expanded to my-store.myshopify.com automatically.
Note
Treat the Client Secret and the access token like a password. Anyone holding them can read and change the Shopify store. The connector masks the stored access token on the Account tab, showing only its first few characters.
Next step
With the app created and the redirect URIs registered, continue to the Setup Wizard.