
Getting Shopify API Credentials
Before the connector can talk to your Shopify store, Shopify has to hand it a set of credentials. You create those on the Shopify side by making an app for your store and giving that app permission to read and write your products, orders, customers, inventory, and content.
This page covers the whole Shopify-end process. When you finish it you will be holding either:
- a Client ID and Client Secret — from an app built in the Shopify Dev Dashboard, which is the current and recommended method; or
- an Admin API access token (
shpat_…) — from a legacy custom app, only if your store already uses one.
You then paste those into WooCommerce, which is covered in Connecting a Shopify Account.
What you need before you start
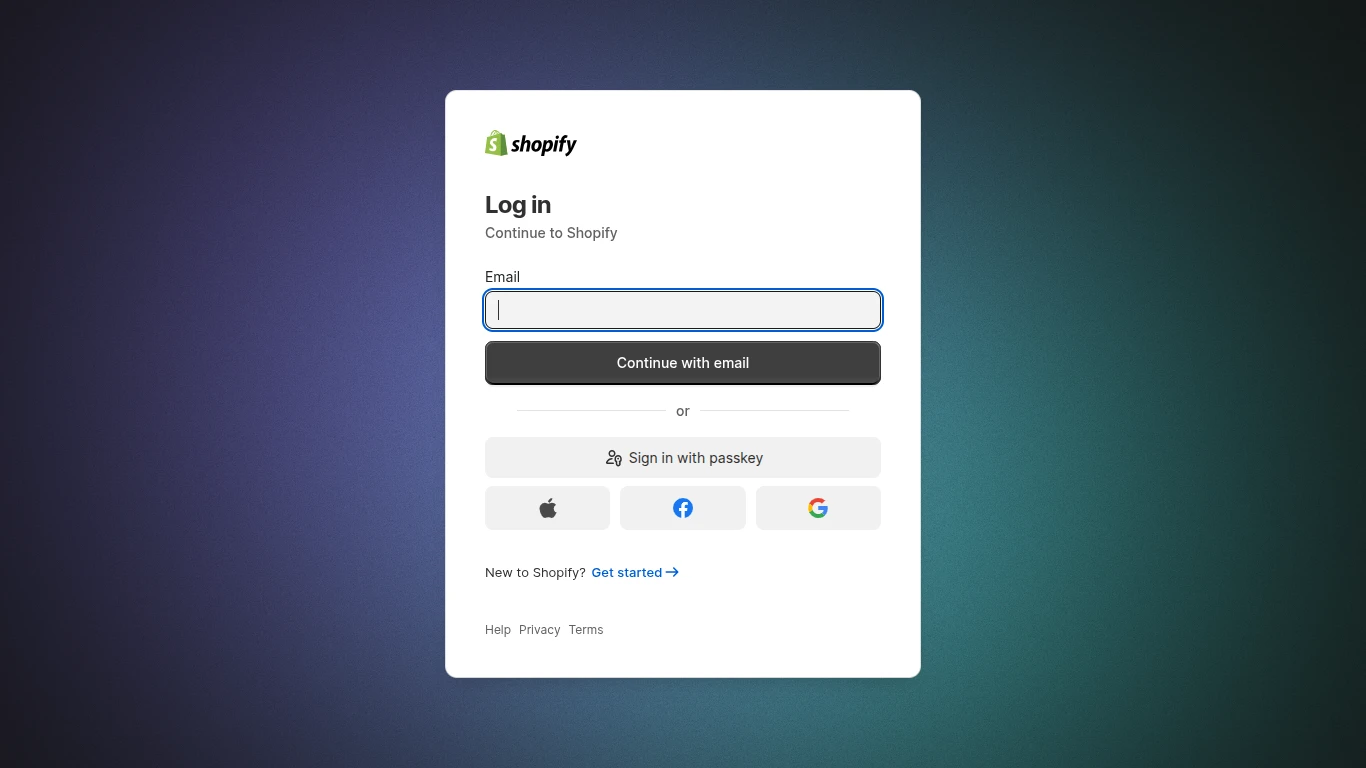
Log in to Shopify as the store owner, or as a staff user with permission to develop apps. Only those accounts can see the app-development screens used below.
Method 1 — Create an app in the Shopify Dev Dashboard
This is the method to use for every new connection.
Step 1 — Open the app-development screen
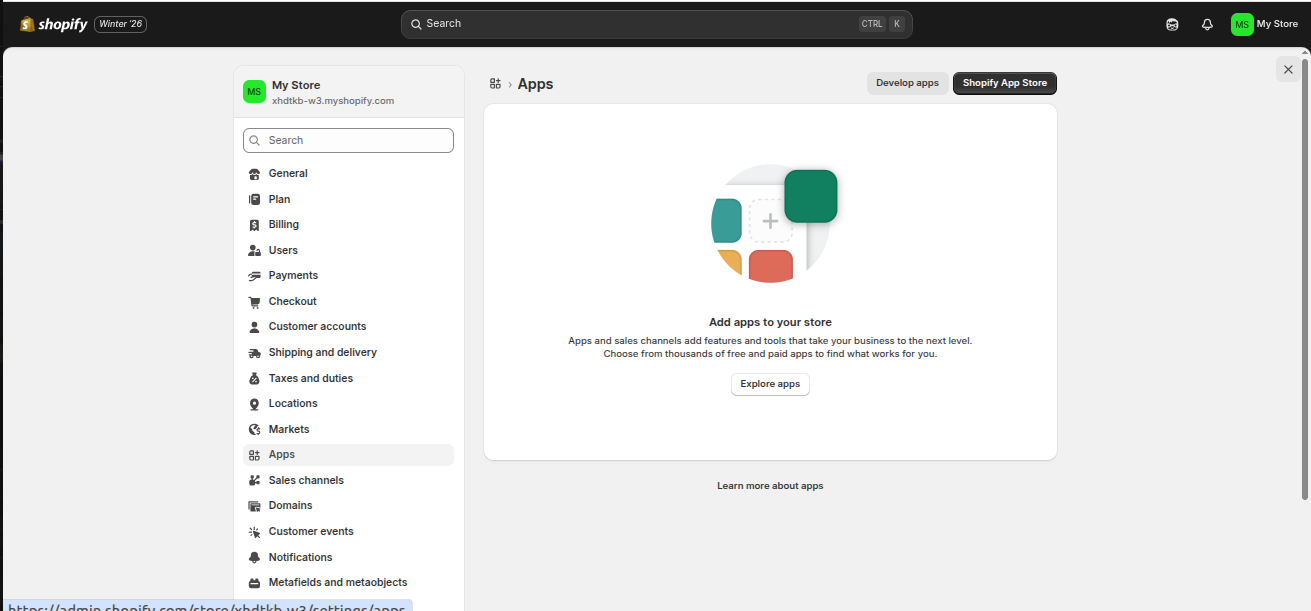
In your Shopify admin, go to Settings → Apps. This page lists every app and sales channel on the store, and it holds the Develop apps button in the top-right corner.
Select Develop apps. Shopify shows the App development panel and points you at its newer home for building apps.
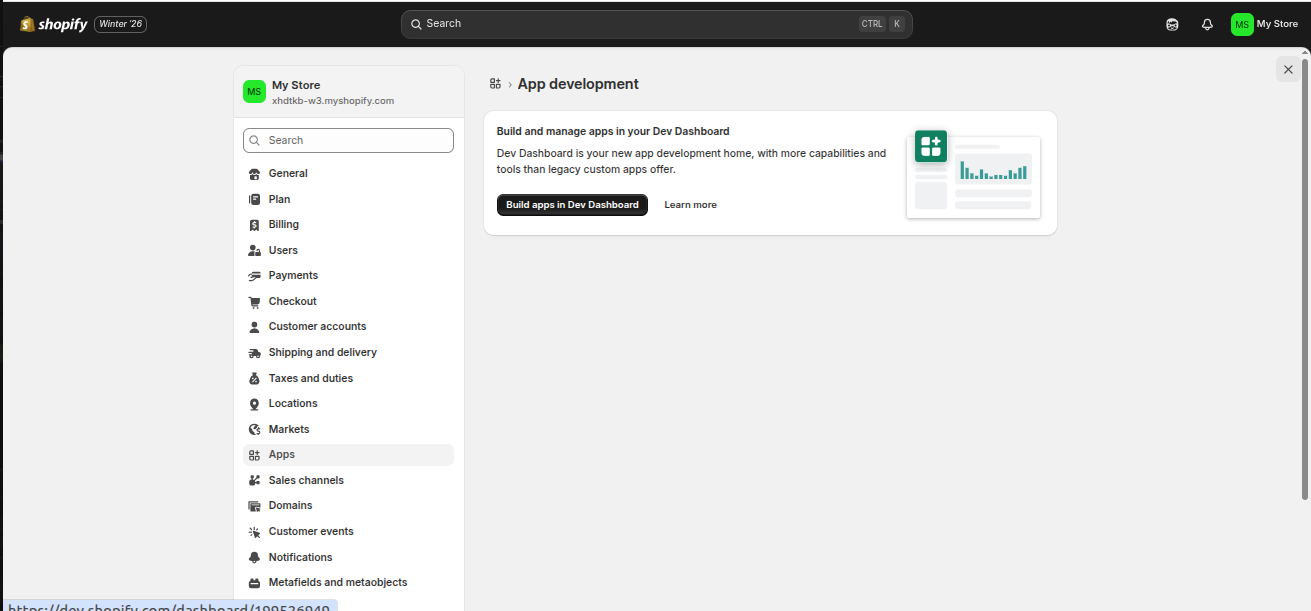
Select Build apps in Dev Dashboard. The Shopify Dev Dashboard opens in a new tab.
Step 2 — Create the app
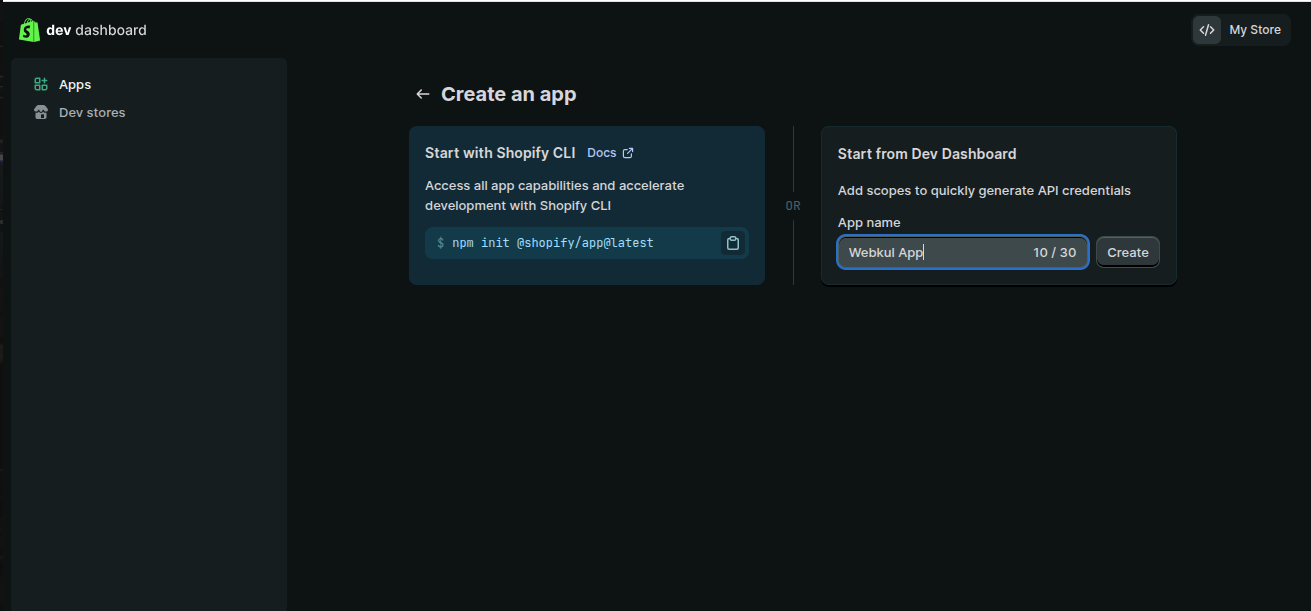
In the Dev Dashboard, open Apps and select Create app in the top-right corner.
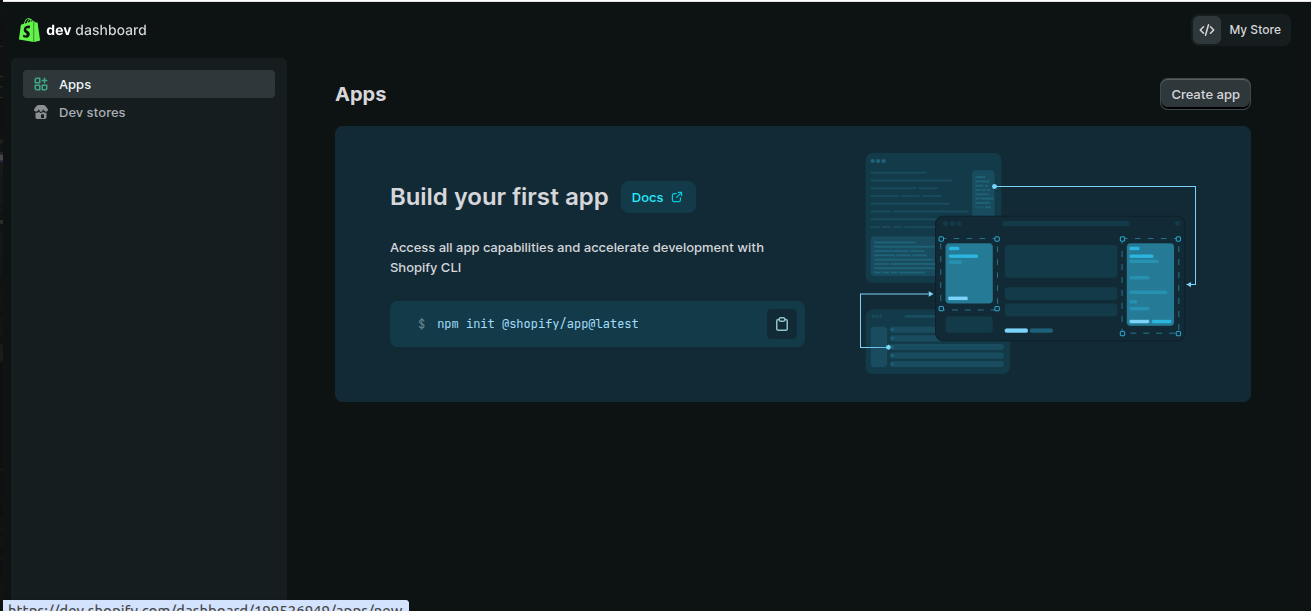
Shopify offers two ways to start. Use the Start from Dev Dashboard panel on the right — it is the no-code path that generates API credentials directly. Type an App name (anything you like, for example Webkul App) and select Create.
Step 3 — Set the App URL
Shopify opens a Create a version screen for the new app. The App URL is where Shopify sends the merchant after the app is installed or opened — and, for this connector, it is where Shopify returns the authorization result.
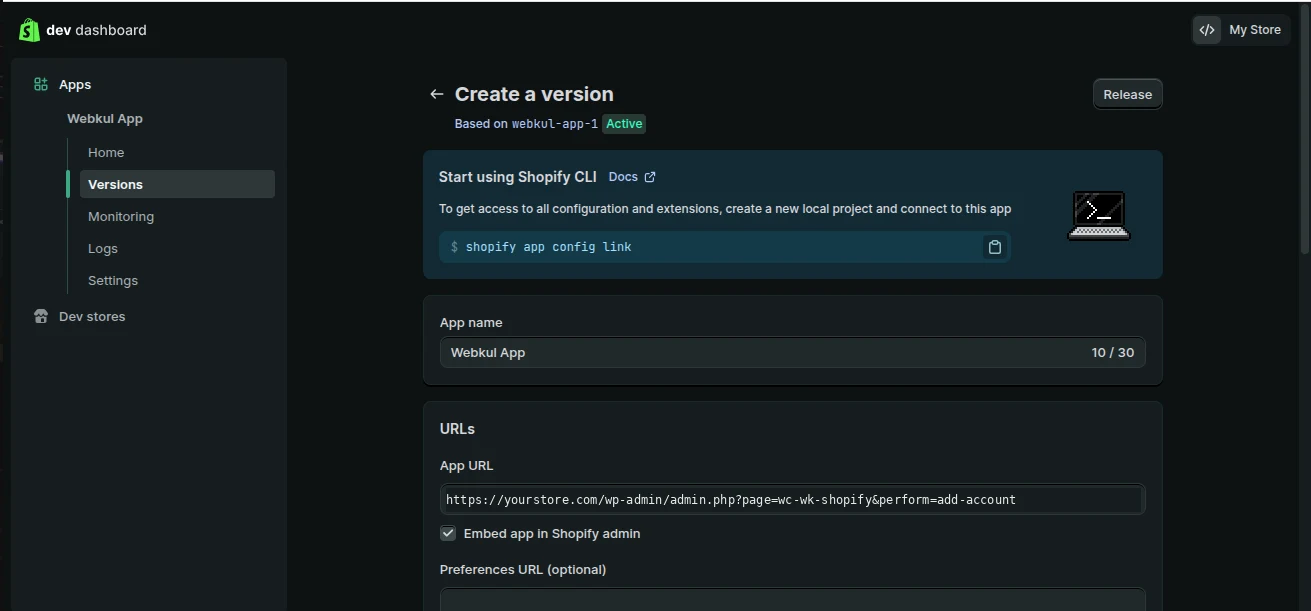
Enter the connector's Add Account screen on your WordPress site:
https://your-wordpress-site.com/wp-admin/admin.php?page=wc-wk-shopify&perform=add-account
Replace your-wordpress-site.com with your own domain, keeping any subdirectory your WordPress install sits in.
If you will connect through the Setup Wizard instead
The Setup Wizard returns to a different screen. If you plan to connect your first store through the wizard rather than through Add Account, use this URL instead:
https://your-wordpress-site.com/wp-admin/admin.php?page=wkwooshopify-setup
Step 4 — Choose the Admin API scopes
Scroll to the Access section of the same screen and select Select scopes. This is the most important step on the Shopify side: the connector does not ask Shopify for permissions of its own. It sends only your Client ID and the return URL, so the app receives exactly the scopes you tick here — nothing more. A permission you forget now cannot be granted later from WooCommerce; you would have to come back and release a new version of the app.
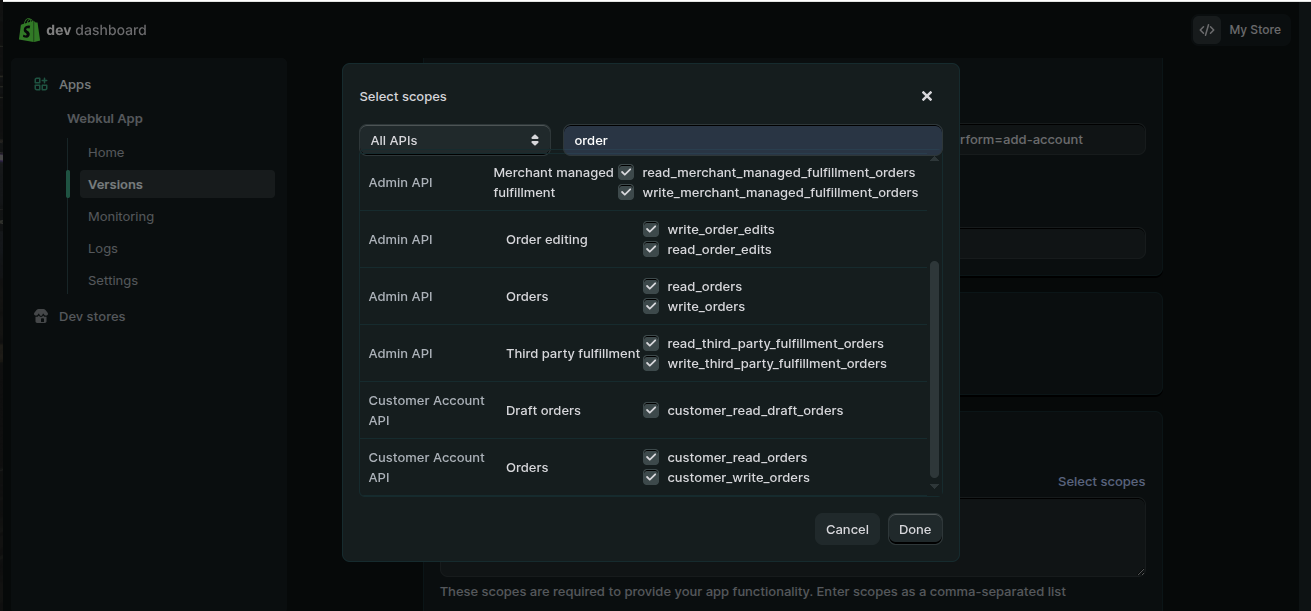
Give the app both read and write access for everything the connector touches:
| What it covers | Why the connector needs it |
|---|---|
| Products — products, variants, collections, publications | Importing the Shopify catalogue and exporting WooCommerce products back |
| Inventory and Locations | Keeping stock levels in step across both stores |
| Orders, order editing, and fulfillment (assigned, merchant-managed, and third-party) | Importing Shopify orders, exporting WooCommerce orders, and writing back fulfillment and tracking |
| Customers and draft orders | Importing customer records attached to orders |
| Discounts / price rules | Importing Shopify discounts as WooCommerce coupons |
| Shipping | Importing shipping zones and tax rates |
| Online Store content — pages, blogs, articles | Importing Shopify pages and blog posts |
Read and write, not read-only
Sync runs in both directions. If you grant only read_ scopes, imports will appear to work and every export will fail. Tick the read_ and write_ entry for each area above.
Still on the same screen, set the Webhook subscriptions → Event version to the latest version Shopify offers in the dropdown. Real-time sync subscribes to Shopify webhooks, and an old event version can deliver payloads the connector does not expect. Version 4.0.0 of the connector talks to the Shopify Admin API at version 2025-10.
Select Done, then Release in the top-right corner.
Step 5 — Release the version
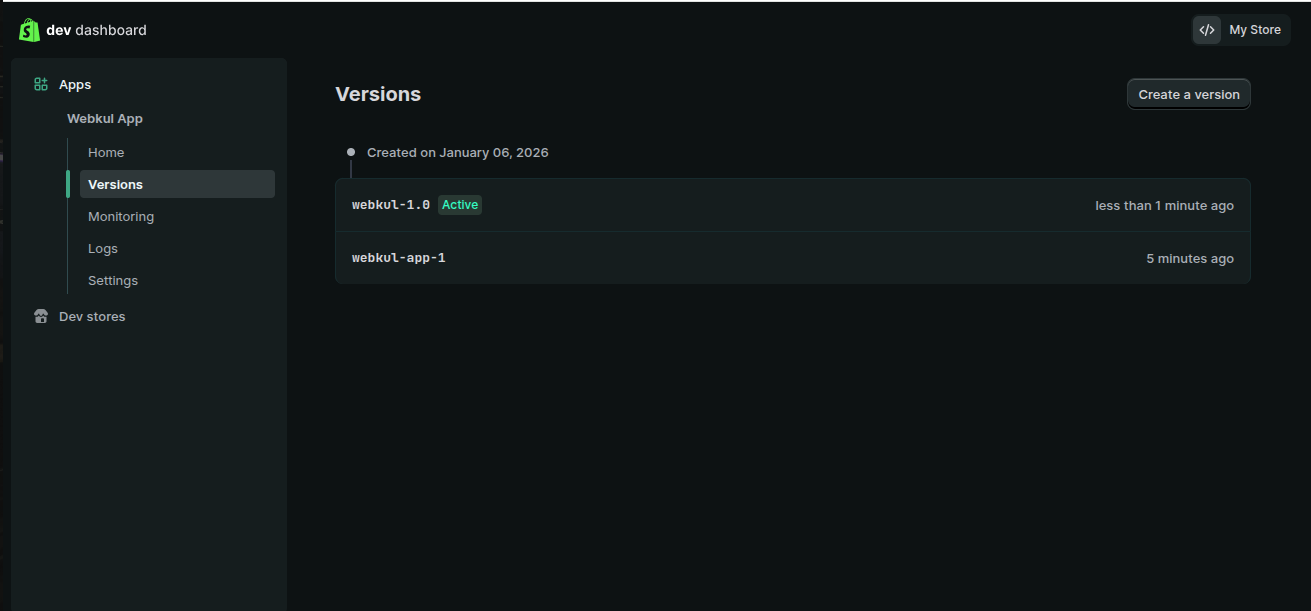
Confirm the release. Shopify creates a new app version and marks it Active on the Versions screen — the scopes only take effect once a version carrying them is active.
Step 6 — Copy the Client ID and Client Secret
Open Settings in the app's left menu. Under Credentials you will find:
- Client ID — visible, copy it with the button beside it.
- Secret — hidden. Select the eye icon to reveal it, then copy it.
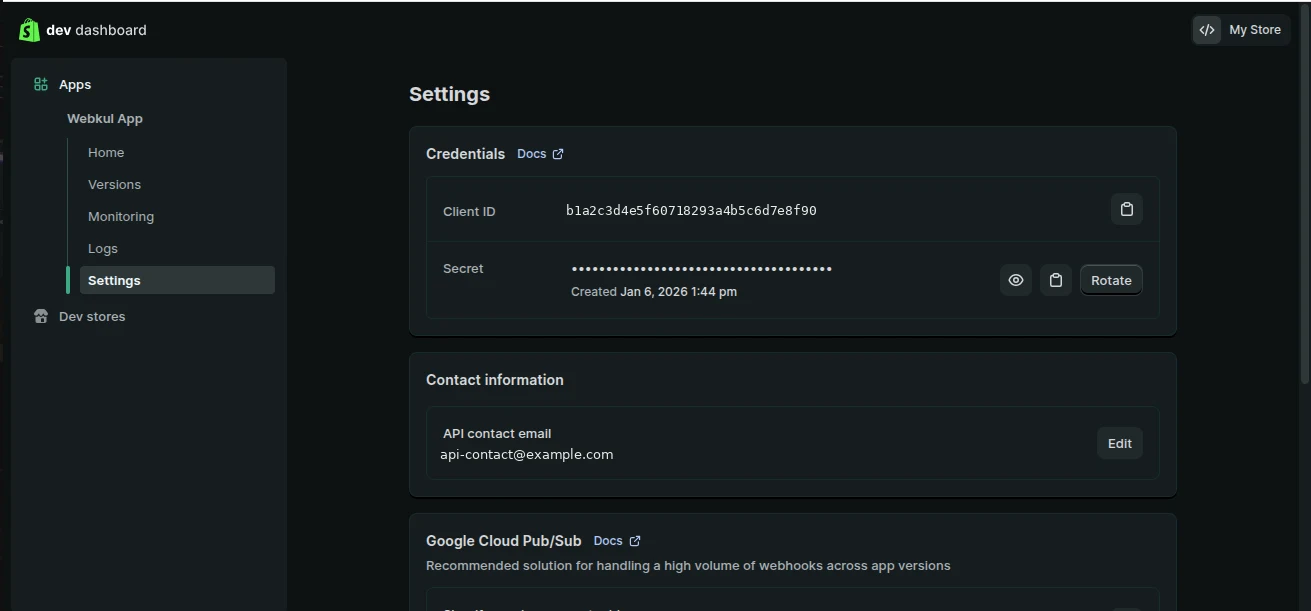
Treat these like a password
The Client Secret grants full API access to your store. Store both values somewhere secure, never paste them into a support ticket, chat, or screenshot, and use Rotate if you think the secret has leaked.
Step 7 — Install the app on your store
Back on the app's Overview, select Install app. Shopify shows exactly what the app will be able to see and change — this is a useful last check that your scopes are right — then confirm with Install.
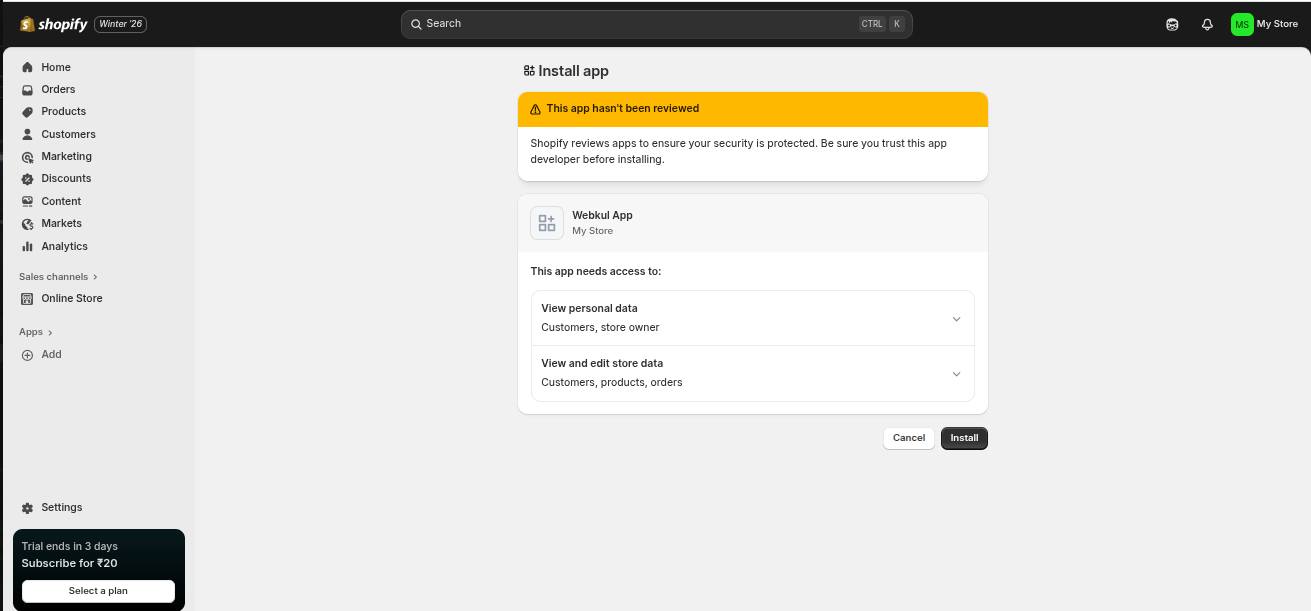
The app is now live on your store and its credentials are ready to use.
Step 8 — Enter the credentials in WooCommerce
Go to Webkul WC Addons → WC Shopify Connector → Add Account and fill in your store name, your *.myshopify.com domain, and the Client ID and Client Secret you just copied. Full instructions, including what happens during the Shopify authorization redirect, are in Connecting a Shopify Account.
Method 2 — Legacy custom app (existing stores only)
Older stores connected the connector with a single Admin API access token generated by a legacy custom app. The screens differ from the Dev Dashboard, so they are documented here for stores that still run one.
Do not start here for a new store
Shopify stopped allowing new legacy custom apps to be created from 1 January 2026. Use Method 1 above unless you are maintaining a connection that already exists.
Step 1 — Open Apps and sales channels
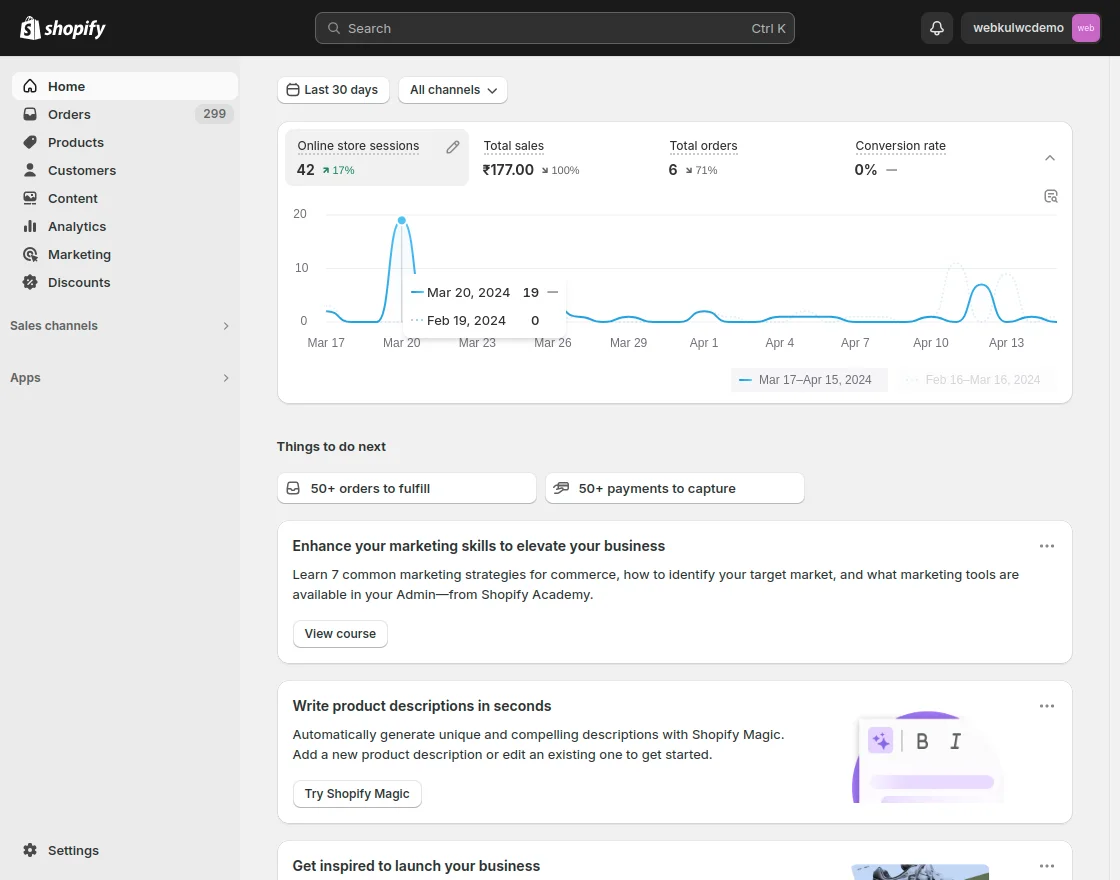
From the Shopify admin, open Settings at the bottom of the left menu.
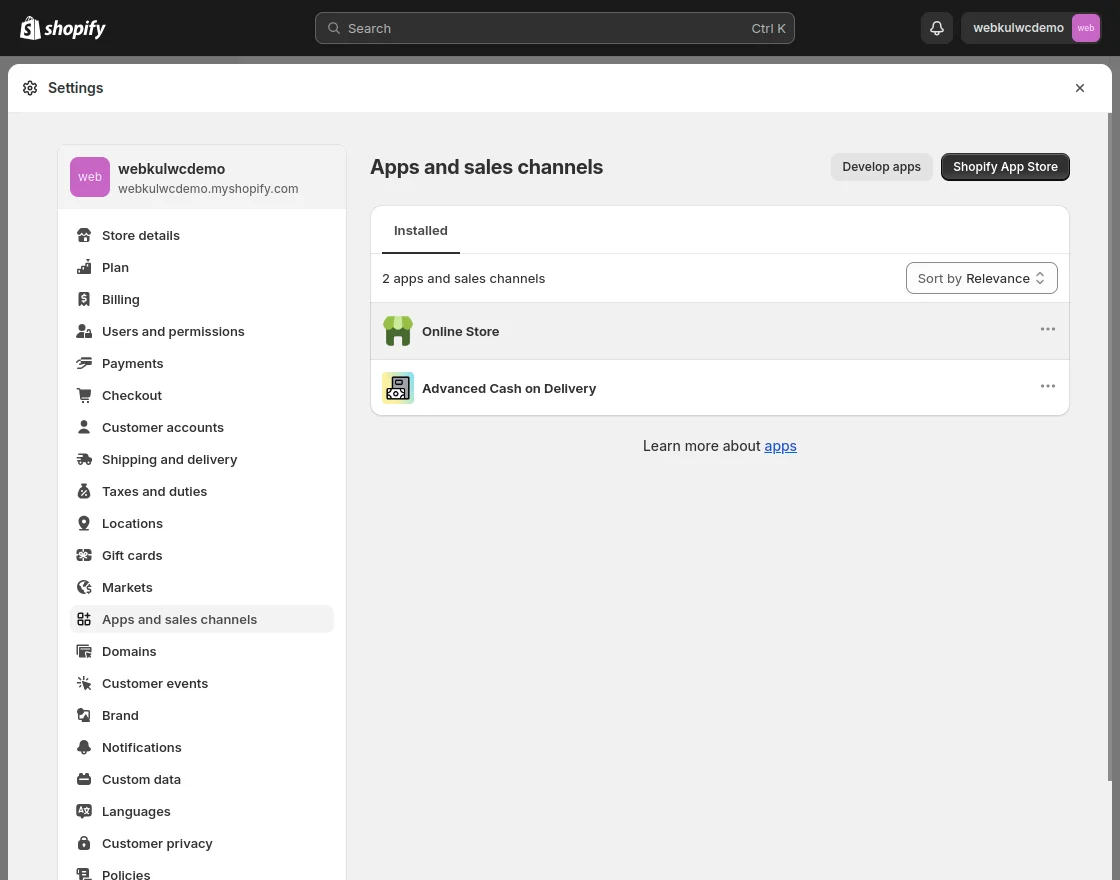
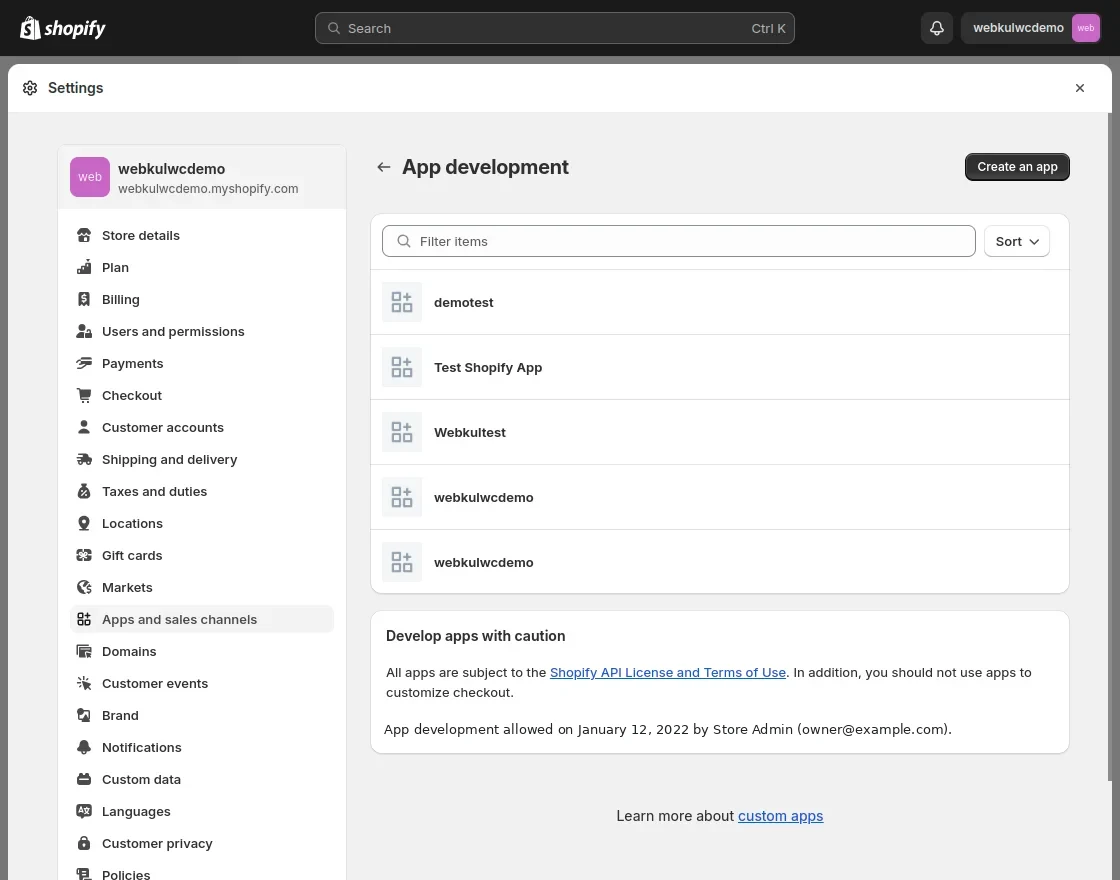
Select Apps and sales channels, then Develop apps in the top-right corner.
Step 2 — Create the app
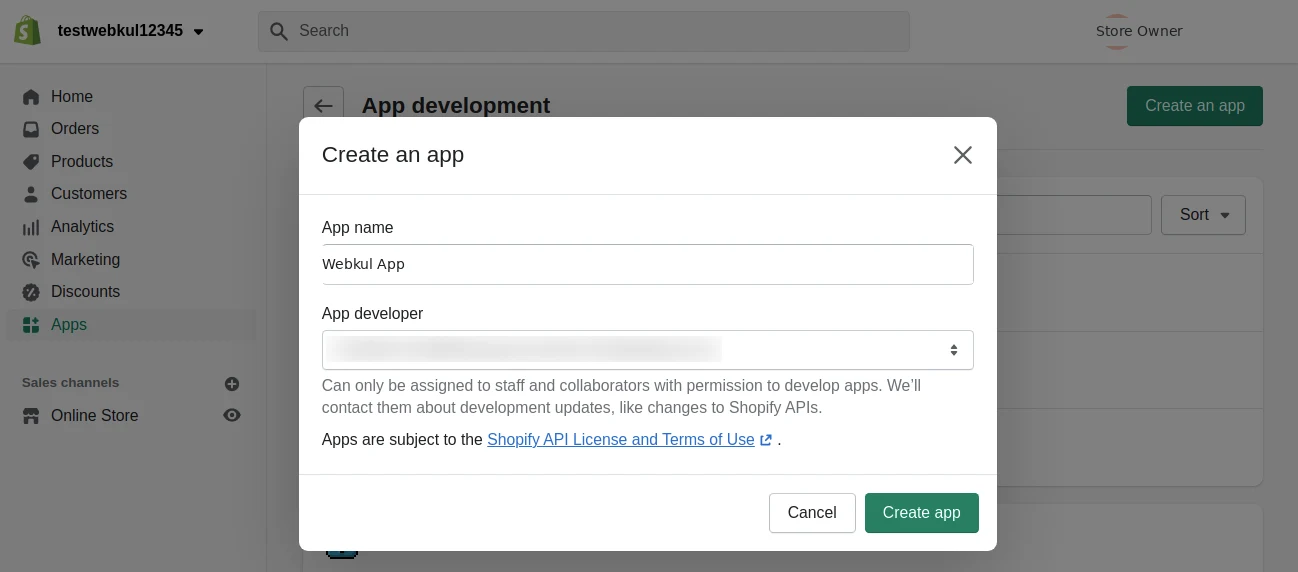
On the App development screen, select Create an app.
Enter an App name, pick an App developer, and select Create app.
Step 3 — Configure the Admin API scopes
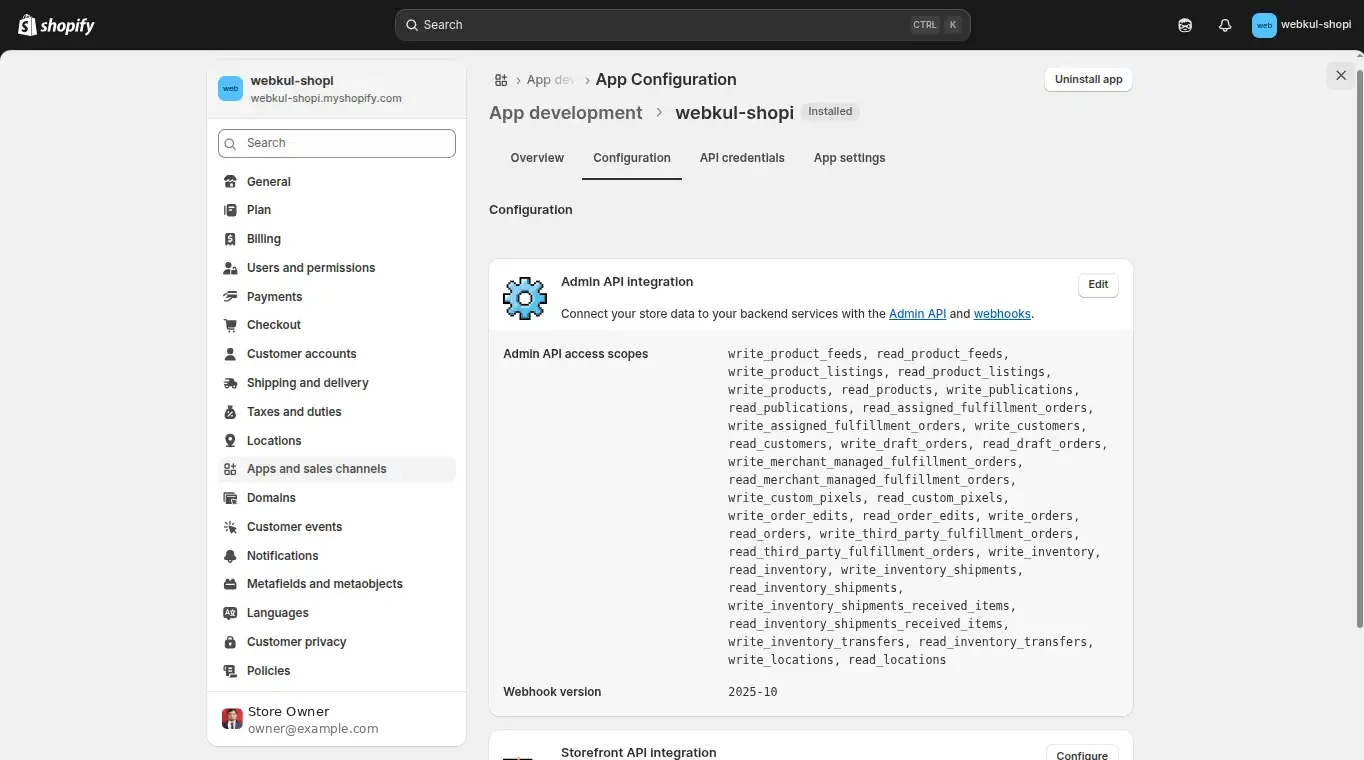
Open the Configuration tab and select Configure next to Admin API integration. Tick read and write access for the same areas listed in Method 1, Step 4 — products and collections, inventory, locations, orders and fulfillment, customers, discounts, shipping, and Online Store content.
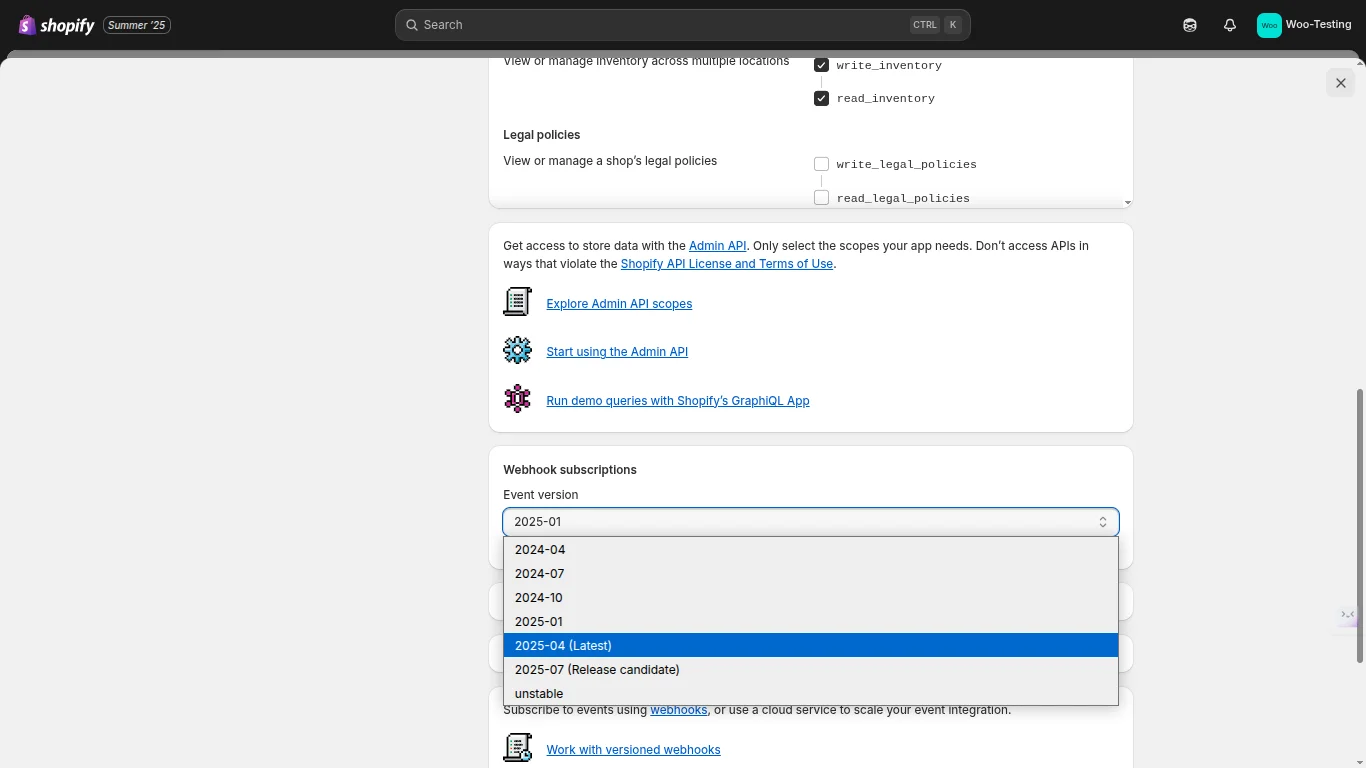
Set Webhook subscriptions → Event version to the latest version in the list, then Save.
Step 4 — Install and reveal the token
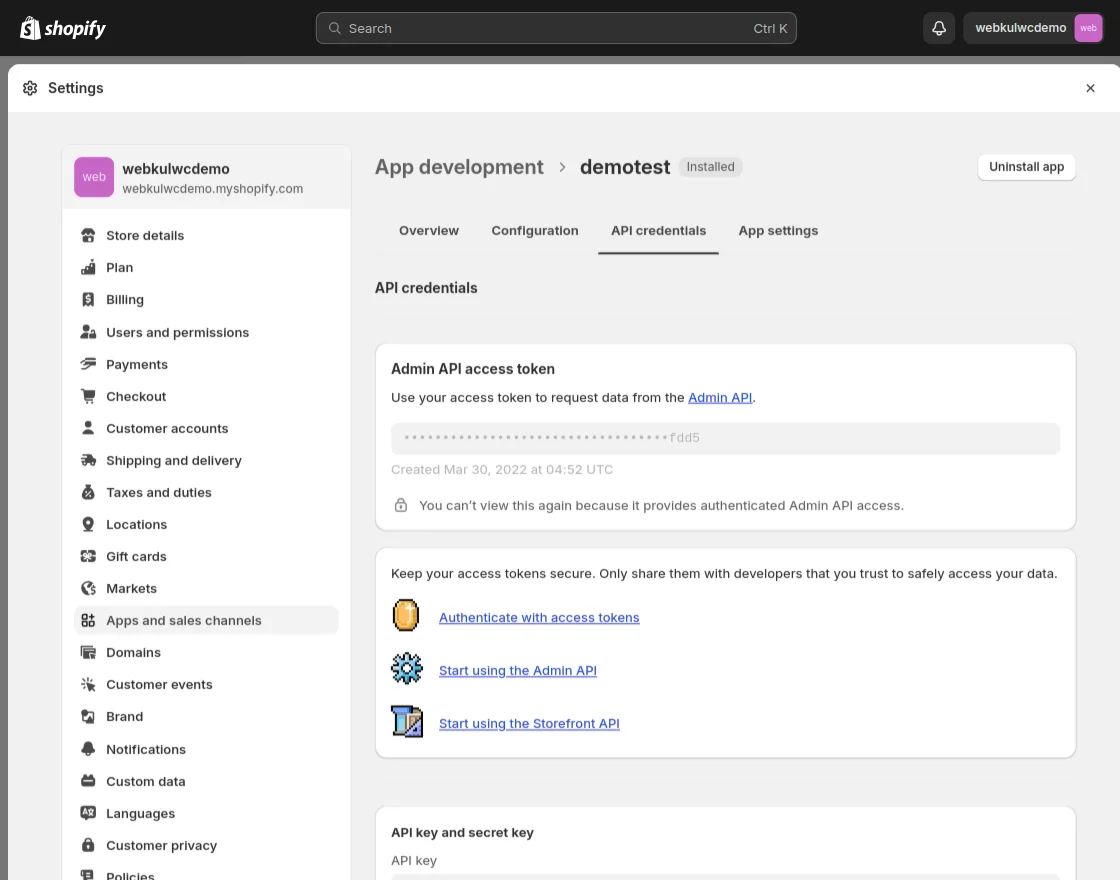
Open the API credentials tab and select Install app. Under Admin API access token, select Reveal token once and copy the shpat_… value.
The token is shown exactly once
Shopify will not display it again — the screen says so explicitly. Copy it into a secure place straight away. If you lose it, you must uninstall the app and create a new one.
Then paste it into the Connect with old legacy app form described in Connecting a Shopify Account.
If something goes wrong
| Symptom | Cause | Fix |
|---|---|---|
| "Please Enter Correct Details." after saving the account | Shopify rejected the credentials, or the app is not installed on that store | Re-copy the Client ID and Secret, confirm the domain has no https:// prefix, and confirm the app shows as installed on that exact store |
| "Invalid OAuth state" after authorizing | The Shopify return did not match the request — usually an expired link, a reused link, or a wrong App URL | Check the App URL matches your site exactly (Step 3), then start again from Add Account |
| Shopify authorizes, but you land on a WordPress 404 or the wrong page | The app's App URL points somewhere other than the connector screen | Edit the app in the Dev Dashboard, correct the App URL, and release a new version |
| Imports work but exports fail | The app has read_ scopes but not the matching write_ scopes | Add the missing write scopes and release a new version, then use Refresh the app details on the account's Account Settings tab |
| Real-time sync never fires | Missing scopes for the resource, or an outdated webhook event version | Re-check the scope list and set the Event version to the latest, then re-save the webhooks — see Webhooks & Real-Time Sync |
After changing anything in the Shopify app
Scope and URL changes only apply once you release a new version. Then open the account in WooCommerce, go to Account Settings, and select Refresh the app details to re-run the authorization with the new permissions.
Next step
With your credentials in hand, continue to Connecting a Shopify Account.