
Get Shopify API Credentials
Before a vendor can connect a store, they need API credentials from Shopify. The connector never creates these for you — you generate them once inside your own Shopify store, then paste them into the Setup Wizard or the Add Account form.
This page covers the Developer Dashboard app, which is the route Shopify supports for new apps.
You need to be signed in to Shopify as the store owner, or as a staff member with app-development permission. Nobody else can create the app or see its keys.
What you will end up with
| Credential | Where you use it |
|---|---|
| Client ID | Setup Wizard step 3, or the App Client ID field on Add Account |
| Client Secret | Setup Wizard step 3, or the App Secret Key field on Add Account |
Keep both somewhere safe. The secret is shown behind a Reveal control and can be rotated, but it is never shown in the connector again once saved.
Shopify stopped issuing new legacy custom apps on 1 January 2026. If you already have a legacy custom app with an Admin API access token beginning
shpat_, it still works and you can connect with it — see Shopify Accounts. For anything new, follow the steps below.
Step 1 — Sign in to your Shopify admin
Sign in to the Shopify store you want to connect, using your store URL and your Shopify account.
Step 2 — Open Settings → Apps
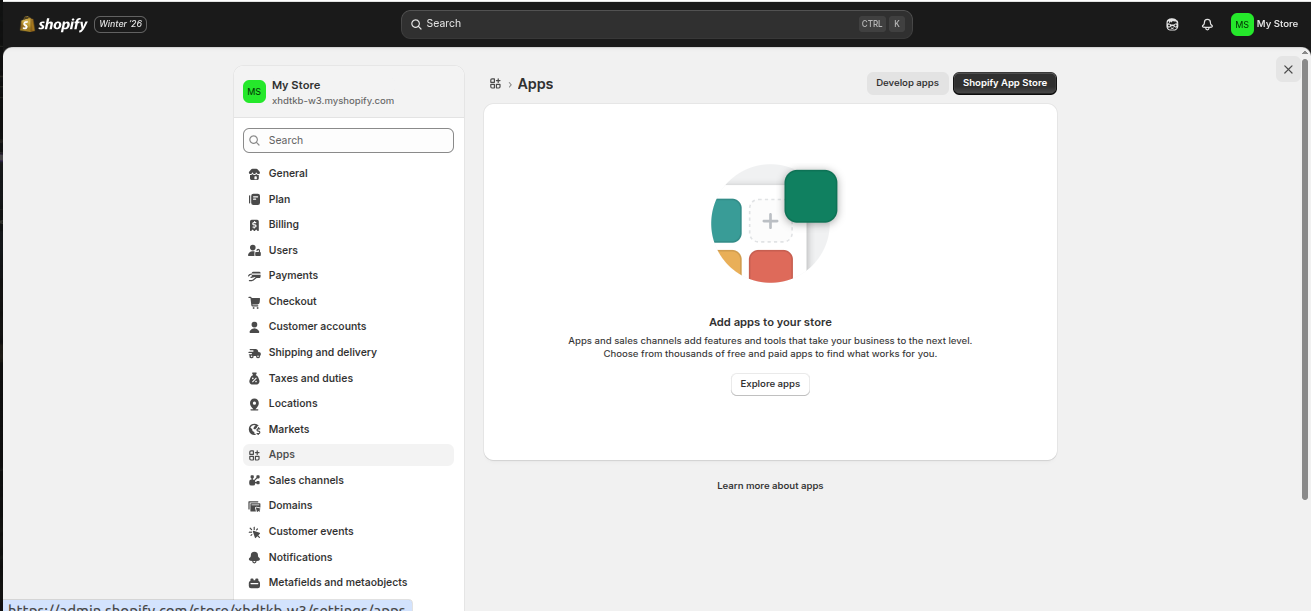
From the Shopify admin, go to Settings → Apps. This is where every integration and custom app on the store is managed.
At the top right of the page, select Develop apps.
Step 3 — Go to the Dev Dashboard
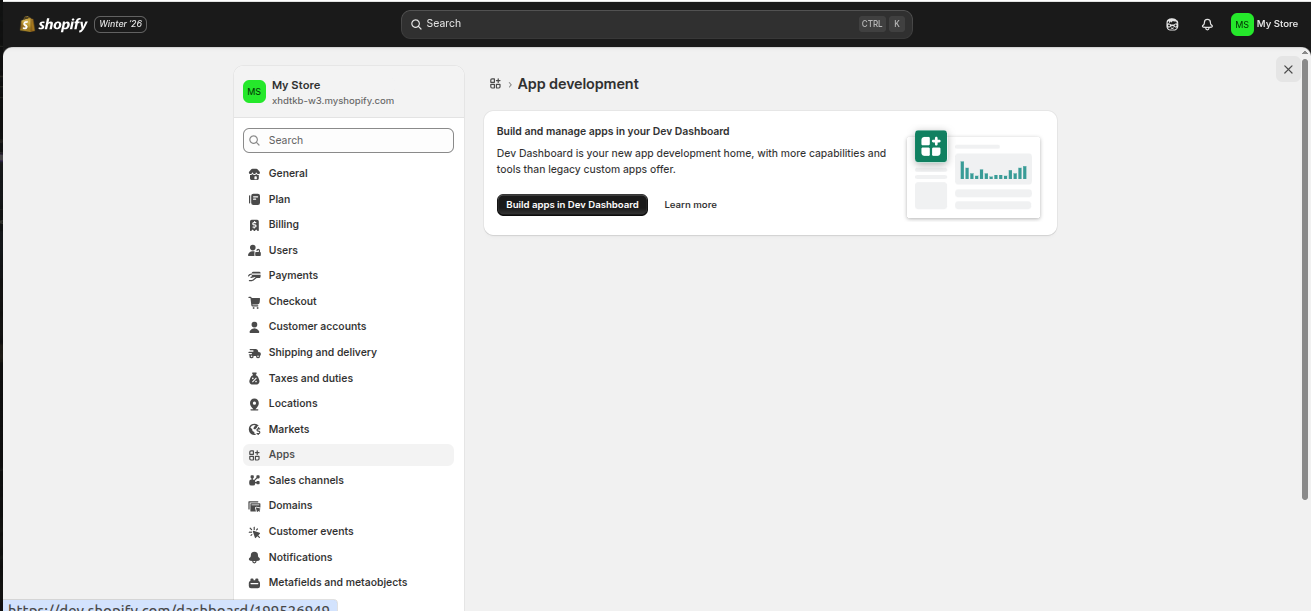
The App development panel appears. Select Build apps in Dev Dashboard.
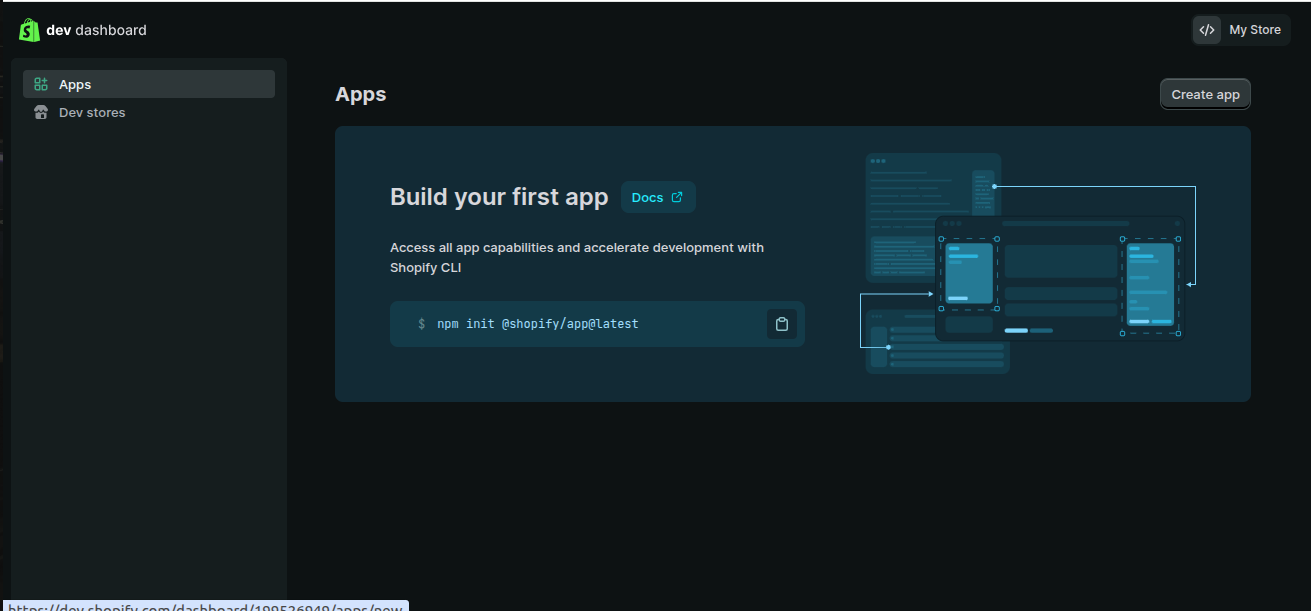
Your Dev Dashboard opens at dev.shopify.com. This is where your apps live from now on.
Step 4 — Create the app
Select Create app. Two options are offered — ignore Start with Shopify CLI, which is for developers building an app locally.
Under Start from Dev Dashboard, type an App name of your choice and select Create.
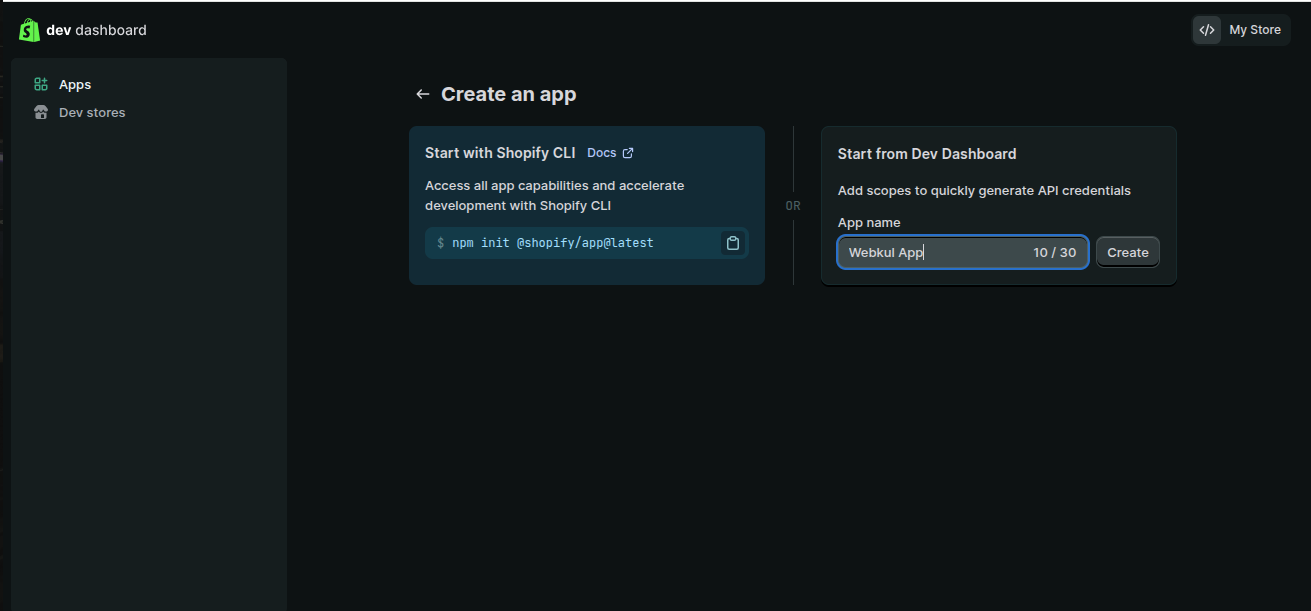
Step 5 — Fill in the app URLs
The app's version configuration opens. Every URL this section needs comes from the connector itself — don't type them by hand.
Open Vendor Dashboard → Shopify Connector → Add Account (or Setup Wizard step 3) in another browser tab. Choose Dev Dashboard App, and a panel appears reading "Add these Redirect URIs in your Shopify App (Settings / Allowed Redirection URLs)" with two values and a copy button beside each: Copy Setup URI and Copy Main URI.
Now fill in the URLs section of your Shopify app:
| Field | What to enter |
|---|---|
| App URL | The Main URI — the same value behind Copy Main URI |
| Allowed redirection URLs | Both values: the Setup URI and the Main URI |
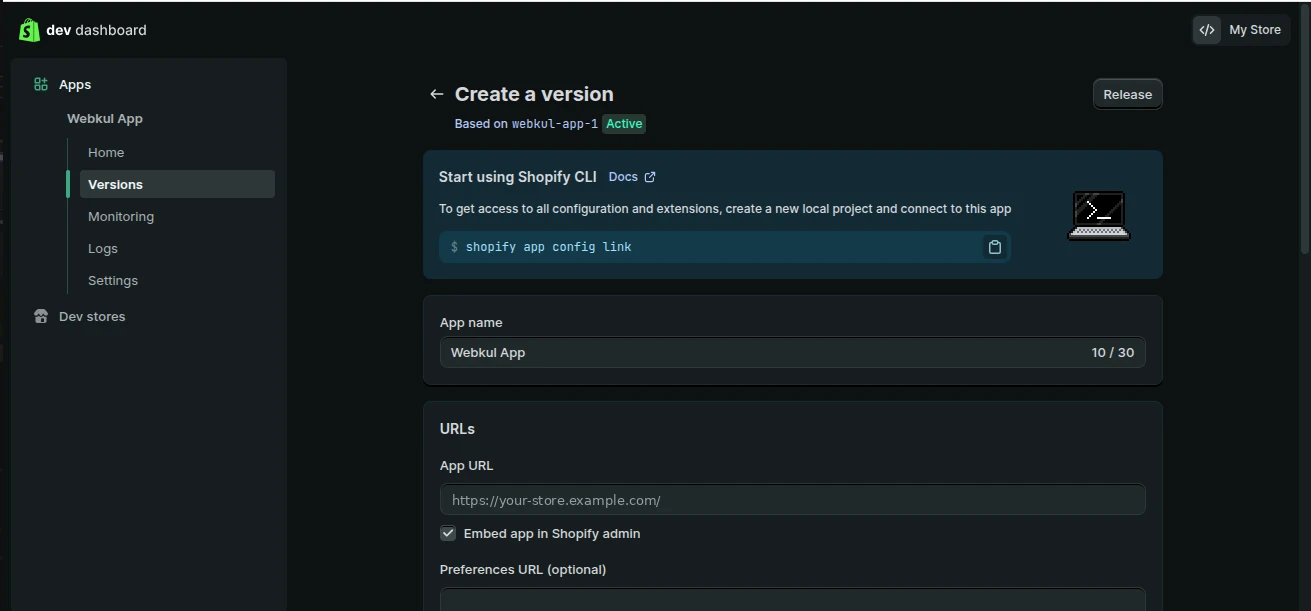
The two URIs point at the two places a vendor can start a connection from — the Setup Wizard and the Shopify Connector page — which is why Shopify needs both, and why the Main URI doubles as the app's home.
Paste them exactly as copied. Use the copy buttons rather than retyping. If the App URL is left blank, or either redirect URI is missing or altered, Shopify refuses the handshake and the connector reports "OAuth Authentication Failed."
Step 6 — Select the API scopes and release
Open the Access section and select the API scopes the connector needs. Shopify shows a Select scopes dialog — filter by API, search by keyword, and tick each scope, or paste them as a comma-separated list.
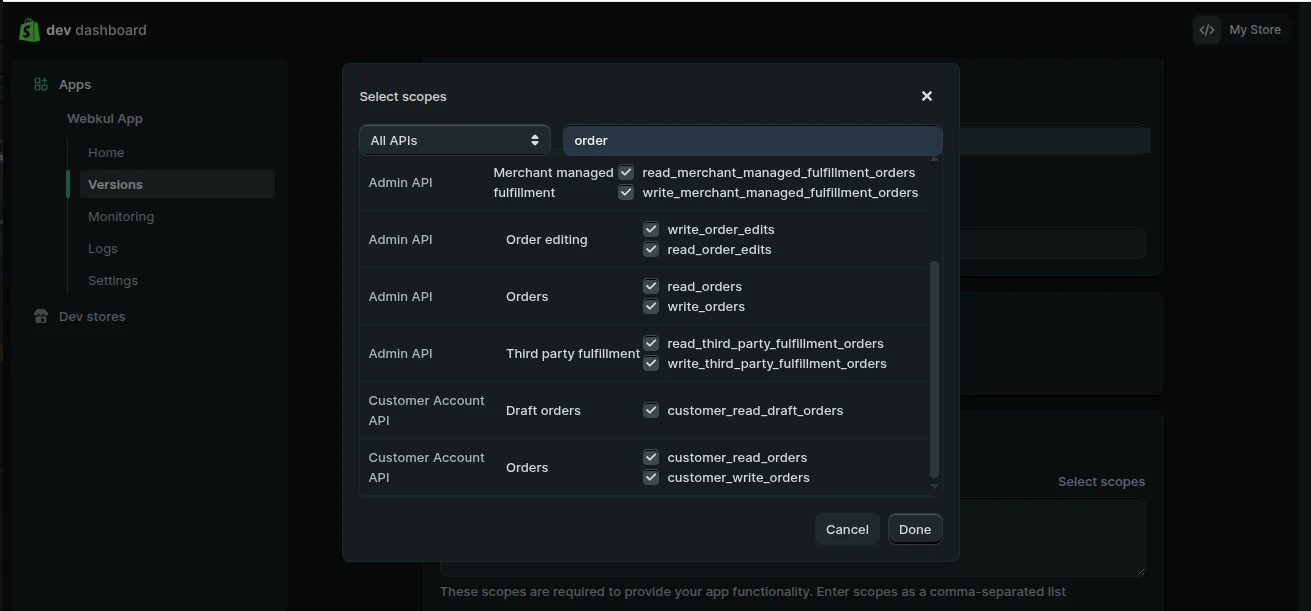
Grant both Read and Write access across these areas:
| Access area | Why the connector needs it |
|---|---|
| Products, variants and collections | Importing a Shopify catalogue into WooCommerce, and exporting WooCommerce products back |
| Orders, transactions and fulfilment | Importing Shopify orders, exporting WooCommerce orders, and reading fulfilment details |
| Inventory | Keeping stock levels aligned in both directions |
| Locations | Resolving the Shopify location that stock is held at, used by Select Shop Location |
| Customer details and customer groups | Attaching customer details to imported and exported orders |
| Discounts | Carrying order discounts across |
| Shipping rates | Carrying shipping lines on exported orders |
| Online Store pages | Page data read through the GraphQL Admin API |
Set the Event version when you add a webhook subscription. Always choose the latest available Event version, so the payloads the connector receives match the API version it reads.
When the scopes and Event version are set, select Release, then confirm with Release again. A new app version is created.
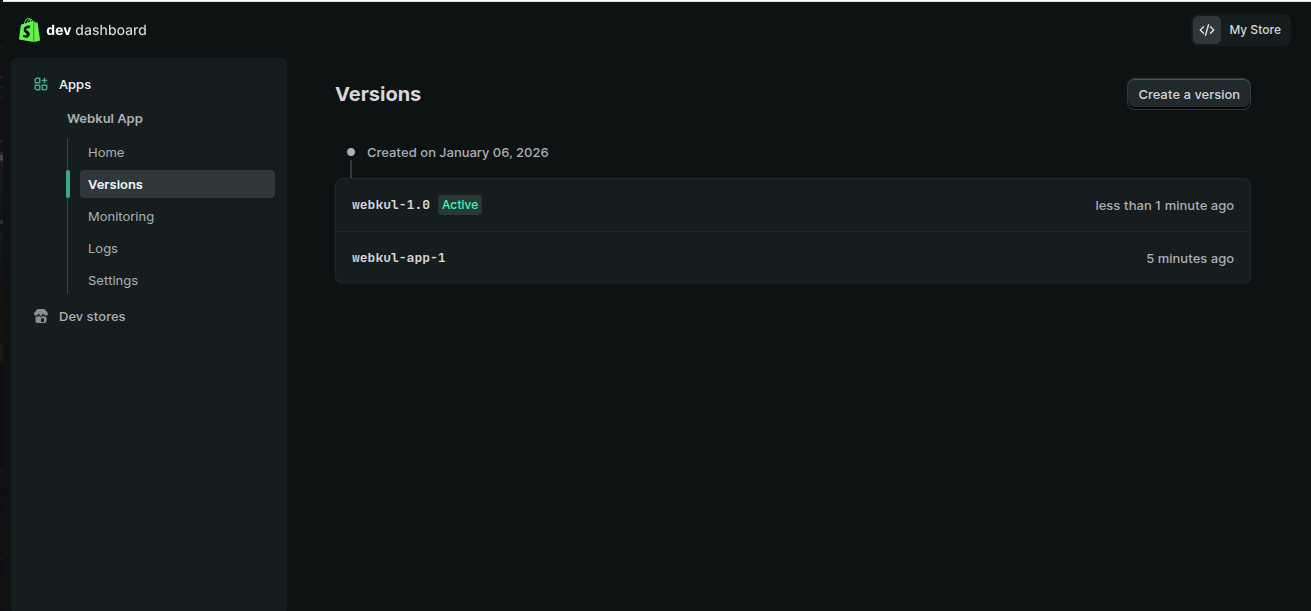
A version that is not released does nothing. Scopes only take effect once the version holding them is active. If you skip this, the connector authorises but then reports "Connected to Shopify, but reading the store details failed…"
Step 7 — Copy the Client ID and Client Secret
Open Settings in the app's sidebar and find the Credentials section.
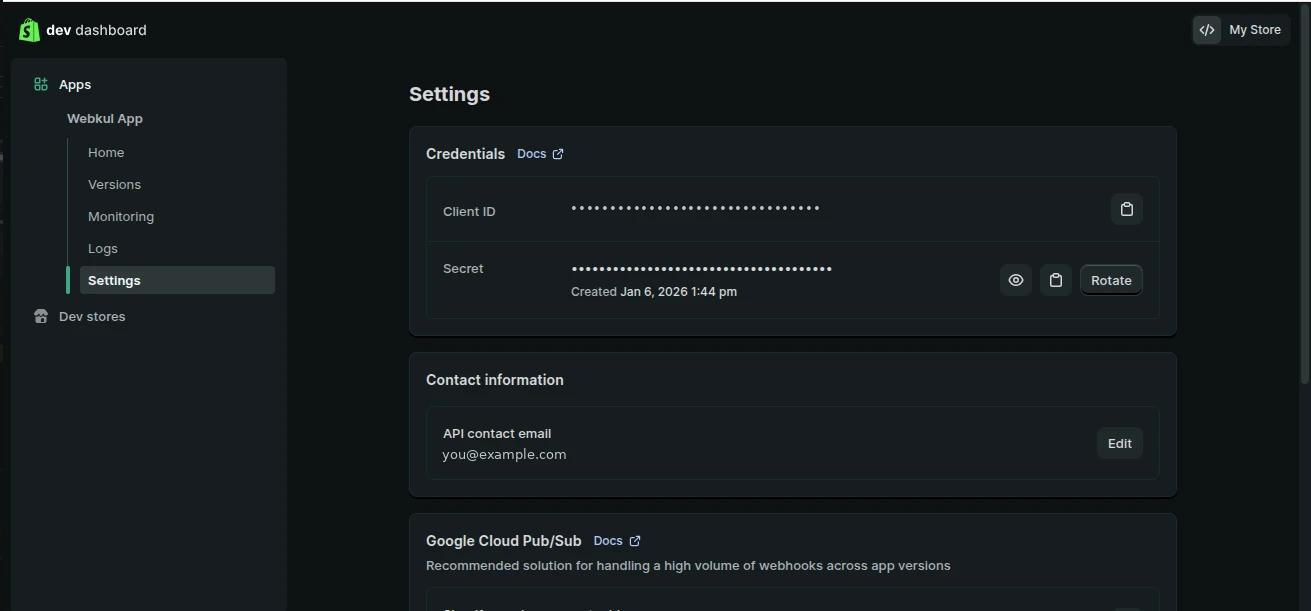
- Client ID — copy it straight from the field
- Secret — select the reveal (eye) control first, then copy it
Store both securely. Treat the secret like a password: anyone holding it can act on your Shopify store through the API. If it is ever exposed, use Rotate to issue a new one — then update the credentials in the connector, because the old secret stops working immediately.
Step 8 — Install the app on your store
Select Install app and confirm in the dialog. Shopify lists the access the app is asking for and warns that the app has not been reviewed — that is expected for an app you built yourself.
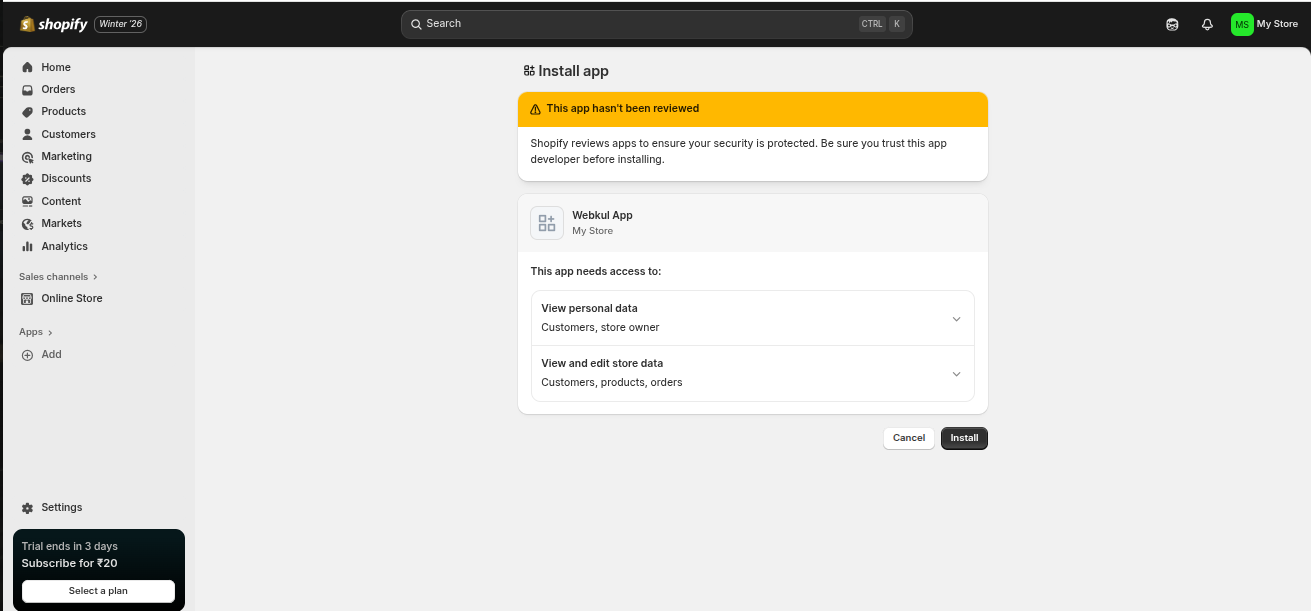
Installation is what activates API access for the store.
Now connect the store
With the Client ID and Client Secret in hand, connect the store from the vendor dashboard:
- Setup Wizard — the guided route, which verifies the credentials for you
- Shopify Accounts — Add Account, if you would rather fill the form directly
If something goes wrong
| Message | What it means | What to do |
|---|---|---|
| OAuth Authentication Failed: Please check your Shopify Client ID, Client Secret, and Store Name. | Shopify rejected the handshake | Re-check both keys, and that both redirect URIs from step 5 are whitelisted in the app |
| Connected to Shopify, but reading the store details failed… | The app connected, but cannot read the store | Grant the missing scopes and release the app version, then use Refresh the app details on the Account tab |
| Added store name does not match with the shopify store name. | Store name mismatch | Use the exact store name shown in your Shopify admin |
| Changes made in a new app version have no effect | The connector still holds the previous version's details | Select Refresh the app details on the account's Account tab |
What to do next
- Setup Wizard — connect the store
- Map Categories — decide where imported products land
- Webhooks — switch on real-time synchronisation