
Shopify Accounts
The Shopify Account List is the vendor's home screen for the connector. It shows every Shopify store they have connected and is the starting point for managing any of them.
Open it from Vendor Dashboard → Shopify Connector.
The account list
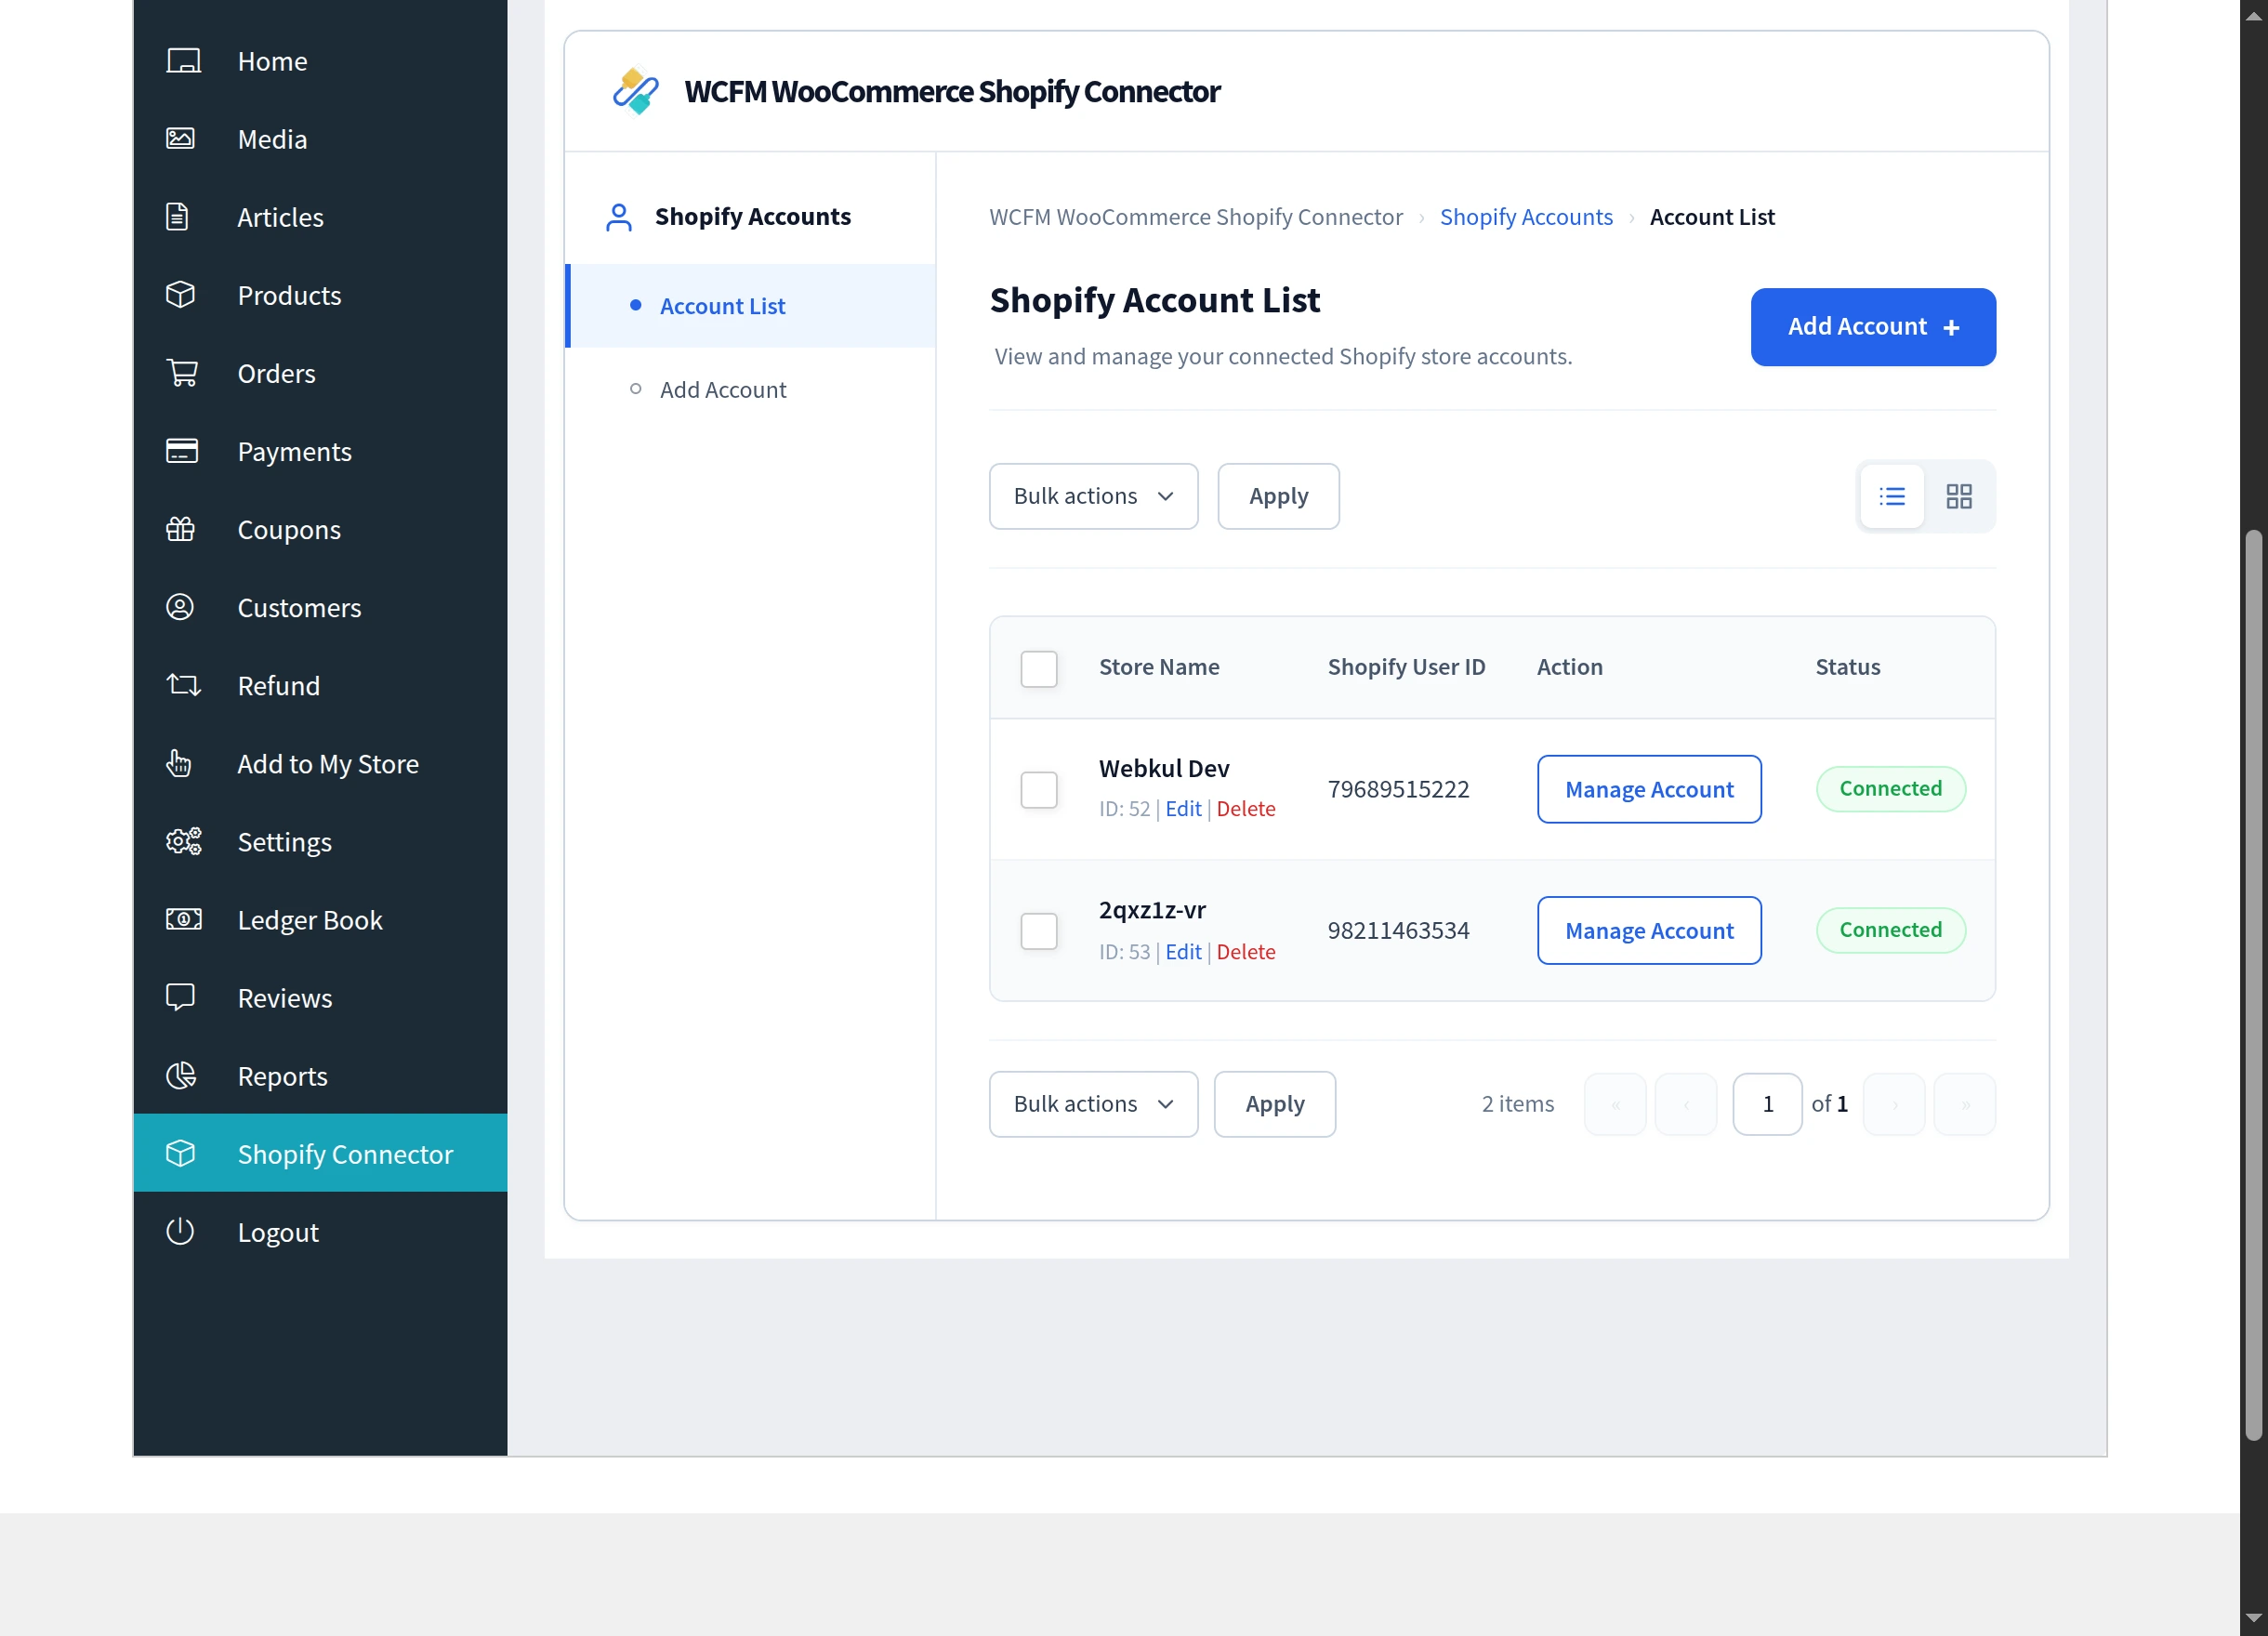
Each row shows:
| Column | Meaning |
|---|---|
| Store Name | The name given when the store was connected, with its internal ID |
| Shopify User ID | The store's identifier on Shopify |
| Action | Manage Account, to open the store's tabs |
| Status | Connected or Disconnected |
The status is checked in the background when the page loads, so it briefly reads Checking… before settling.
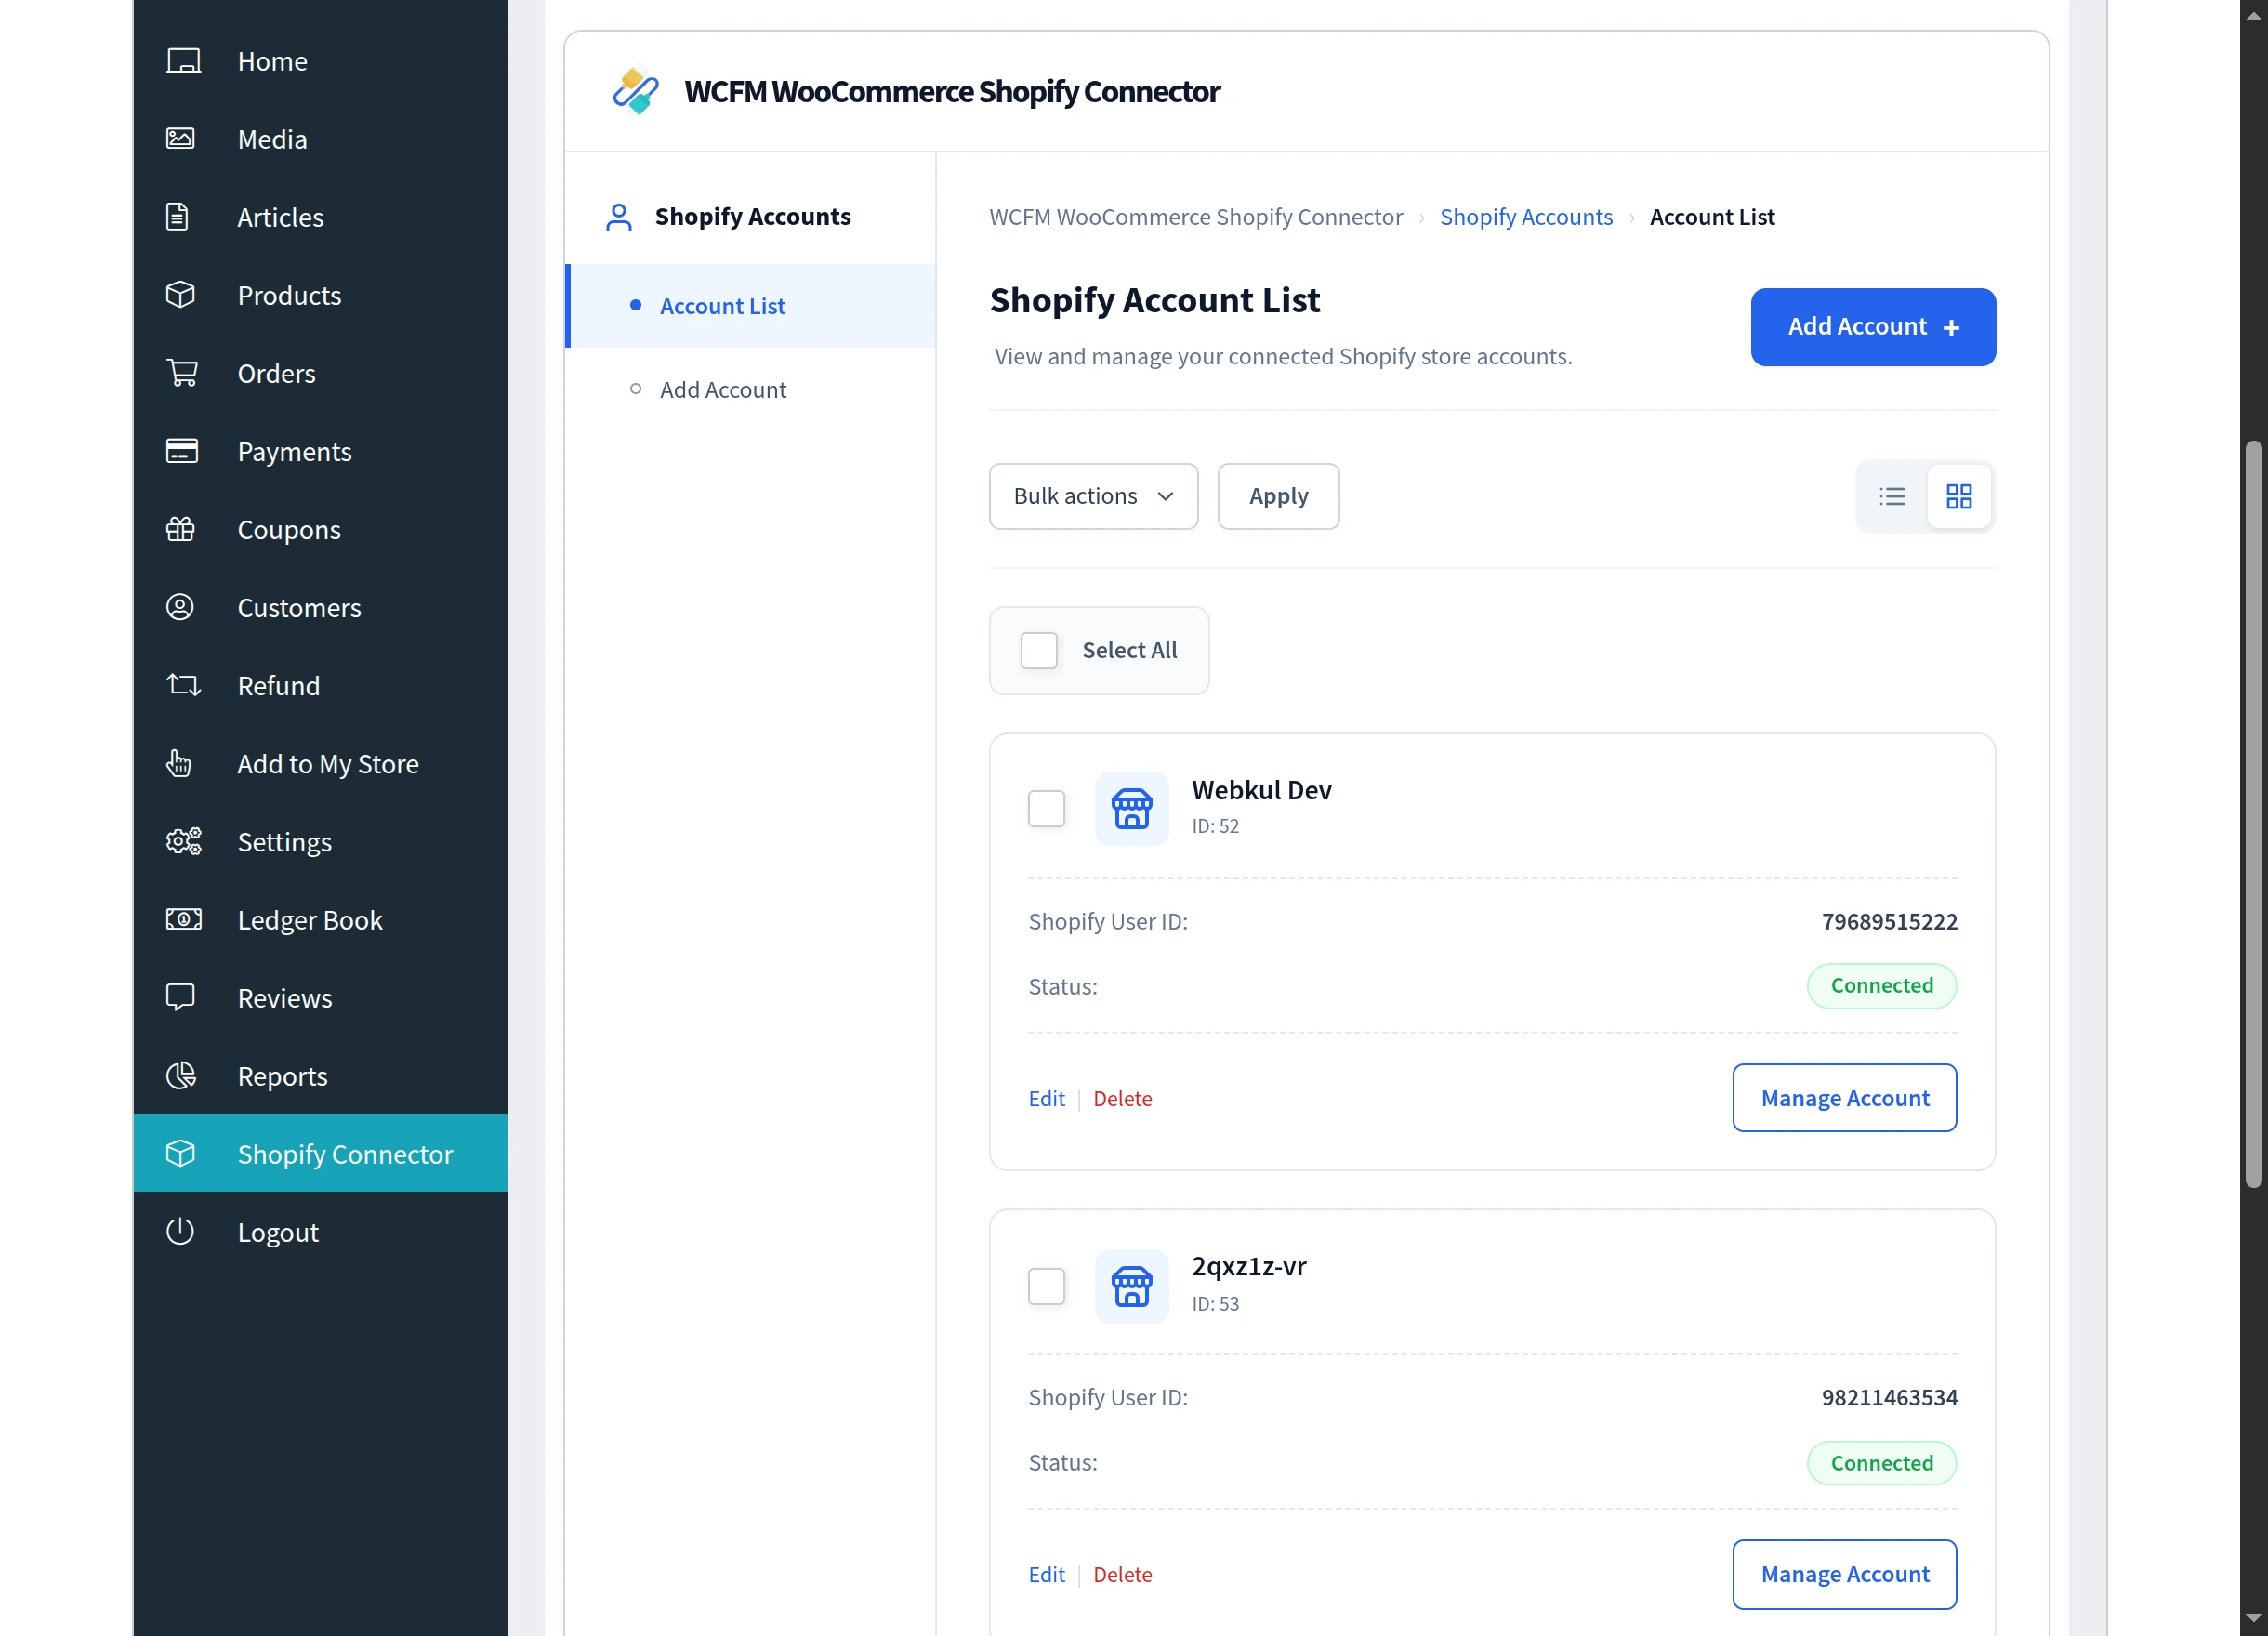
Use the toggle at the top right to switch between list and grid view. Grid view shows the same information as cards.
If no stores are connected yet, the list reads No accounts found.
Connecting another store
A vendor can connect as many Shopify stores as they need. Each keeps its own settings, mappings, price rules and webhooks.
Select Add Account and choose how you want to connect.
Dev Dashboard App (OAuth)
The recommended route. Enter the Store Name, Domain Name, App Client ID and App Secret Key. If you have not created the Shopify app yet, see Get Shopify API Credentials.
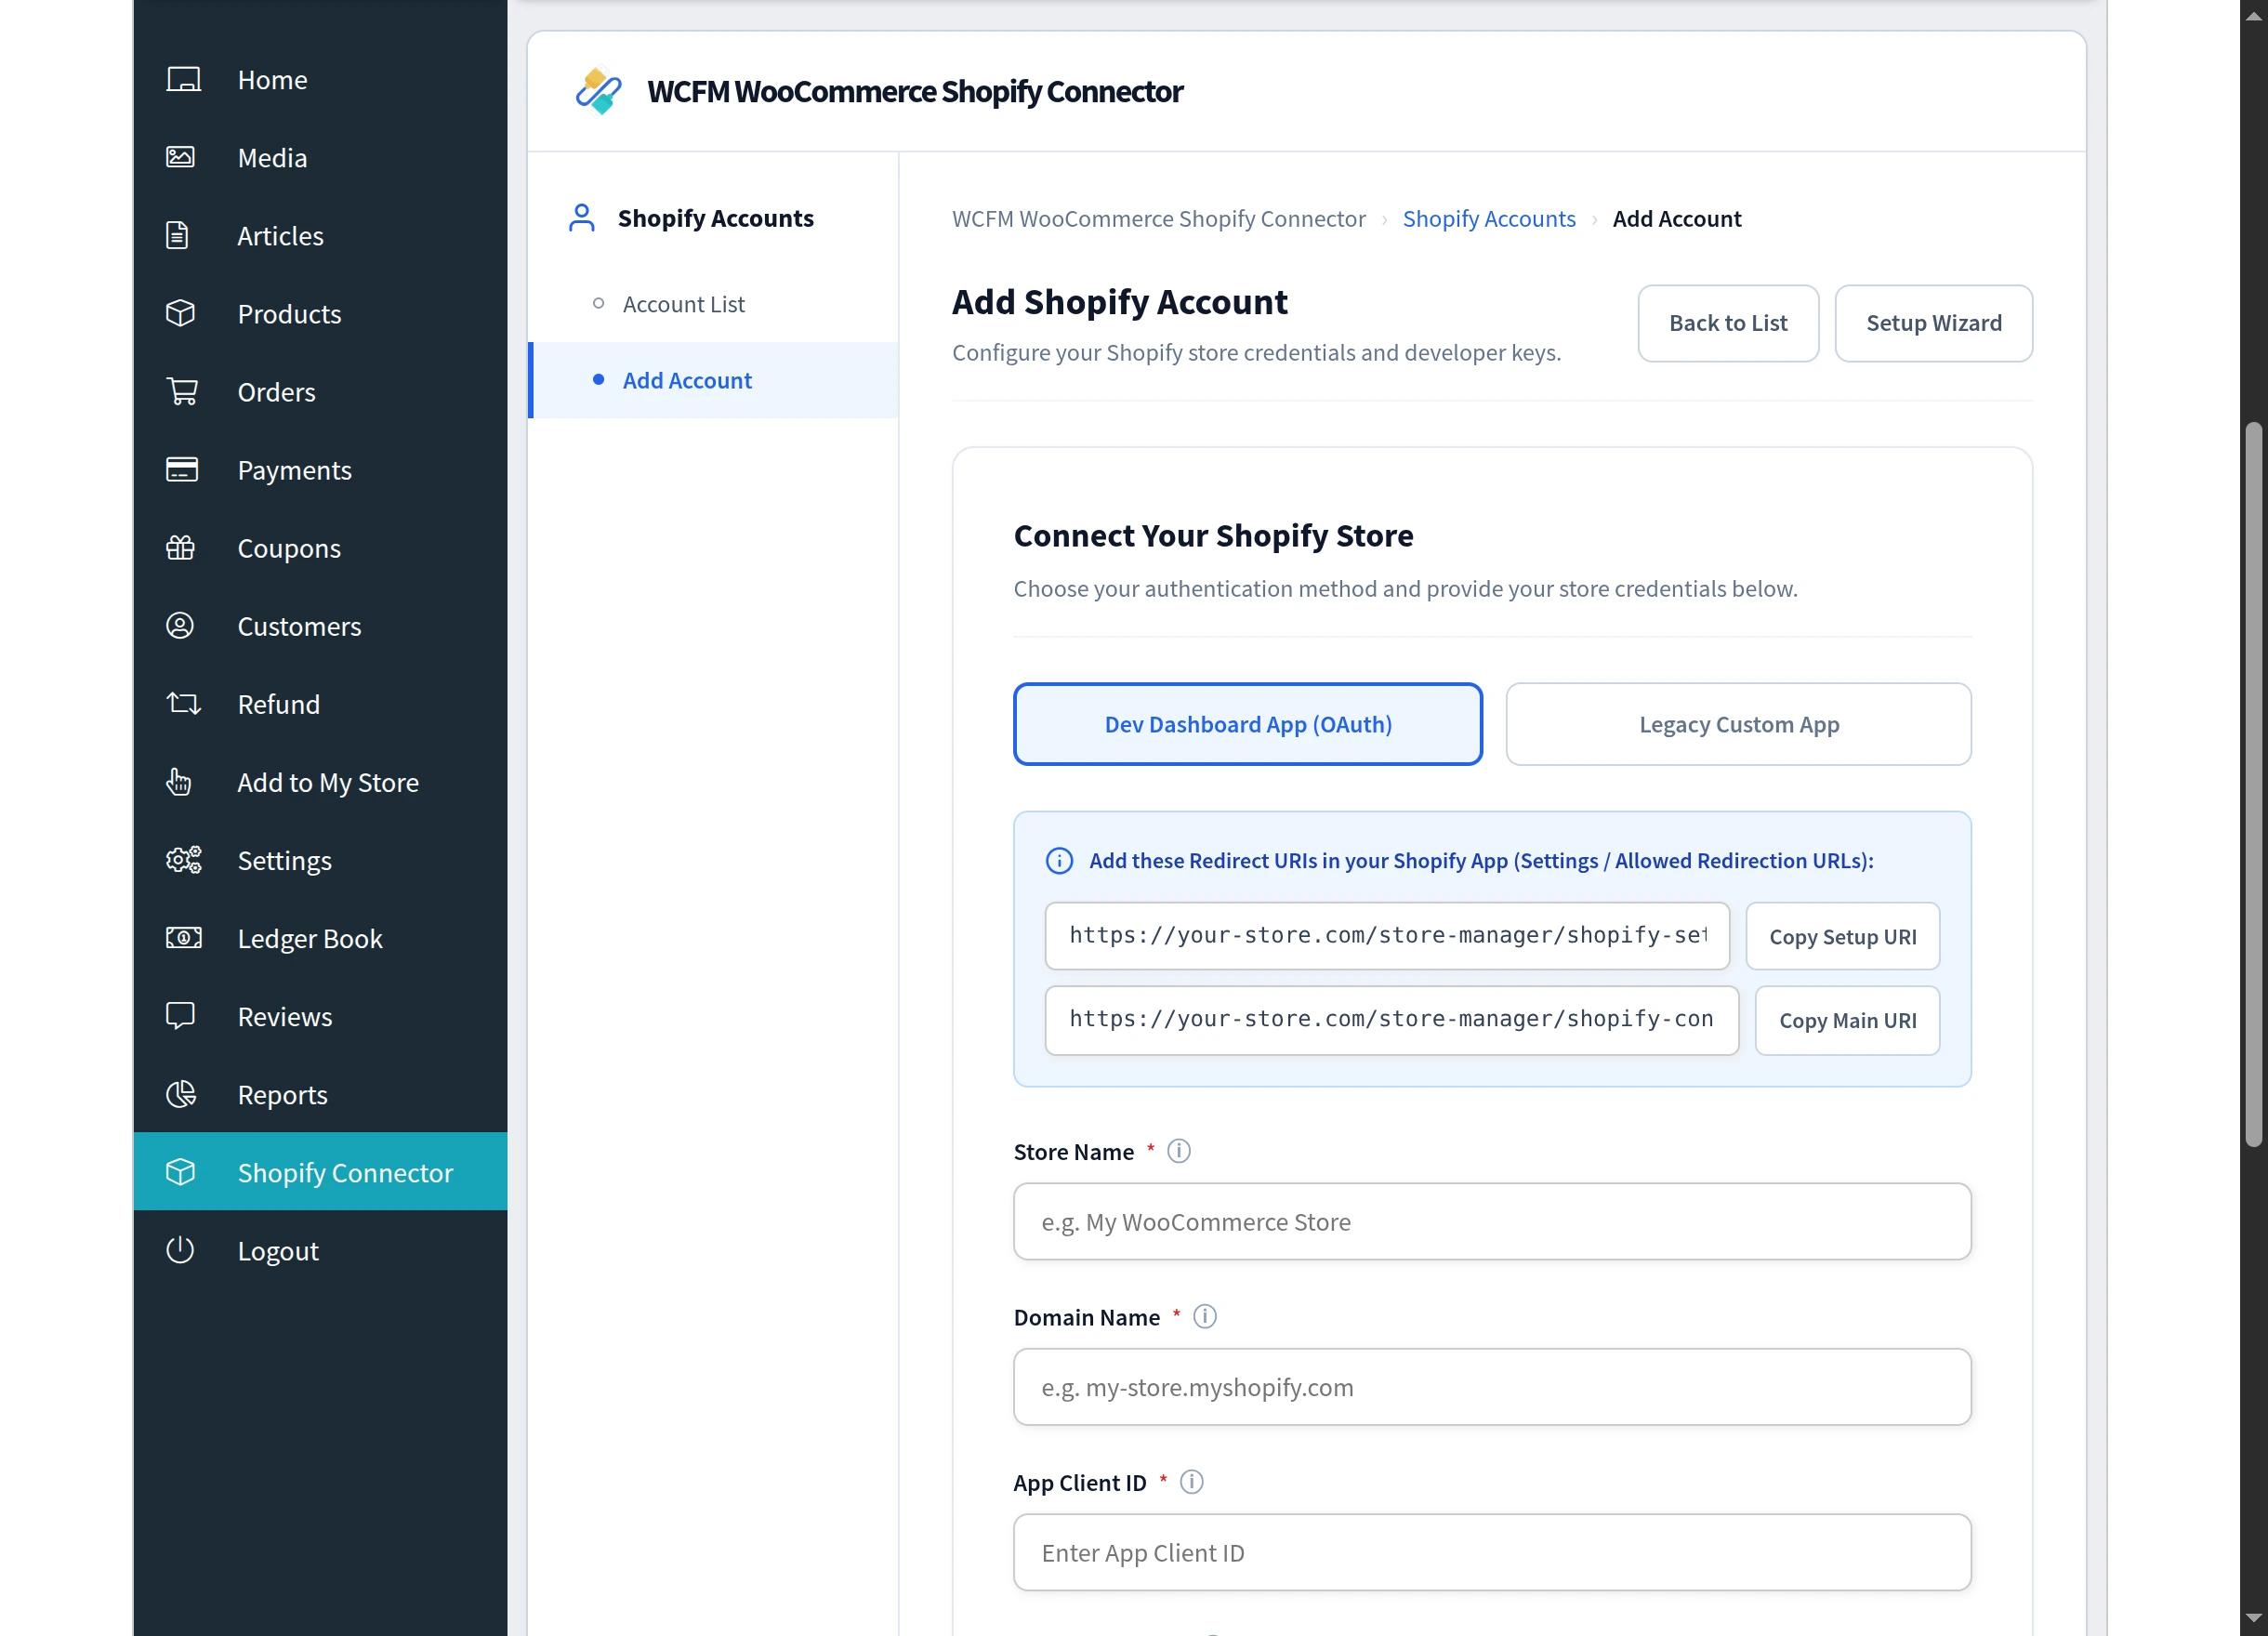
Before authorising, copy the two redirect URIs shown on the form into your Shopify app under Settings → Allowed Redirection URLs, using Copy Setup URI and Copy Main URI. The Main URI is also the value that belongs in the app's App URL field — see Get Shopify API Credentials.
Legacy Custom App
Select Legacy Custom App — or Connect Legacy Account — and provide the Store Name, API Token, Domain Name and API Secret Key.
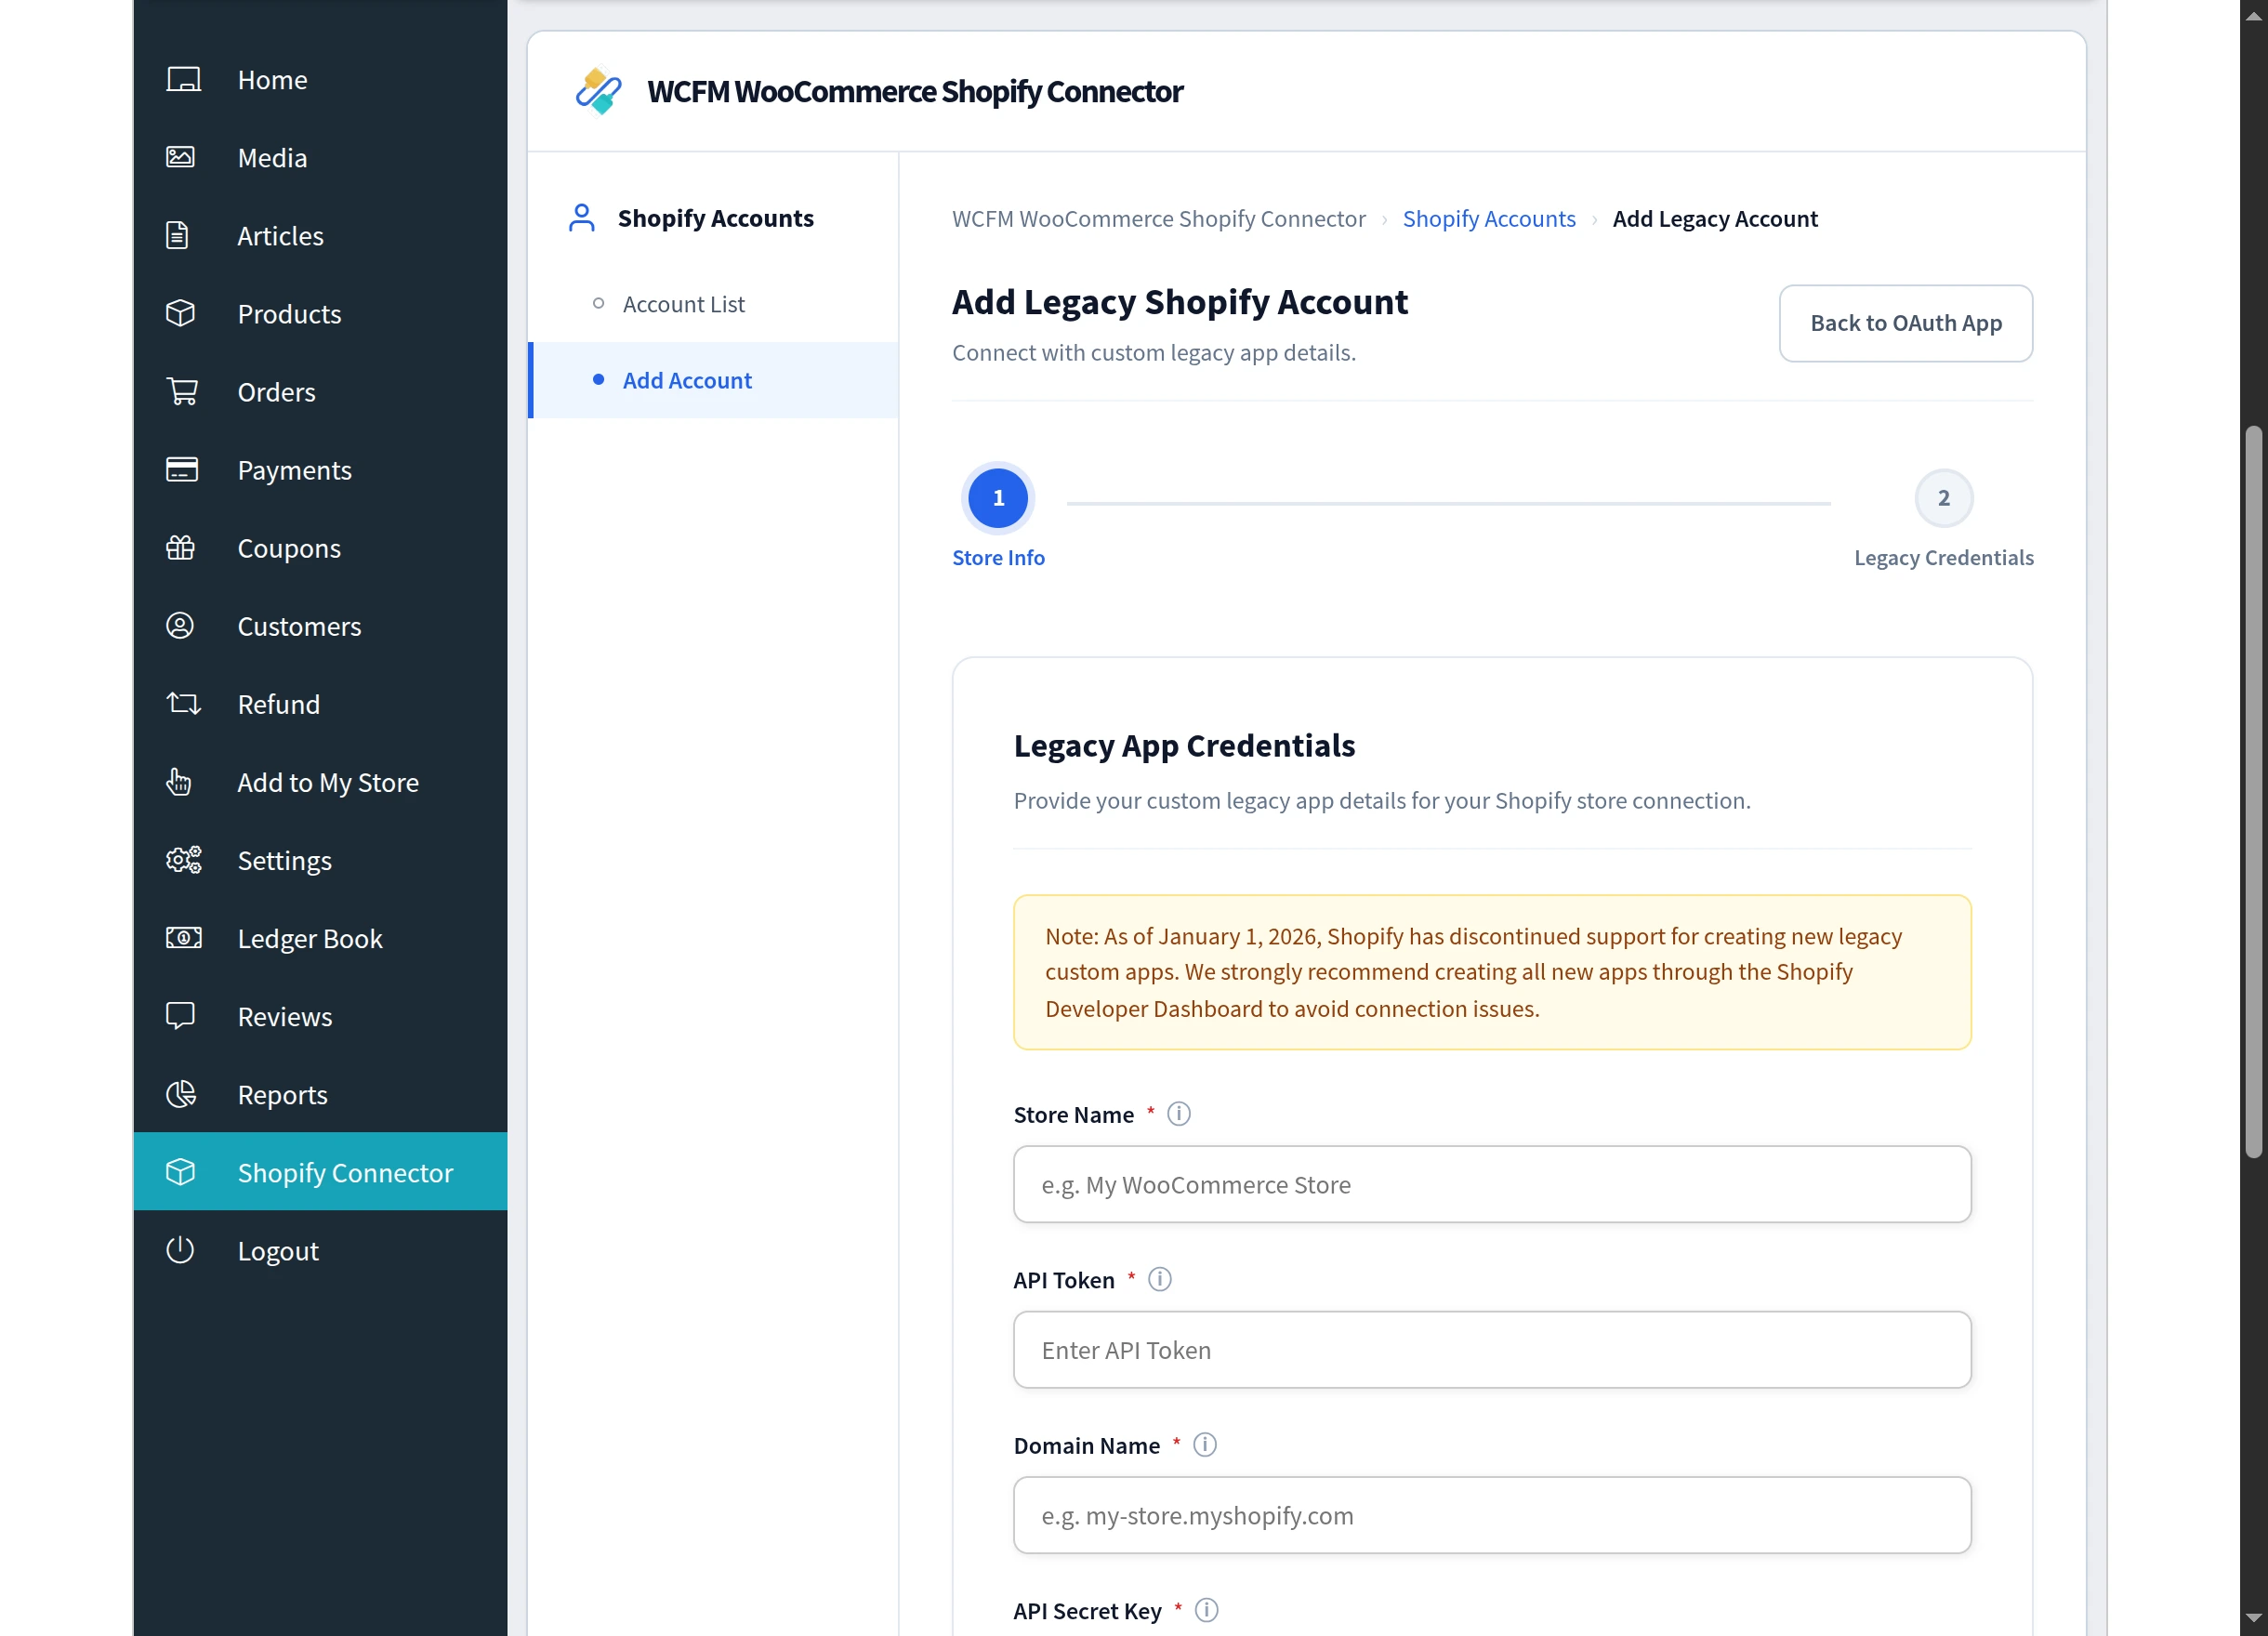
Shopify stopped issuing new legacy custom apps on 1 January 2026. Use the Developer Dashboard for any new connection. Existing legacy apps still work.
If you would rather be guided through this, use the Setup Wizard instead — it collects the same details and verifies them for you.
If the connection is refused
| Message | What to do |
|---|---|
| Please Enter All Required Details. | Complete every required field |
| Please Enter Your Correct Shopify Account Details. | Re-check the domain and credentials |
| Account already exists. | This store is already connected |
| Added store name does not match with the shopify store name. | Use the exact store name from Shopify |
| Shopify authorization failed. Please check your credentials and try again. | Re-check the keys and the whitelisted redirect URIs |
On success you will see Account created successfully.
Disconnecting a store
Select Delete on the row you want to remove. You are asked to confirm.
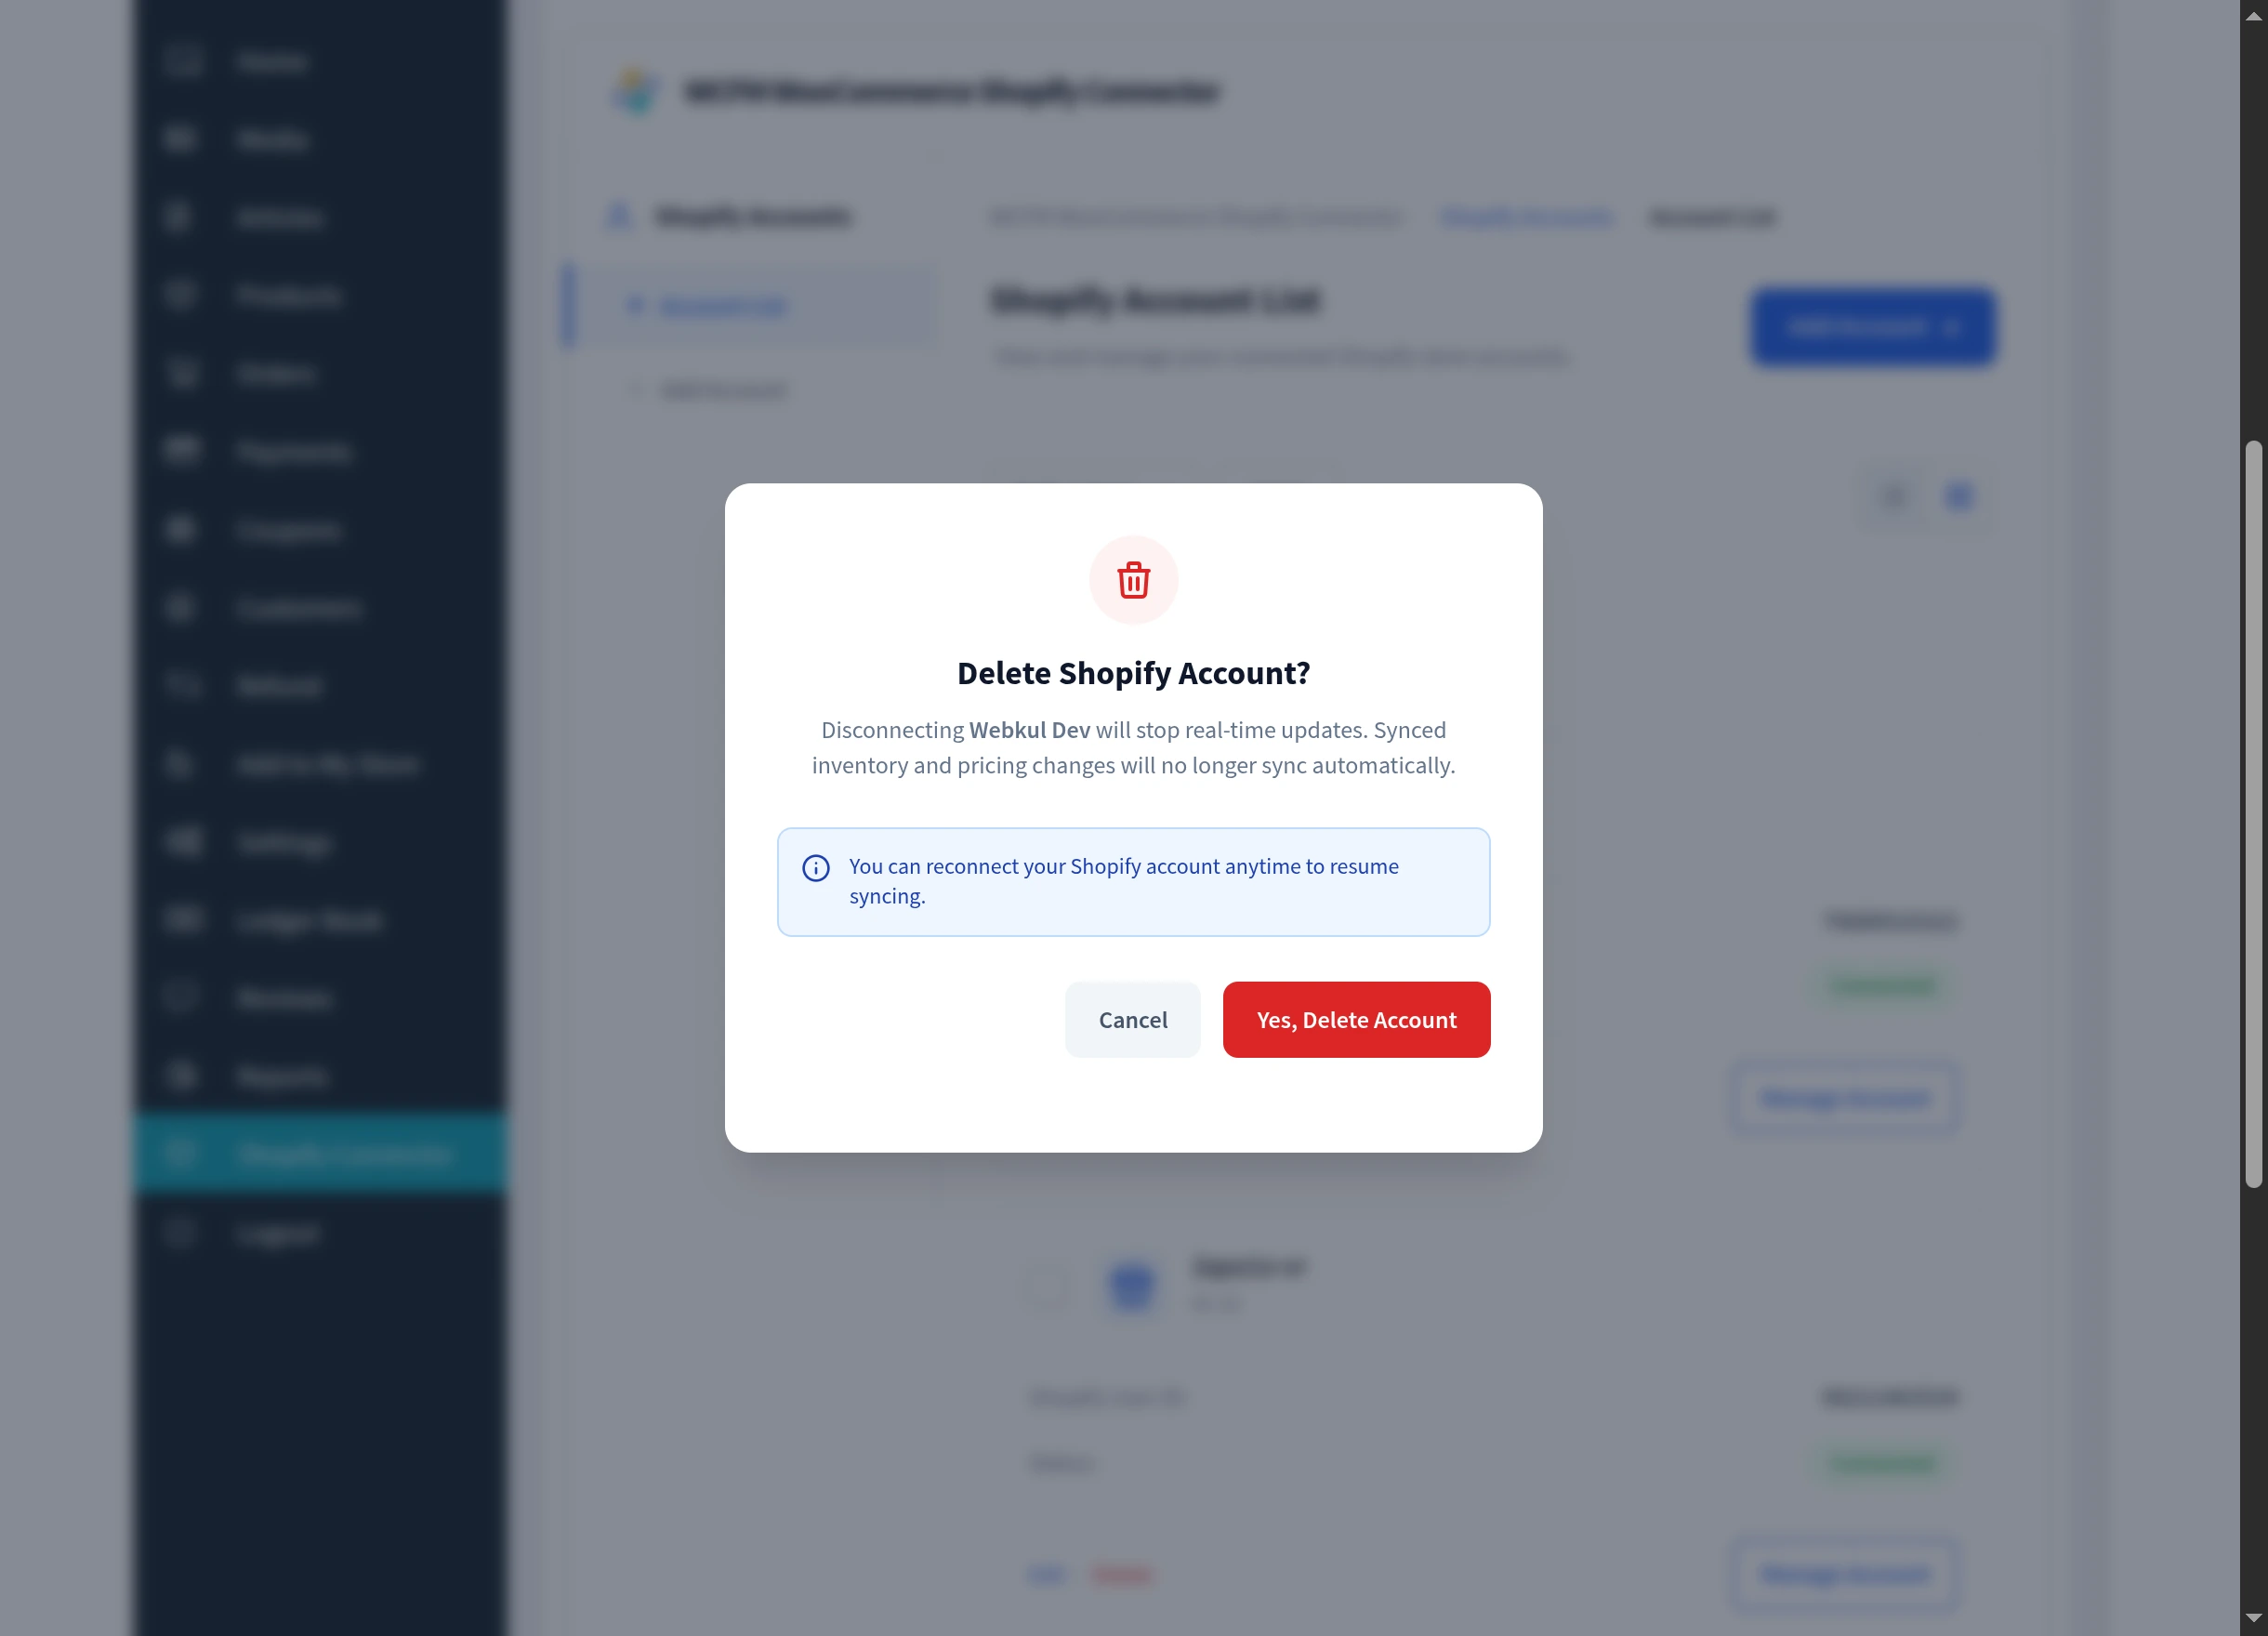
The confirmation explains exactly what happens: real-time updates stop, and synced inventory and pricing changes no longer flow automatically. Your Shopify store itself is untouched, and you can reconnect at any time.
Choose Yes, Delete Account to disconnect, or Cancel to keep it.
To remove several at once, tick the rows, choose Delete under Bulk actions and select Apply.
Next steps
Open a store with Manage Account — see Manage Account for what each tab does.