Azure AD Setup — Get Your Microsoft Keys
At a Glance
- Time: About 10 minutes.
- You will leave with: Client ID, Tenant ID, Client Secret Value, and (optional) ROPC support.
- Skill level: Beginner. No coding. Just clicks.
- You need: Access to the Azure portal with rights to register apps.
- Want the short version? Jump to the Quick Start checklist.
Why You Need This
The Power BI API does not take a plain username and password. Instead, Microsoft asks every app to register in Azure first. In return, Azure gives you three small keys: a Client ID, a Client Secret, and a Tenant ID. The plugin uses these to sign in to Power BI on your behalf.
Think of it like a hotel key card. The card only opens the rooms you have paid for. In the same way, your Azure app can only touch the Power BI data you allow.
You can finish this page in one sitting. Plan for 10 to 15 minutes. Finish all the steps before you open the Setup Wizard.
Your Scorecard
Tick each box as you go. Use this to track where you are.
- [ ] 1. Signed in to portal.azure.com
- [ ] 2. Created an app called "WooCommerce Power BI Connector"
- [ ] 3. Set the Redirect URI to the wizard URL
- [ ] 4. Copied the Client ID
- [ ] 5. Copied the Tenant ID
- [ ] 6. Copied the Client Secret Value (shown once!)
- [ ] 7. Added the five Power BI API permissions
- [ ] 8. Clicked Grant admin consent and saw green checks
- [ ] 9. (Optional) Turned on Allow public client flows for ROPC
- [ ] 10. (Optional) Enabled the Power BI tenant API settings
What You Will Collect
By the end, you should have these five items ready:
| Key | What it is for |
|---|---|
| Application (client) ID | Tells Microsoft which app is calling |
| Directory (tenant) ID | Tells Microsoft which organization you belong to |
| Client Secret (Value) | Proves your app is really yours |
| Microsoft account email | The Power BI user the plugin will act as |
| Microsoft account password (optional) | Only if you want silent auto-refresh (ROPC) |
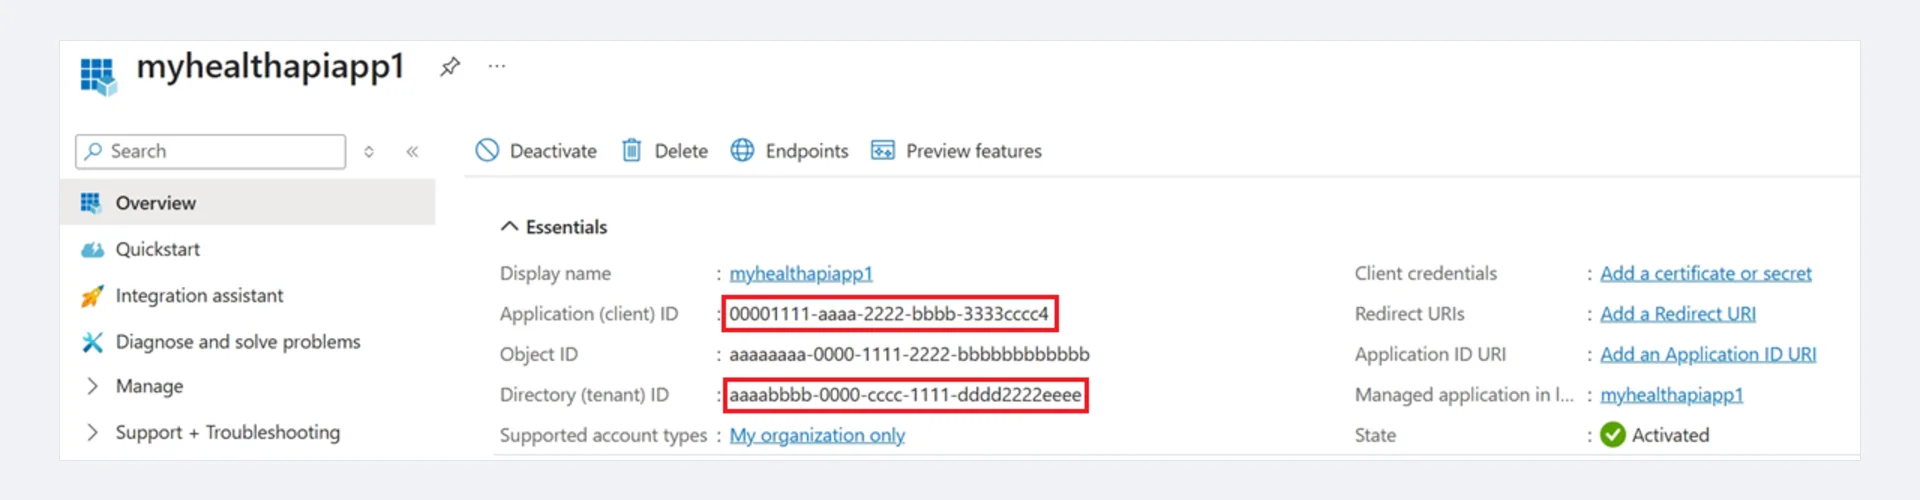 Screenshot: App registration Overview page — Application (client) ID and Directory (tenant) ID highlighted in red.
Step 1 — Sign in to the Azure Portal
First, open your browser and visit https://portal.azure.com. Then sign in with a Microsoft account that has Azure AD admin rights. If you do not have one, ask your IT admin to help. You can also sign up for a free Microsoft 365 Developer account at developer.microsoft.com.
Once you are in, type Azure Active Directory in the top search bar. Click the result.
Personal accounts will not work
You need a work or school Microsoft account. Plain Outlook or Live accounts cannot create a Power BI workspace. Use a Microsoft 365 account instead.
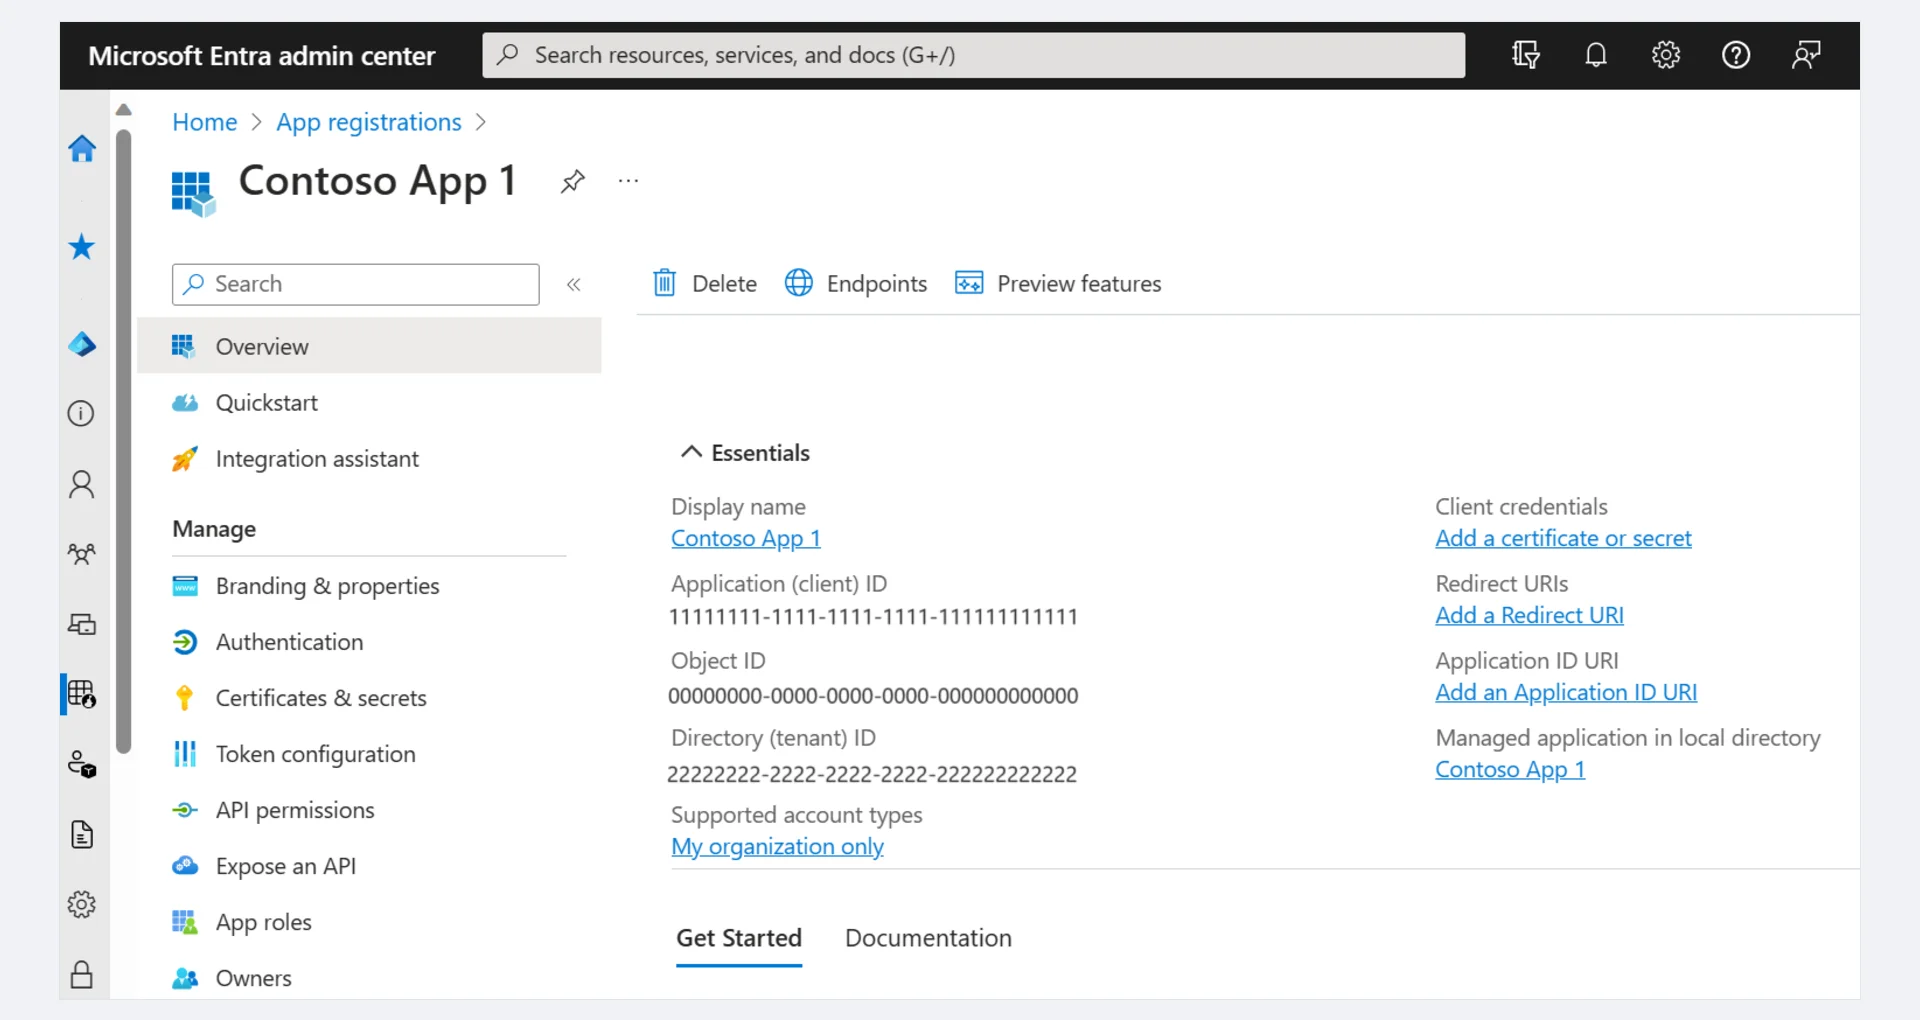 Screenshot: Microsoft Entra admin center — App registrations overview showing Client ID, Tenant ID, and left-hand navigation menu.
Step 2 — Create a New App Registration
Now you will tell Azure about the plugin. This is called an app registration.
Inside Azure Active Directory, click App registrations on the left.
Click + New registration at the top.
Fill in the form like this:
Field Value Name WooCommerce Power BI Connector(any name works)Supported account types Accounts in this organizational directory only (Single tenant) Redirect URI Select Web and enter: https://your-domain.com/wp-admin/admin.php?page=wkpbic-setup-wizard&step=3Click Register.
The Redirect URI must match exactly
Swap your-domain.com for your real WordPress site. Also, the URL must start with https://. If it does not match, OAuth will fail with the error AADSTS50011: The redirect URI does not match.
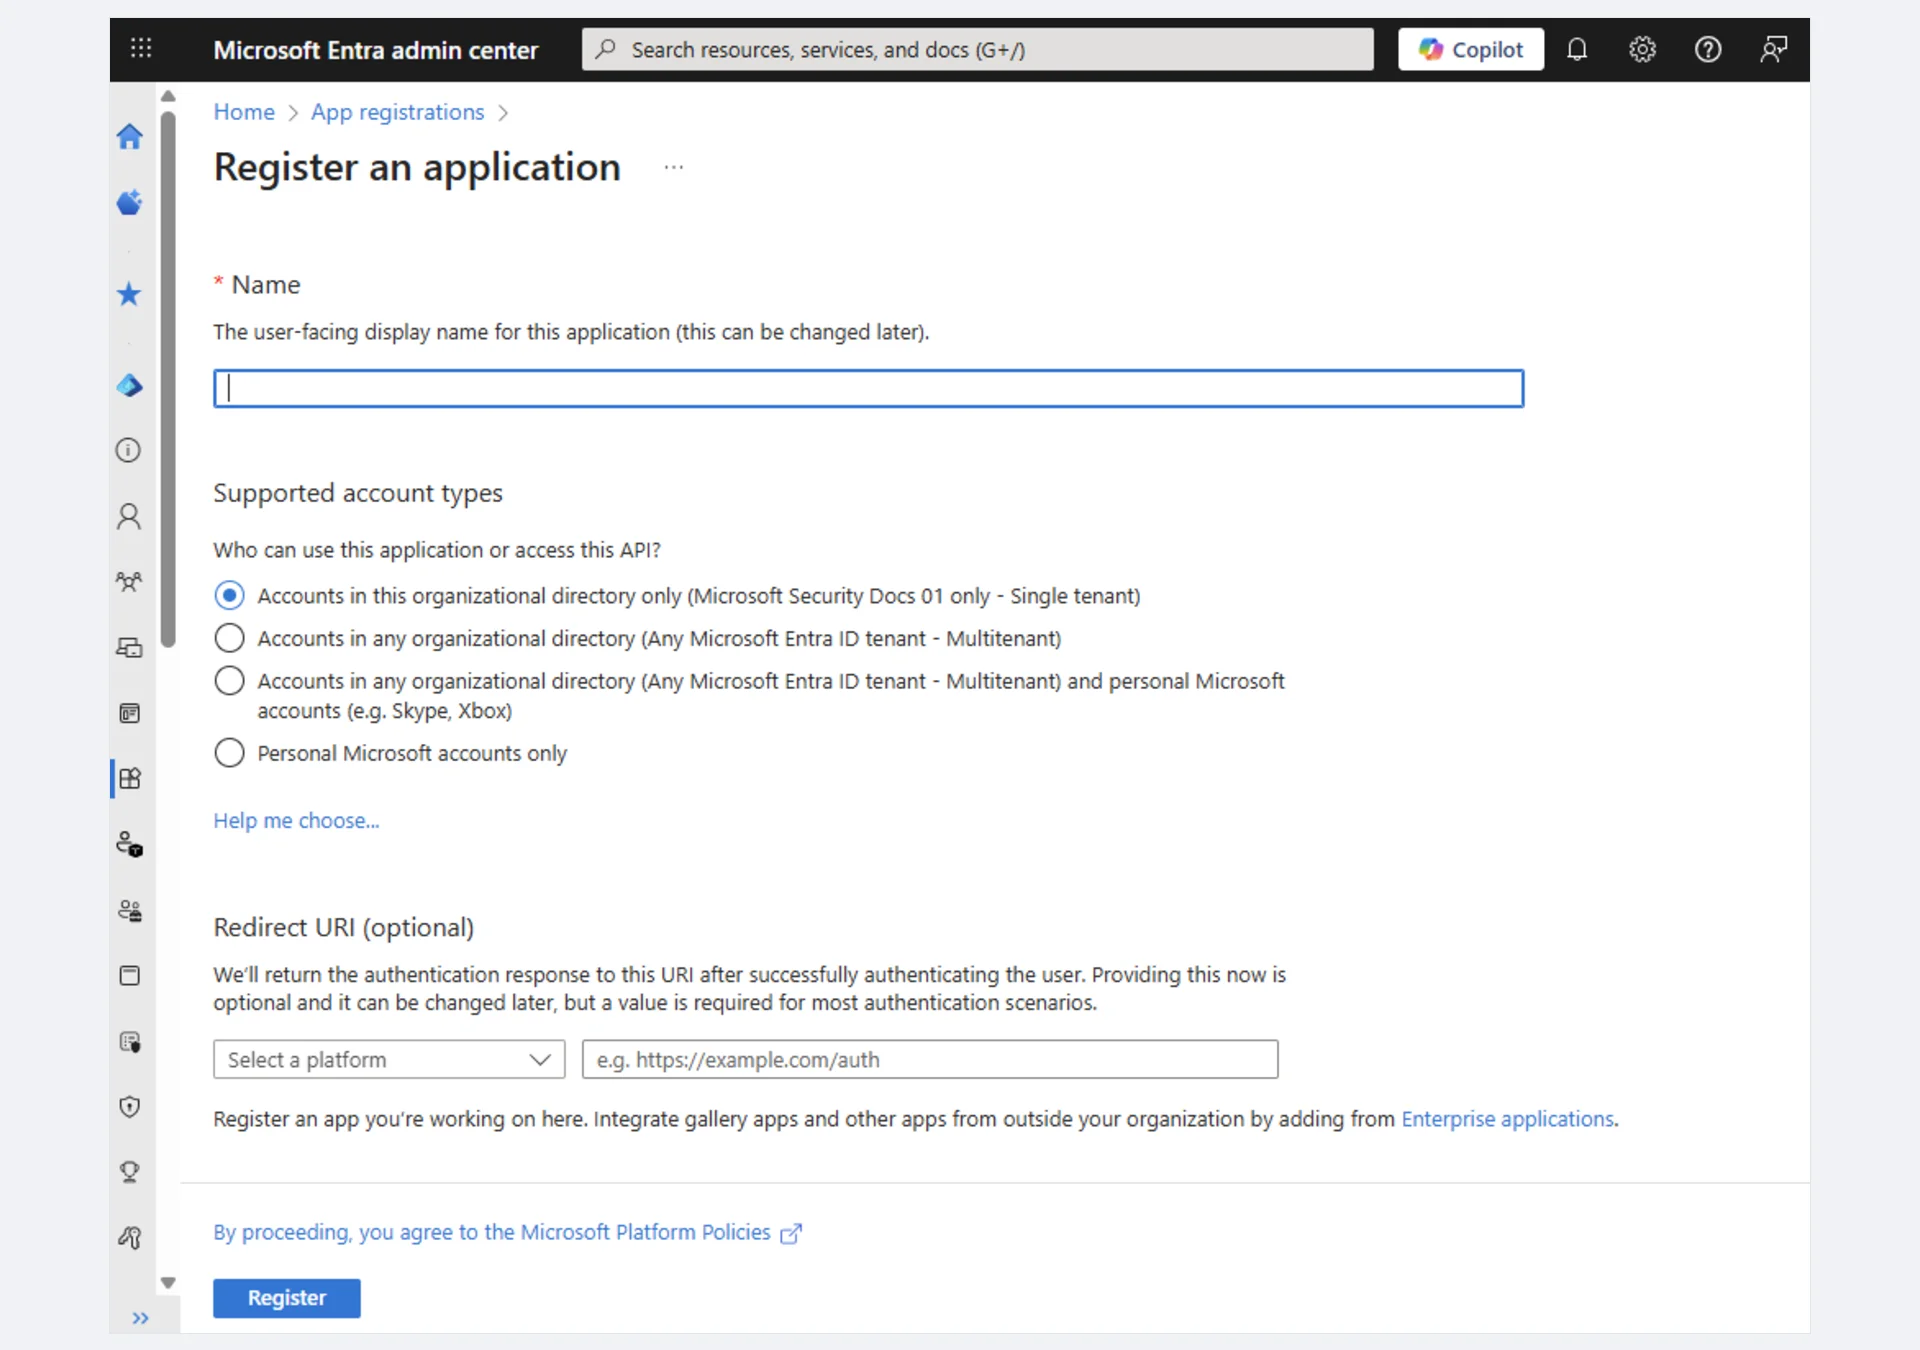 Screenshot: "Register an application" form — enter your app Name, select Supported account types, and set the Redirect URI.
Step 3 — Copy the Client ID and Tenant ID
After you click Register, Azure shows you the app's Overview page. Look for these two values and copy them now:
- Application (client) ID → this is your Client ID
- Directory (tenant) ID → this is your Tenant ID
Paste them into a safe place. You will need them in Step 2 of the Setup Wizard.
Step 4 — Create a Client Secret
Next, you need to create a secret. A secret is like a password for your app.
- On the left menu, click Certificates & secrets.
- Under Client secrets, click + New client secret.
- Give it a name, like
WC Power BI Secret. - Pick an expiration date. 24 months is a good choice. Also, set a reminder so you can rotate it later.
- Click Add.
- Copy the
Valuecolumn right away. This is your Client Secret.
You only see the Value once
Azure hides the Value as soon as you leave the page. If you miss it, you cannot get it back. You will have to delete the secret and make a new one.
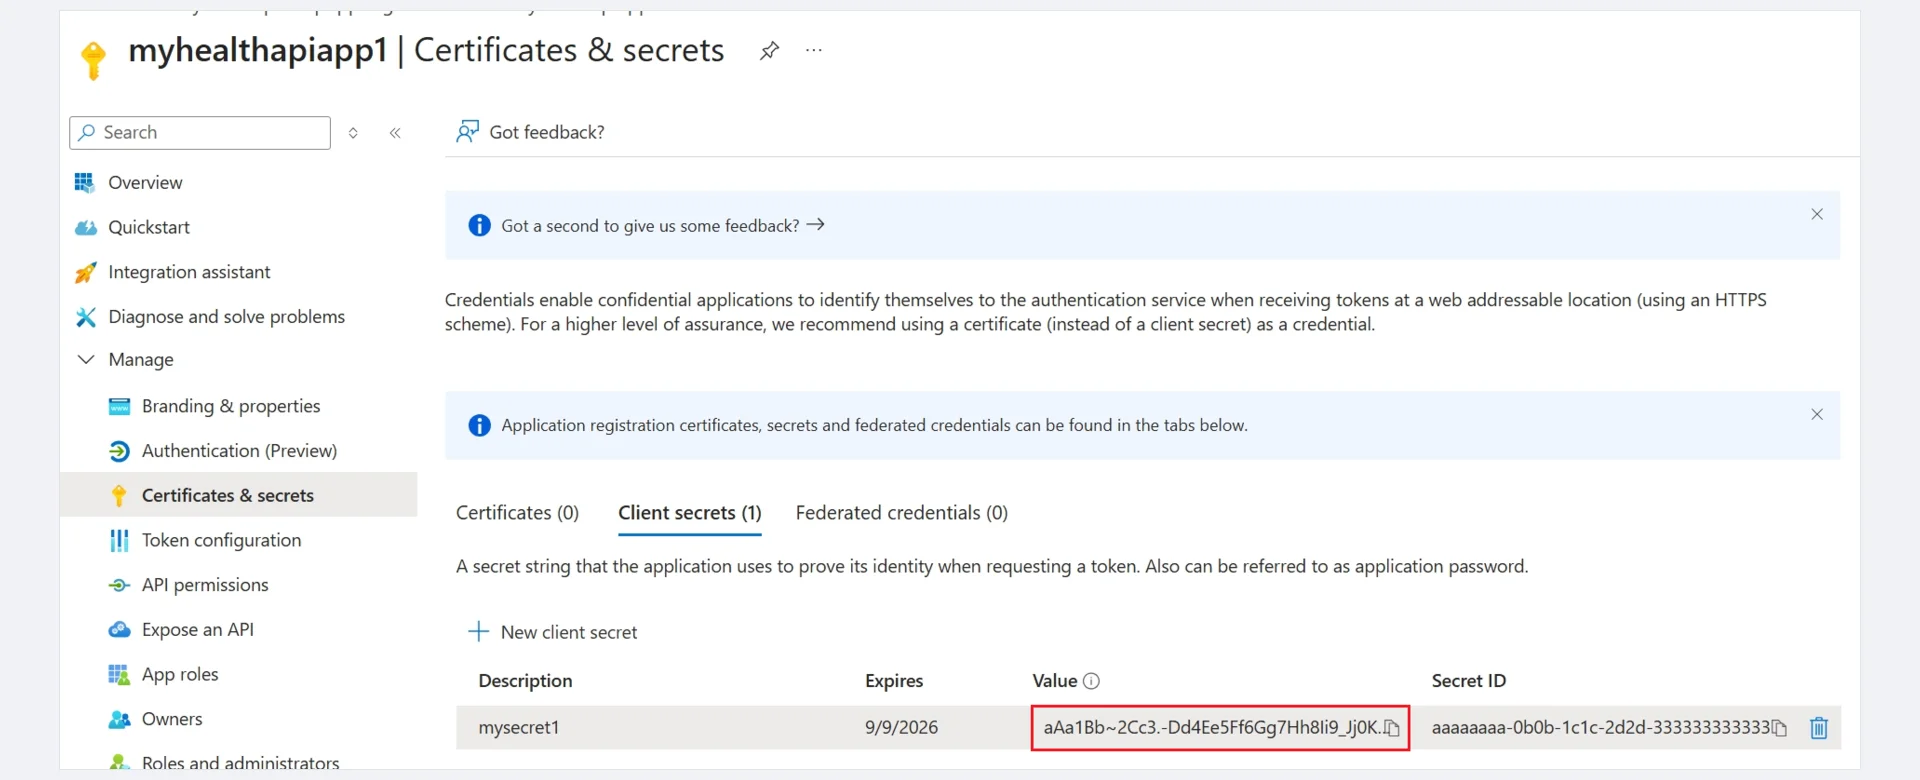 Screenshot: Certificates & secrets page — Client secrets tab with the secret Value highlighted. Copy this value immediately.
Step 5 — Grant Power BI API Permissions
Now you need to tell Azure which Power BI actions your app can take.
- On the left menu, click API permissions.
- Click + Add a permission.
- Pick Power BI Service.
- Choose Delegated permissions.
- Tick all five of these:
Dataset.ReadWrite.AllWorkspace.ReadWrite.AllReport.Read.AllDashboard.Read.AllContent.Create
- Click Add permissions.
- Back on the permissions screen, click Grant admin consent for [Your Organization]. Confirm with Yes.
After that, every permission should show a green check ✅ next to it.
Cannot see the "Grant admin consent" button?
You are signed in as a user, not an admin. You can ask your admin to click it for you. Or, you can consent per-user later during the OAuth step in the wizard.
 Screenshot: API permissions page — click "+ Add a permission" to add Power BI Service permissions, then click "Grant admin consent" for your organization.
Step 6 — Turn On ROPC (Optional but Handy)
ROPC stands for Resource Owner Password Credentials. It lets the plugin sign in on its own, without any browser redirect. So you never have to log in by hand when the token expires. Scheduled sync also runs more reliably.
This step is optional. However, we strongly recommend it for production sites.
- On the left menu, click Authentication.
- Scroll to Advanced settings → Allow public client flows.
- Toggle it to Yes.
- Click Save at the top.
ROPC and MFA do not mix
ROPC will not work if your Microsoft account has Multi-Factor Authentication (MFA) turned on. So, create a dedicated service account without MFA. Alternatively, skip this step and use interactive OAuth only.
Step 7 — Turn On the Power BI API (If Needed)
Your Power BI tenant admin must also allow apps to call the Power BI REST API. This is a one-time change.
- Open https://app.powerbi.com and sign in.
- Click the gear icon → Admin portal → Tenant settings.
- Find Developer settings → Allow service principals to use Power BI APIs. Turn it on.
- You can scope it to a security group if you want more control.
- Click Apply.
You only need to do this once for your whole tenant.
Your Final Checklist
By now you should have all five values ready:
| Key | Where you got it |
|---|---|
| Client ID | App registration → Overview |
| Tenant ID | App registration → Overview |
| Client Secret (Value) | App registration → Certificates & secrets |
| Microsoft Email | The account you use for Power BI |
| Microsoft Password (optional) | Same account's password (for ROPC) |
Save all five in a password manager. You will paste them into the wizard next.
What's Next
Now that you have your keys, head over to Power BI Account Setup. Then run the Setup Wizard.
References
- Register an app in Microsoft Entra ID — Official Microsoft guide for app registration
- Create a service principal in Azure — Client secret creation and API permissions
- Microsoft identity provider setup — Microsoft account identity provider configuration
- Power BI REST APIs — API reference for Power BI Service
- Embed Power BI with service principal — Service principal authentication for Power BI