Install the Plugin
At a Glance
- Time: About 2 minutes (plus fixing any missing prerequisites).
- What you do: Check your system → upload the ZIP → activate → open the wizard.
- Up next: Azure AD Setup
- Want the short version? See the Quick Start.
Pre-flight Checklist
Run through this list first. It only takes a minute. However, each item saves a lot of time later.
- [ ] PHP 7.4 or higher (run
php -vto check) - [ ] WordPress 6.7 or higher
- [ ] WooCommerce 10.0 or higher, and active
- [ ] HPOS turned on at
WooCommerce → Settings → Advanced → Features - [ ] Site runs on HTTPS
- [ ] PHP has
openssl,curl, andjsonextensions - [ ] You have a Microsoft account with Azure AD rights
- [ ] You have a Power BI account (Pro if you want to embed reports)
- [ ]
max_execution_timeis at least 300 seconds for big stores
System Requirements
Here is the full version table, so you know what works.
| Requirement | Minimum | Tested Up To |
|---|---|---|
| PHP | 7.4 | 8.4 |
| WordPress | 6.7 | 7.0 |
| WooCommerce | 10.0 | 10.6 |
You also need these three things:
- WooCommerce must be installed and active before you turn on this plugin.
- HPOS (High-Performance Order Storage) must be on. If not, some data will not sync.
- HTTPS must be on. Microsoft will block OAuth on plain HTTP.
Your server also needs to reach these Microsoft URLs:
https://login.microsoftonline.comhttps://api.powerbi.comhttps://graph.microsoft.com
HPOS is a must
This plugin expects HPOS. If you leave HPOS off, you will see a warning and some entities will not work. Turn it on first.
How to Install the Plugin
You have three easy ways to install. Pick the one that fits your workflow.
Option 1 — Upload the ZIP (Easiest)
- Grab
woocommerce-power-bi-connector.zipfrom your Webkul account. - In WordPress, go to
Plugins → Add Newand click Upload Plugin. - Click Choose File, select the ZIP, and click Install Now.
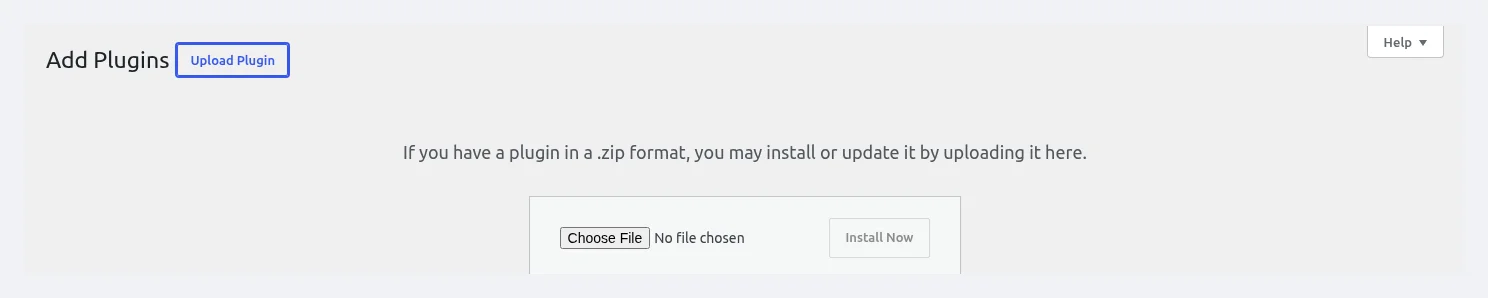 Add Plugins — click Upload Plugin, choose the ZIP file, and click Install Now.
- Wait for "Plugin installed successfully." and click Activate Plugin.
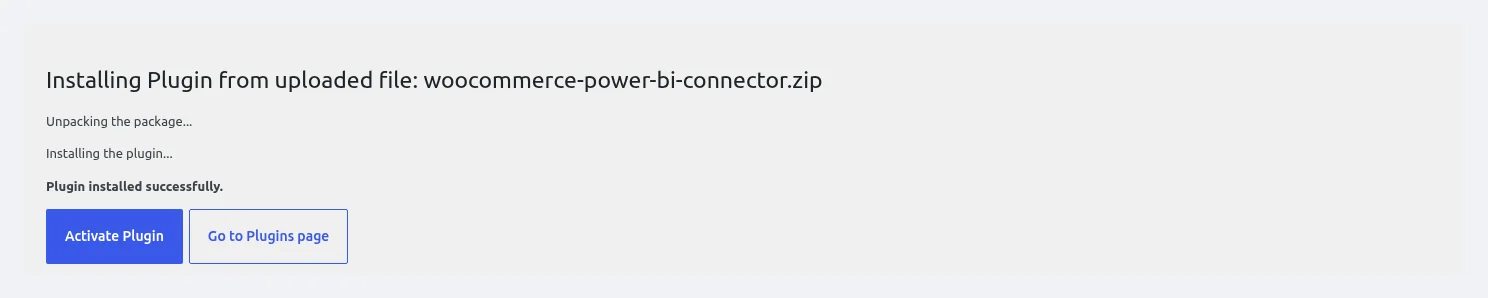 Installing woocommerce-power-bi-connector.zip — click Activate Plugin after installation completes.
Option 2 — FTP or SFTP
Unzip
woocommerce-power-bi-connector.zipon your computer.Open your FTP/SFTP client (FileZilla, Cyberduck, etc.) and connect to your server.
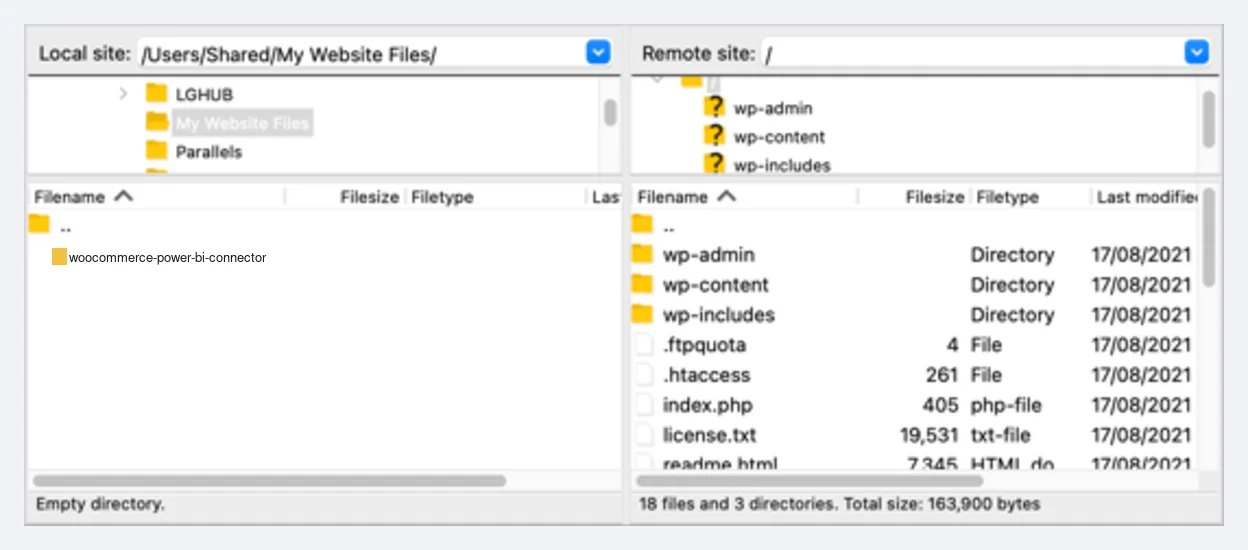 FileZilla — Local site (your computer) on the left, Remote site (your server) on the right.
- On the remote side, navigate to
/wp-content/plugins/. Then drag the unzippedwoocommerce-power-bi-connectorfolder from the local side and drop it into the plugins directory.
 Right-click the plugin folder on the left and select Upload — or drag it to the /wp-content/plugins/ folder on the right.
Open your WordPress admin panel and go to
Plugins → Installed Plugins.Search for WooCommerce Power BI Connector in the plugin list and click Activate.
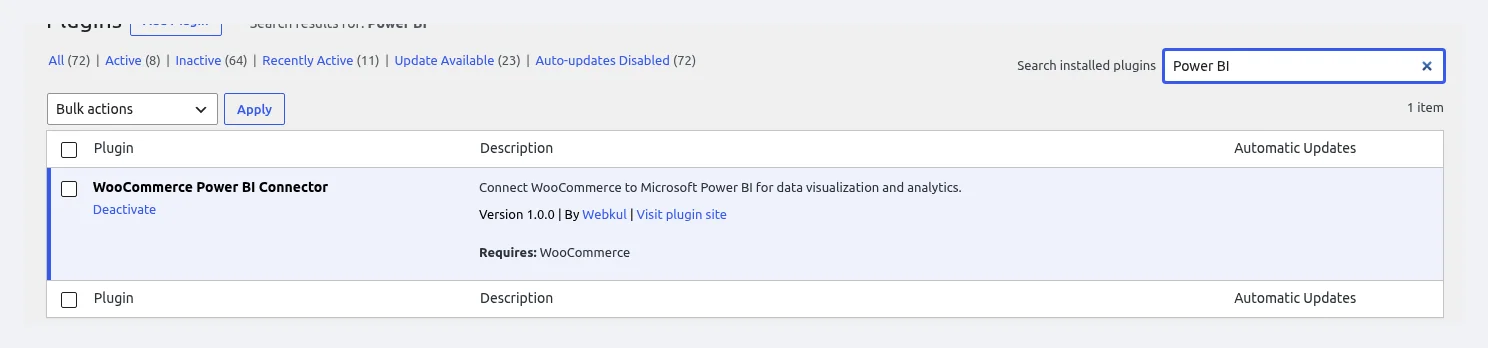 Search "Power BI" — find WooCommerce Power BI Connector (Version 1.0.0 by Webkul) and click Activate.
Option 3 — WP-CLI (For Developers)
If you live in the terminal, run this one line:
wp plugin install /path/to/woocommerce-power-bi-connector.zip --activate
What Happens After You Activate
A few things happen right away. Here is what you will see.
First, a new menu called Power BI Connector shows up under Webkul WC Addons. It includes these pages:
- Dashboard
- Settings
- Setup Wizard
- Workspaces
- Datasets
- Tables
- Sync
- Export Center
- Data Load
- Reports
- Alerts
- Logs
- Access Control
- Query Builder
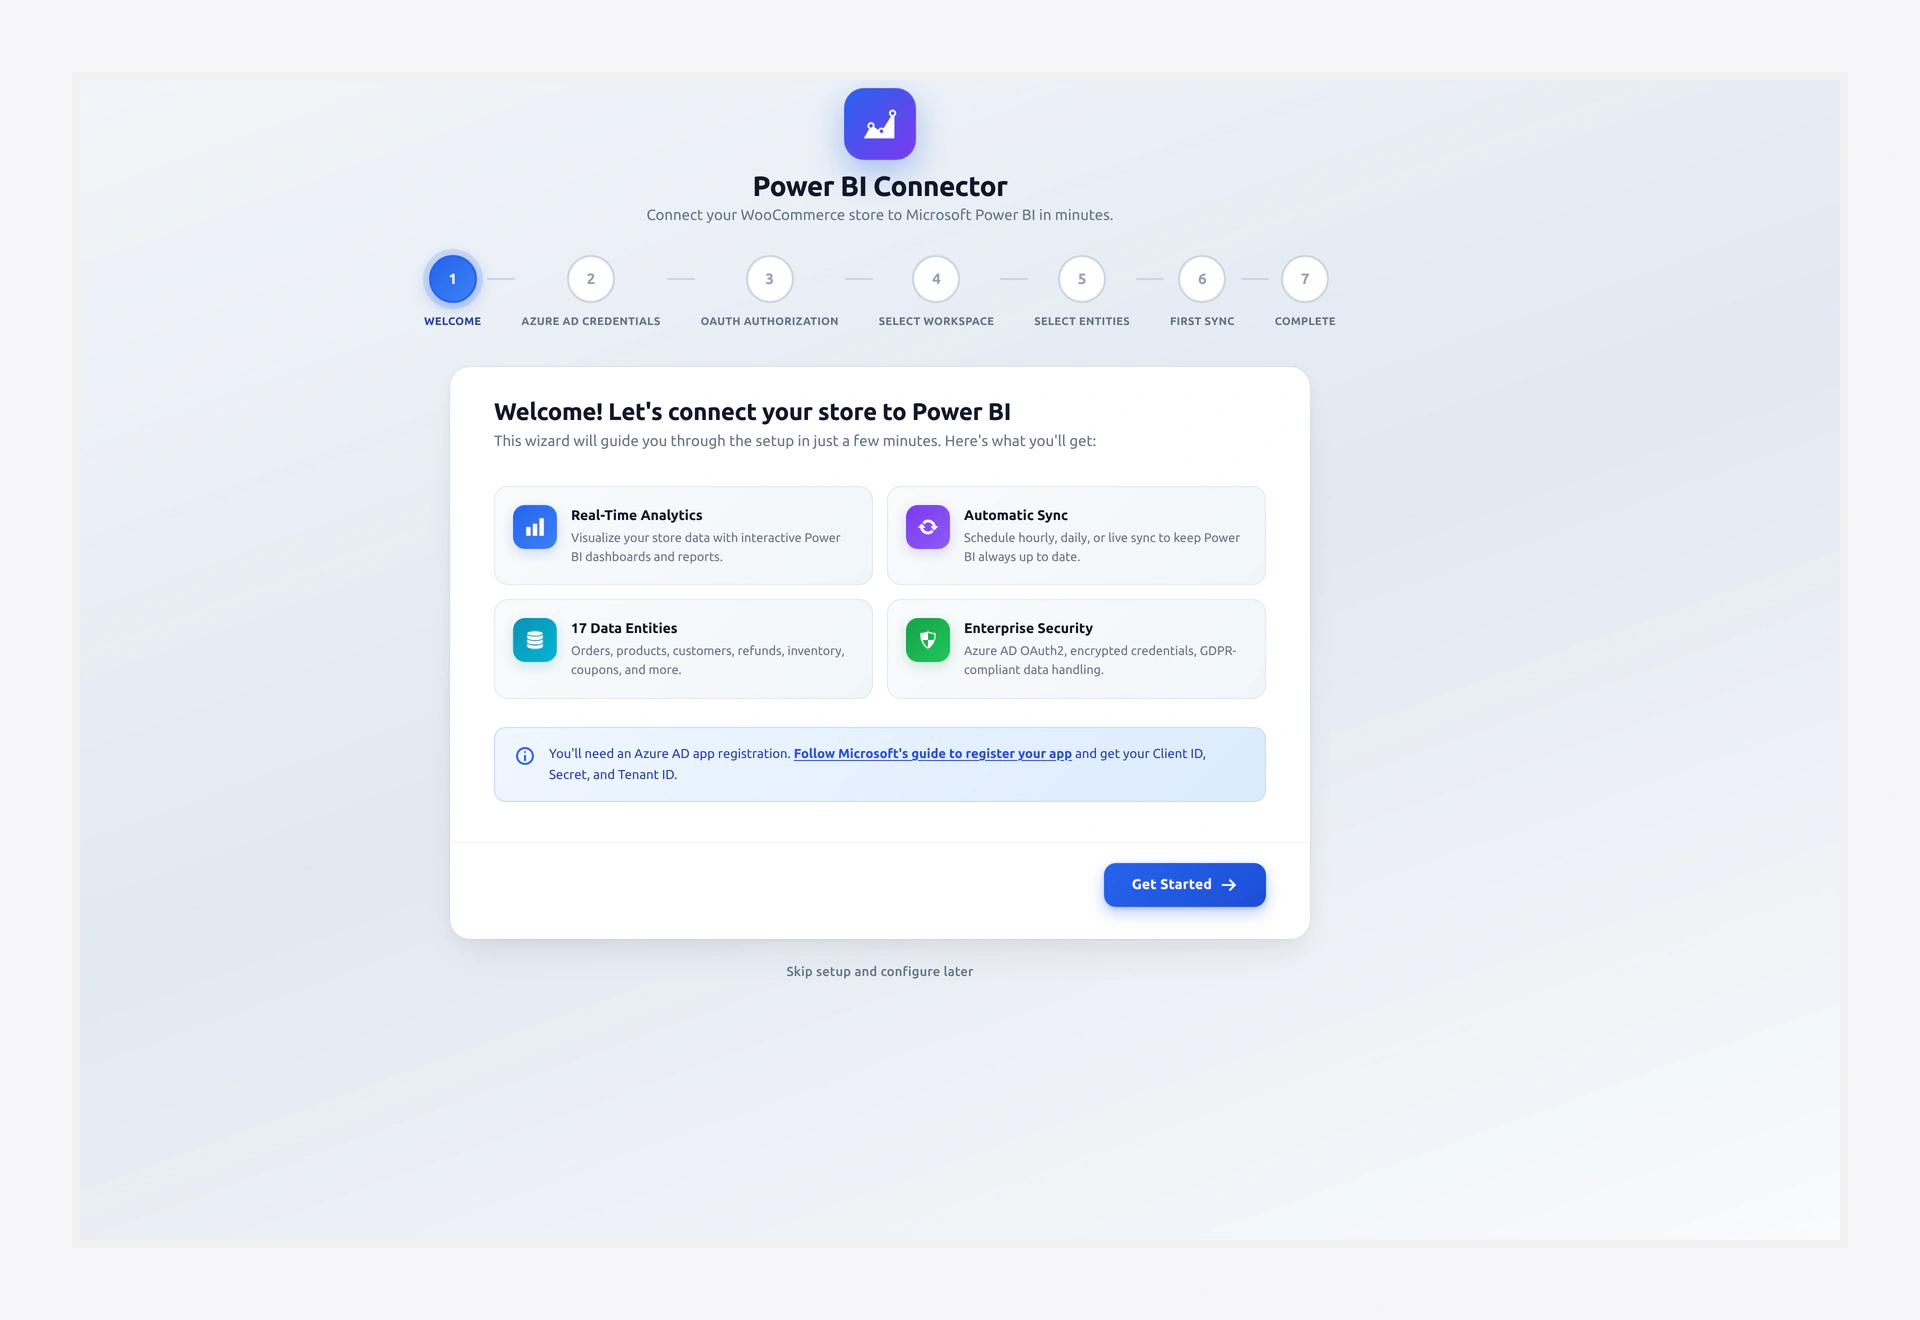 After activation, the Setup Wizard opens automatically.
Next, the Setup Wizard opens by itself. If it does not, just go to:
https://your-domain.com/wp-admin/admin.php?page=wkpbic-setup-wizard
Finally, the plugin creates a few database tables for logs, profiles, and the retry queue. It also gives only Administrators full access. You can change that later in Access Control.
Where to Go Next
You cannot use the plugin until you have your Microsoft keys. So finish these two pages next:
- Azure AD Setup — get your Client ID, Secret, and Tenant ID.
- Power BI Account Setup — get your workspace ready.
Then run the Setup Wizard to finish.
How to Uninstall or Reset
Sometimes you need to start over. Here is what each action does.
- Deactivate keeps all your data. Profiles, logs, and keys stay put.
- Uninstall (Delete from the Plugins screen) removes the files. By default, it keeps your settings in case you reinstall.
- Reset plugin (under
Settings → Advanced) wipes everything — keys, profiles, logs — and starts fresh.
Reset wipes everything
Reset is final. You cannot undo it. Make sure you really want a clean slate first.