Power BI Account Setup
Before the plugin can push any data, your Power BI account needs to be ready. This page shows you what to do on the Power BI side. It takes about five minutes.
1. Pick the Right Power BI License
Power BI has several plans. Your choice depends on what you want to do. Here is a quick breakdown:
| License | Good for | Notes |
|---|---|---|
| Power BI (Free) | Personal use and testing | You can push data and build reports. However, you cannot share or embed them with others. |
| Power BI Pro | Sharing and embedding in WordPress | This is what most users need. Required for the Report Embedding feature. |
| Power BI Premium Per User (PPU) | Bigger datasets and AI features | Also supports sharing and embedding with higher limits. |
| Power BI Premium (Capacity) | Large teams and anonymous embedding | Only needed if you want to show reports to visitors who are not signed in. |
If you plan to embed Power BI reports inside WordPress, you need at least Power BI Pro. You also need Pro for each person who will view the report, unless your workspace is on Premium capacity.
To start a trial or buy a license, head to Power BI Pricing.
2. Sign in to Power BI Service
Next, open https://app.powerbi.com and sign in. Use the same Microsoft account you used in the Azure AD Setup guide. If you see a trial prompt, accept it.
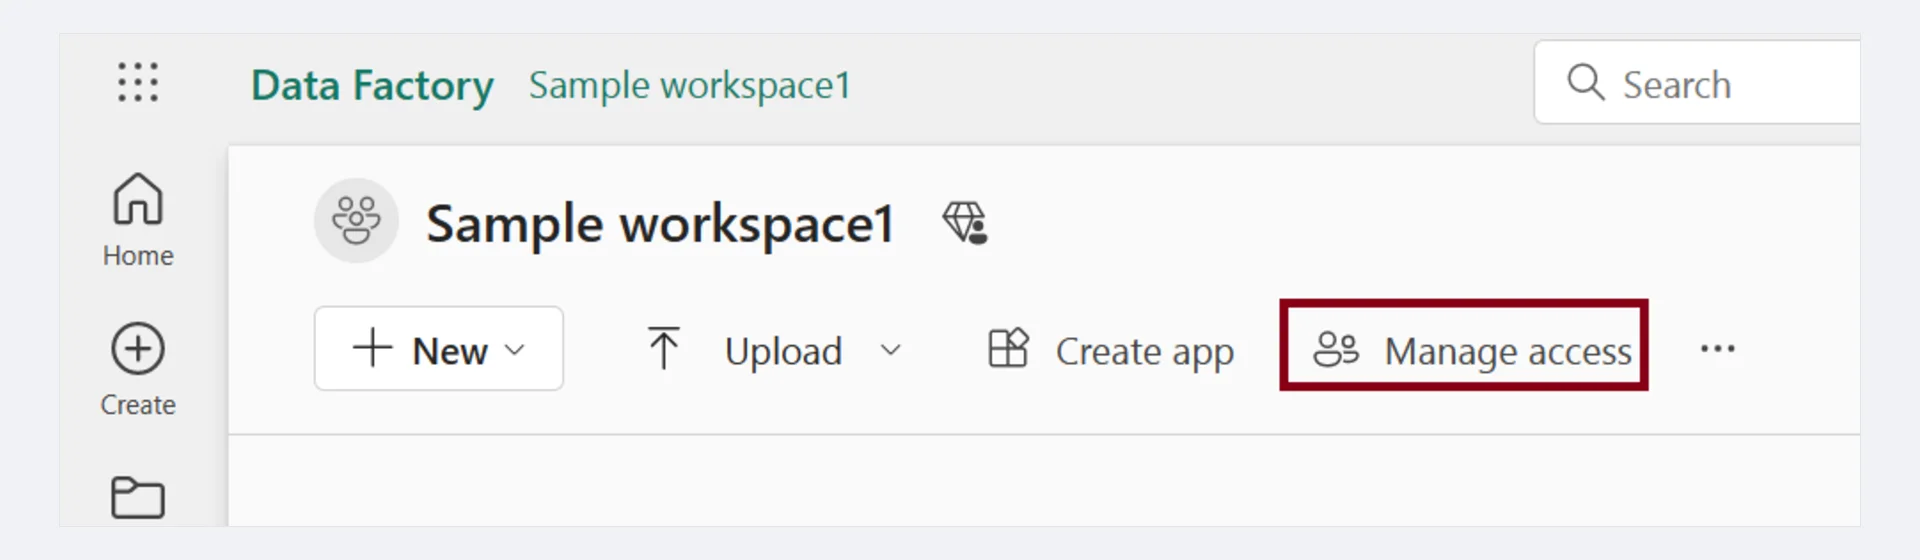 Screenshot: Microsoft Fabric workspace page — click "Manage access" on the command bar to control who can use this workspace.
3. Create or Pick a Workspace
A workspace is like a folder in Power BI. It holds datasets, reports, and dashboards. The plugin pushes all your WooCommerce data into one workspace, so you need to pick one first.
Create a new workspace
- In the Power BI sidebar, click Workspaces → + New workspace.
- Give it a clear name, for example,
WooCommerce Store Analytics. - Add a description if you want.
- Under Advanced, pick the license mode that matches your plan.
- Click Apply.
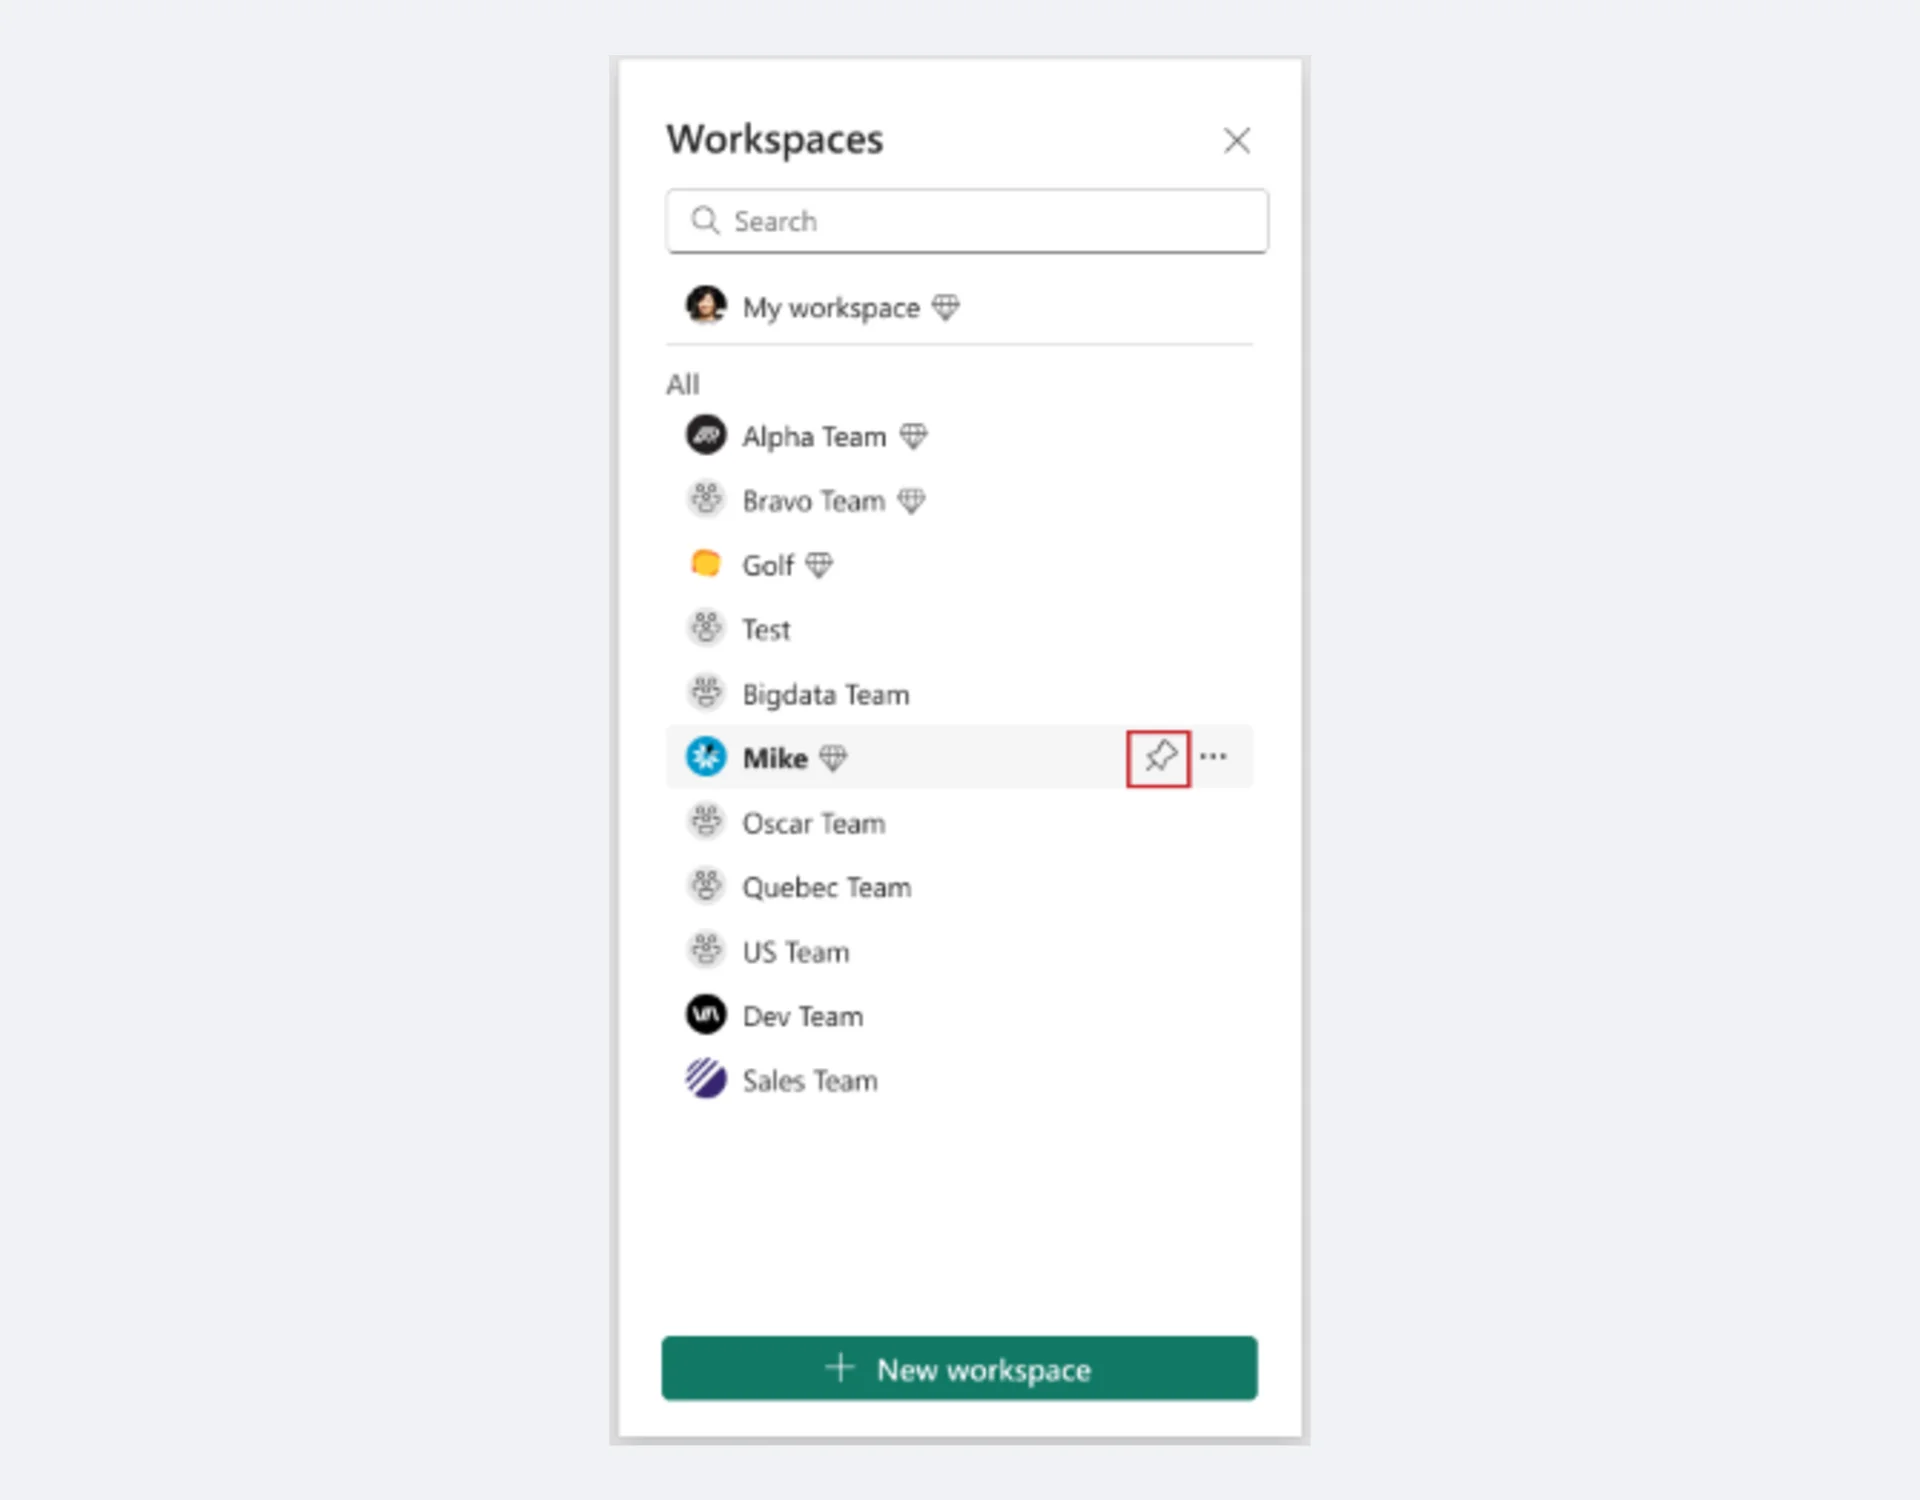 Screenshot: Workspaces panel in Microsoft Fabric — click "+ New workspace" at the bottom to create a new workspace.
Or use a workspace you already have
You can also let the Setup Wizard list your existing workspaces. Just pick one from the dropdown. Make sure you are Admin or Member of that workspace, though.
Do not use "My Workspace"
The default "My Workspace" does not work well with API-based apps. Always create a fresh workspace for this plugin.
4. Check Your Workspace Permissions
Open the workspace and click Access in the top-right corner. Make sure your Microsoft account has the right role. The plugin needs write access to create datasets and push rows.
| Role | Can the plugin push data? |
|---|---|
| Admin | ✅ Yes |
| Member | ✅ Yes |
| Contributor | ⚠️ Partially |
| Viewer | ❌ No |
If you are only a Viewer, ask the workspace owner to bump you up to Member or Admin.
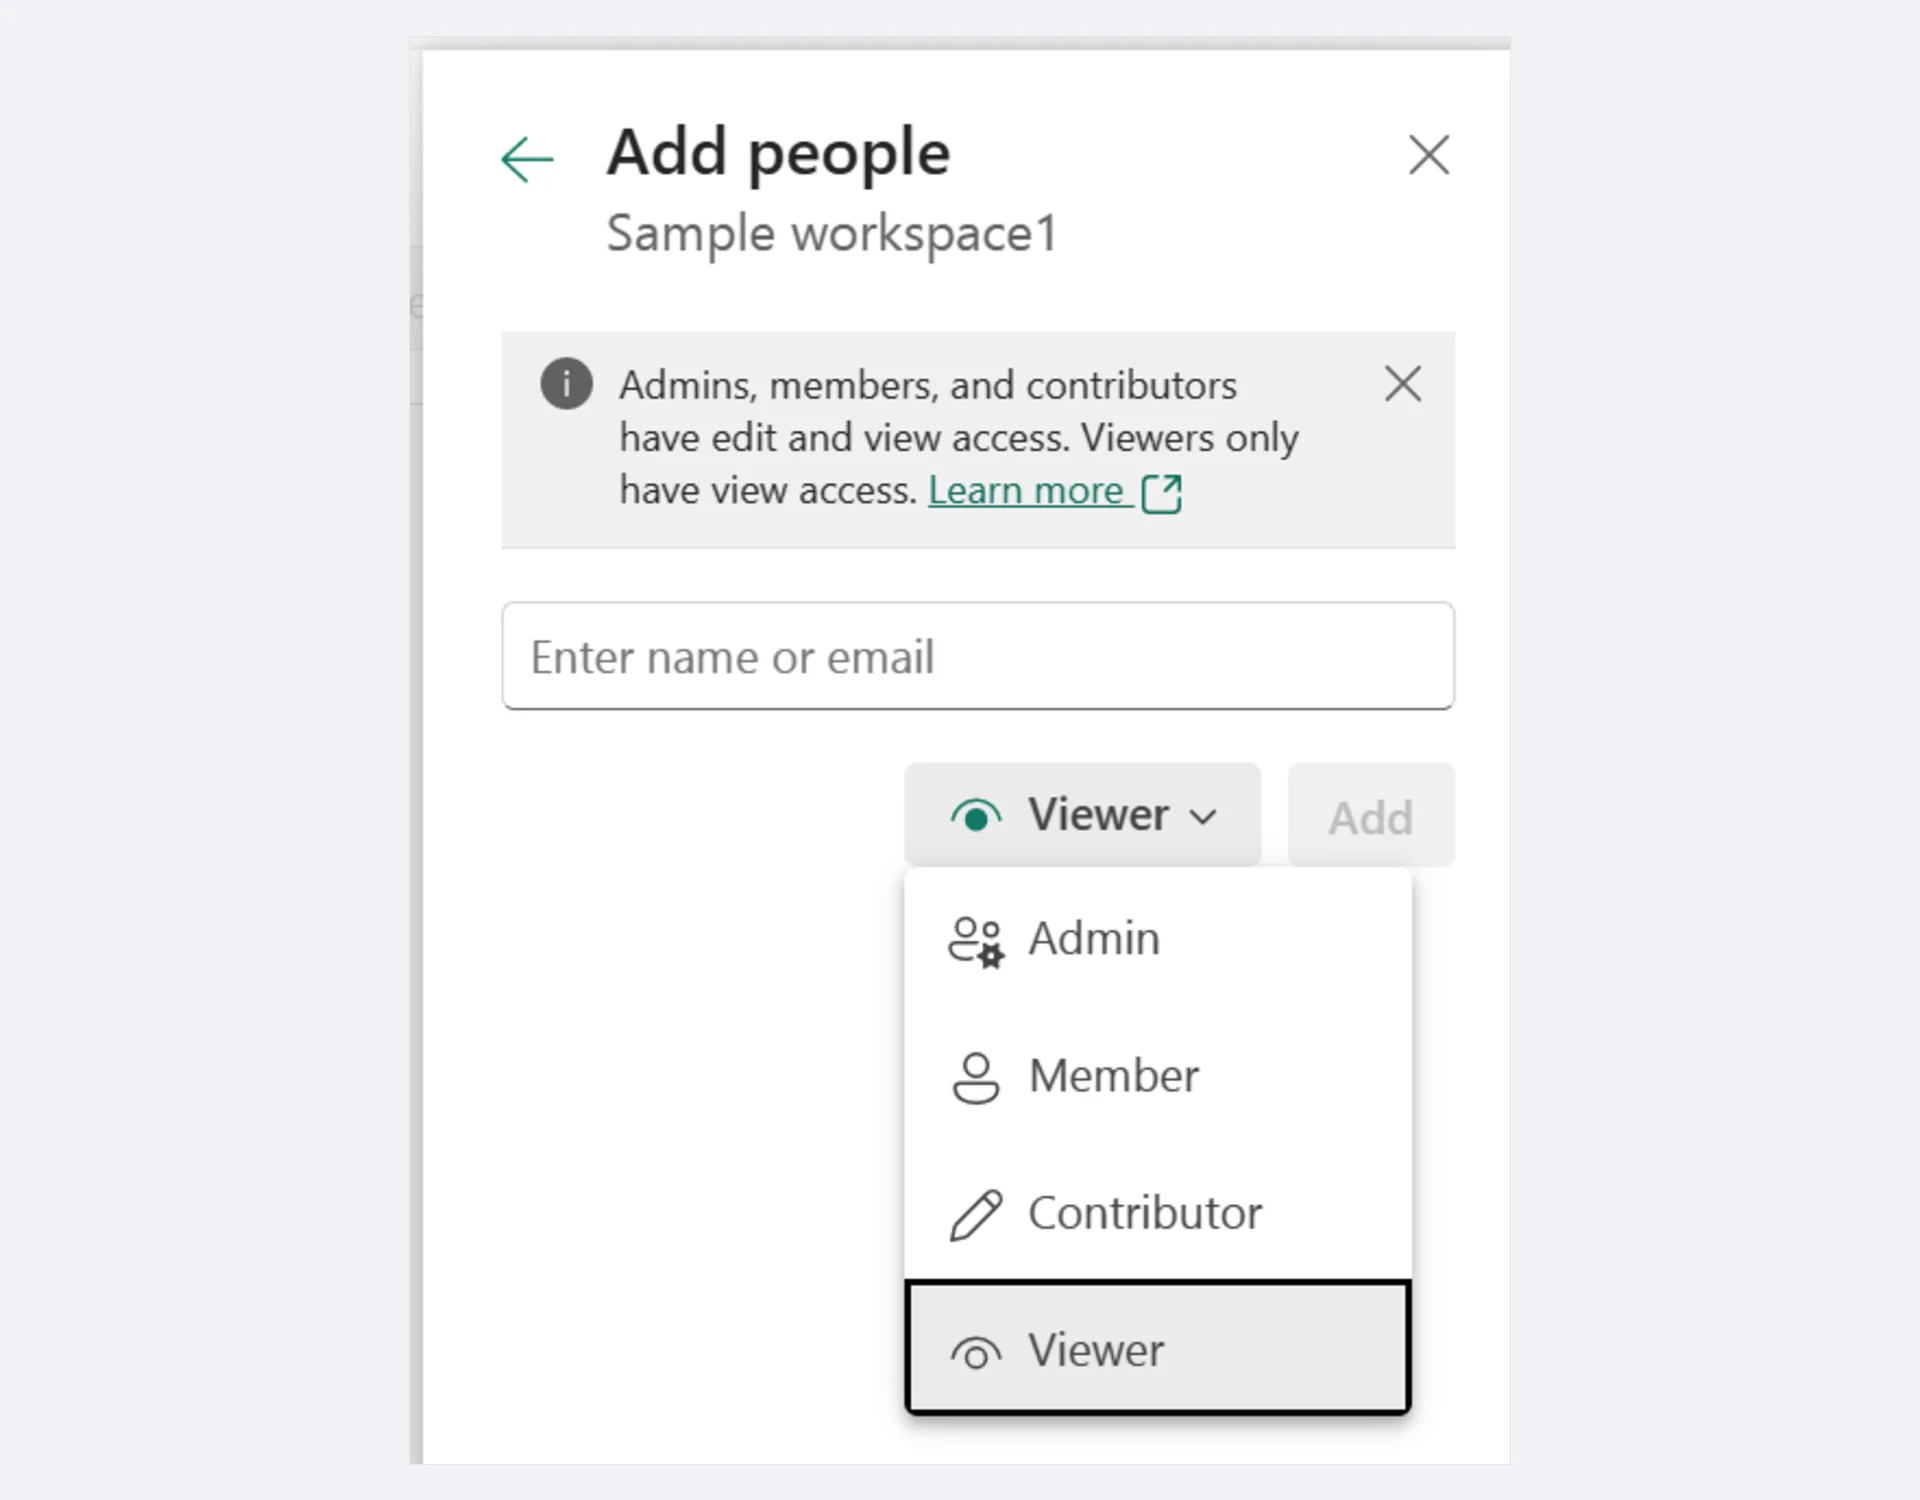 Screenshot: "Add people" panel — enter a name or email and select a role (Admin, Member, Contributor, or Viewer) from the dropdown.
5. Enable the Power BI API (Tenant Admin)
If your company shares a Power BI tenant, your tenant admin needs to allow API access once. Here is how:
- Open https://app.powerbi.com.
- Click the gear icon → Admin portal. (You must be a Power BI tenant admin.)
- Click Tenant settings.
- Turn on these toggles:
- Allow service principals to use Power BI APIs (recommended)
- Allow service principals to create and use profiles
- Embed content in apps
- Create workspaces (new workspace experience)
- Scope them to a security group if you want fine-grained control.
- Click Apply at the bottom.
You only need to do this once for the whole tenant.
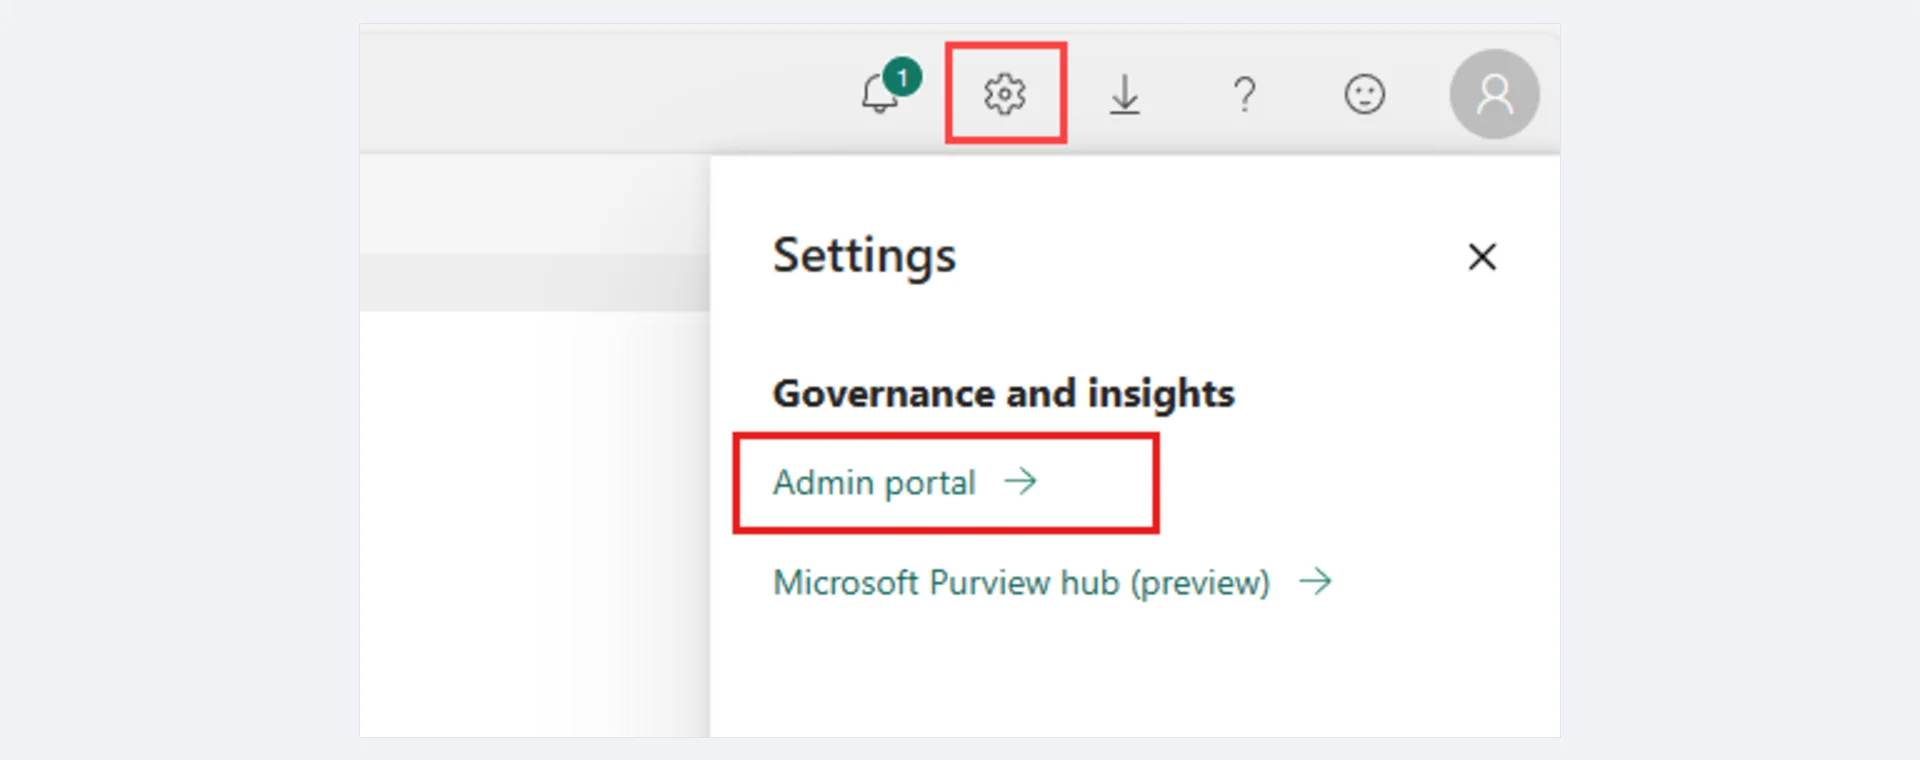 Screenshot: Click the gear icon in the top-right corner, then select "Admin portal" under Governance and insights to open Tenant settings.
6. Quick Health Check
Want to make sure your setup can reach Power BI? Open your browser and visit:
https://api.powerbi.com/v1.0/myorg/groups
You should see a 401 Unauthorized JSON response. That is a good sign. It means the endpoint is reachable. The plugin will supply the real token later.
Your Pre-Wizard Checklist
Before you run the Setup Wizard, tick every box:
- [ ] Microsoft account with a Power BI license (Pro if you want embedding)
- [ ] A workspace is ready (or you will create one in the wizard)
- [ ] You are Admin or Member of that workspace
- [ ] Tenant API access is on (or your admin agreed to turn it on)
- [ ] Your Azure AD keys are in hand — see Azure AD Setup
What's Next
You are ready to go. Head to the Setup Wizard to finish the configuration.
References
- Sign in to Power BI Service — How to sign in and navigate the Power BI Service
- Create a workspace in Power BI — Create and configure workspaces
- Workspace roles and permissions — Admin, Member, Contributor, and Viewer roles
- Give users access to workspaces — Manage workspace access in Microsoft Fabric
- Developer admin settings — Enable service principals and API access in Tenant settings
- Power BI pricing — Compare Free, Pro, PPU, and Premium plans