Quick Start — Up and Running in 5 Minutes
Who this page is for
You know WordPress. You know Power BI. You just want the short version. If you get stuck, every step links to the full guide.
The Big Picture
Here is the whole setup on one page:
| Step | Task | Time | Guide |
|---|---|---|---|
| 1 | Check your system | 1 min | Installation |
| 2 | Install and activate the plugin | 1 min | Installation |
| 3 | Create an Azure app and copy the keys | 10 min | Azure AD Setup |
| 4 | Get your Power BI workspace ready | 2 min | Power BI Setup |
| 5 | Run the Setup Wizard (7 steps) | 5 min | Setup Wizard |
| 6 | Trigger the first sync | 2–10 min | Sync |
| Total | ~20 min |
Before You Start
Check these boxes first. They save you headaches later.
- [ ] WordPress 6.7 or higher
- [ ] WooCommerce 10.0 or higher (active)
- [ ] PHP 7.4 or higher
- [ ] HTTPS is turned on
- [ ] HPOS is turned on (
WooCommerce → Settings → Advanced → Features) - [ ] You have a Microsoft work or school account
- [ ] You can sign in to the Azure portal
- [ ] You have Power BI Pro (only if you want to embed reports)
The 5 Keys You Will Collect
Grab these before you open the Setup Wizard. Keep them in a password manager.
| # | Key | Where to find it |
|---|---|---|
| 1 | Client ID | Azure → App registrations → Overview |
| 2 | Tenant ID | Azure → App registrations → Overview |
| 3 | Client Secret Value | Azure → Certificates & secrets (shown only once) |
| 4 | Microsoft Email | The email you use for Power BI |
| 5 | Microsoft Password (optional) | Only for silent auto-refresh (no MFA) |
Copy the Client Secret right away
Azure shows the Value only once. If you close the tab, you lose it. Then you have to delete the secret and make a new one.
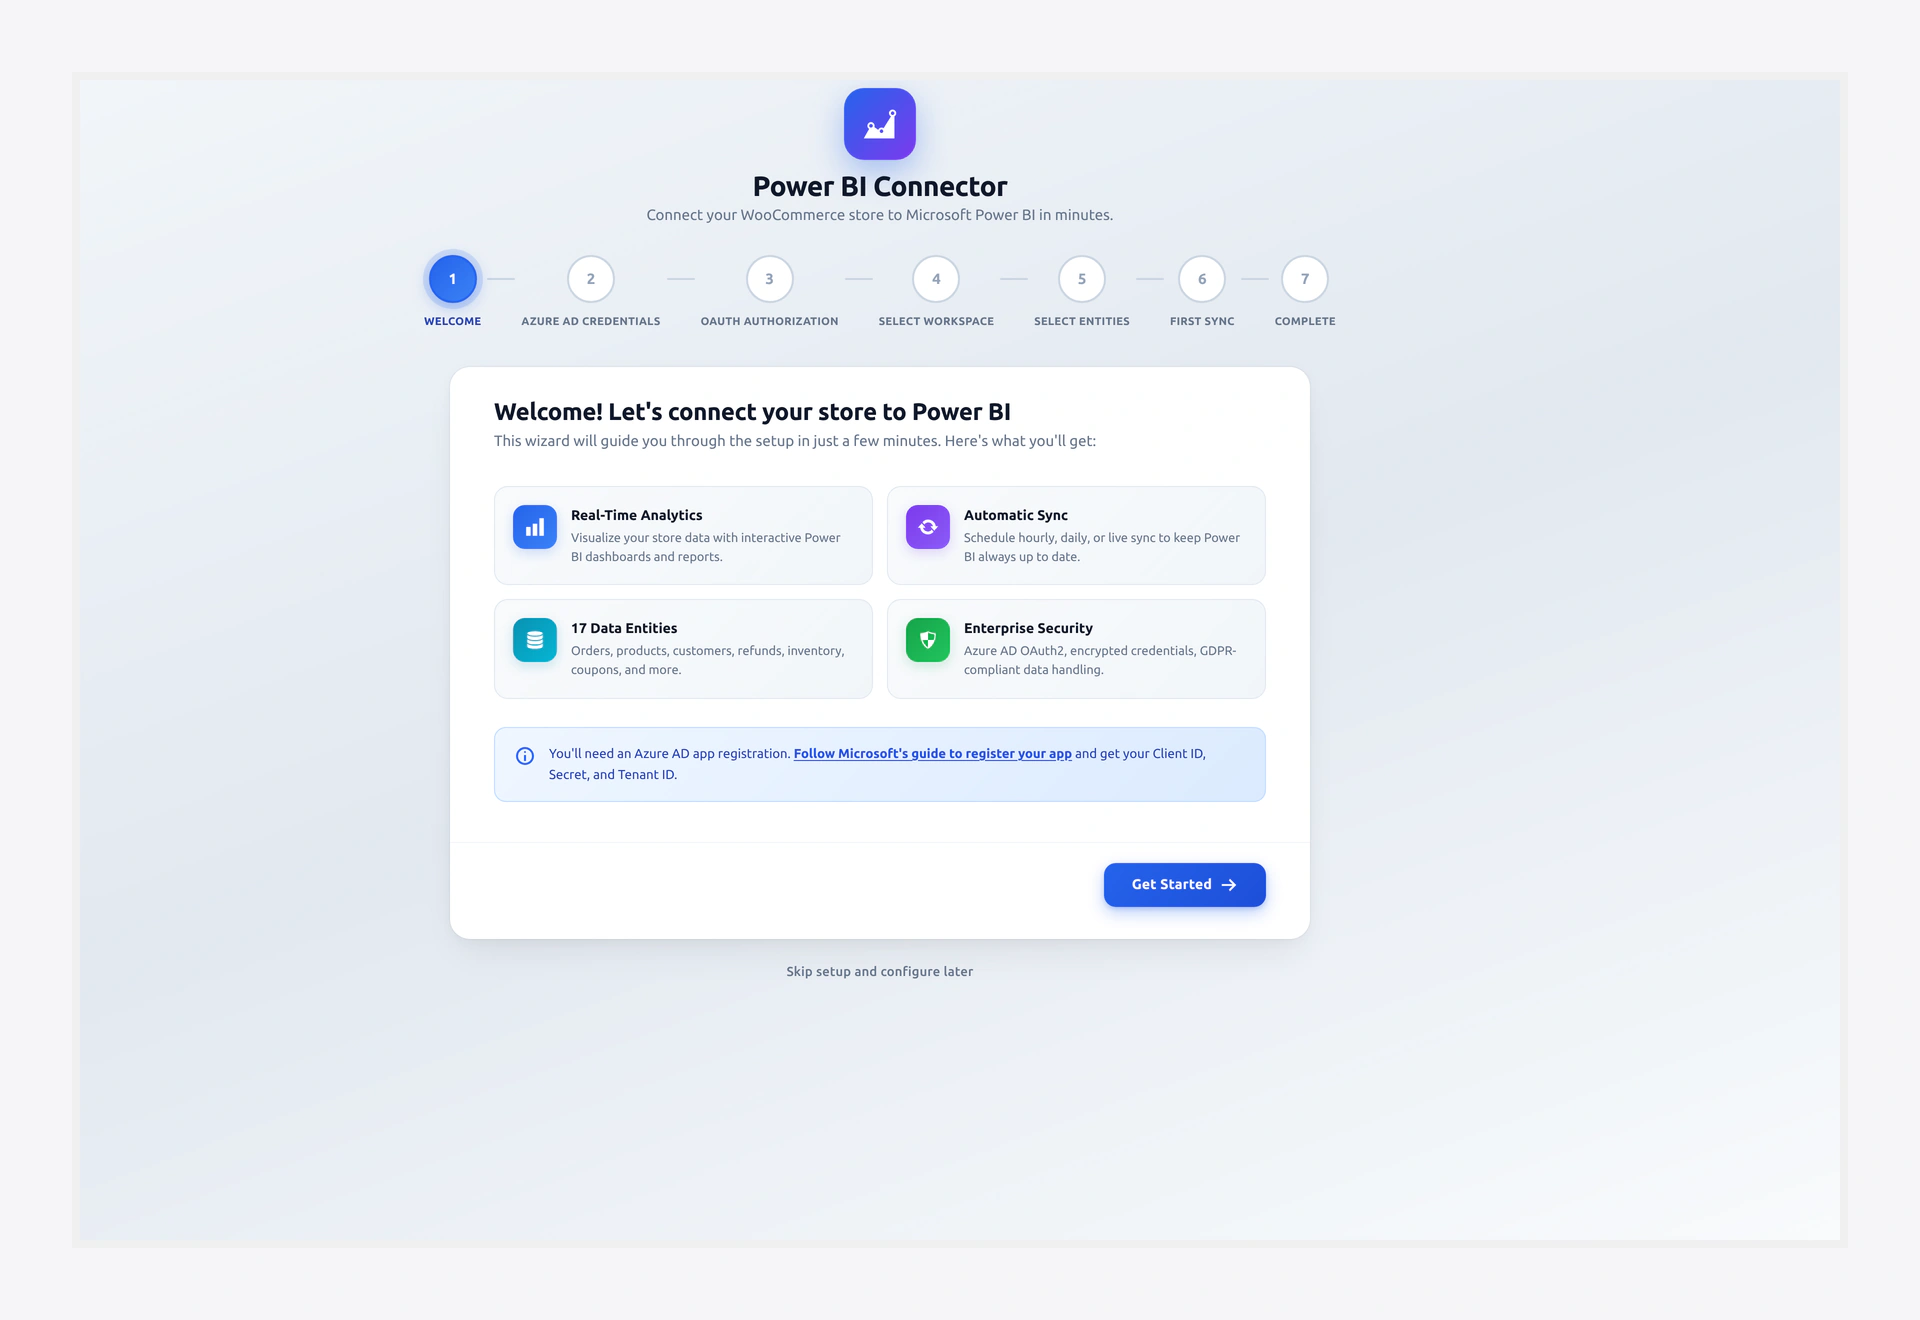 The Setup Wizard walks you through credentials, OAuth, workspace selection, and first sync.
Step-by-Step Fast Path
1. Azure AD — One Page, Six Clicks
- Go to portal.azure.com and sign in.
- Open Azure Active Directory → App registrations → + New registration.
- Fill in the form:
- Name:
WooCommerce Power BI Connector - Account type: Single tenant
- Redirect URI: Web →
https://your-domain.com/wp-admin/admin.php?page=wkpbic-setup-wizard&step=3
- Name:
- Click Register. Copy Client ID and Tenant ID from the Overview page.
- Go to Certificates & secrets → + New client secret. Click Add, then copy the Value right away.
- Open API permissions → + Add → Power BI Service → Delegated. Check these five:
Dataset.ReadWrite.AllWorkspace.ReadWrite.AllReport.Read.AllDashboard.Read.AllContent.Create
- Click Grant admin consent. You should see green checks next to each one.
- (Optional) Go to Authentication → Allow public client flows → Yes. This turns on silent auto-refresh.
Need more detail? See Azure AD Setup.
2. Power BI — Get Your Workspace Ready
- Open app.powerbi.com and sign in with the same Microsoft account.
- Click Workspaces → + New workspace.
- Name it (for example,
WooCommerce Store) and click Apply. - Make sure you are Admin or Member of the workspace.
See also: Power BI Setup.
3. Plugin — Run the Setup Wizard
- In WordPress, go to Webkul WC Addons → Power BI Connector → Setup Wizard.
- Paste your Client ID, Client Secret, and Tenant ID. Click Next.
- Click Connect to Microsoft and accept the consent prompt.
- Pick the workspace you created. Click Next.
- Tick Orders, Products, and Customers to start small. Click Next.
- Watch the progress bar until you see the success message.
- Click Go to Dashboard.
That's it. Your data is now in Power BI.
4. Check That It Worked
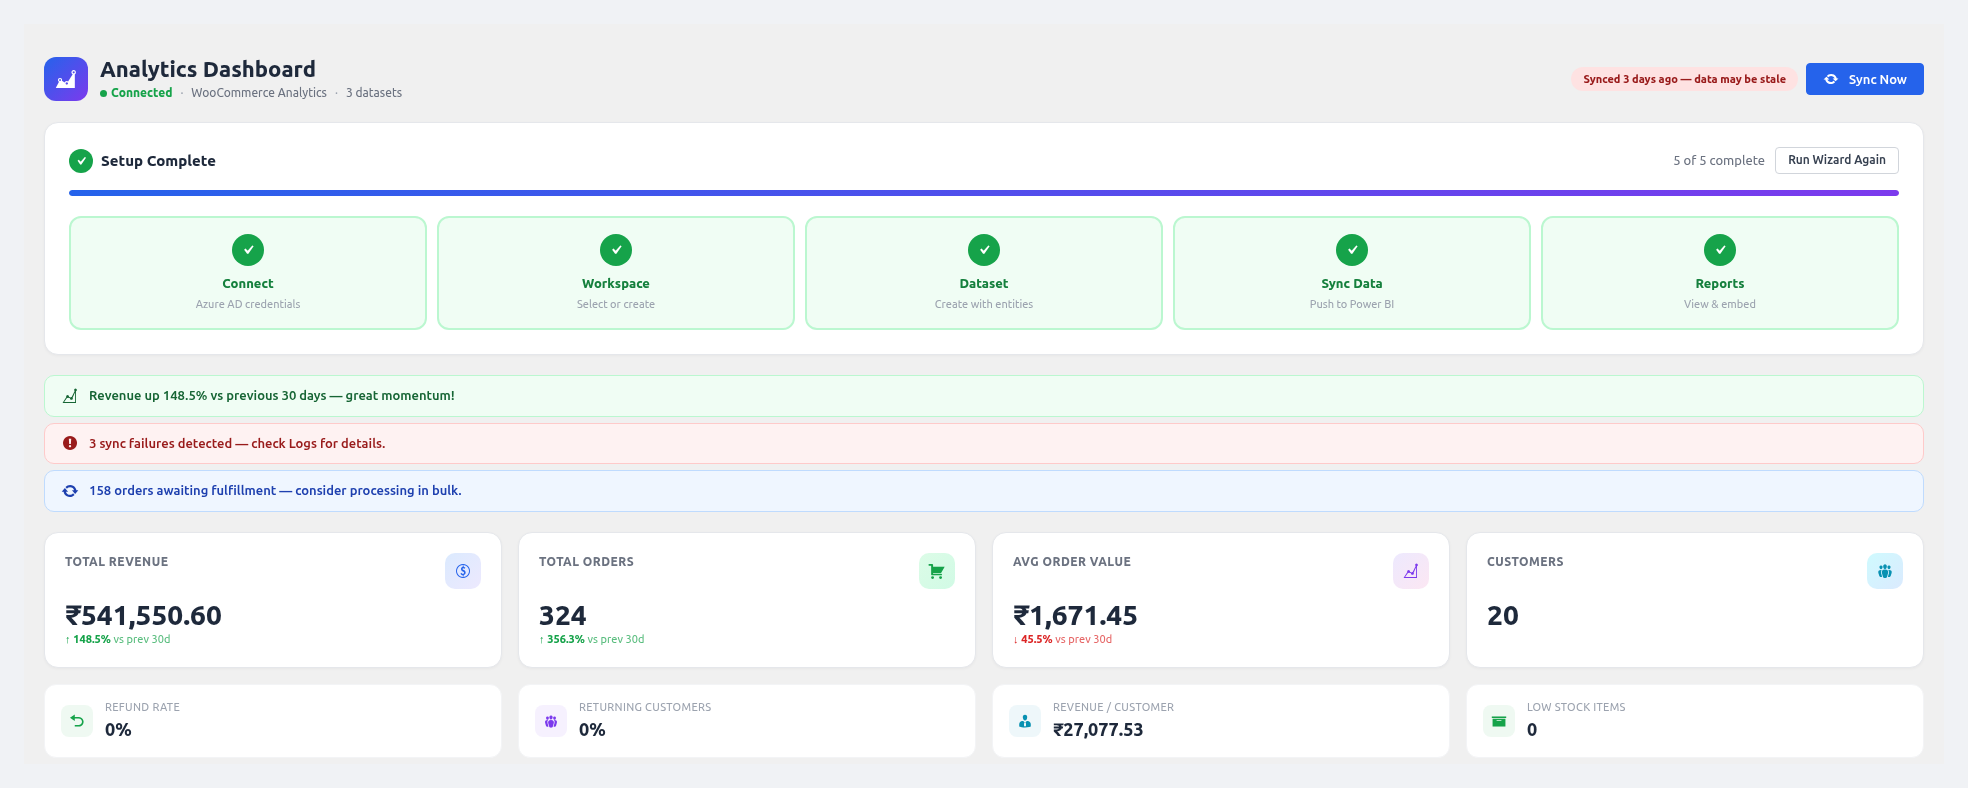 After a successful sync, the Dashboard shows live KPI cards, charts, and recent sync activity.
- Dashboard page: KPI cards should show real numbers.
- Logs page: The latest row should say ✅ Success.
- Power BI Service: Your workspace should contain new datasets.
What to Do Next
| I want to... | Go to |
|---|---|
| Build a report and show it in WordPress | Reports & Dashboards |
| Run sync every hour on its own | Sync & Scheduler |
| Get an email when sales drop | Alerts |
| Let my team see the reports | Access Control |
| Connect a second store | Settings → WC API |
| Build a custom query with no code | Query Builder |
When Something Breaks
- Wizard fails at OAuth → Troubleshooting → Connection
- Sync runs but no rows appear → Troubleshooting → Sync Issues
- Report will not embed → Troubleshooting → Embedding
- Have a question? → FAQ