Setup Wizard — From Zero to First Sync
At a Glance
- Time: About 5 minutes, plus the first sync.
- Steps: 7 — Welcome → Credentials → OAuth → Workspace → Entities → Sync → Done.
- What you need: Client ID, Client Secret, Tenant ID, Microsoft email (and password for ROPC).
- Saving your spot: You can close the browser. Your progress is saved per step.
The Setup Wizard is the fastest way to get the plugin running. It opens on its own right after you activate the plugin. If it does not, just go to:
https://your-domain.com/wp-admin/admin.php?page=wkpbic-setup-wizard
The 7 Steps in One Table
Here is every step at a glance, so you know what to expect.
| # | Screen | What you do | Time |
|---|---|---|---|
| 1 | Welcome | Read and confirm prerequisites | 30 sec |
| 2 | Credentials | Paste Client ID, Secret, Tenant ID | 1 min |
| 3 | OAuth | Click "Connect to Microsoft" and sign in | 1 min |
| 4 | Workspace | Pick or create a Power BI workspace | 30 sec |
| 5 | Entities | Tick which WooCommerce data to sync | 30 sec |
| 6 | First Sync | Watch progress until done | 2–10 min |
| 7 | Complete | Review summary and open the dashboard | 30 sec |
Before you start
Finish these first:
- Installation
- Azure AD Setup — keys in hand
- Power BI Account Setup — workspace ready
You can pause at any step and come back later.
 Screenshot: 7-step progress bar across the top of the Setup Wizard.
Step 1 — Welcome
The first screen greets you and runs a live prerequisites check. It looks at:
- WooCommerce is active
- HPOS is on
- HTTPS is on
- PHP version
- Required PHP extensions
Any red items must be fixed first. Once every check is green, click Start Setup to move on.
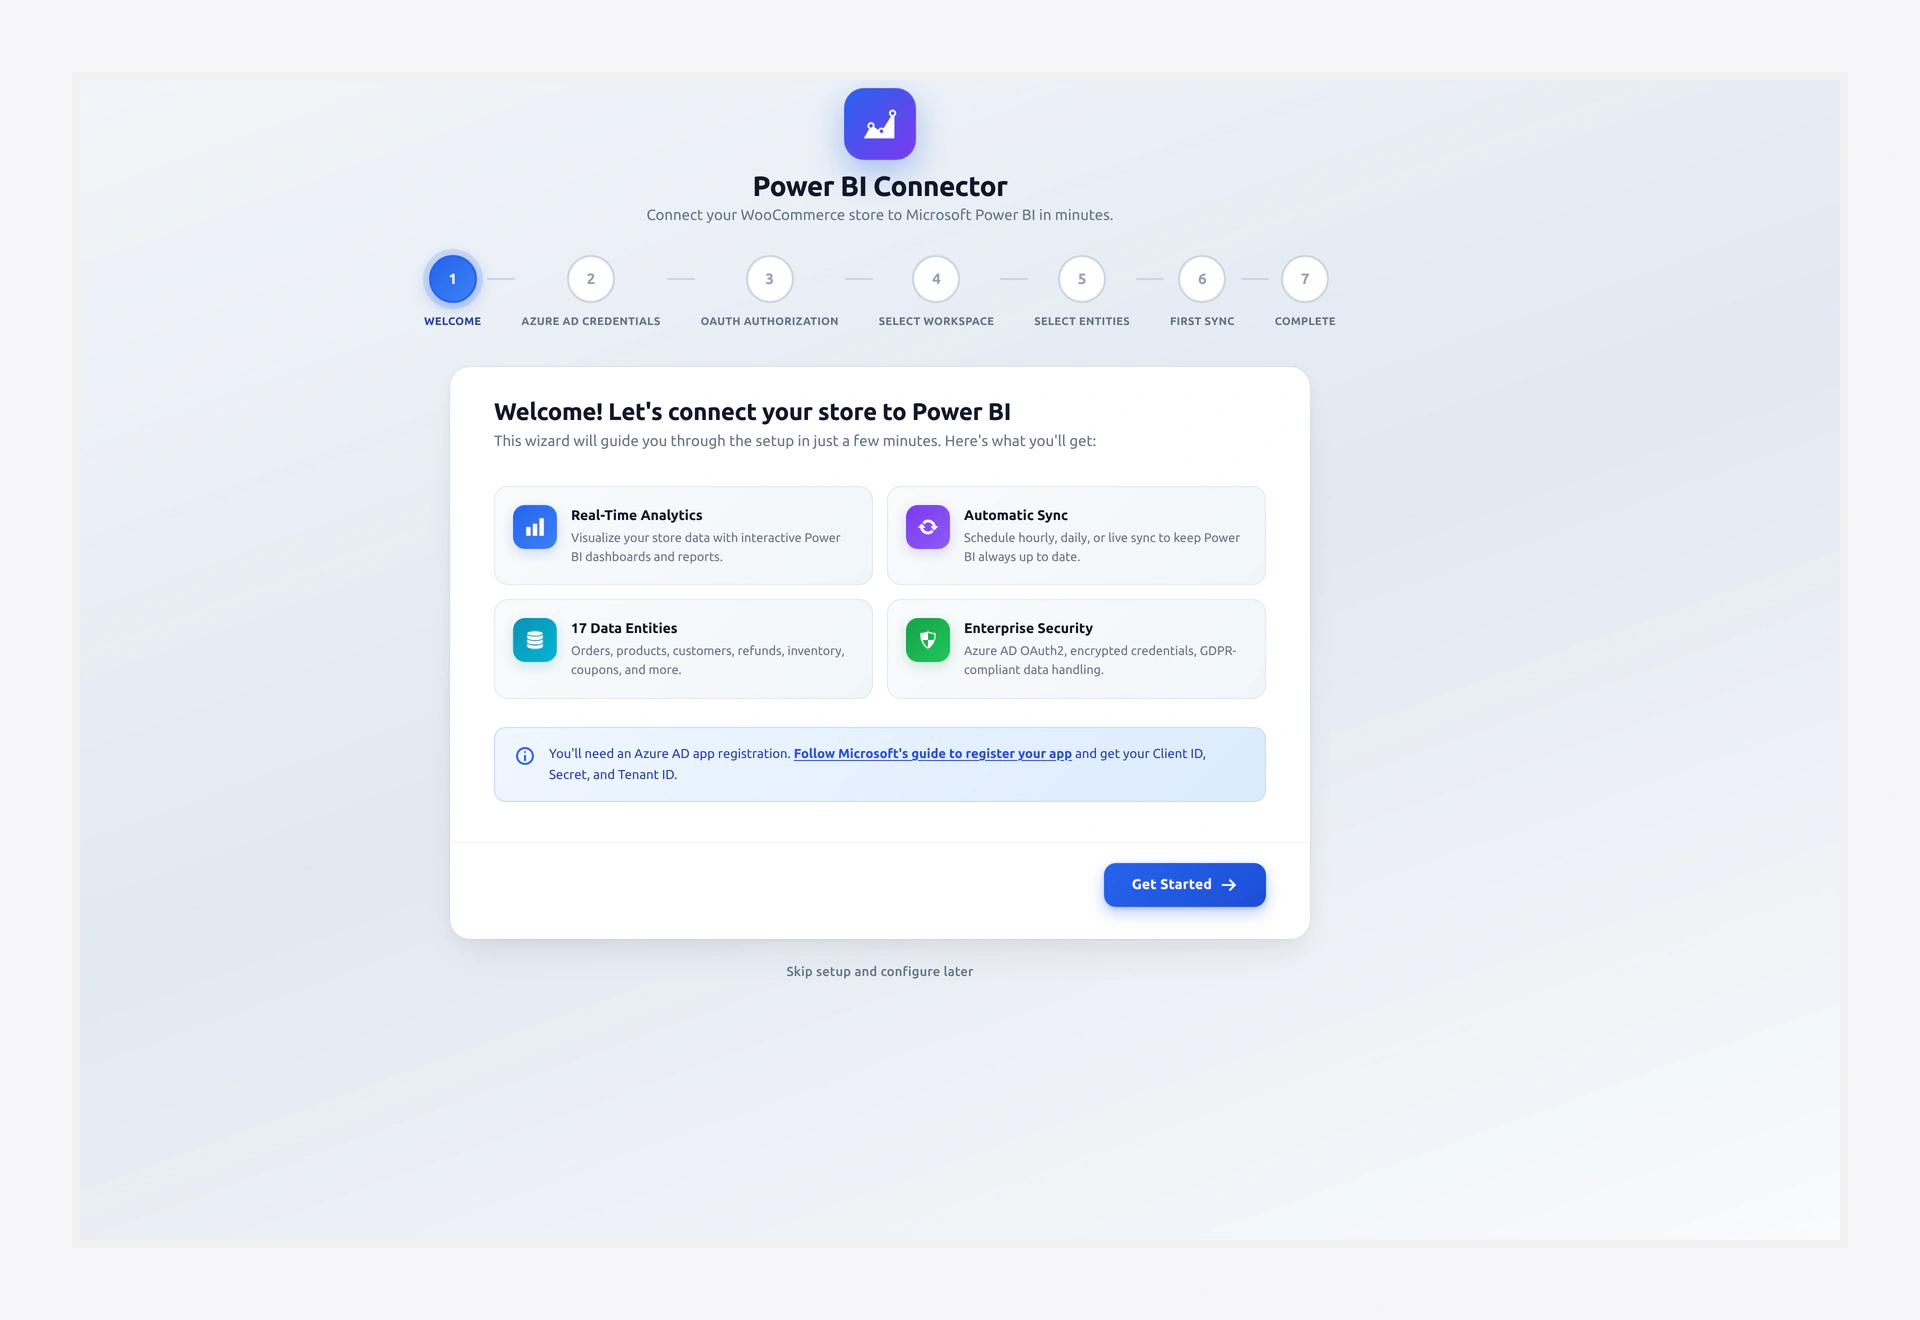 Screenshot: Welcome screen with the prerequisites checklist.
Step 2 — Paste Your Azure Keys
Now you need to paste the keys you grabbed from Azure AD Setup:
| Field | Where it came from |
|---|---|
| Client ID | Azure → App registration → Overview |
| Client Secret | Azure → Certificates & secrets → Value column |
| Tenant ID | Azure → App registration → Overview |
Click Save & Continue. The plugin encrypts the values right away with AES-256-CBC before it saves them.
Value vs Secret ID
Make sure you paste the Value of the secret, not the Secret ID. If you paste the wrong one, OAuth will fail.
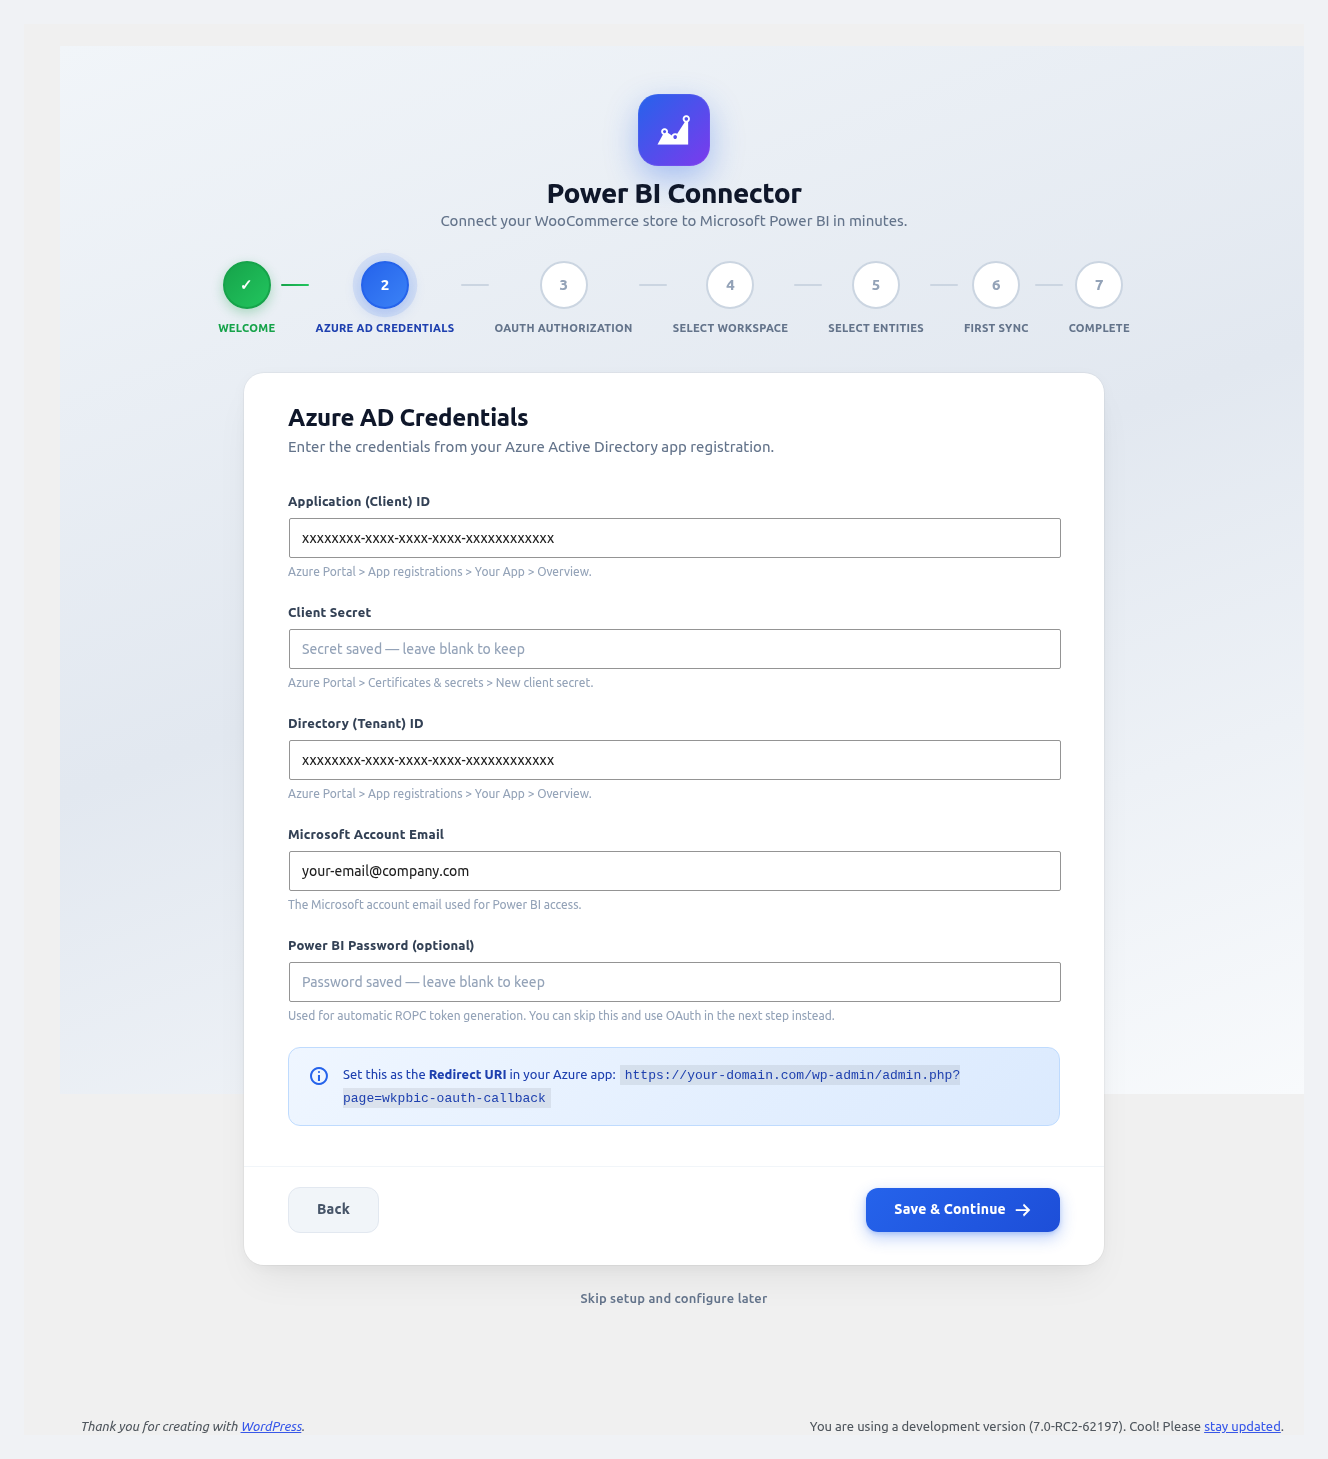 Screenshot: Credentials form with Client ID, Secret, and Tenant ID inputs.
Step 3 — Sign in with OAuth
This step links the plugin to your Microsoft account.
- Click Connect to Microsoft.
- You will land on
login.microsoftonline.com. - Sign in with the Microsoft account that owns your Power BI workspace.
- On the consent screen, click Accept to grant the Power BI permissions.
- Microsoft sends you back to the wizard.
- You should see a green ✓ Connected badge and your email.
ROPC for silent refresh
If you turned on "Allow public client flows" in Azure, the wizard also asks for your email and password. These let the plugin sign in again on its own when the token expires. Then you do not have to log in by hand every hour.
Click Next.
Common OAuth Errors
| Error | Quick fix |
|---|---|
AADSTS50011: Redirect URI does not match | The Redirect URI in Azure must match the wizard URL exactly. Check HTTPS and path. |
AADSTS7000215: Invalid client secret | The secret is wrong or expired. Make a new one in Azure. |
AADSTS700016: Application not found | You are signing in with an account from a different tenant than the app. |
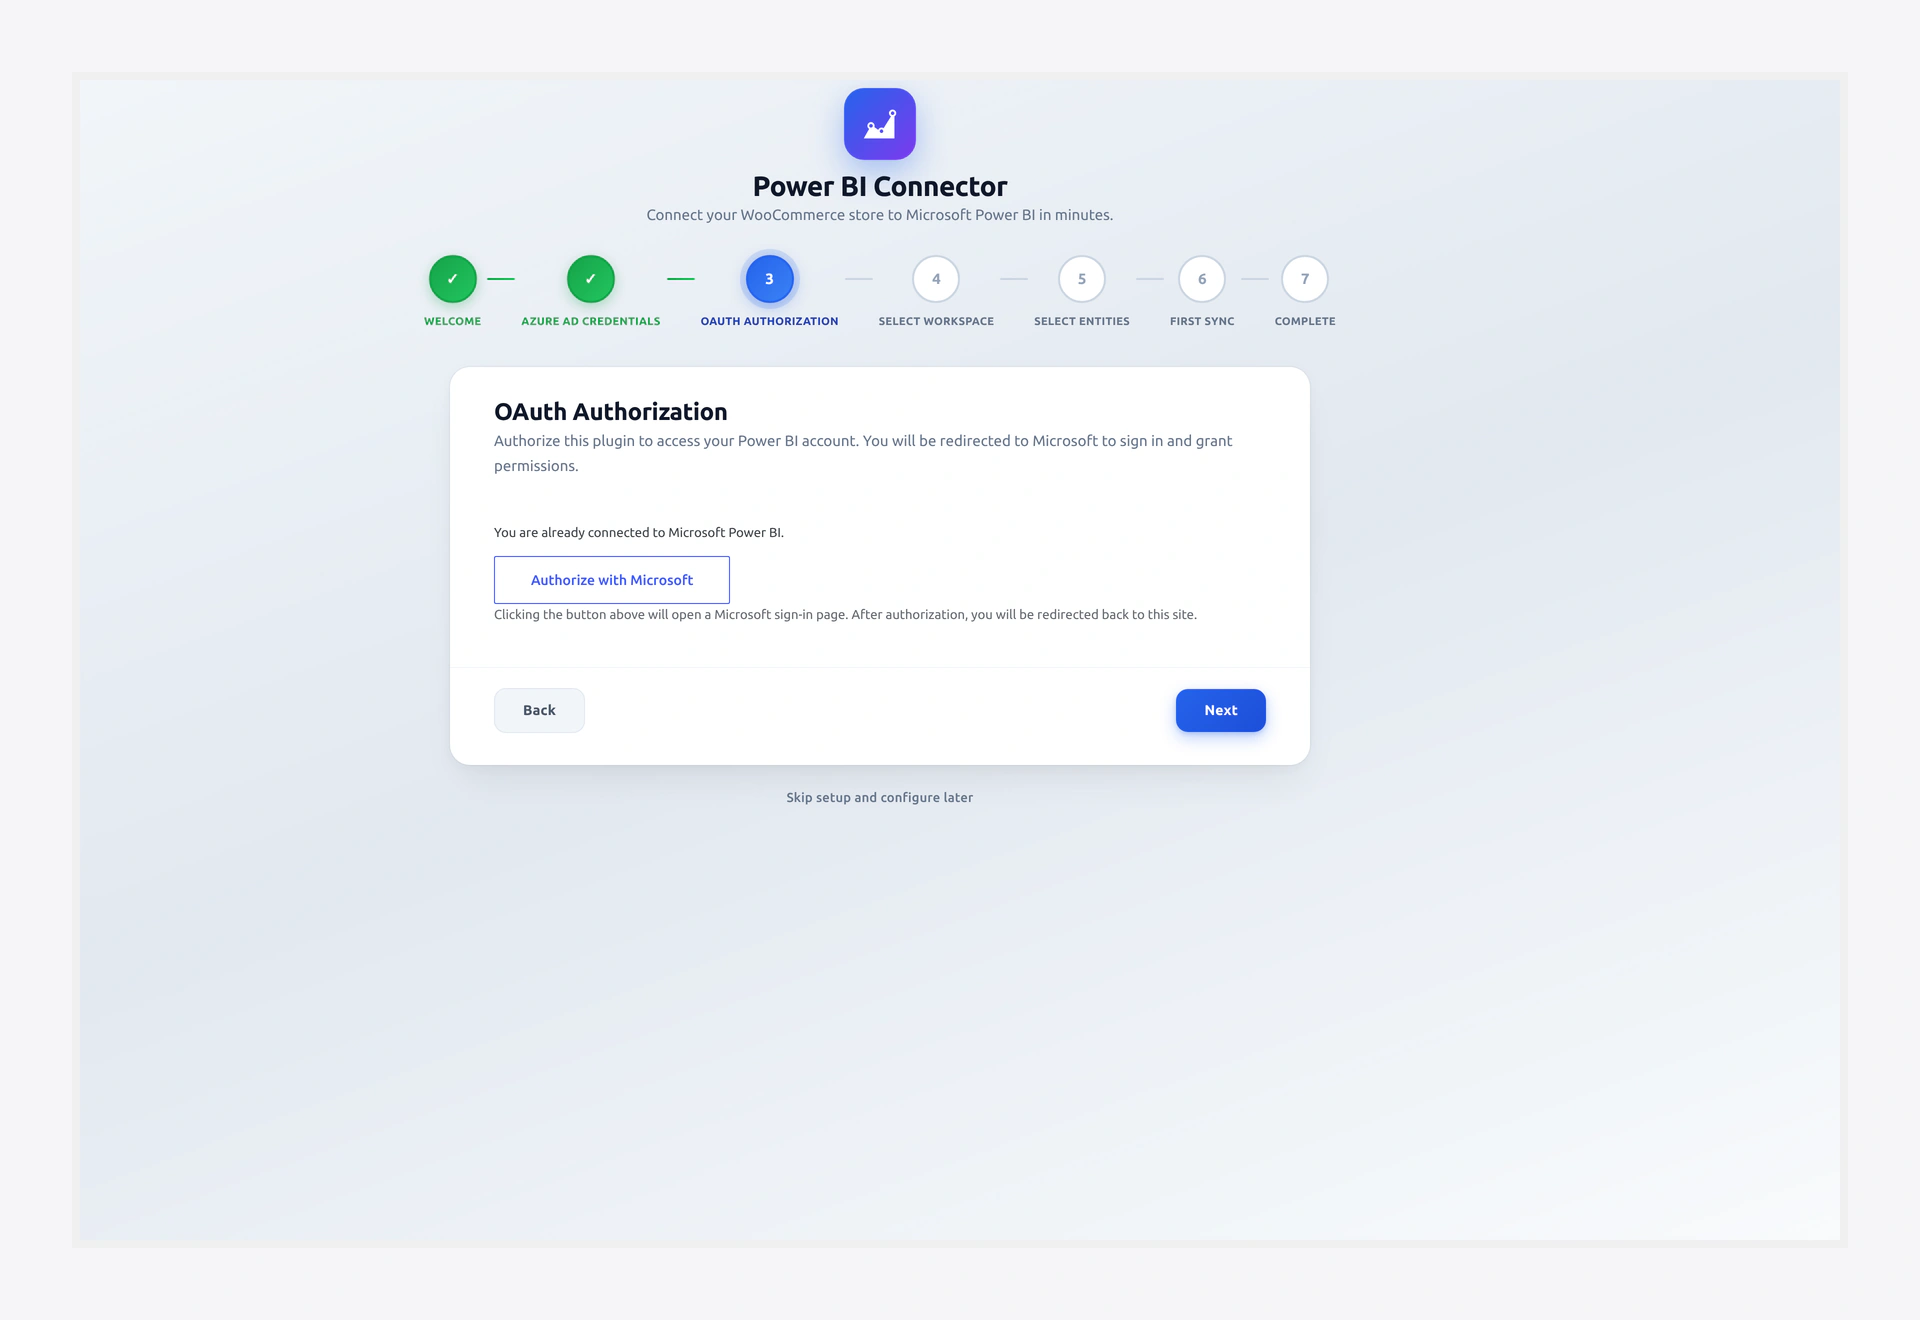 Screenshot: "Connected ✓" badge with the signed-in email.
Step 4 — Pick a Workspace
Next, the plugin lists every Power BI workspace you can access.
- Pick an existing workspace from the dropdown, or
- Create a new one right here — just type a name and click Create.
Your pick becomes the Active Workspace for all sync jobs. You can switch it later on the Workspaces page.
Click Next.
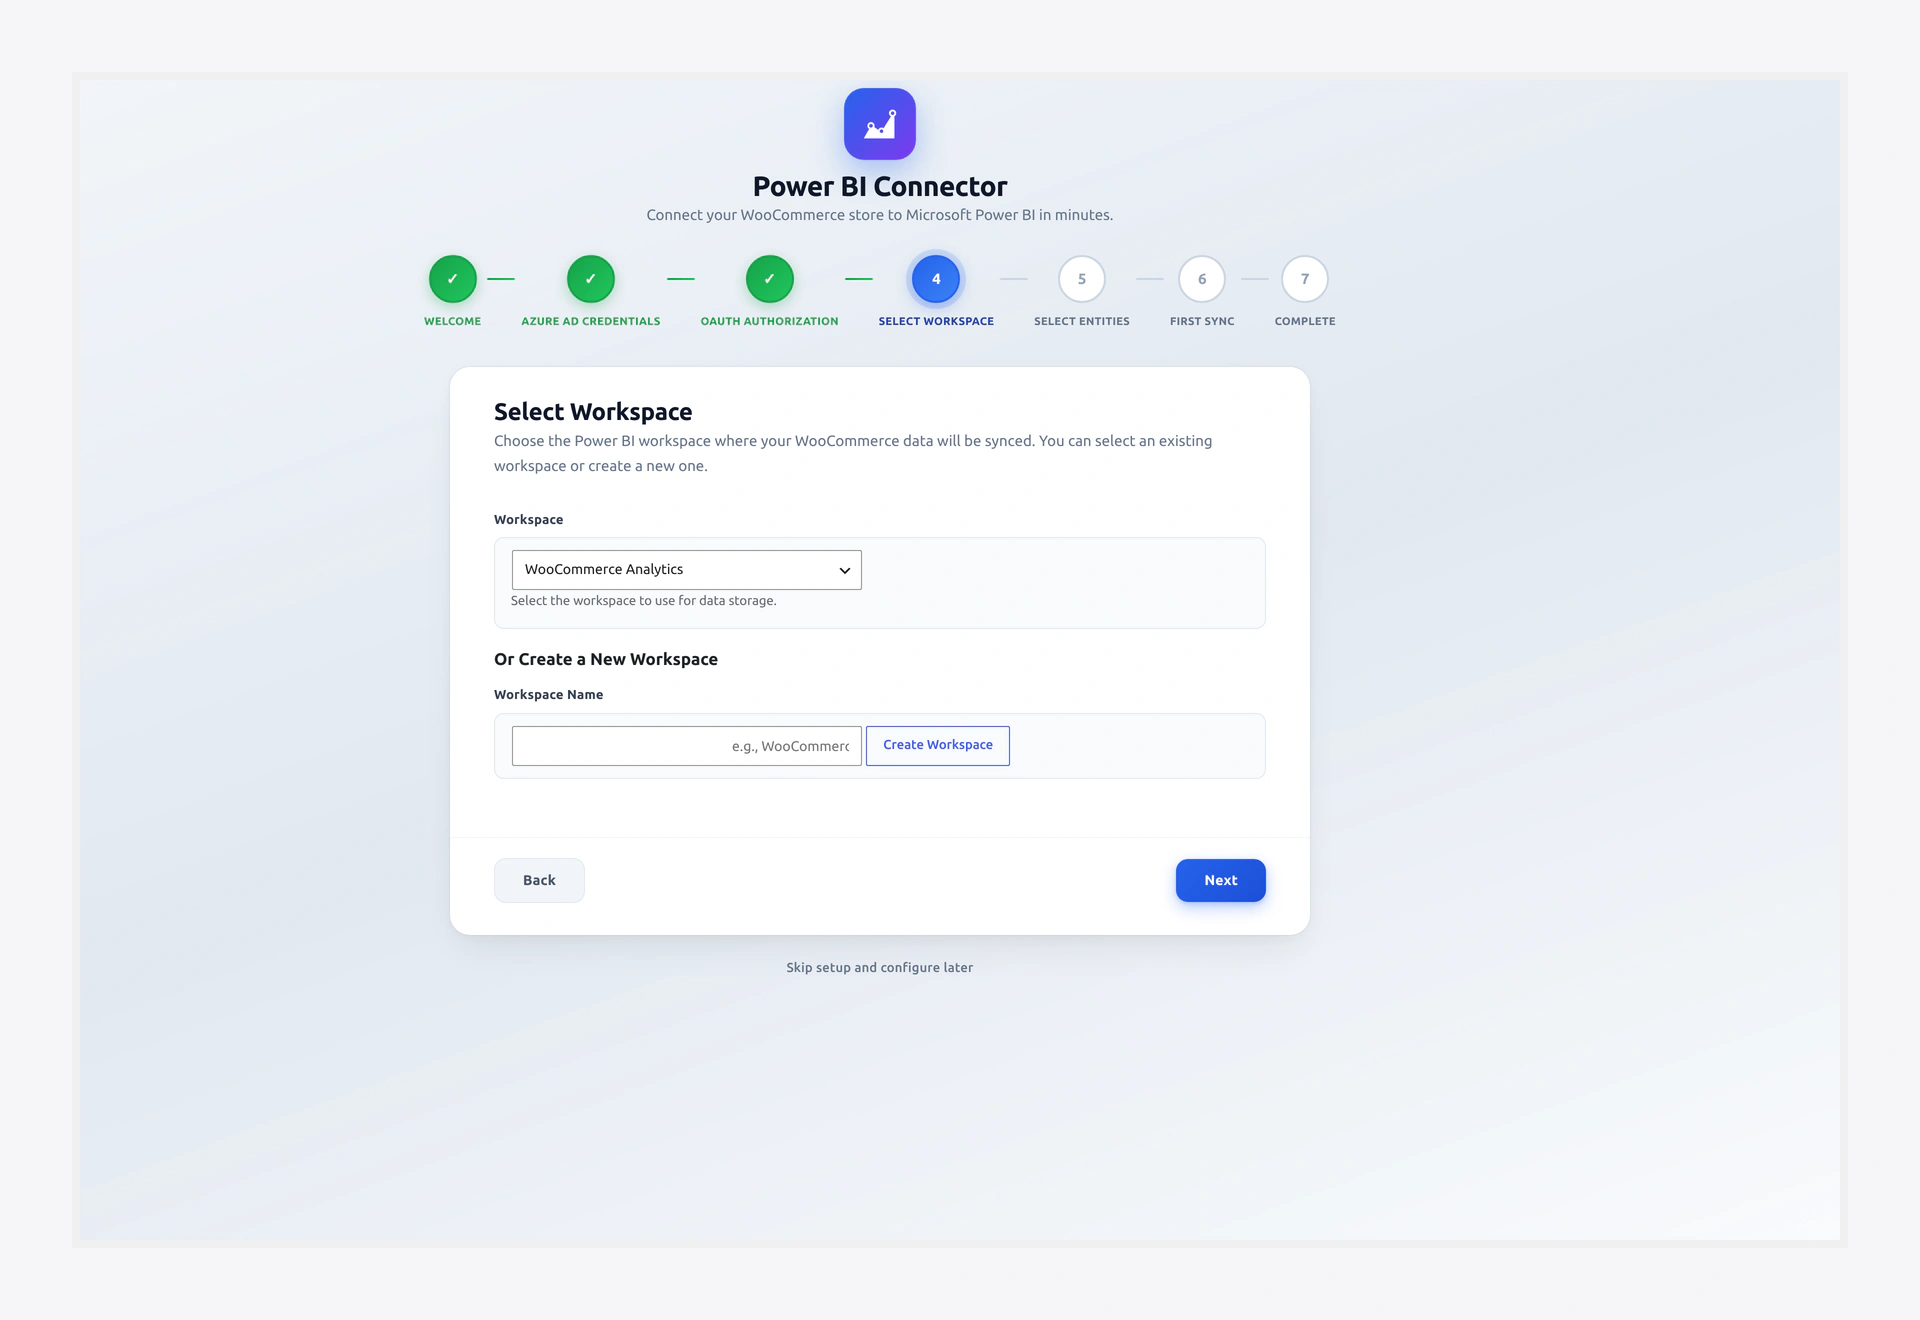 Screenshot: Workspace dropdown plus the "Create New Workspace" option.
Step 5 — Choose Your Data
Tick the WooCommerce data types you want in Power BI:
- ☐ Orders
- ☐ Order Line Items
- ☐ Customers and Customer Profiles
- ☐ Products
- ☐ Product Categories and Tags
- ☐ Coupons and Discounts
- ☐ Refunds
- ☐ Invoices
- ☐ Shipping Zones and Methods
- ☐ Tax Data and Rates
- ☐ Payment Gateway Data
- ☐ Reviews and Ratings
- ☐ Inventory and Stock Levels
- ☐ Subscriptions (only if WooCommerce Subscriptions is active)
- ☐ Order Grid
- ☐ Report Types
Start small
For your first run, pick only Orders, Products, and Customers. You can add more later on the Sync page. Small first syncs are easier to debug.
Click Next. The plugin now creates the dataset and tables on the Power BI side.
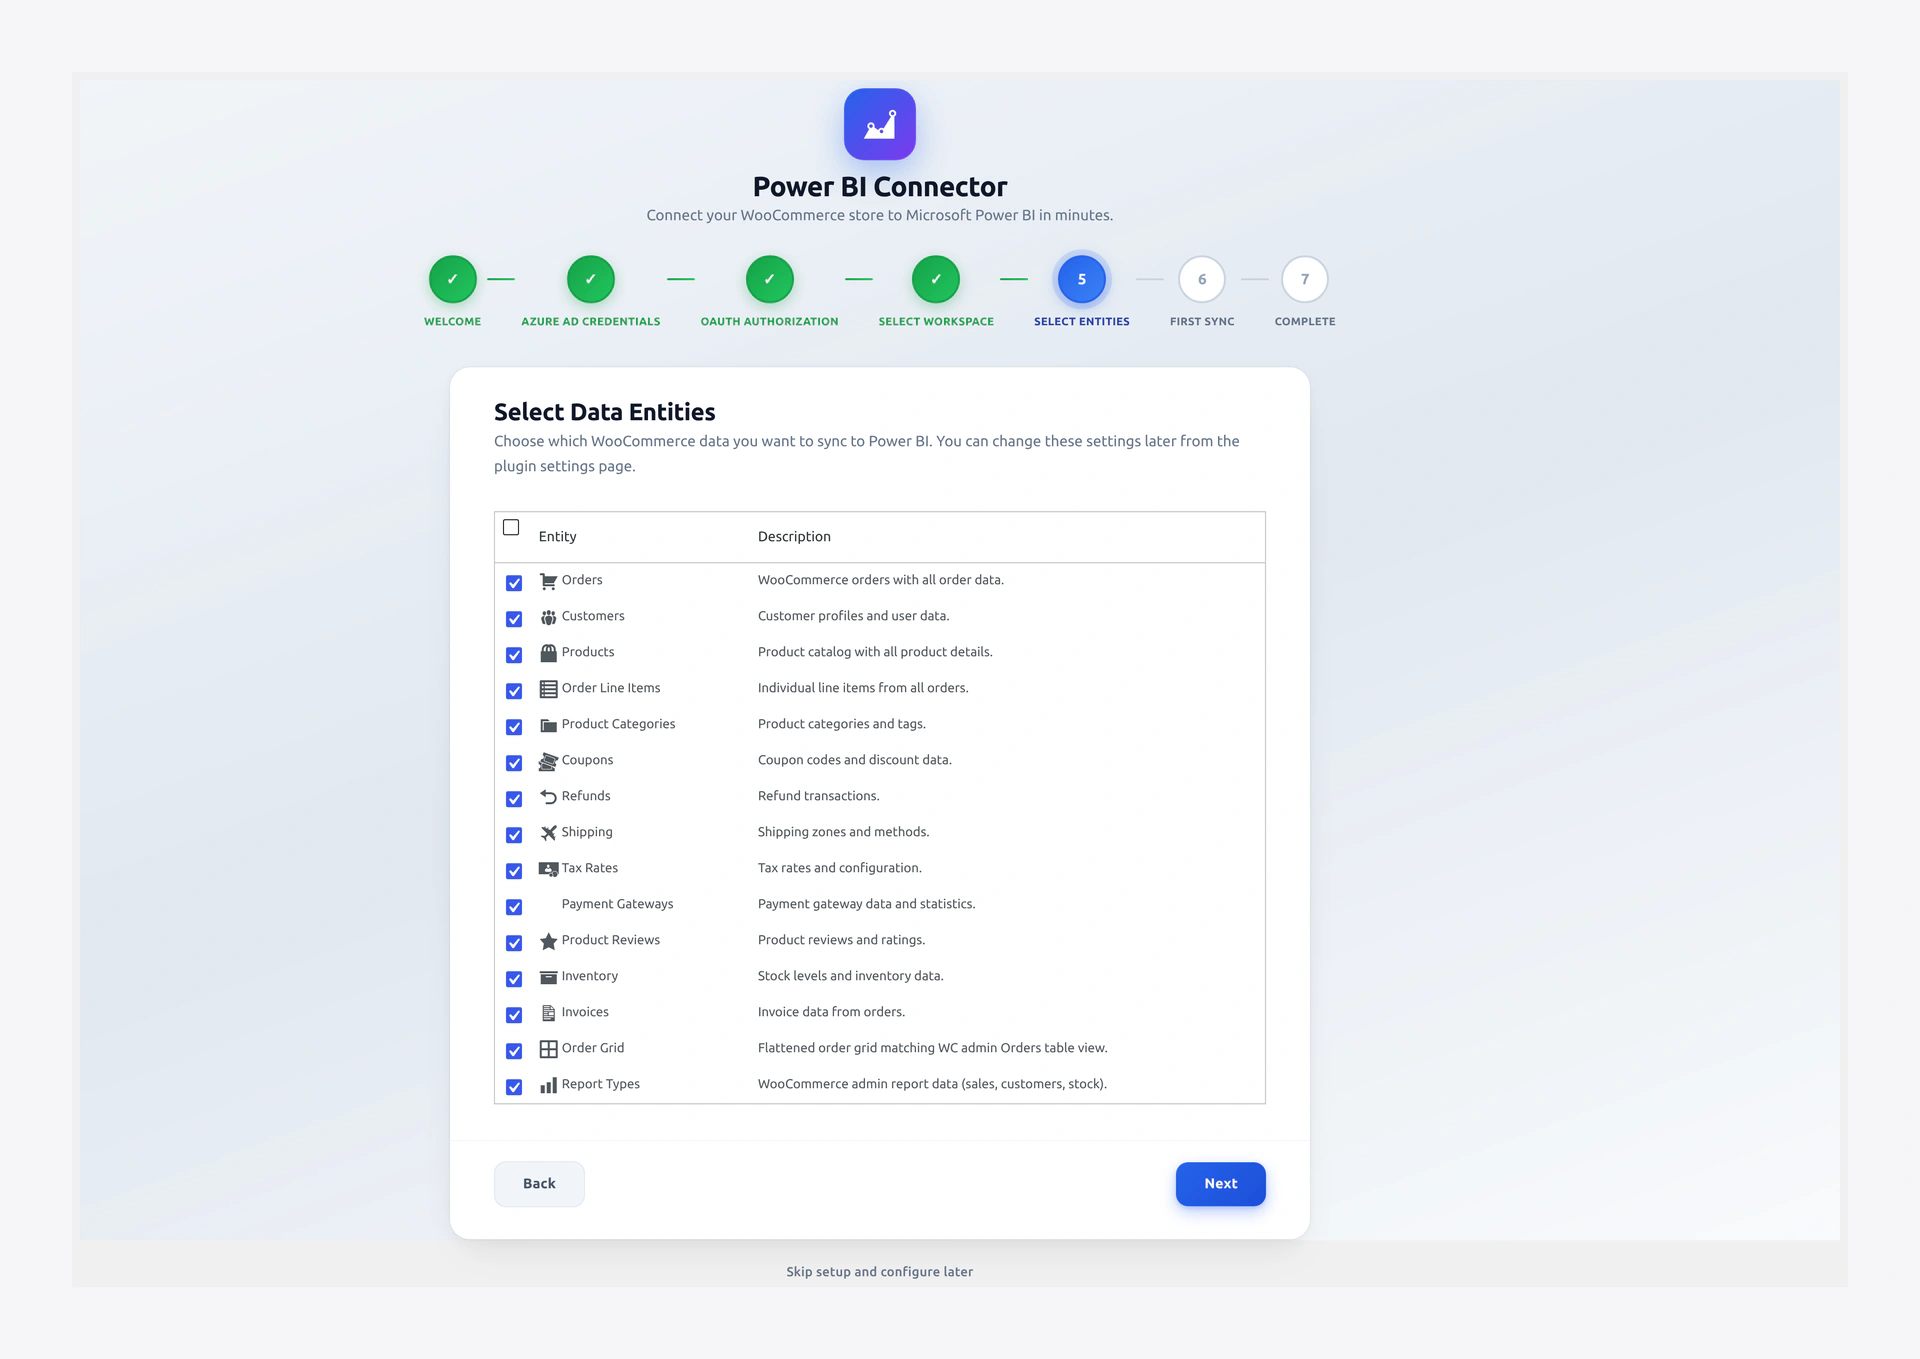 Screenshot: Entity selection grid with checkboxes.
Step 6 — Watch the First Sync
Now the fun part. The plugin starts pushing data to Power BI.
- A progress bar shows how far it has gone.
- A live log prints each batch: entity, batch number, rows pushed, and duration.
- If a batch fails, the plugin retries it on its own with backoff.
Big stores may take a few minutes. Do not close the browser tab until you see the Sync Complete banner. But if you do close it by mistake, do not worry — sync keeps running in the background through Action Scheduler. You can check the Logs page any time.
Click Next when the sync finishes.
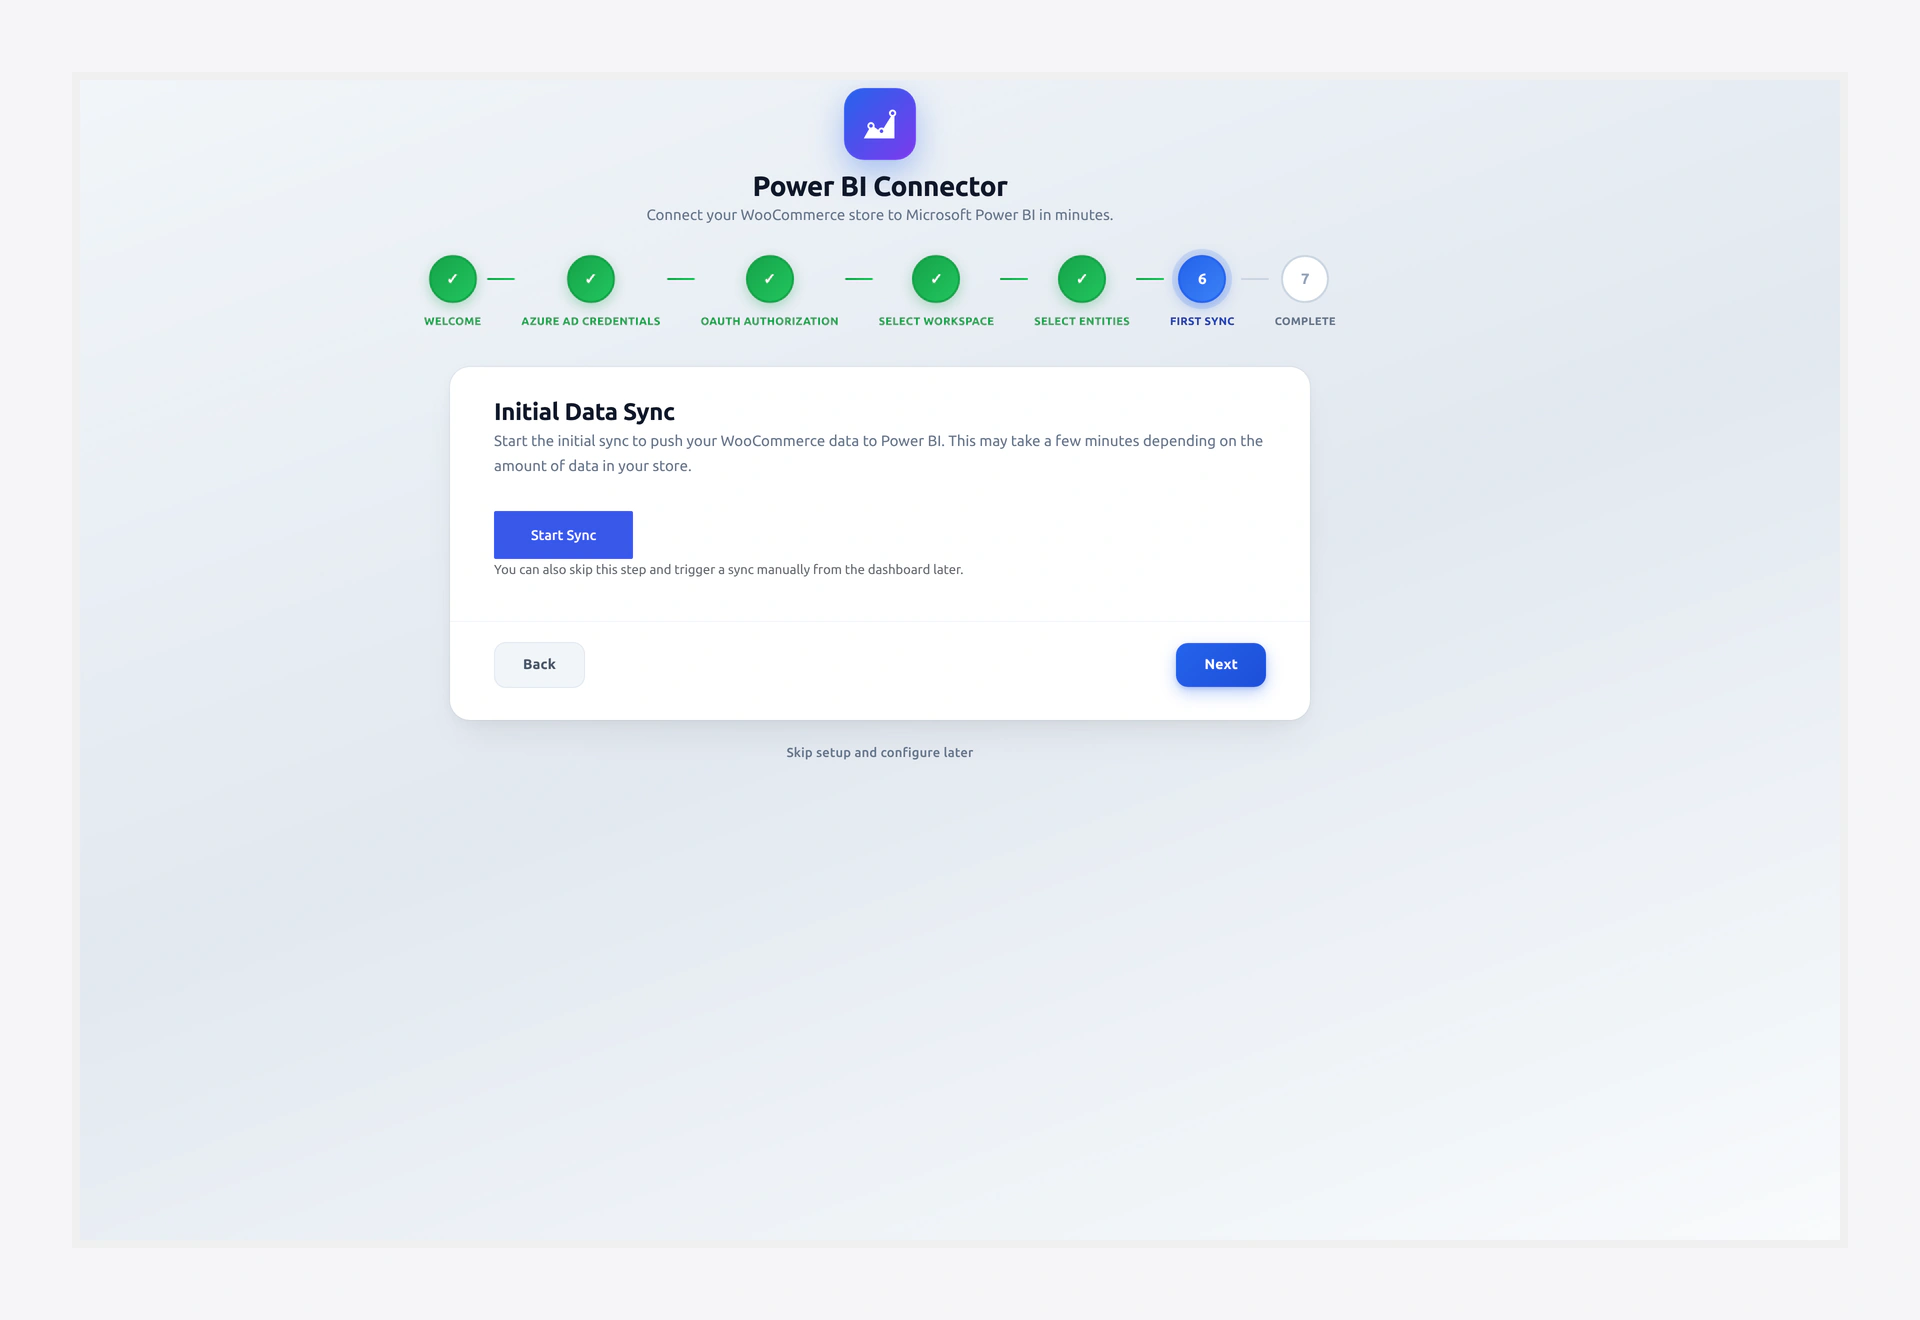 Screenshot: Live progress bar plus batch-by-batch log.
Step 7 — You're Done 🎉
The last screen shows a summary:
- How many entities synced
- Total rows pushed
- How long it took
- Any warnings or errors
- Quick links to Dashboard, Reports, Query Builder, and Settings
Click Go to Dashboard to leave the wizard.
What to Do Next
Now that your data is flowing, here is what to try next:
- Open the Dashboard to see your KPI cards and charts.
- Build a report in app.powerbi.com, then embed it in WordPress.
- Turn on scheduled sync so Power BI always has fresh data.
- Set up Smart Alerts for sales and stock.
- Give your team access in Access Control.