Amazon S3 Setup
Connect to an Amazon S3 bucket for imports or exports. This page walks you through AWS IAM setup.
You need an AWS account
If you do not have an AWS account, create one at aws.amazon.com. S3 has a free tier for 12 months.
What You Will Do
| Step | Time |
|---|---|
| 1. Create a bucket | 3 min |
| 2. Create an IAM user | 5 min |
| 3. Attach a permissions policy | 5 min |
| 4. Generate access keys | 2 min |
| 5. Save keys in the plugin | 1 min |
Total: about 15 minutes.
Part 1 — Create an S3 Bucket
If you already have a bucket, skip to Part 2.
Step 1
Sign in to AWS Console.
Step 2
Top search bar → type S3 → click the S3 service.
Step 3
Click Create bucket.
Step 4
Fill in:
- Bucket name: Must be globally unique. Example:
mystore-woocommerce-imports - Region: Pick the region closest to your WordPress server (e.g.,
us-east-1for US,eu-west-1for Europe) - Leave all other settings at default
- Uncheck "Block all public access" ONLY if you need public file URLs (most users keep this checked)
Click Create bucket.
Part 2 — Create an IAM User
Never use your root AWS account credentials with the plugin. Always create a dedicated IAM user.
Step 1
Top search bar → type IAM → click the IAM service.
Step 2
Left sidebar → Users → Create user.
Step 3
Fill in:
- User name:
woocommerce-importer - Provide user access to the AWS Management Console: NO (we only need API access)
Click Next.
Step 4 — Permissions
Pick Attach policies directly.
Instead of attaching an existing policy, we will create a custom one (more secure).
Click Next for now — we will attach the policy after creation.
Step 5
Click Create user.
Part 3 — Create a Custom Policy
A custom policy limits the user to only what the plugin needs.
Step 1
Left sidebar → Policies → Create policy.
Step 2
Click the JSON tab.
Step 3
Paste this policy. Replace your-bucket-name with your actual bucket name.
{
  "Version": "2012-10-17",
  "Statement": [
    {
      "Sid": "ListBucket",
      "Effect": "Allow",
      "Action": [
        "s3:ListBucket"
      ],
      "Resource": [
        "arn:aws:s3:::your-bucket-name"
      ]
    },
    {
      "Sid": "ReadWriteObjects",
      "Effect": "Allow",
      "Action": [
        "s3:GetObject",
        "s3:PutObject",
        "s3:DeleteObject"
      ],
      "Resource": [
        "arn:aws:s3:::your-bucket-name/*"
      ]
    }
  ]
}
Step 4
Click Next.
Step 5
Fill in:
- Policy name:
WooCommerce-Importer-S3-Policy - Description:
Full access to S3 bucket for WooCommerce plugin
Click Create policy.
Part 4 — Attach the Policy to the User
Step 1
Left sidebar → Users → click your woocommerce-importer user.
Step 2
Permissions tab → Add permissions → Attach policies directly.
Step 3
Search for WooCommerce-Importer-S3-Policy.
Check the box and click Next → Add permissions.
Part 5 — Generate Access Keys
Step 1
On the user page, click the Security credentials tab.
Step 2
Scroll to Access keys → click Create access key.
Step 3
Pick the use case:
- Select Application running outside AWS
Click Next.
Step 4
Add a description tag (optional, e.g., "WooCommerce plugin on my-site.com").
Click Create access key.
Step 5 — COPY BOTH VALUES
You will see:
- Access key ID — like
AKIAIOSFODNN7EXAMPLE - Secret access key — like
wJalrXUtnFEMI/K7MDENG/bPxRfiCYEXAMPLEKEY
Copy both right now. AWS will only show the Secret once. If you lose it, you have to generate a new one.
Click Done.
Part 6 — Save in the Plugin
Step 1
WordPress admin → Webkul WC Addons → Settings → Cloud Storage & API → Amazon S3.
Step 2
Fill in:
- Access Key: The Access key ID
- Secret Key: The Secret access key
- Default Region: Your bucket's region (e.g.,
us-east-1) - Default Bucket:
mystore-woocommerce-imports(your bucket name)
Click Save Changes.
Checking It Works
For Import
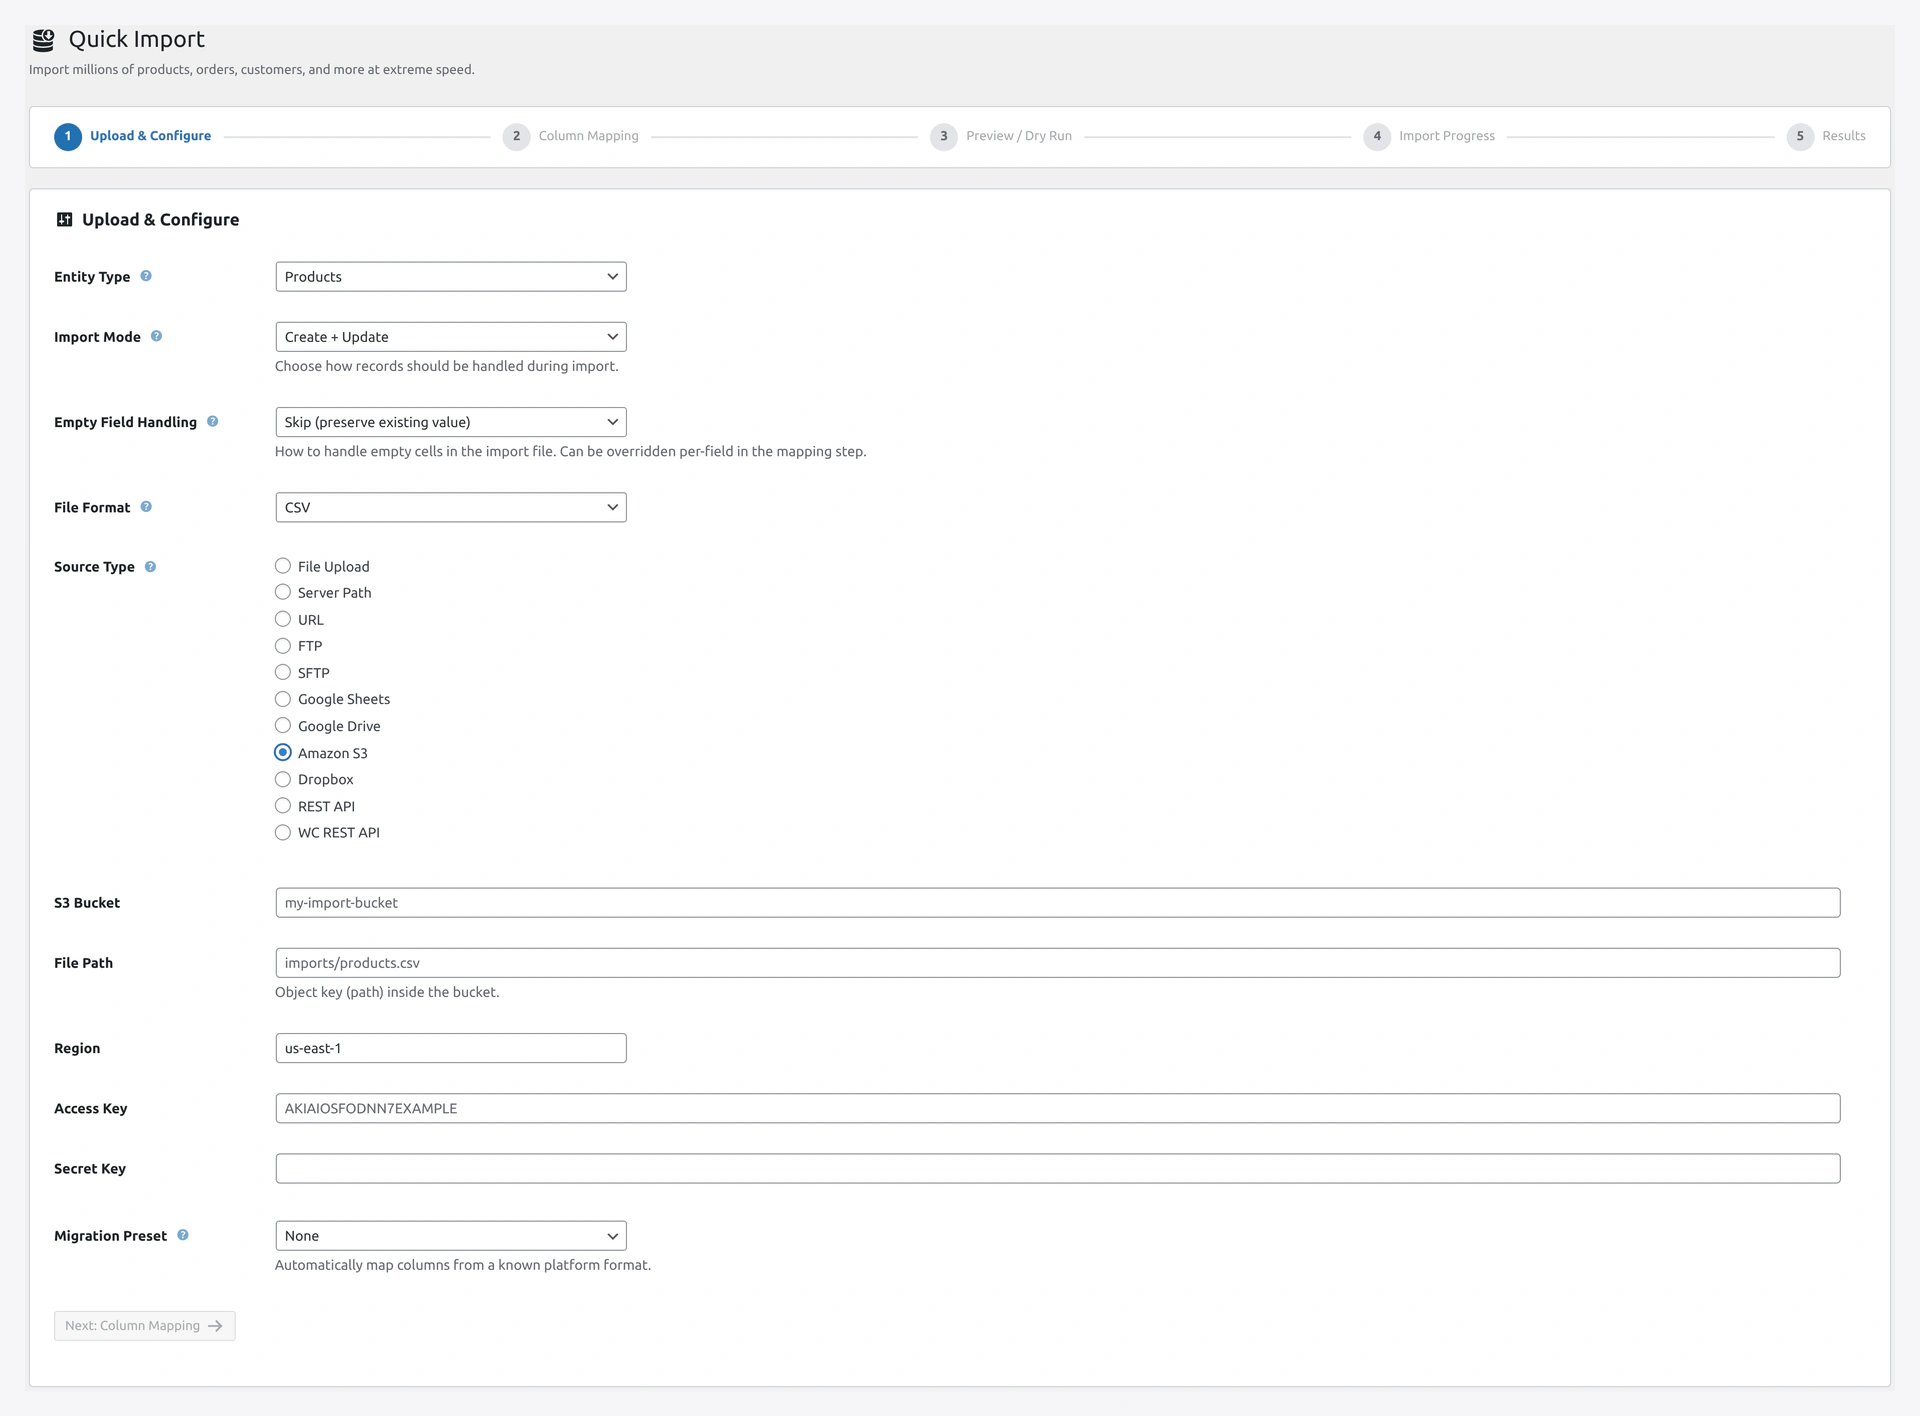 S3 source panel — bucket, file path, and region. Leave keys blank to reuse the Settings defaults.
- Upload a test CSV file to your S3 bucket (via AWS Console)
- Wizard → Source Type: Amazon S3
- Fill in:
- Bucket:
mystore-woocommerce-imports - File path:
test-products.csv - Region: (your region)
- Leave Access Key and Secret Key blank (plugin will use defaults from Settings)
- Bucket:
- Click Next
- If columns load in Step 2, S3 works
For Export (Future Use)
The destination side works the same way once export-to-S3 is fully wired.
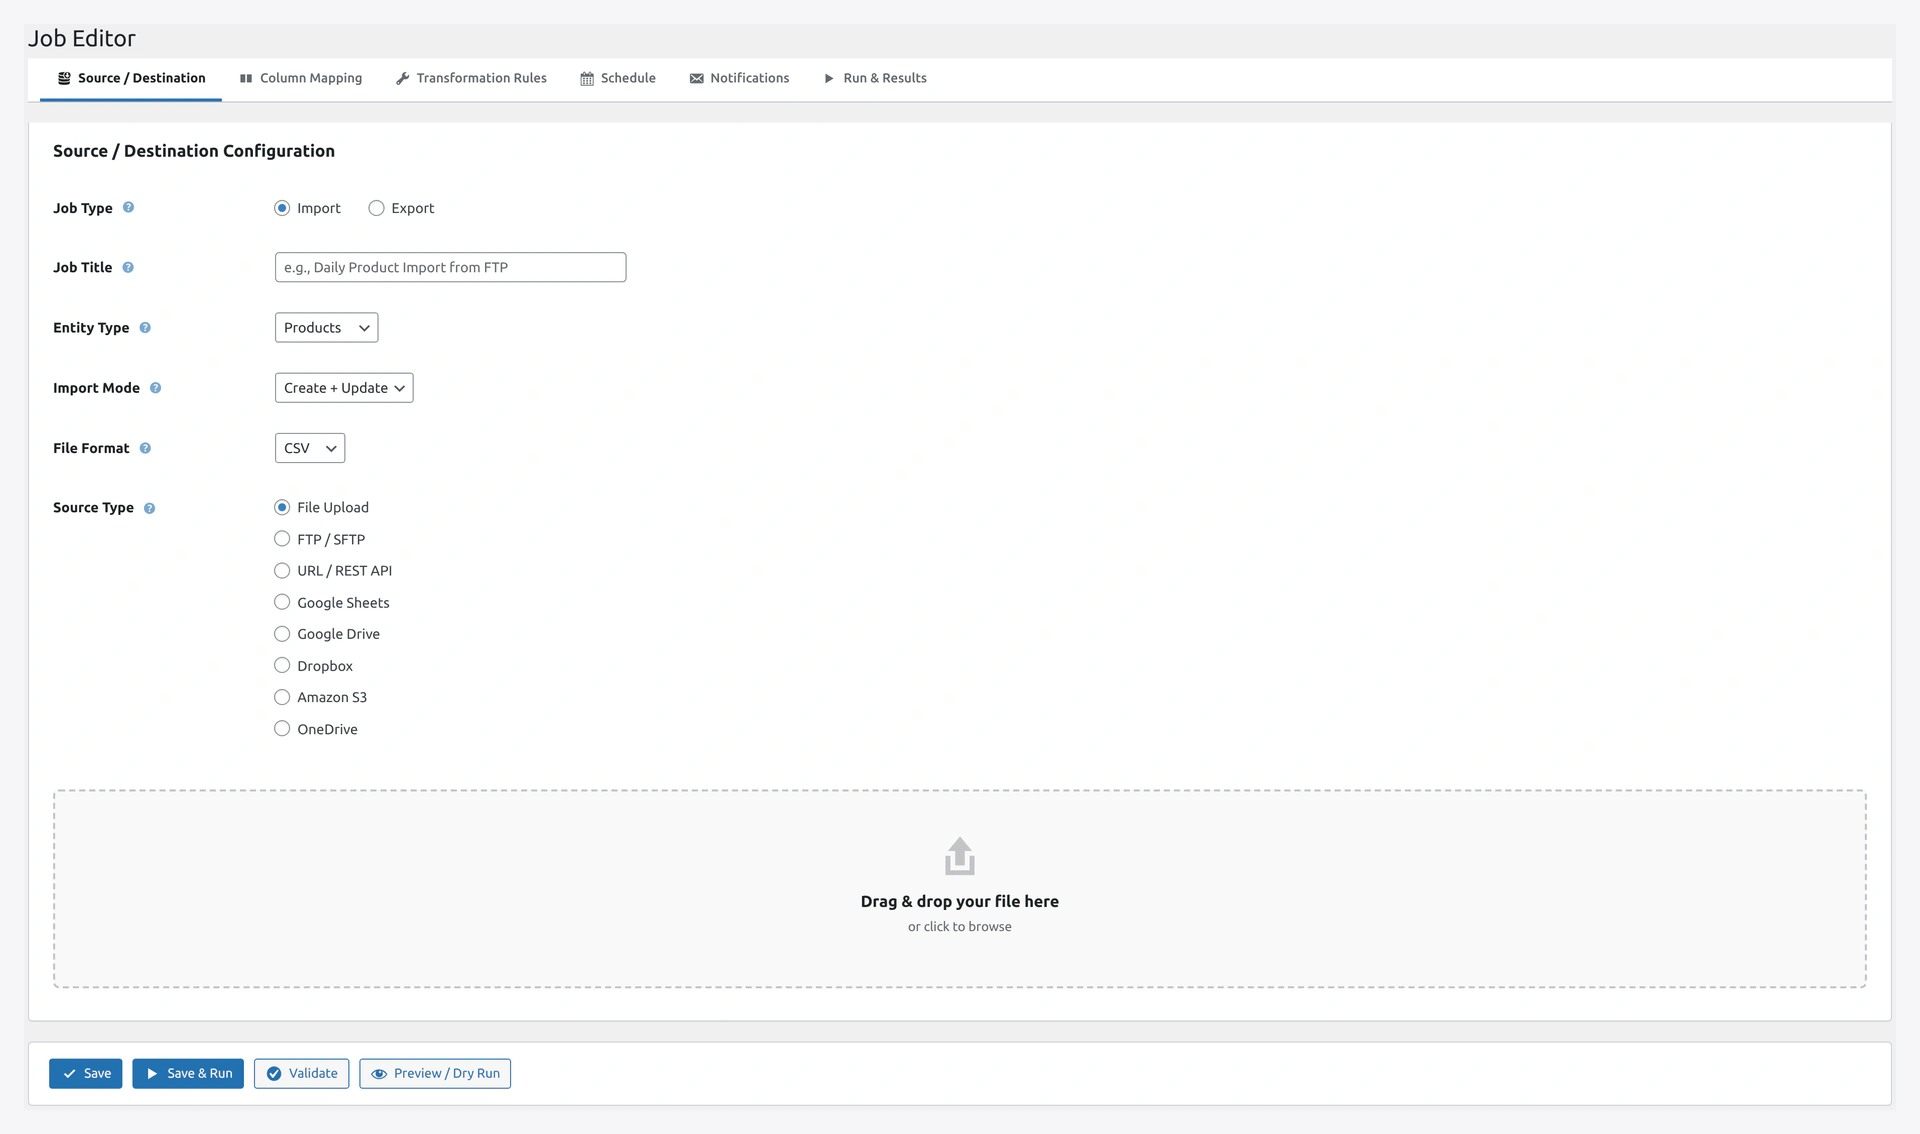 Pick Amazon S3 in the Destination tab of the Job Editor to push exports to a bucket on schedule.
Region Quick Reference
| Region Code | Location |
|---|---|
us-east-1 | Virginia, USA (default) |
us-east-2 | Ohio, USA |
us-west-1 | N. California |
us-west-2 | Oregon |
eu-west-1 | Ireland |
eu-west-2 | London |
eu-central-1 | Frankfurt |
ap-south-1 | Mumbai |
ap-southeast-1 | Singapore |
ap-northeast-1 | Tokyo |
ap-southeast-2 | Sydney |
Security Best Practices
- Use a dedicated IAM user (never root keys)
- Attach a policy scoped to ONE bucket
- Rotate keys every 90 days
- Never commit keys to git — plugin stores them encrypted with AES-256
- Enable MFA on your root AWS account
Costs
AWS S3 has a free tier (12 months):
- 5 GB storage
- 20,000 GET requests per month
- 2,000 PUT requests per month
Beyond free tier:
- Storage: ~$0.023 per GB per month
- Transfer in: Free
- Transfer out: ~$0.09 per GB
Most stores use under $1 per month for imports.
Troubleshooting
| Problem | Fix |
|---|---|
| "Access denied" 403 | IAM policy is wrong. Double-check the bucket name in the policy ARN |
| "NoSuchBucket" | Bucket name does not exist, or typo |
| "InvalidAccessKeyId" | Access key was deleted or typed wrong |
| "SignatureDoesNotMatch" | Secret key is wrong, or region does not match bucket |
| "Insufficient permissions" | Policy missing s3:ListBucket. Add it |
| Slow downloads | Bucket is in a different region than your server. Change region to match |