Tutorial — Shopify to WooCommerce Migration
This tutorial walks you through migrating a complete Shopify store to WooCommerce. Products, customers, orders, images — everything.
Migration Timeline
Most small stores (under 1,000 products) migrate in 2-4 hours. Medium stores (10,000 products): half a day. Large stores (100,000+ products): full day with image download.
What Moves
| What | Works |
|---|---|
| Products (simple, variable, etc.) | Yes |
| Product images | Yes (downloaded to WC Media Library) |
| Categories (Shopify "collections") | Yes (become WC categories) |
| Customers | Yes (with billing/shipping addresses) |
| Orders | Yes (historical orders preserved) |
| Coupons (Shopify "discount codes") | Yes |
| Reviews (with the Shopify Reviews app) | Yes |
| Blog posts | Yes |
| Pages | Yes |
What Does NOT Move
| What | Why |
|---|---|
| Theme / design | Shopify themes do not work in WooCommerce. Pick a WC theme |
| Apps / features | Find WordPress equivalents |
| URLs (if you changed domains) | Set up 301 redirects separately |
| Payment processor setup | Configure WC payments separately |
| Shipping rules | Set up in WooCommerce |
Part 1 — Set Up WooCommerce
Before migrating, install WordPress and WooCommerce.
Step 1
If you don't have WordPress yet, install it on your host. Most hosts offer one-click install.
Step 2
Install WooCommerce:
- WordPress admin → Plugins → Add New
- Search for WooCommerce
- Install and Activate
- Run the WooCommerce setup wizard
Step 3
Install this import plugin:
- Plugins → Add New → Upload Plugin
- Upload
advance-import-and-export-for-woocommerce.zip - Activate
Part 2 — Export from Shopify
Export Products
- Shopify admin → Products → All Products
- Click Export (top-right)
- Pick All products → CSV
- Download
products_export.csv
Export Customers
- Shopify admin → Customers
- Click Export
- Pick All customers
- Download
customers_export.csv
Export Orders
- Shopify admin → Orders
- Click Export
- Pick a date range (Shopify limits to 1 year at a time for large stores)
- Download
orders_export.csv
Export Images
Shopify does not export images directly. Images stay on Shopify's CDN. You have two options:
- Option A — Keep URLs: Link to Shopify CDN URLs. Risk: if Shopify site goes down, images break
- Option B — Download: Use a tool like ShopifyFD or a custom script
For this tutorial, we use Option A (faster). The plugin will download images to WooCommerce later.
Part 3 — Import Customers First
Always customers first. Then orders can link to them.
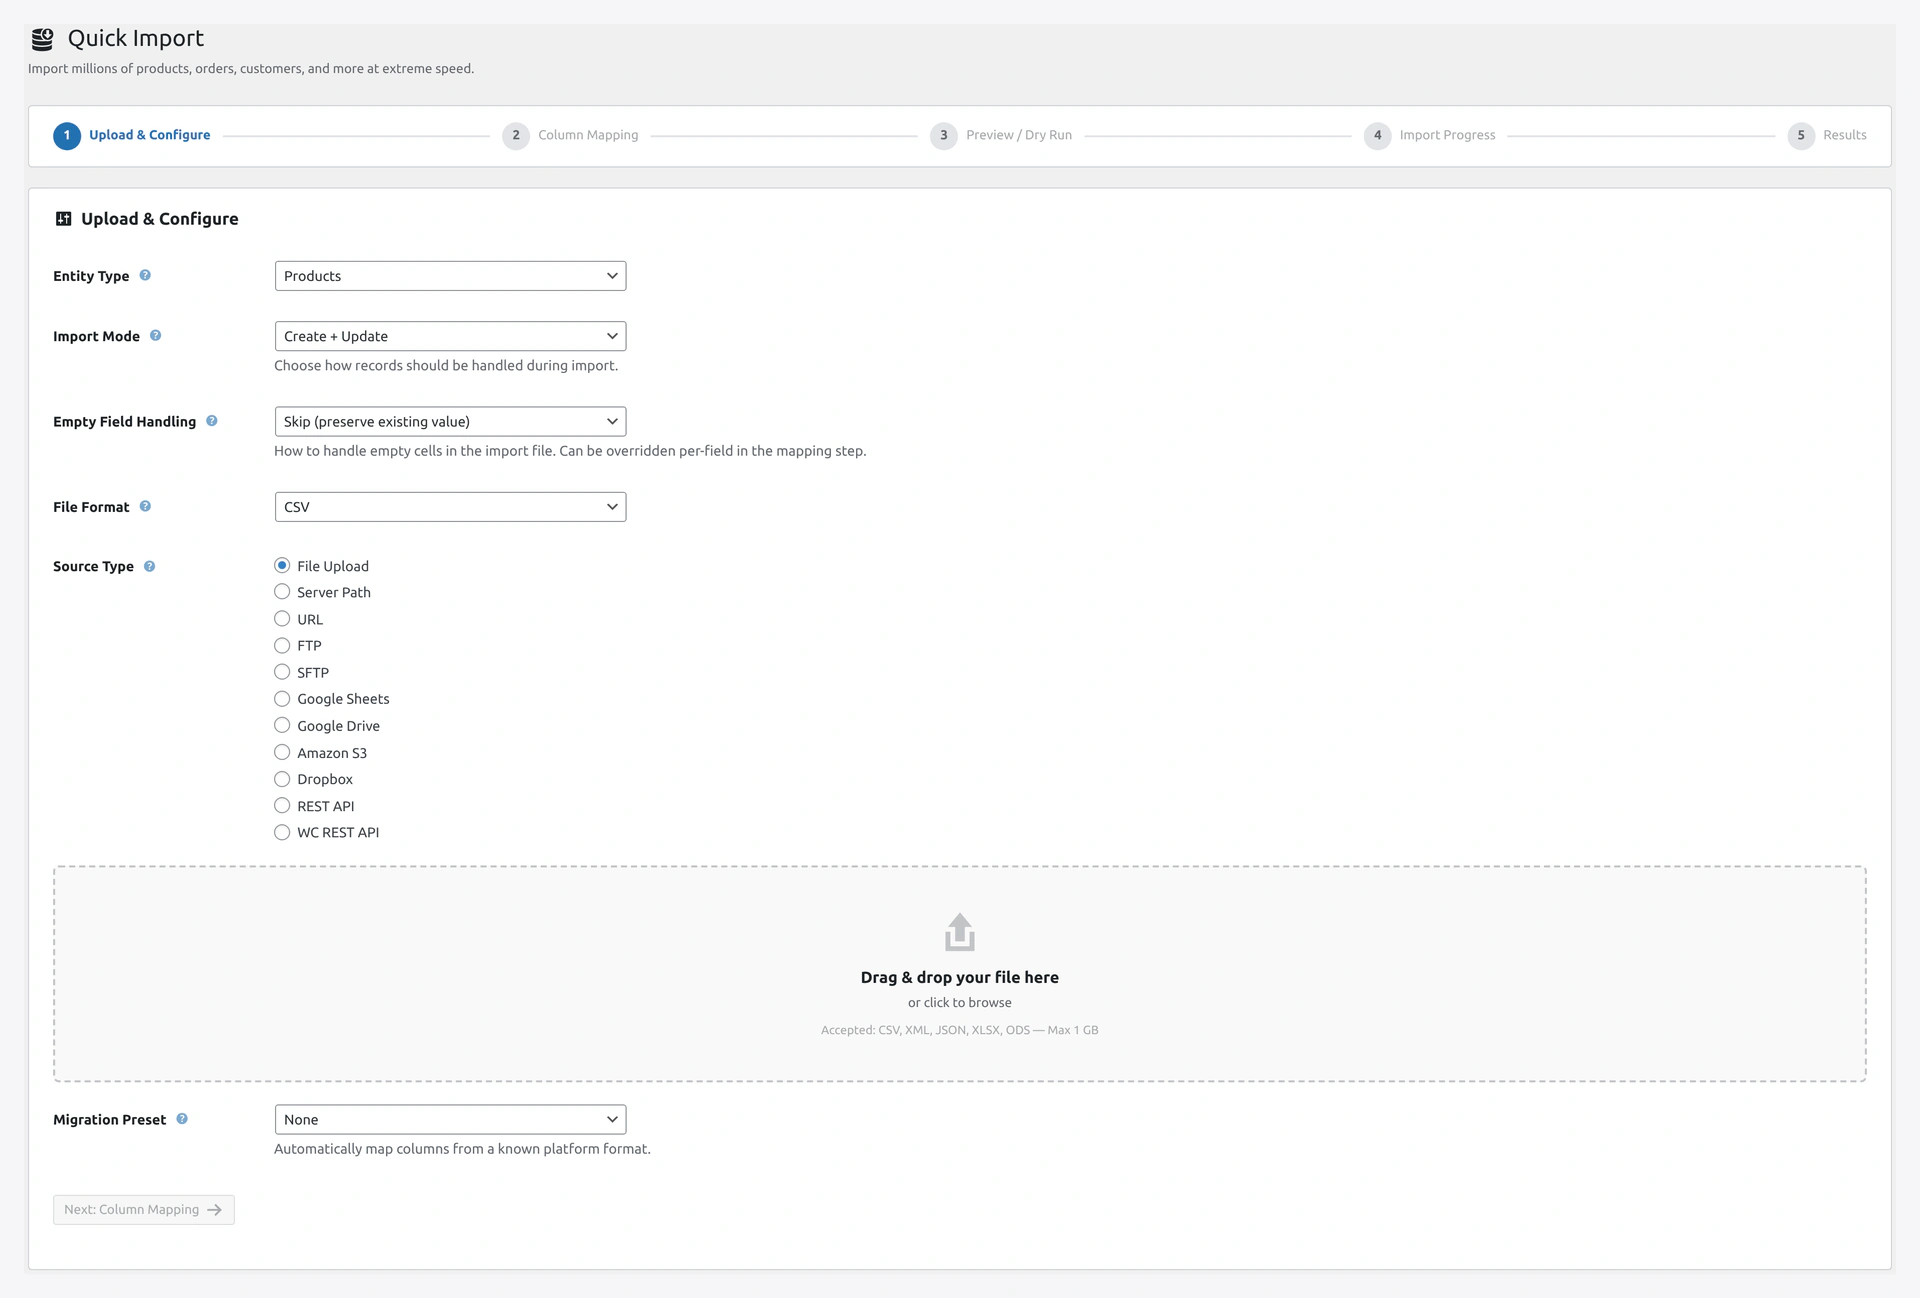 Step 1 of the Quick Import wizard — pick entity, mode, file format, source, and migration preset in one screen.
Step 1
Quick Import Wizard.
Step 2 — Step 1 of Wizard
| Field | Value |
|---|---|
| Entity Type | Customers |
| Import Mode | Create + Update |
| File Format | CSV |
| Source Type | File Upload |
| Upload | customers_export.csv |
Click Next.
Step 3 — Column Mapping
Shopify columns should auto-map to WooCommerce fields. Verify:
| Shopify | WooCommerce |
|---|---|
| First Name | first_name |
| Last Name | last_name |
| Company | billing_company |
| Address1 | billing_address_1 |
| Address2 | billing_address_2 |
| City | billing_city |
| Province | billing_state |
| Country | billing_country |
| Zip | billing_postcode |
| Phone | billing_phone |
Any unmapped columns (like "Accepts Marketing") can be stored as custom meta or ignored.
Click Next.
Step 4 — Password Handling
Shopify does not export customer passwords (security). Plugin will auto-generate.
In Step 3 of the wizard:
- Password Mode: Auto-generate
- Send Welcome Email: Yes
Each customer will get a welcome email with a password reset link.
Step 5 — Import
Click Start Import. Watch Step 4 progress.
Typical speed: 1,000 customers per minute.
Part 4 — Import Products
Step 1
Quick Import Wizard → Entity Type: Products.
Step 2 — Use Shopify Preset
On Step 1, find the Migration Preset dropdown.
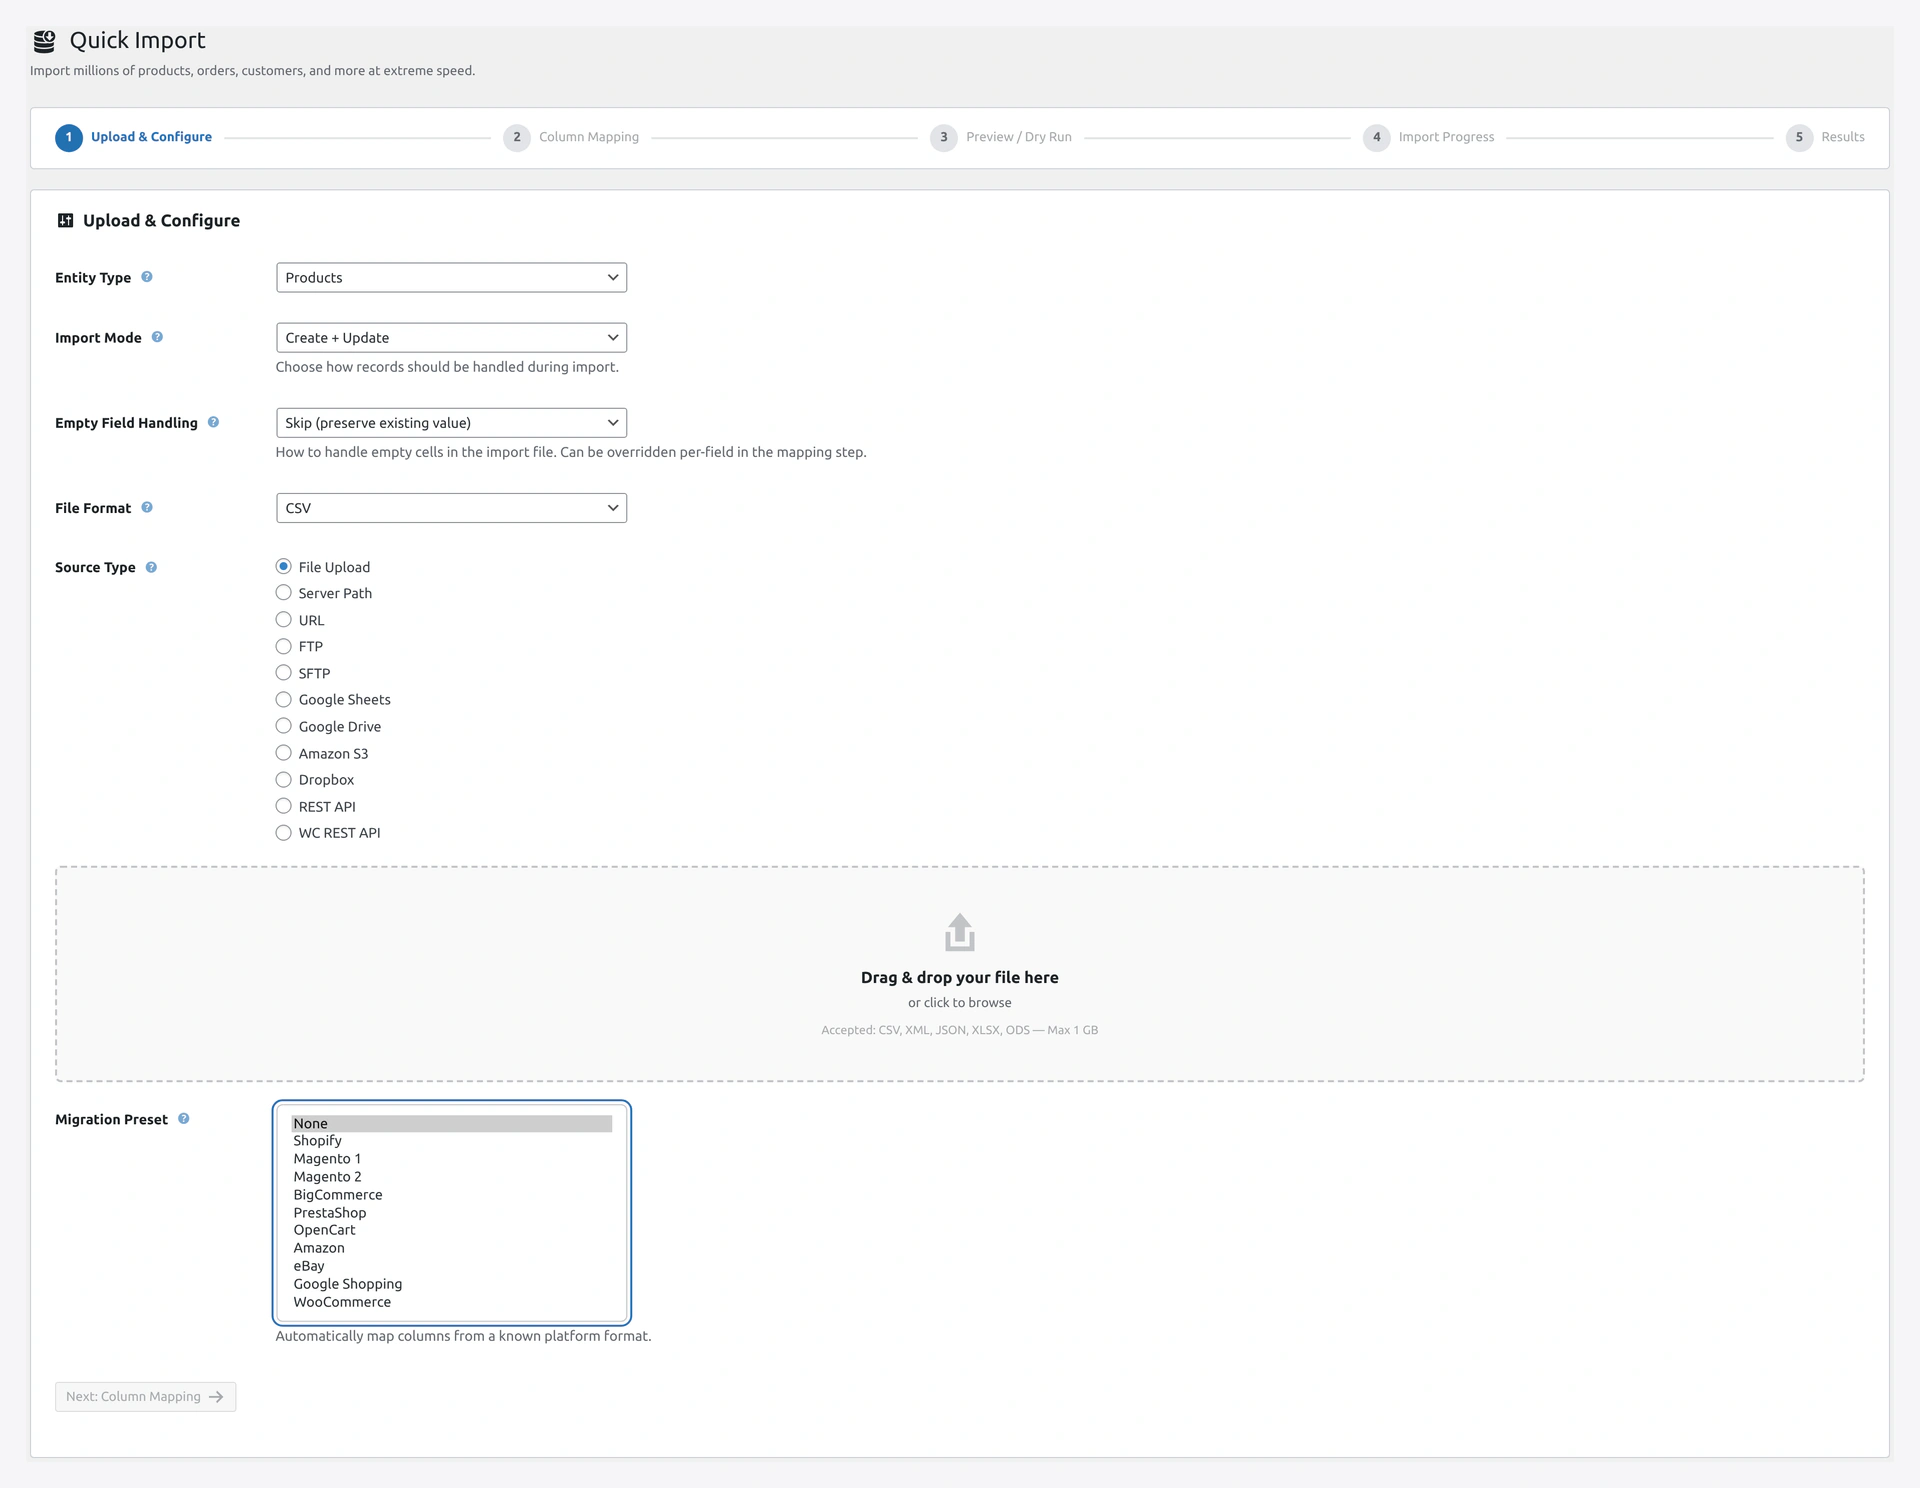 Migration preset dropdown — Shopify, Magento 1/2, BigCommerce, PrestaShop, OpenCart, Amazon, eBay, Google Shopping, and WooCommerce export are all ready to go.
Pick Shopify.
This auto-configures column mapping for Shopify's CSV format.
Step 3
Upload products_export.csv. Click Next.
Step 4 — Column Mapping
With the Shopify preset, this is mostly auto-done:
| Shopify | WooCommerce |
|---|---|
| Handle | Slug |
| Title | Name |
| Body (HTML) | Description |
| Vendor | Brand (if brands plugin active) |
| Type | Product type |
| Tags | Tags |
| Published | Status |
| Option1 Name | Attribute 1 name |
| Option1 Value | Attribute 1 values |
| Variant SKU | SKU |
| Variant Grams | Weight (converted to kg automatically) |
| Variant Price | Regular price |
| Variant Compare At Price | Regular price (if price becomes sale price) |
| Image Src | Featured + gallery images |
Step 5 — Variable Products
Shopify stores variants as separate rows with the same Handle. The plugin automatically groups them into variable products.
You should NOT have to do anything special. It just works.
Step 6 — Preview
Step 3 shows a summary. Verify:
- Row count matches expected
- Variable products: correct count
- Variations: correct count
- Simple products: correct count
Step 7 — Start Import
Click Start Import. This is the big one.
For 1,000 products with images: 10-30 minutes. For 10,000 products with images: 2-4 hours.
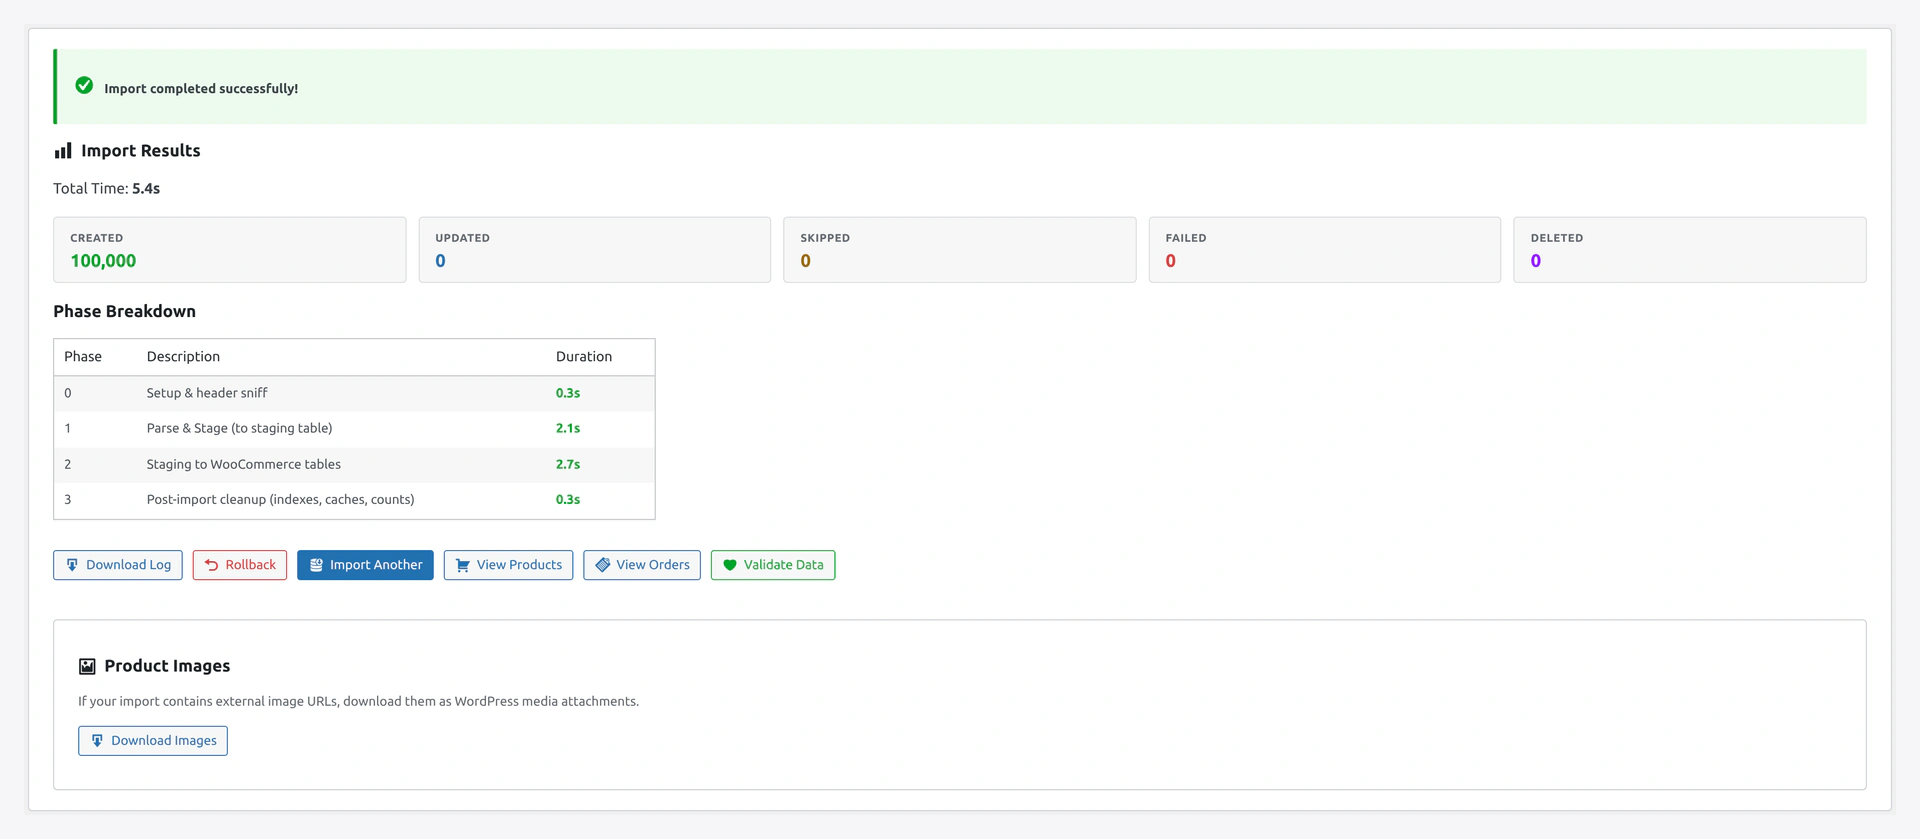 Step 5 shows the final Import Results — created, updated, skipped, failed counts, plus Save as Job and Rollback buttons.
Part 5 — Import Orders
Step 1
Quick Import Wizard → Entity Type: Orders.
Step 2 — Preset
Pick Shopify preset (auto-configures mapping).
Step 3
Upload orders_export.csv. Click Next.
Step 4 — Column Mapping
Verify key mappings:
| Shopify | WooCommerce |
|---|---|
| Name (order number) | Order Number |
| Customer Email | |
| Financial Status | Order Status (needs mapping) |
| Fulfillment Status | (custom meta) |
| Total | Total |
| Subtotal | Subtotal |
| Shipping | Shipping Total |
| Taxes | Tax Total |
| Discount Amount | Discount Total |
Step 5 — Status Mapping
Shopify uses paid, pending, refunded. WooCommerce uses processing, completed, cancelled, refunded, etc.
In Step 2 → Transformations → Order Status column:
| Shopify | WooCommerce |
|---|---|
| paid | completed |
| pending | on-hold |
| refunded | refunded |
| voided | cancelled |
| authorized | processing |
Step 6 — Line Items
Shopify exports line items as a specific format. The preset handles this.
Each order row has:
Lineitem skuLineitem quantityLineitem priceLineitem name
Plugin combines these into the order's line items.
Step 7 — Import
Start Import. Watch progress.
Orders with many line items take longer (each item creates a database row).
Part 6 — Import Categories (Collections)
Shopify "collections" become WooCommerce categories.
Step 1
Export collections from Shopify (some apps needed, or use Products CSV's "Product Category" column).
Step 2
Quick Import → Entity: Categories → Upload.
Categories auto-create from Products already. This step is optional.
Part 7 — Import Coupons
Shopify calls these "discount codes."
Step 1
Shopify admin → Discounts → Export. Download CSV.
Step 2
Quick Import → Entity: Coupons → Upload.
Map Shopify's fields:
| Shopify | WooCommerce |
|---|---|
| Code | Code |
| Title | Description |
| Value | Amount |
| Value Type | Discount Type |
| Starts At | (custom meta) |
| Ends At | date_expires |
Part 8 — Post-Migration Checks
Step 1 — Run Health Check
Webkul WC Addons → Health Check → Run Health Check.
Review the 23 checks. Fix any issues with auto-fix.
Step 2 — Spot Check Products
Pick 10 random products. Verify:
- Name, description, price correct
- Images display
- Categories assigned
- Stock correct
- Variations work
Step 3 — Spot Check Orders
Pick 5 random orders. Verify:
- Order total matches Shopify
- Customer linked
- Line items with correct quantities
- Status shown correctly
Step 4 — Spot Check Customers
Pick 10 random customers. Verify:
- Email exists
- Billing/shipping addresses filled
- Login works (use "Forgot Password" to reset)
Step 5 — Test Checkout
Place a test order:
- Add product to cart
- Checkout
- Use test payment method (or Cash on Delivery)
- Verify order shows in WooCommerce admin
Part 9 — Set Up 301 Redirects
Shopify URLs look like /products/widget-name.
WooCommerce URLs look like /product/widget-name.
Set up redirects so customers' old bookmarks work.
Use a plugin like Redirection.
Or add to .htaccess:
RewriteRule ^products/(.*)$ /product/$1 [R=301,L]
RewriteRule ^collections/(.*)$ /product-category/$1 [R=301,L]
Part 10 — Go Live
Pre-Launch Checklist
- [ ] All products imported
- [ ] All customers imported
- [ ] All orders imported (or at least last 1-2 years)
- [ ] Coupons imported
- [ ] Health Check passes
- [ ] Test checkout works
- [ ] Email notifications work
- [ ] Payment gateway configured
- [ ] Shipping configured
- [ ] Tax configured
- [ ] 301 redirects set up
- [ ] Theme customized
- [ ] SEO plugin configured (Yoast, RankMath)
Switch DNS
Once you are confident, switch your domain DNS to point to the WooCommerce server.
Customers land on the new site. Old URLs redirect. Nothing breaks.
Troubleshooting
| Problem | Fix |
|---|---|
| Variable products did not group | Handle column missing. Re-export from Shopify with all columns |
| Images broken | URLs did not download. Check Settings → Image & Media → Download Images |
| Customer count mismatches | Shopify export may have filters. Re-export |
| Order statuses look wrong | Run the status mapping transformation (Part 5, Step 5) |
| Prices off by a factor of 100 | Shopify cents vs dollars. Divide by 100 in transformation |
| Tax did not import | Configure WC tax first, then re-import orders |
Related Pages
- Migration Presets — Other platforms
- Products Import — Products deep dive
- Orders Import — Orders deep dive
- Customers Import — Customers deep dive
- Health Check — Verify integrity