First-Time Setup — Complete Checklist
Brand-new to the plugin? This page walks you through everything in order. Check each box as you complete the step.
Why a checklist?
The plugin has many features, but most users do not need all of them at once. This page covers the essential setup that 95% of stores need.
Estimated Time
About 30 minutes for a complete setup.
The Checklist
Part 1 — Install (5 min)
- [ ] Check system requirements (see Installation)
- [ ] Download the plugin ZIP from Webkul or CodeCanyon
- [ ] Upload via
Plugins → Add New → Upload Plugin - [ ] Activate the plugin
- [ ] See "Webkul WC Addons" in your sidebar
Part 2 — System Check (5 min)
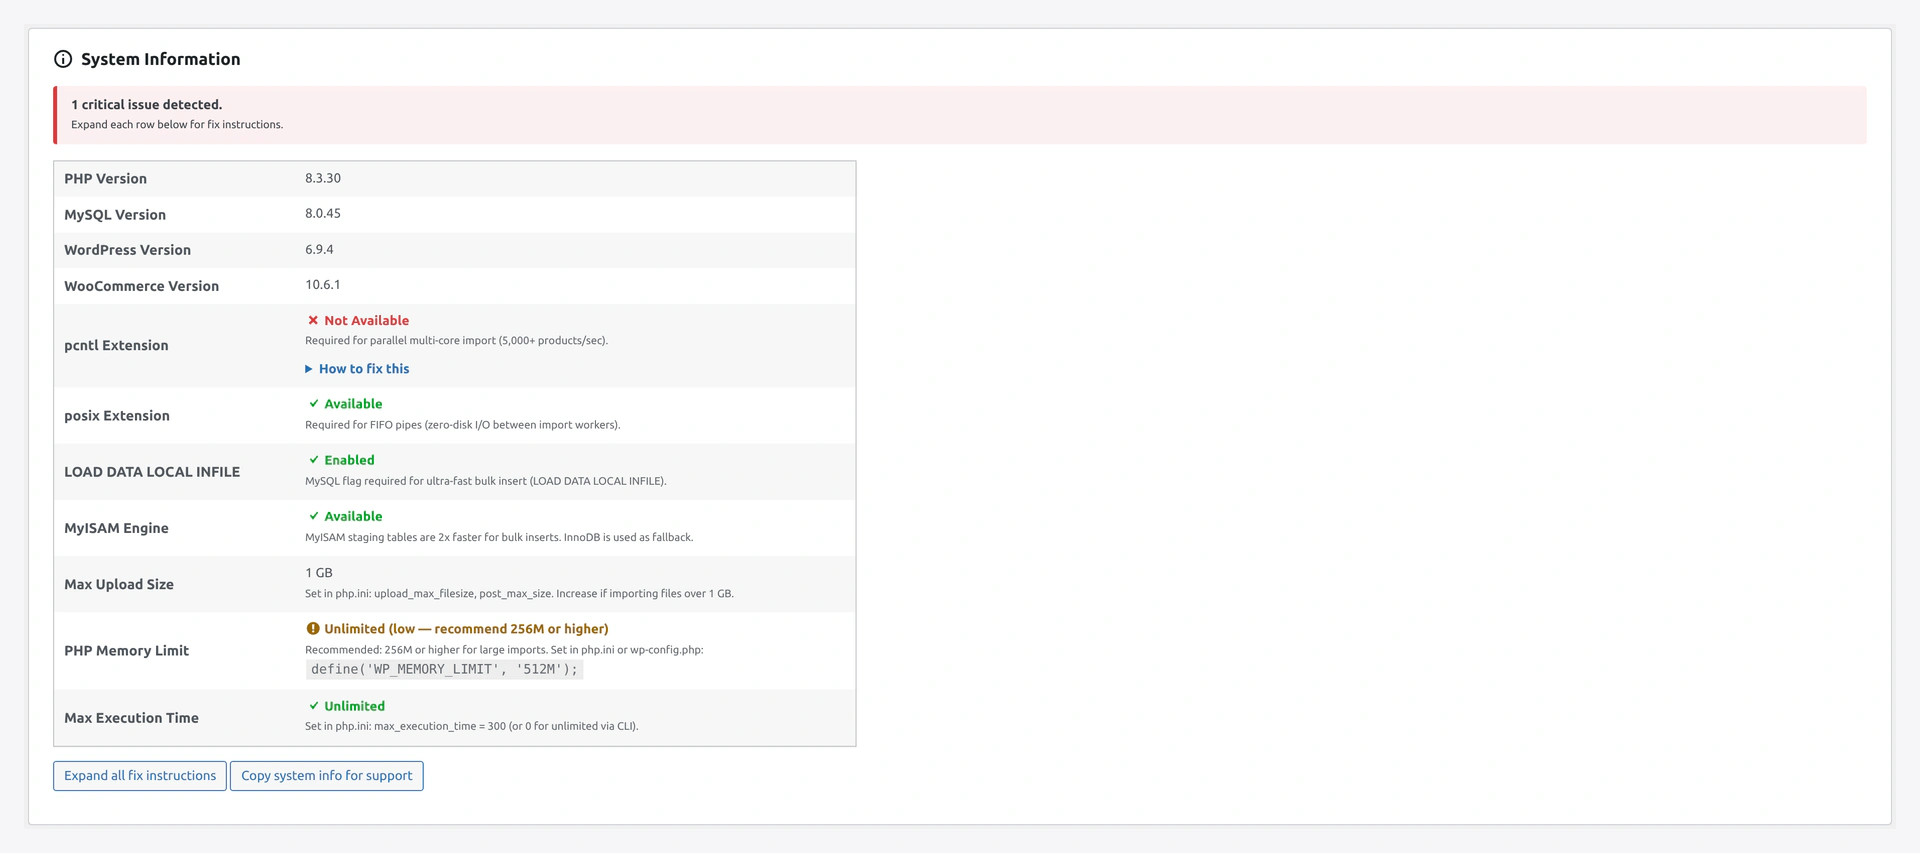 Screenshot: Dashboard System Information card — review status before continuing.
- [ ] Open
Webkul WC Addons → Import Export(Dashboard) - [ ] Scroll to System Information card
- [ ] Check the banner:
- Green "All system requirements met" → skip to Part 3
- Yellow "X performance warnings" → review warnings but you can continue
- Red "X critical issues" → fix these first
- [ ] For any red items, click How to fix this
- [ ] Follow the OS-specific install commands
- [ ] Refresh the Dashboard — confirm everything is green
Most common fixes:
- pcntl not available — Ask hosting to install
php8.3-pcntl - LOAD DATA LOCAL INFILE disabled — Ask hosting to enable MySQL
local_infile = 1 - PHP memory < 256M — Add
define('WP_MEMORY_LIMIT', '512M');towp-config.php
See PHP Configuration for details.
Part 3 — Basic Settings (5 min)
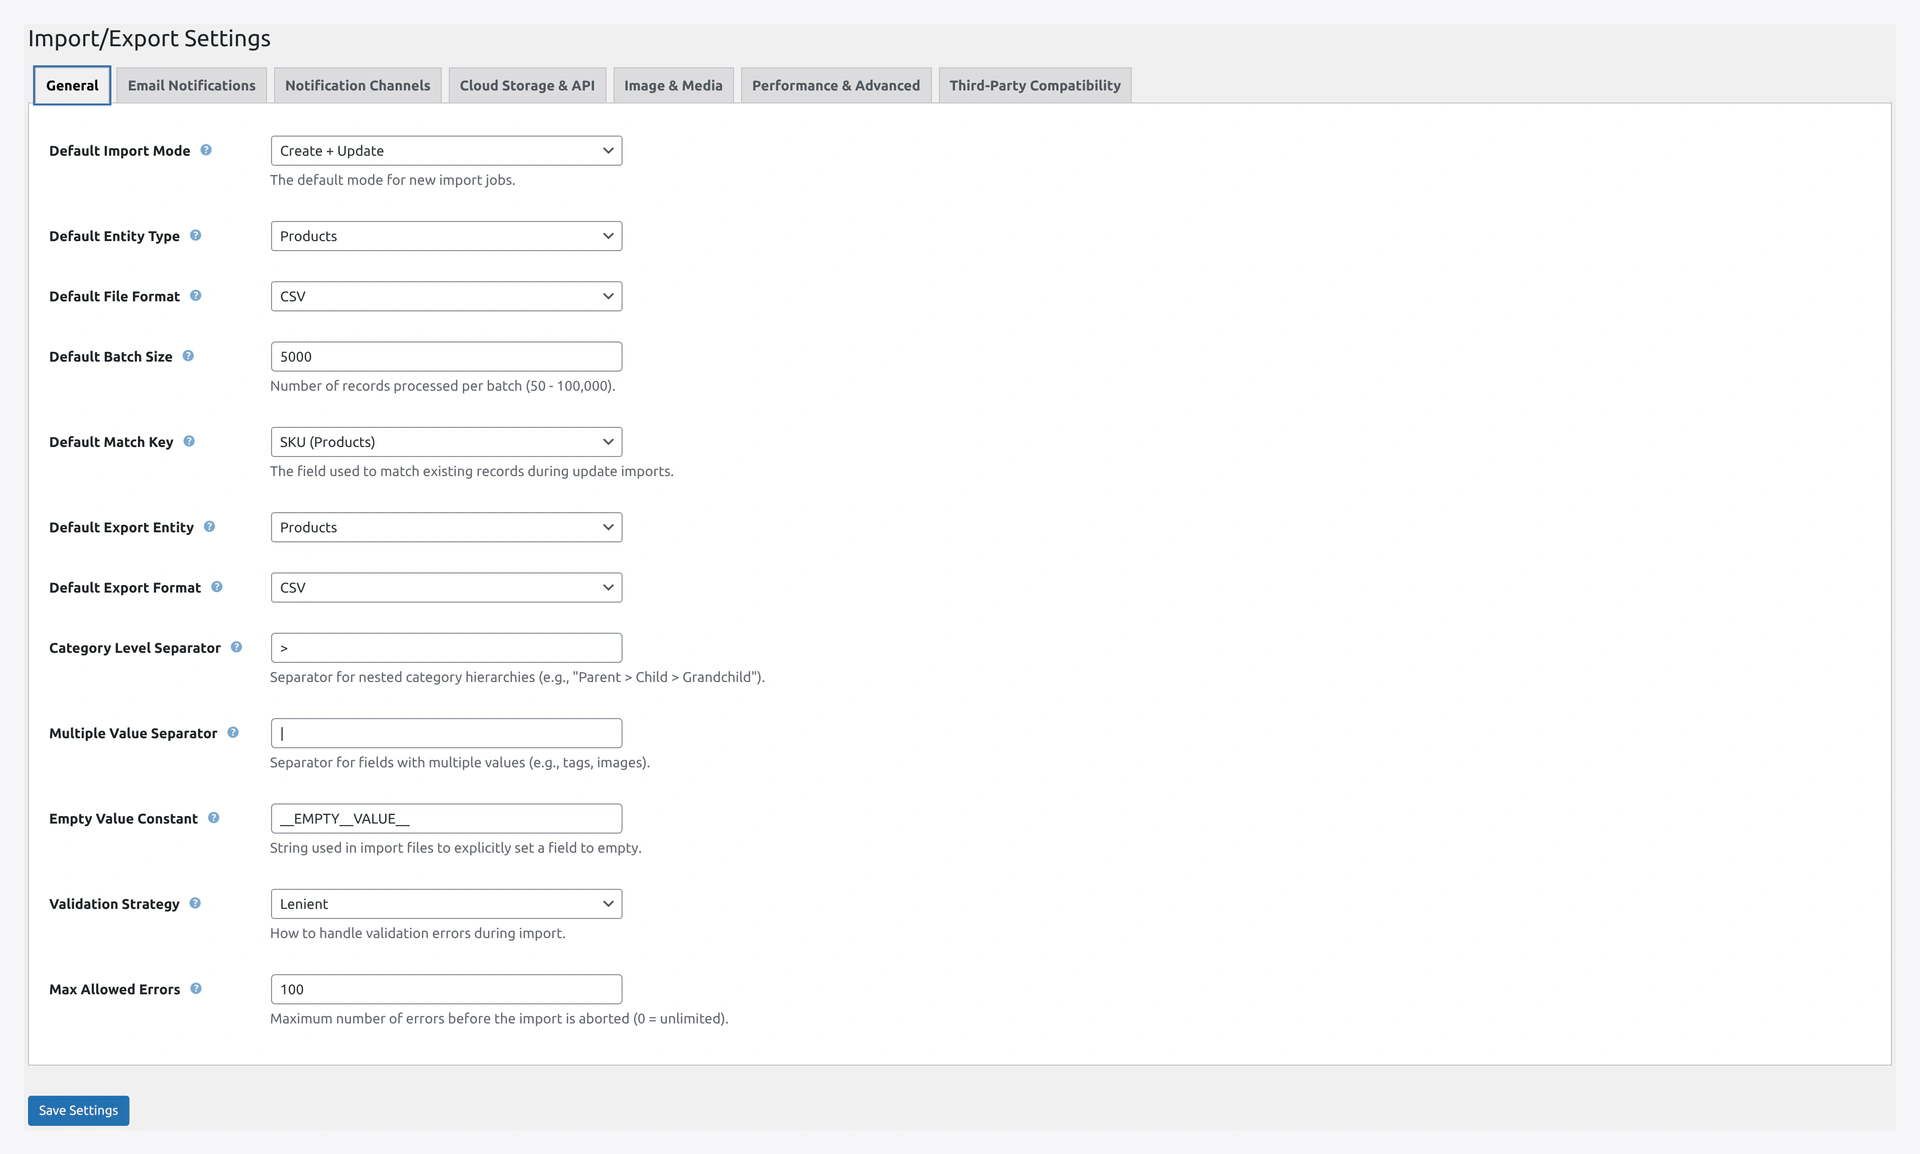 Screenshot: Settings — General tab for default import mode, entity, and batch size.
- [ ] Open Settings → General
- [ ] Set Default Import Mode to
Create + Update(most common) - [ ] Set Default Entity Type to
Products(or whatever you import most) - [ ] Set Default Batch Size based on your store:
- Small store (<10K products):
500 - Medium (10-100K):
1000 - Large (>100K):
2000
- Small store (<10K products):
- [ ] Click Save Changes
Part 4 — Email Notifications (5 min)
- [ ] Open Settings → Email Notifications
- [ ] Check Send on Failure (you want to know when things break)
- [ ] Fill Recipients (To) with your email
- [ ] Leave Send on Success unchecked (daily schedules would spam you)
- [ ] Click Save Changes
- [ ] Install an SMTP plugin like WP Mail SMTP if your hosting mail is unreliable
See Email Setup for SMTP configuration.
Part 5 — Compatibility Plugins (5 min)
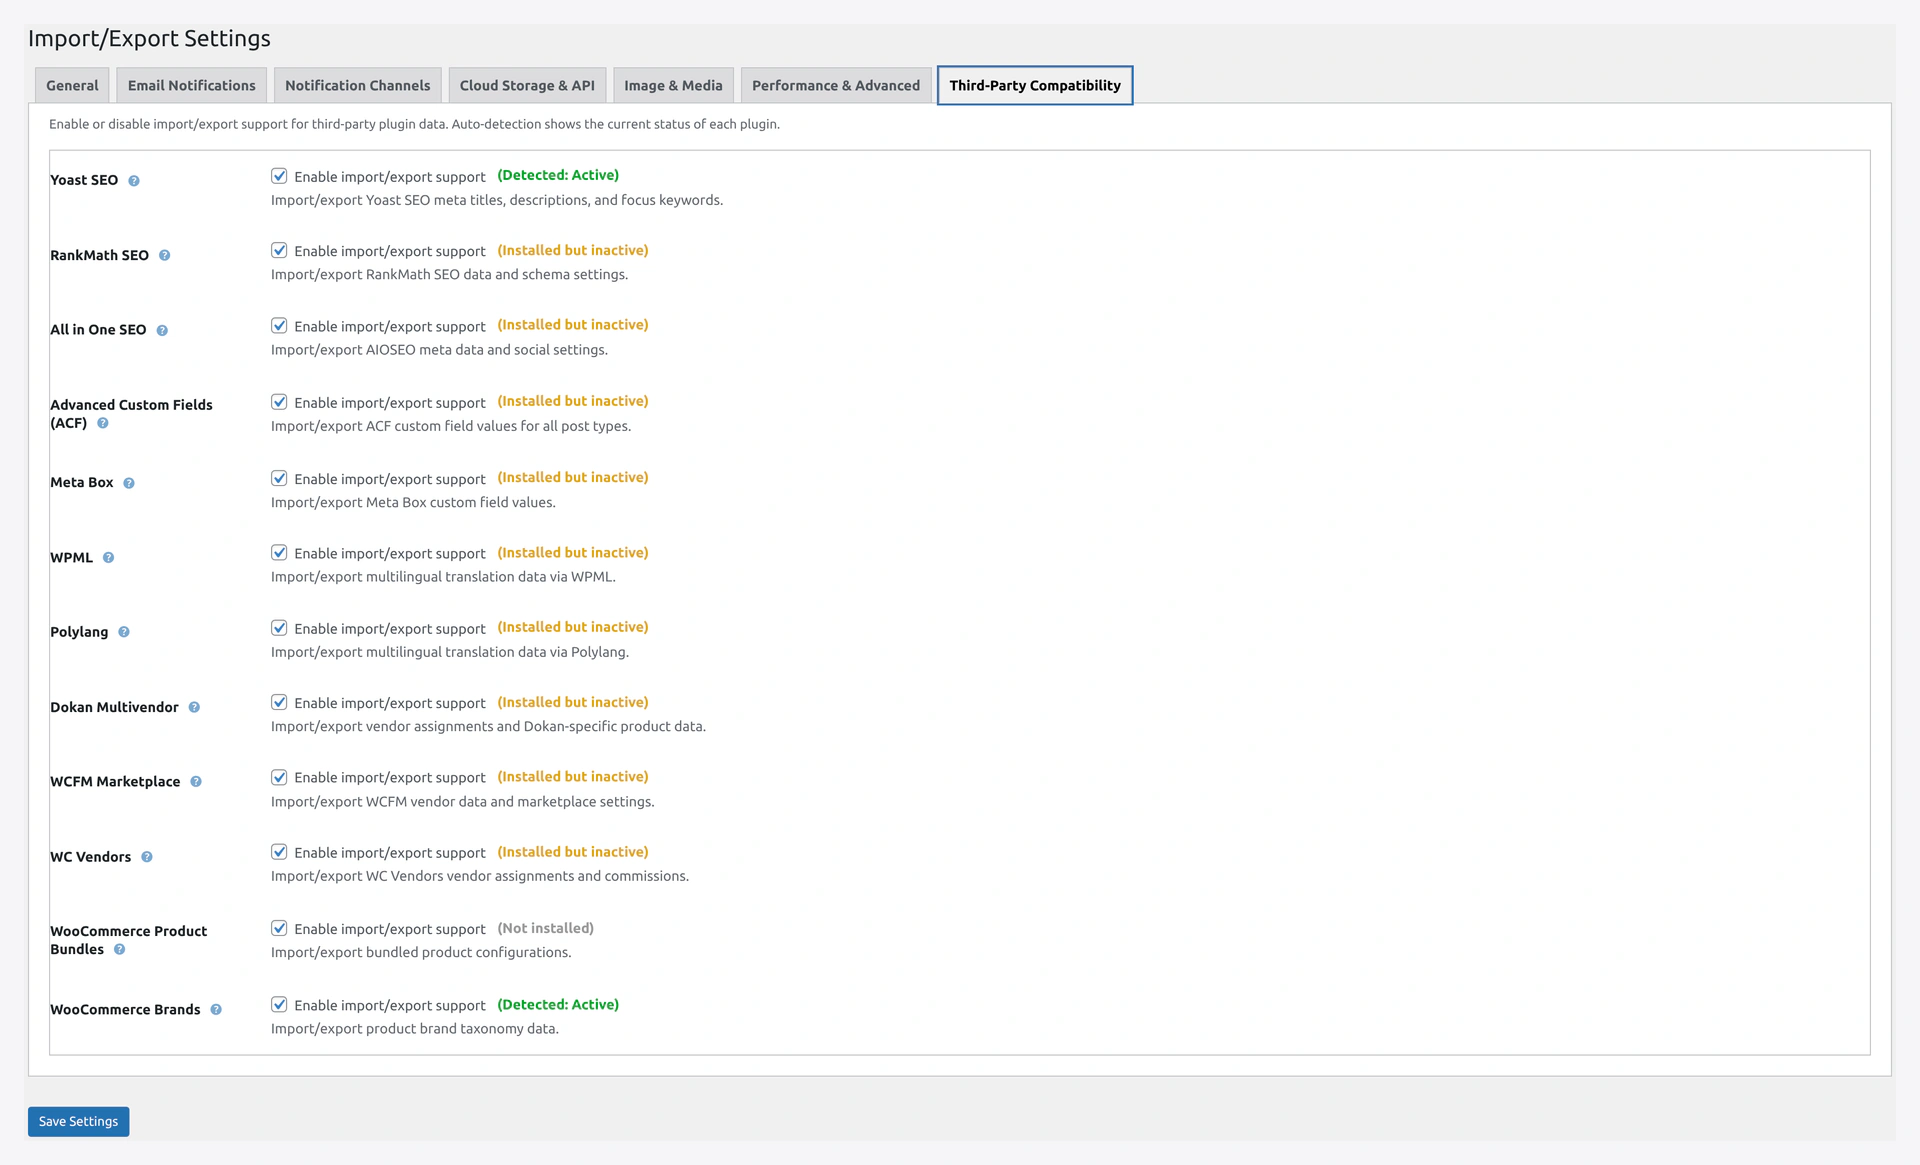 Screenshot: Settings — Third-party compatibility with detection badges.
- [ ] Open Settings → Third-Party Compatibility
- [ ] For each plugin you use, check the status badge:
- "Detected: Active" — check the box to enable support
- "Installed but inactive" — activate the plugin first
- "Not installed" — skip
- [ ] Common to enable: Yoast SEO, RankMath, ACF, WPML/Polylang
- [ ] Click Save Changes
See Compatibility for what each integration does.
Part 6 — Your First Import (10 min)
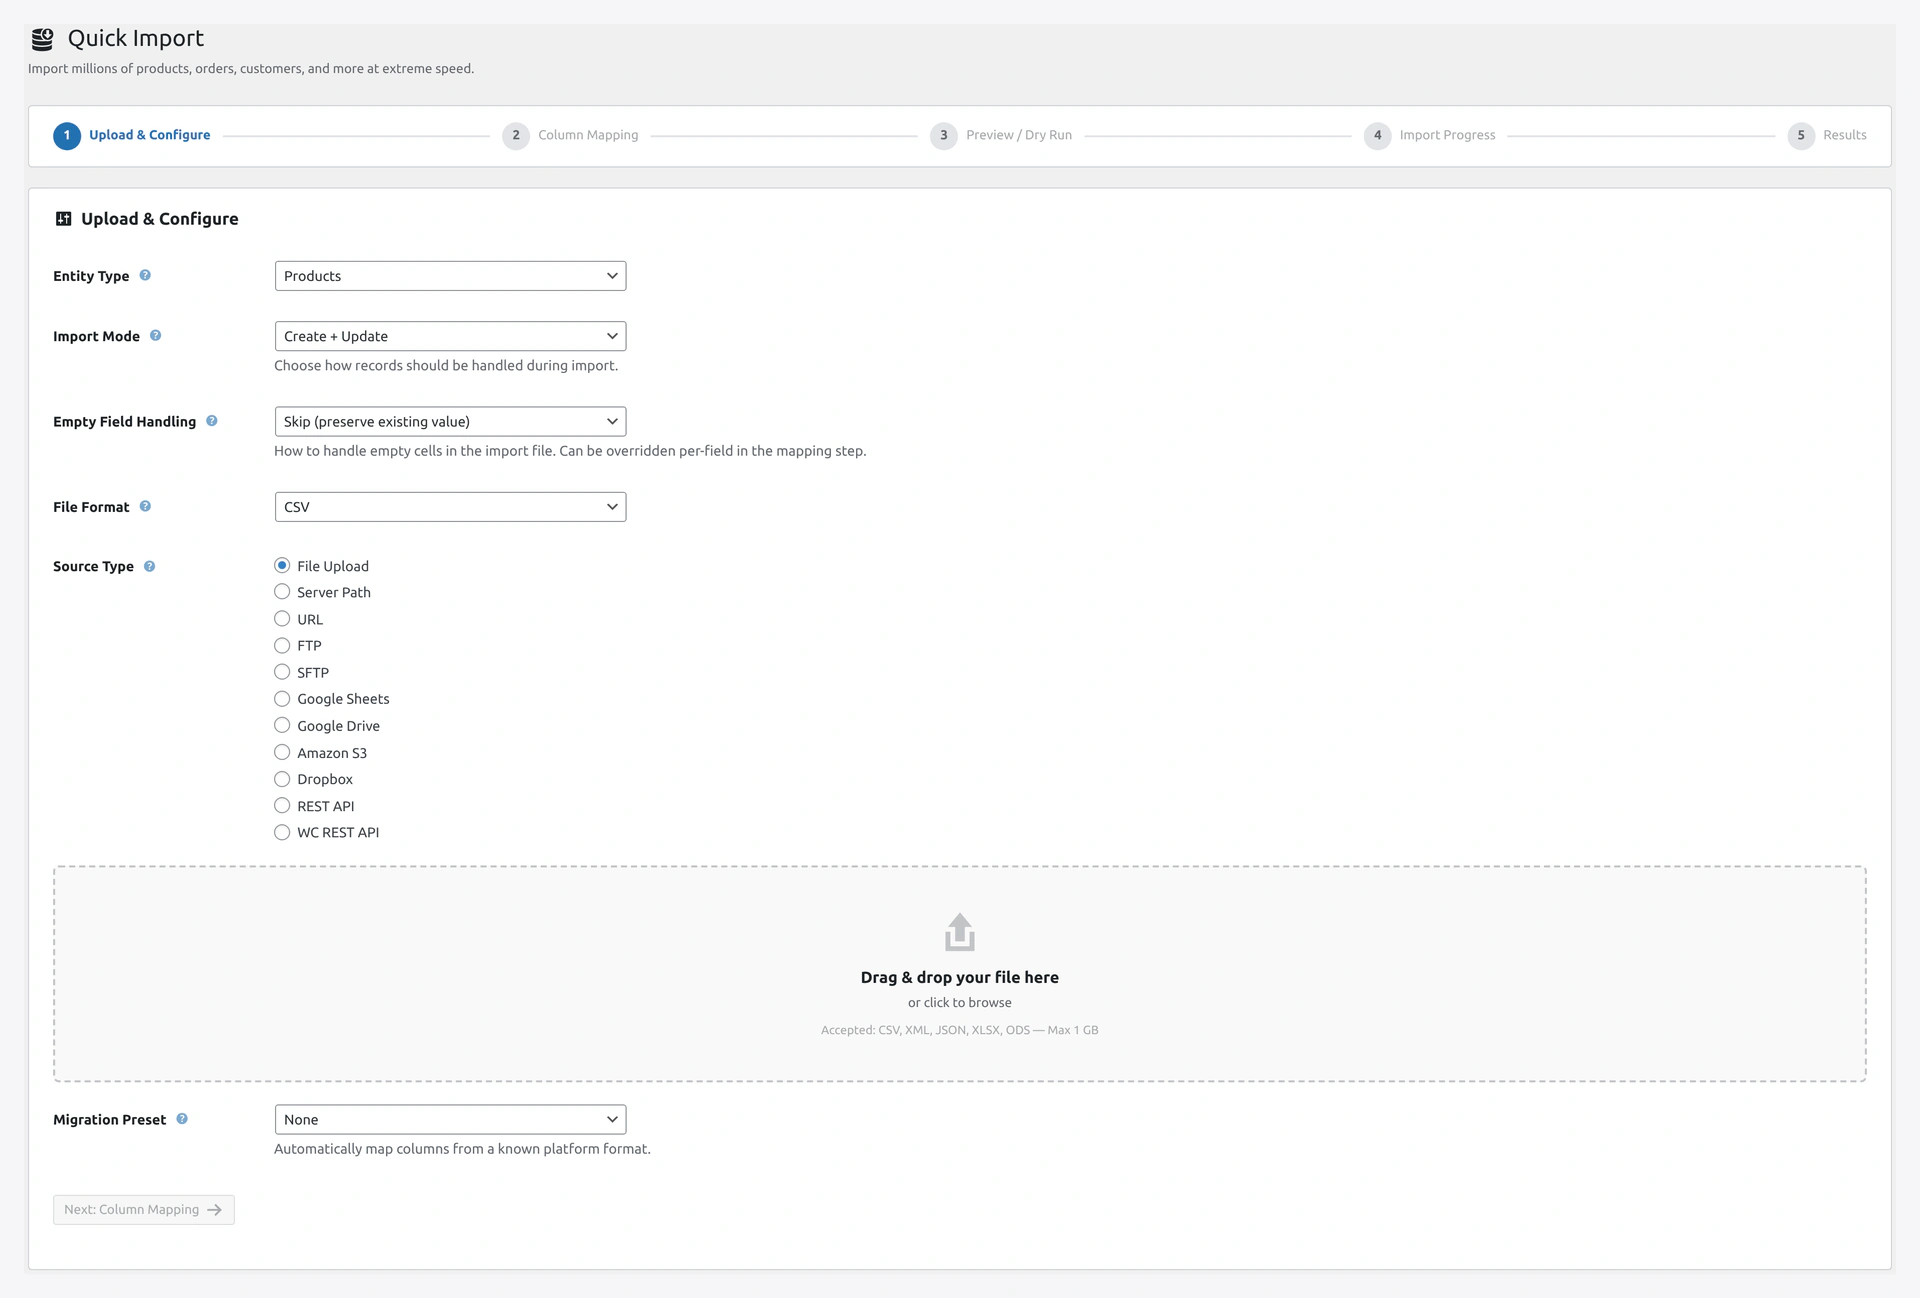 Screenshot: Quick Import wizard step 1 — upload and configure your file.
- [ ] Prepare a test CSV with 10 products (or use the sample file)
- [ ] Open Quick Import from the menu
- [ ] Step 1:
- [ ] Entity Type: Products
- [ ] Import Mode: Create + Update
- [ ] File Format: Auto-Detect
- [ ] Source Type: File Upload
- [ ] Upload your file
- [ ] Click Next
- [ ] Step 2: Review column mapping (should auto-match standard columns)
- [ ] Click Next
- [ ] Step 3: Read the preview summary
- [ ] Click Start Import
- [ ] Step 4: Watch the progress bar
- [ ] Step 5: See the result — click View Products to verify
Part 7 — Save as Job (Optional, 3 min)
If this will be a recurring import:
- [ ] Click Save as Job on the result page
- [ ] Give it a clear title (e.g., "Daily Supplier Feed")
- [ ] Pick a schedule (e.g., Daily at 3 AM)
- [ ] Click Save
- [ ] Go to Jobs page and verify it is listed
Part 8 — Server Cron (For Reliable Scheduling)
WordPress built-in cron is unreliable. For scheduled jobs:
- [ ] SSH into your server (or use cPanel → Cron Jobs)
- [ ] Add this to your server crontab:
*/5 * * * * curl -s https://your-site.com/wp-cron.php > /dev/null - [ ] Save
See Server Cron Setup for full instructions.
Part 9 — Backups (Optional but Recommended)
- [ ] Install UpdraftPlus or similar
- [ ] Schedule daily backups before imports run
- [ ] Test restore once to make sure it works
This is separate from the plugin's Rollback, which only undoes one import.
You Are Done
After completing this checklist, you have:
- Plugin installed and working
- System optimized
- Defaults set
- Notifications configured
- Compat plugins connected
- First import done
- Scheduling set up (if needed)
- Backups in place
What to Learn Next
| Topic | Why It Matters |
|---|---|
| Quick Import Wizard | Deep dive on each step |
| Import Sources | Connect Google Sheets, FTP, S3 |
| Jobs | Set up scheduled imports |
| Rollback | Undo mistakes |
| Health Check | Keep your data clean |
| Troubleshooting | Fix issues when they come up |
Common First-Time Questions
Do I need to import everything at once?
No. Start with 10 products. Get comfortable with the flow. Then do the full import.
Should I test on staging first?
Yes, especially for large imports. Most hosts offer free staging.
Can I undo my first import if I mess up?
Yes. Every import creates a rollback snapshot. See Rollback.
How long will a 10,000-product import take?
On a decent VPS with pcntl enabled: under 10 seconds. On shared hosting without pcntl: 2-10 minutes.